1/4" Fuel Barb to Hyundai Fuel Rail
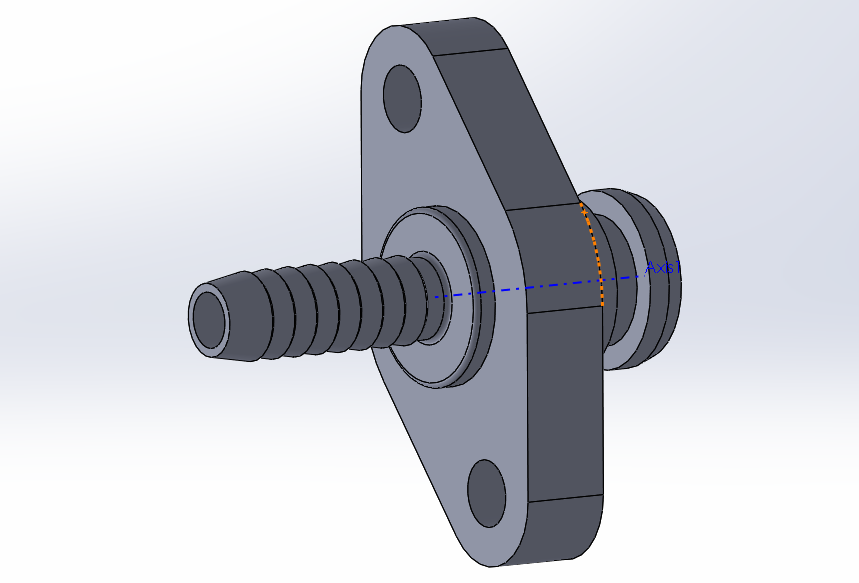
In another project I'm in the process of converting my car to turbo, a Hyundai Tiburon. Part of the conversion is adding an additional fuel rail, this project is to make an adapter for between the fuel rail and some hose.
Design
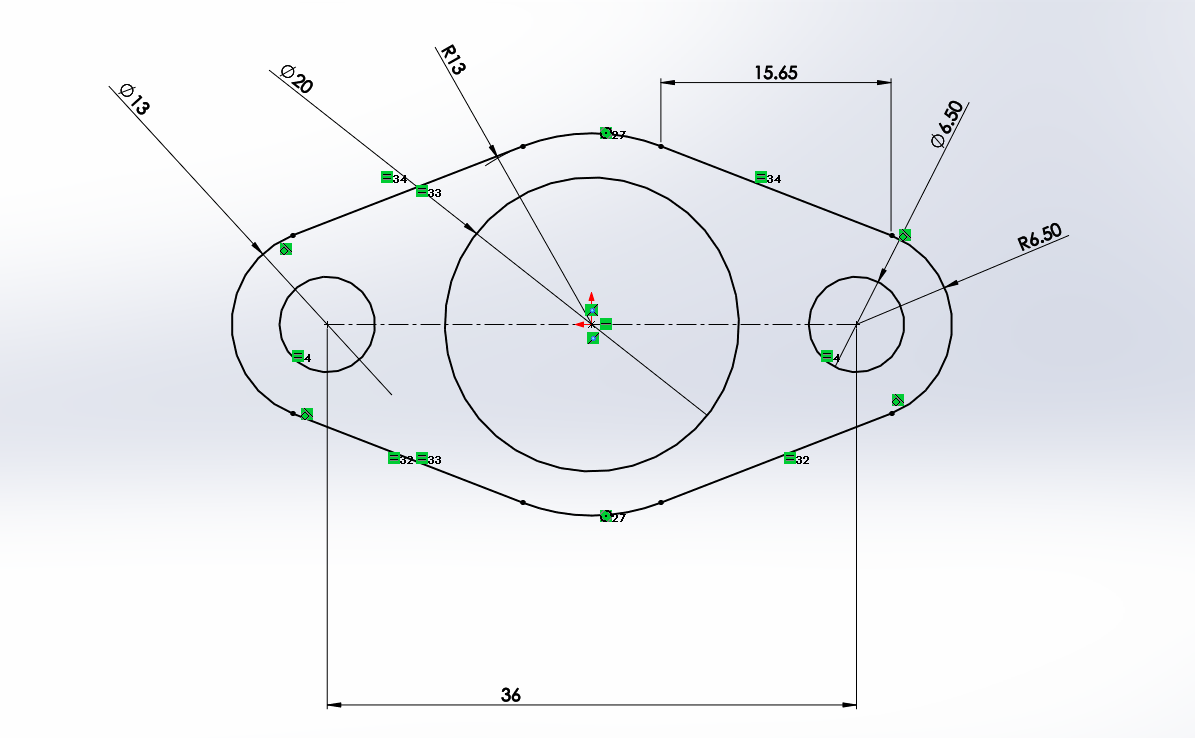
The first design was to make a barb with a shroud, the shroud acts as support since the aluminium barb is rather thin. The original idea was to make this shroud rather thin so that it could crimp to the tube, I abandoned this idea quickly as I would need to make a crimping tool. I first started out by measuring the flange on the fuel rail and made up a drawing in Solidworks.
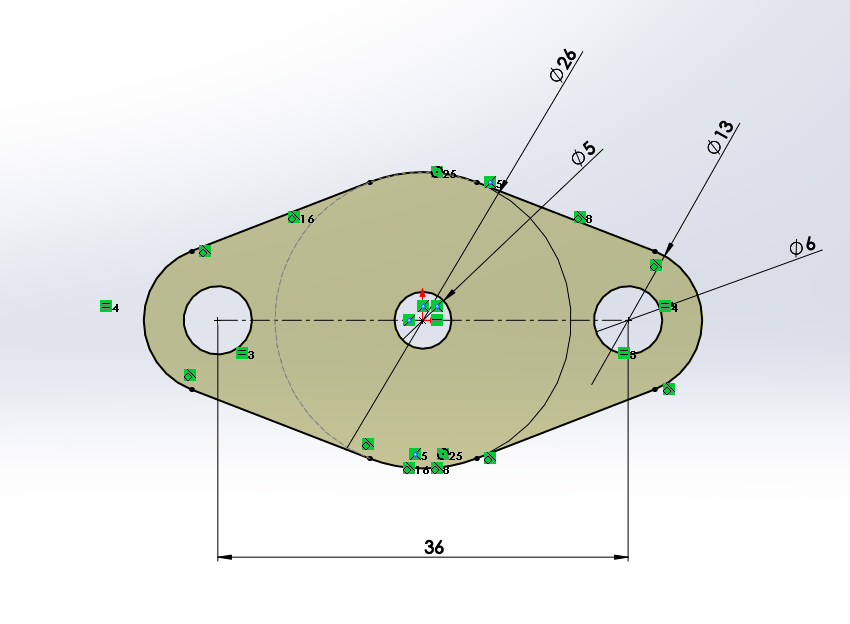
The part was extruded to 6mm.

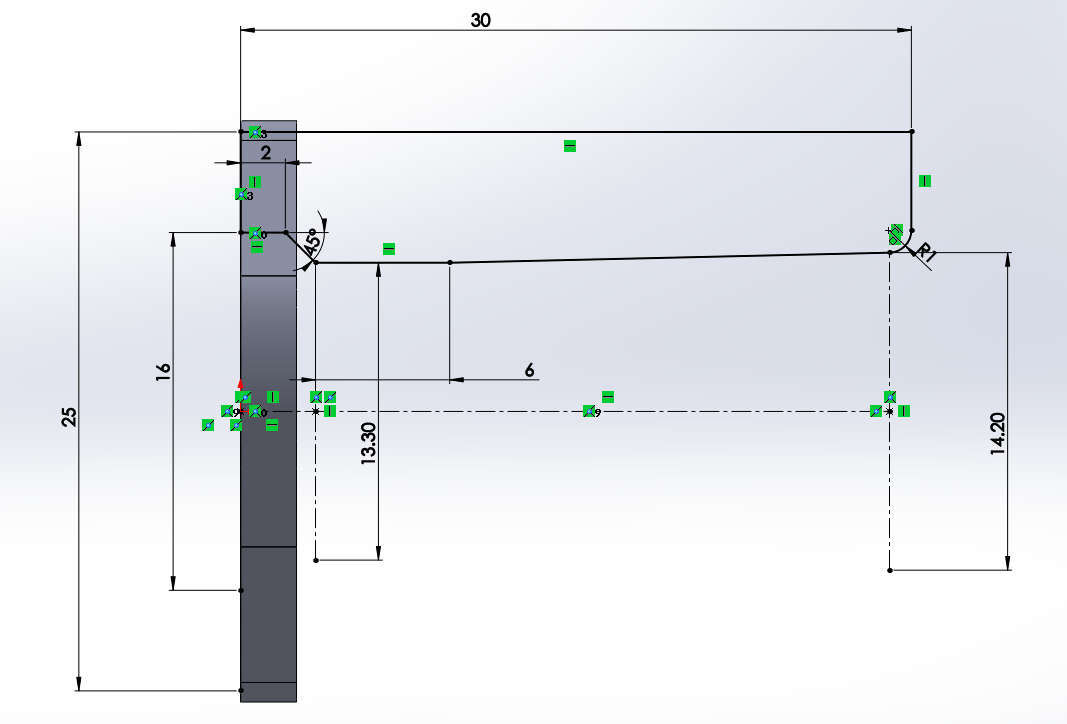
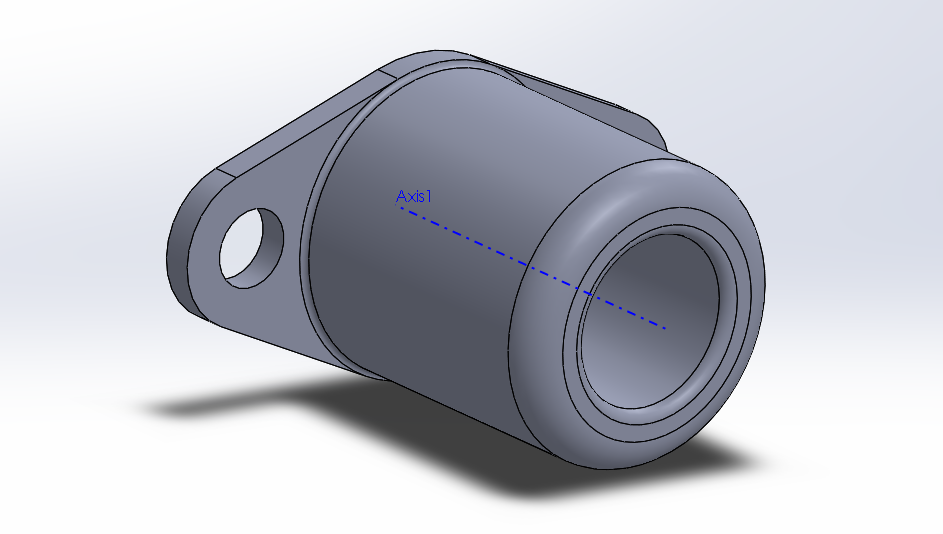
I drew the profile for the part that pushes into the fuel rail, it will be seal via an O-ring.

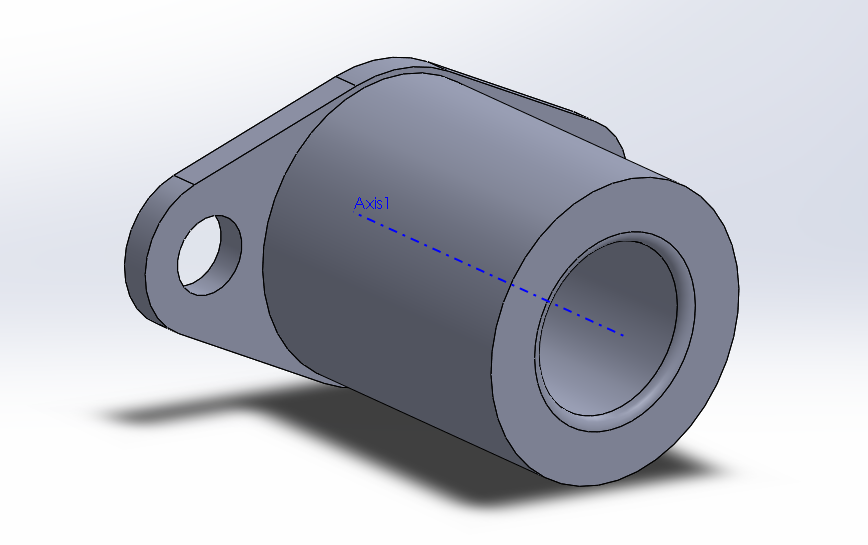
The sketch was revolved around an axis.
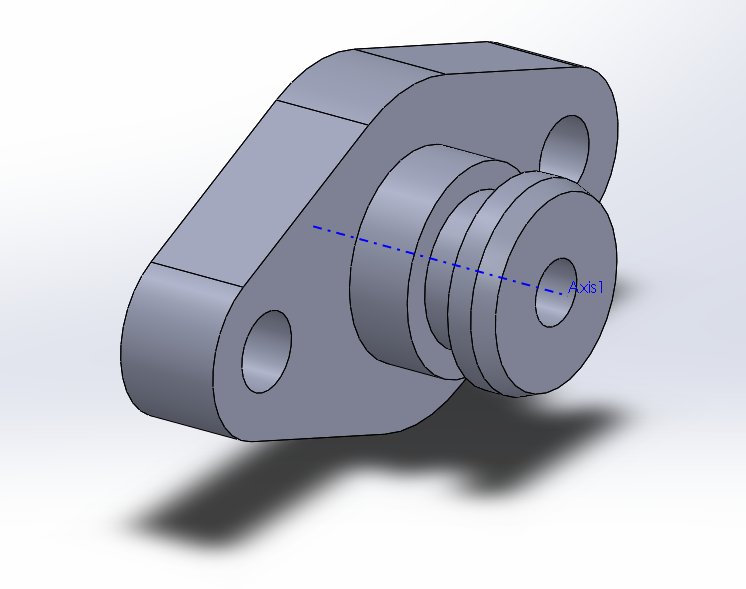
The barb sketch was drawn, I tried to make the bore as large as possible to optimise fuel flow, this is the reason for the shroud, to add extra support.
The sketch revolved around the axis.
The sketch of the shroud.
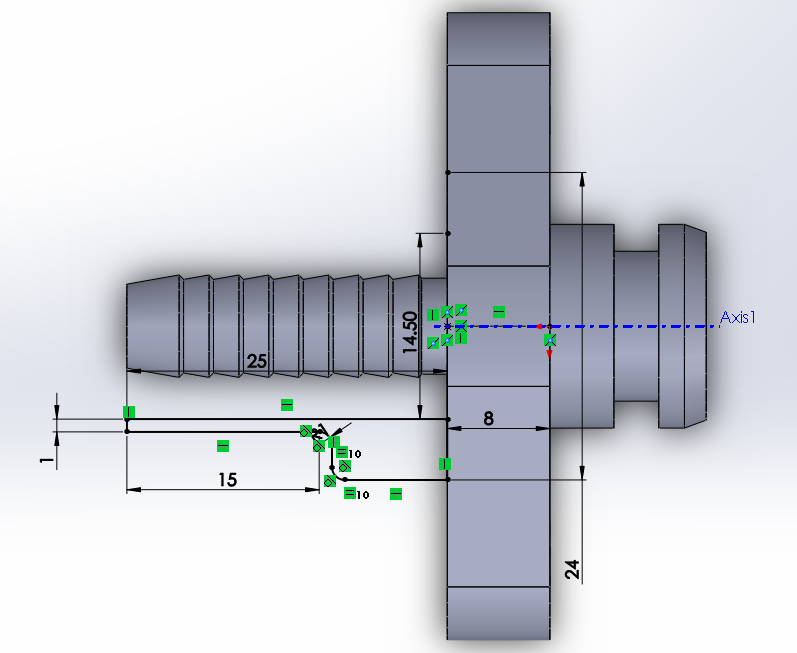
The shroud was originally intended to be crimped on the tube, instead I chose to make it an interference fit.
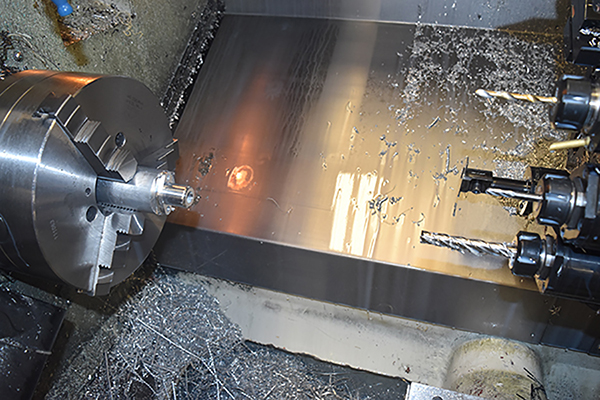
Machining
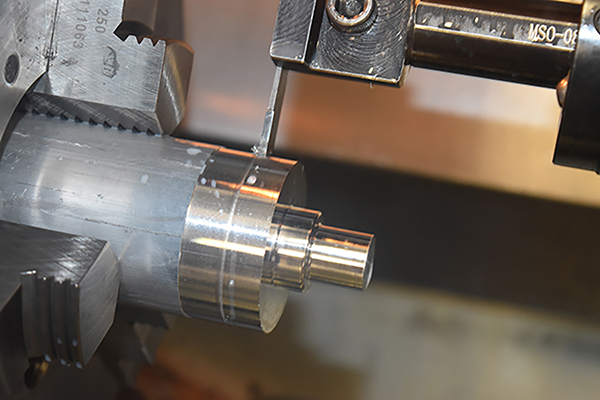
The first step in machining was to set the zero point using the datum tool, all tools there after can be set to the front of the work piece as zero. The next tool was the outside turning, I set the stock spinning at 100 rpm in MDI mode and touched the piece lightly.
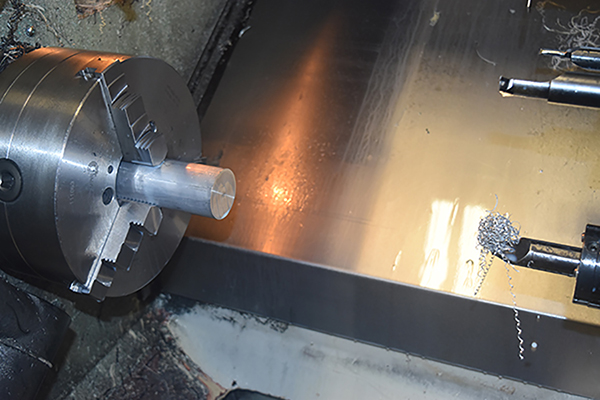
The "Z" of this tool was set to zero.
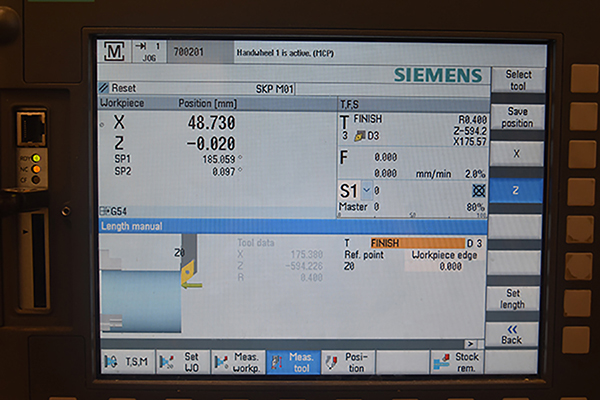

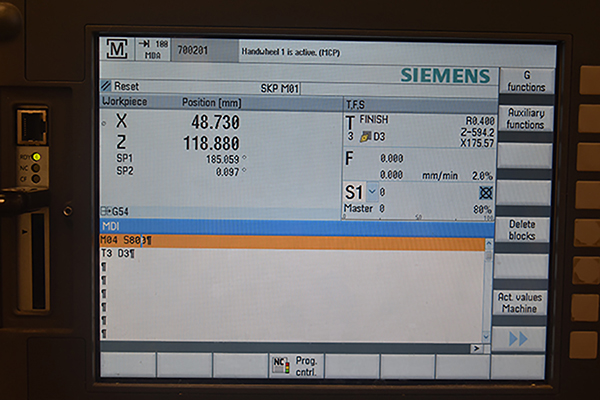
I set the machine spinning at a higher speed and took a light cut on the outside, the diameter was measured and the "X" offset for the tool was set, it was ready to turn the profile.
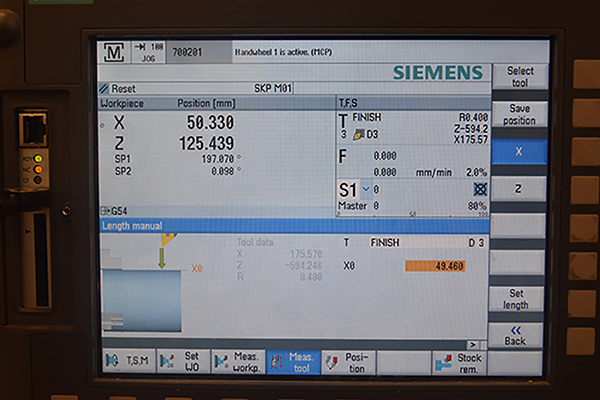
Here shows what the tool was originally set at and what I have now set it to.

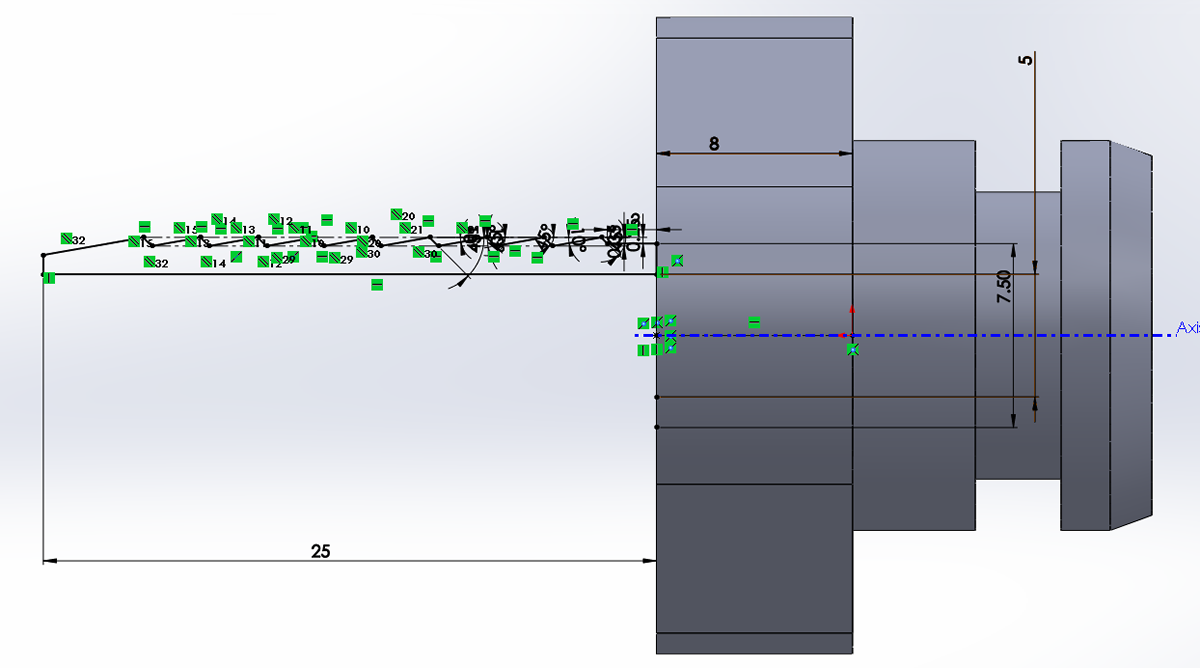
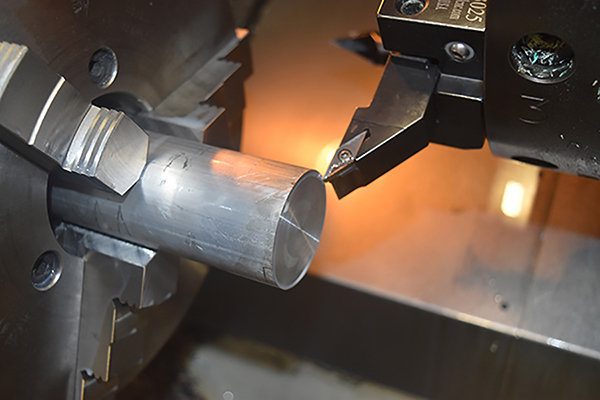
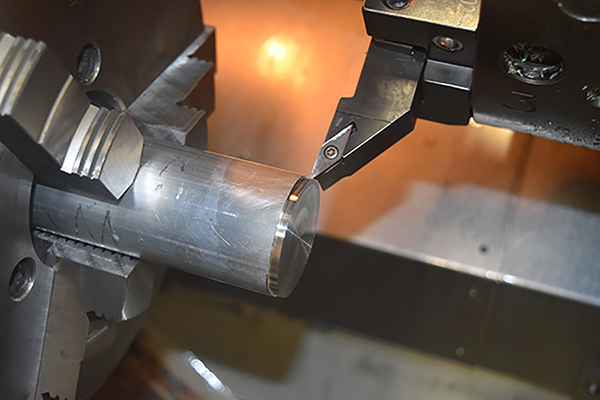
The outside of the part was turned, the left picture shows me setting the grooving tool, to cut the back of the part. The milling contour was then cut, I didn't simulate the program which allowed me to miss a mistake in my program, when I returned the tool to a specific point before retracting it I shaved off one of the edges.
I knew that cutting such a deep groove in the face of the part was going to be an issue and it was. I tried a few different tools but all of them bent, I decided to scrap this idea and go for a new design.
Design 2
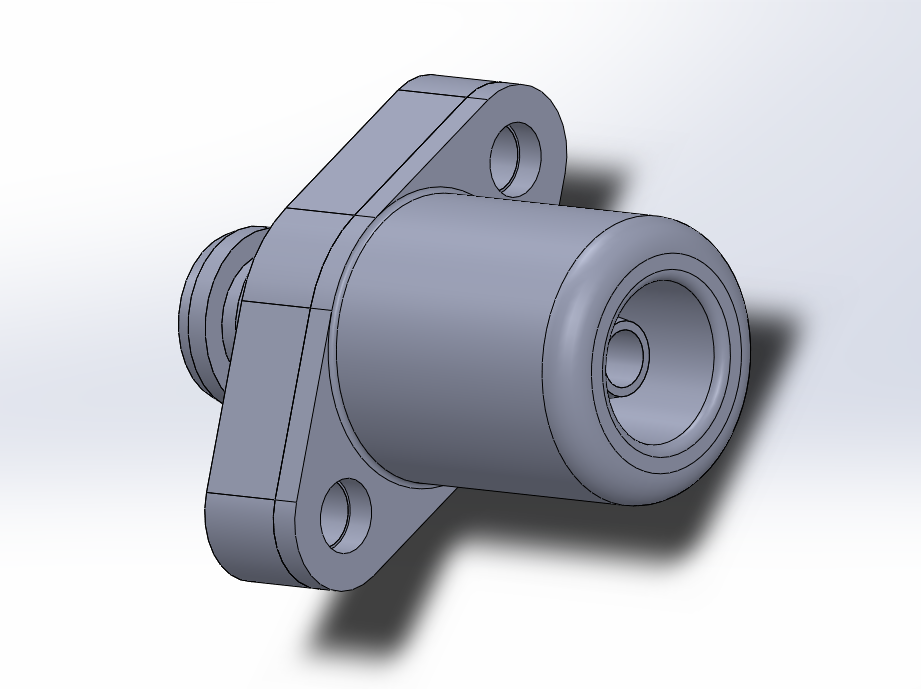
I had some issues with turning the groove in the front of the part, I instead chose to make a new design where the shroud would be a separate piece. I removed the shroud in the CAD and replaced it with a step, this will at as a centralising point for the shroud in order to present even pressure on the circumference of the fuel pipe.
I started drawing a flange that would butt up to the barb.
This was extruded to a depth of 2.5mm, just enough so that it would not be flimsy.

The contour drawn for the shroud, a taper on the inside that will crimp the tube to the barb. This shroud will be easy on the tube while gripping it tightly, the smooth edges should allow a long service time.
The sketch revolved around an axis.
Some fillets were added to smooth all of the edges.
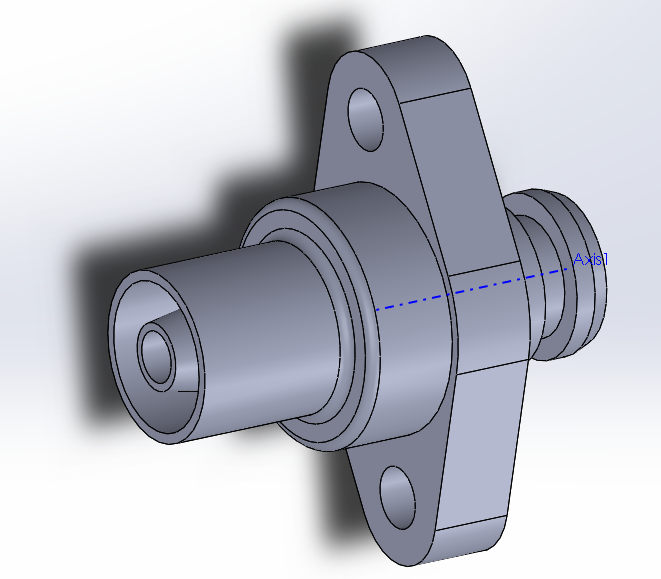
Here are how the two parts will assemble together.
A cross-sectional view.
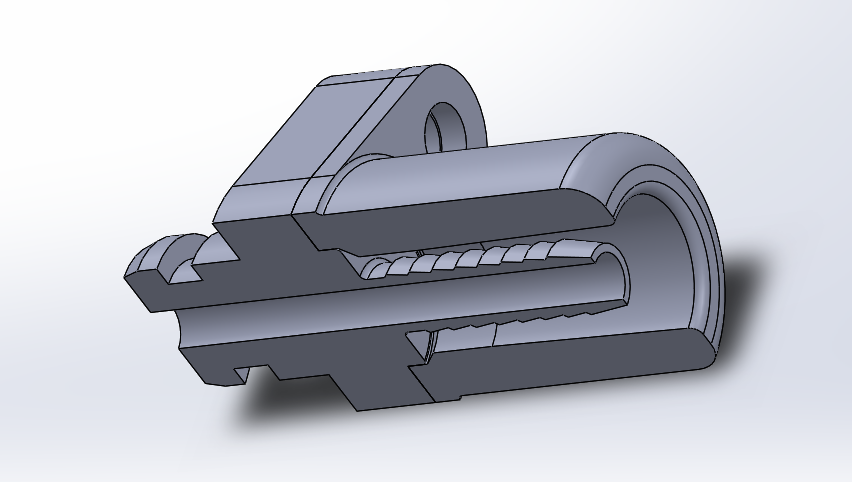
Here shows how gradual the taper is and how the parts mate together.

Machining
Since I had messed up on the previous part I thought I should finish it off with the new program to get things right.
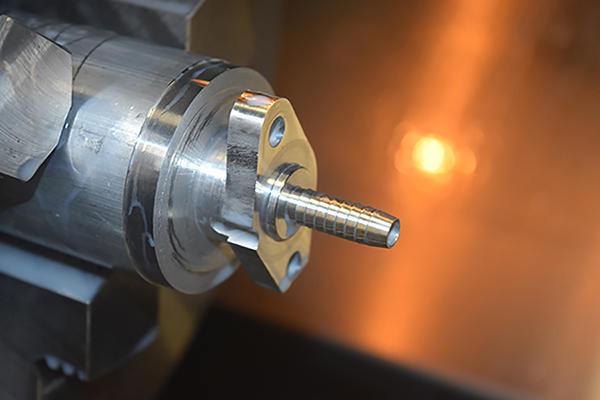
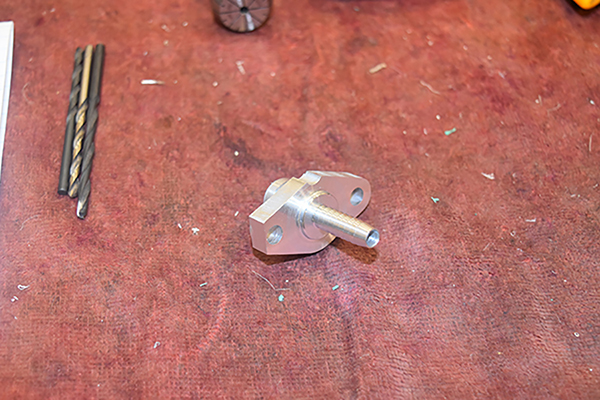
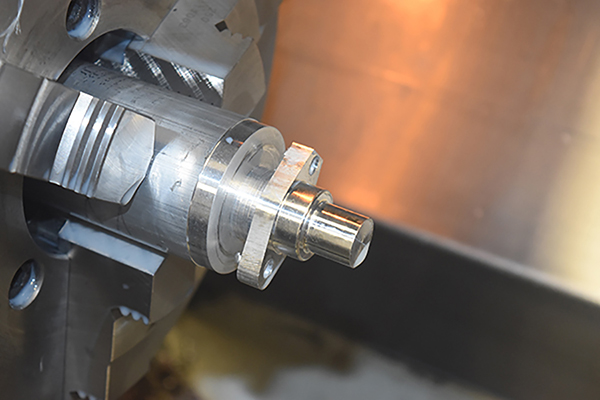
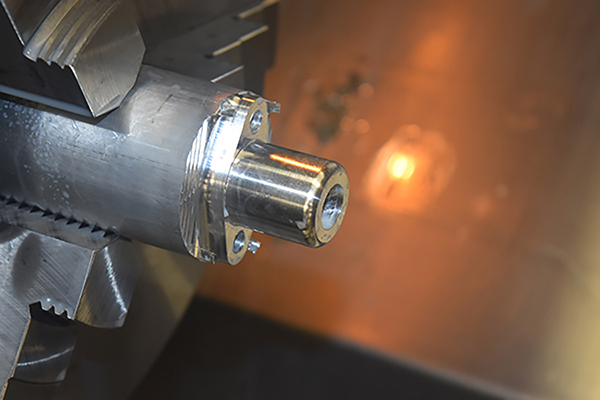
The second one off came out perfect, I ran quite a few of these parts before flipping them in the lathe to machine the other side. I left a little bit of stock since the grooving tool I used wasn't really up to the job.
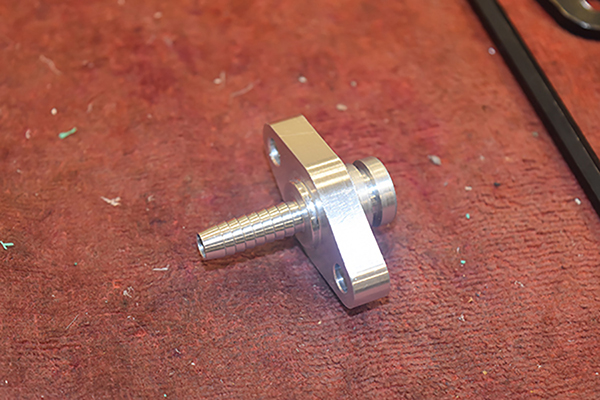
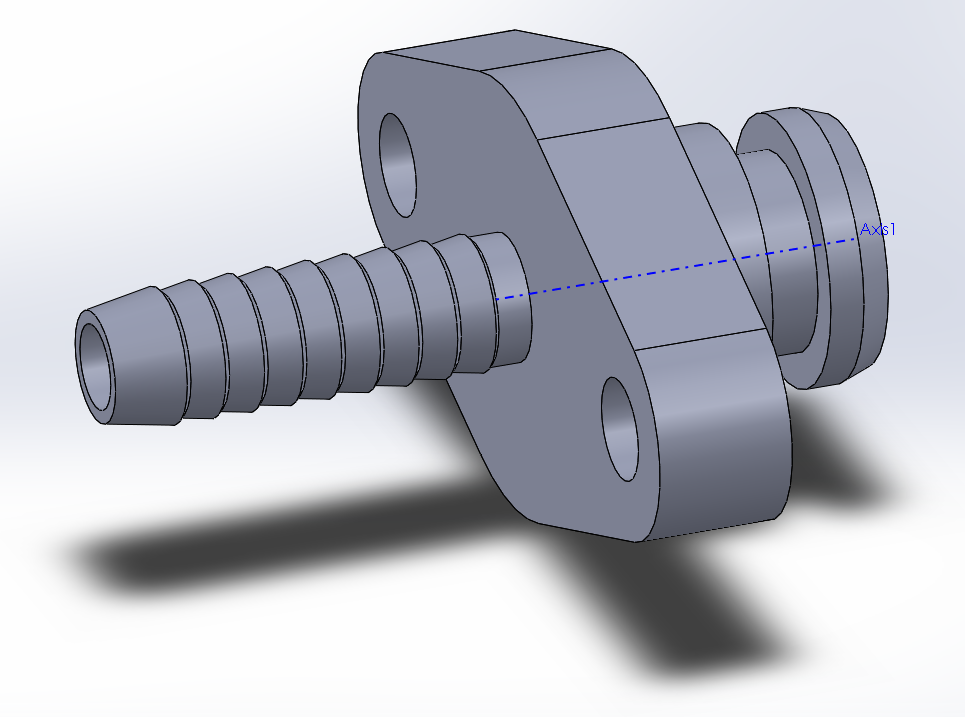
The part came out really good, once finished I started the shrouds.

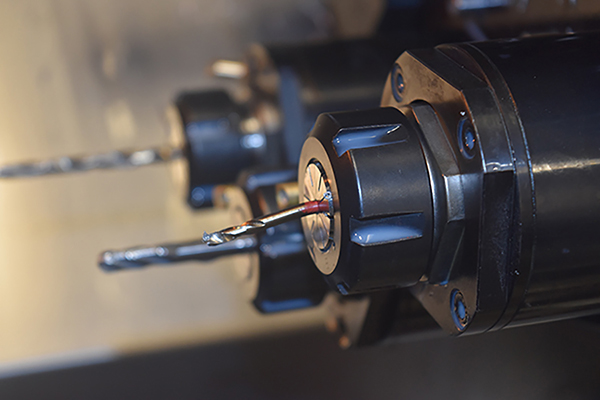
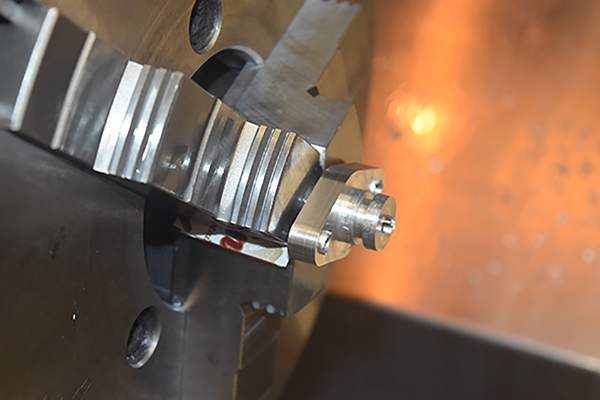
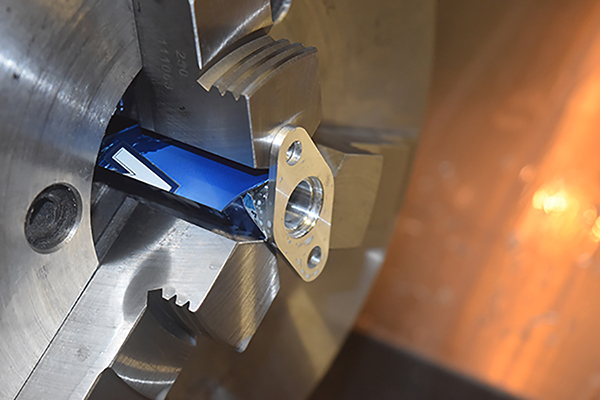
I used a long slot drill to bore out the part.
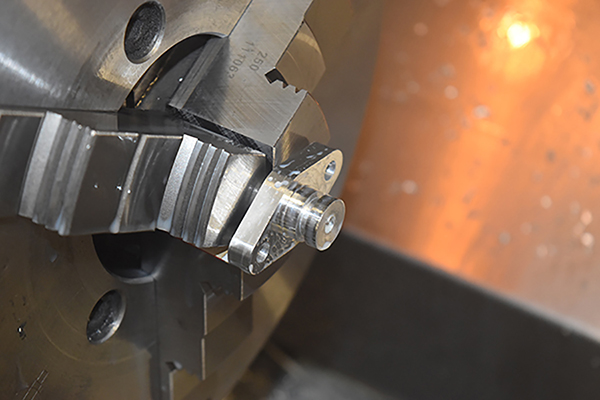
I bored them out to achieve a mirror finish and then parted them off a little longer since I would have to machine the back, the parting tools have a tendency to taper, a lot.
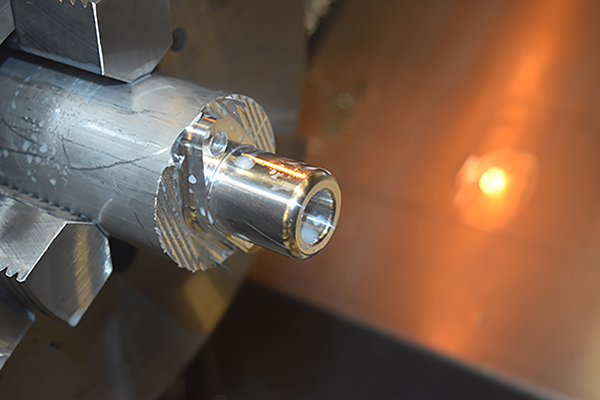

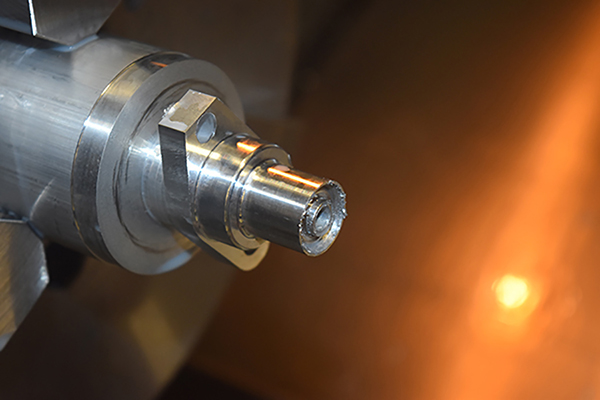
The flange was faced to the correct height and a step in the bore turned in order to locate it on the barb. A total of five pairs were machined, two for the fuel rails and then three for the fuel manifold.
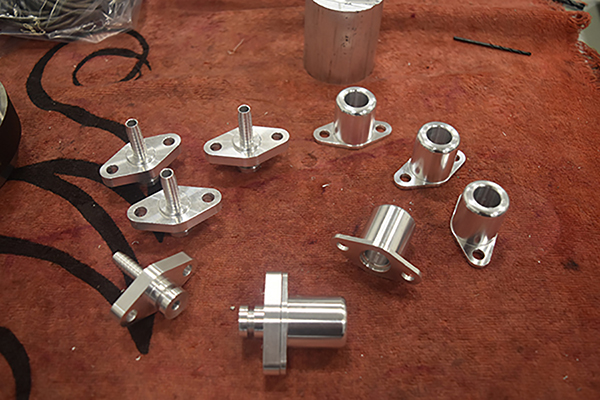
I assembled one of these together with the tube, there is no way the pipe will come off and of course they are removable without damaging the hose like any crimp or clamp would. It is great to have access to a CNC because quite often these types of parts are not available or obscenely expensive because they have to be machined. I would later like to anodise them to protect against corrosion and make them stand out.
Hello, if you have enjoyed reading this project, have taken an interest in another or want me to progress one further then please consider donating or even sponsoring a small amount every month, for more information on why you may like to help me out then follow the sponsor link to the left. Otherwise you can donate any amount with the link below, thank you!