How to Replace Captive Rotors / Brake Discs
Normally I wouldn't post this as a project on my website as brakes are normally a straight forward task taking at most an hour a corner, however this was not the case for the car I just bought. I found a Hyundai Tiburon going pretty cheap with very low mileage, it needed quite a few things doing to it like a service, etc... One of the front rotors was badly warped causing the brake pedal to pulsate, so bad that the previous owner ran into the back of someone. I took the front wheel off to change the rotor to find that it was infact behind the hub, which means to change the rotors you have to pull the hub and with pulling the hub you should change the wheel bearings and to change the wheel bearings you must pull the ball joint and tie rod, quite a job.
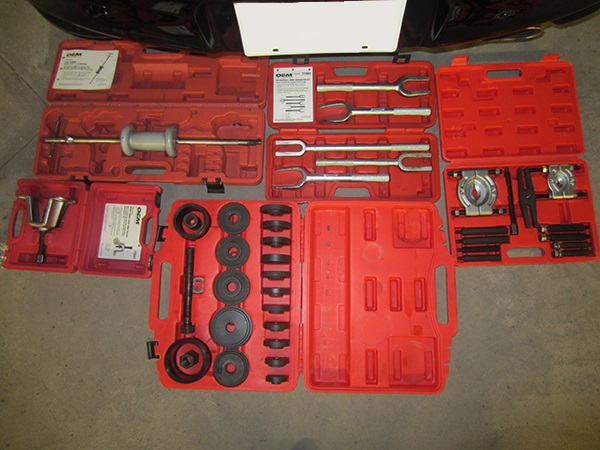
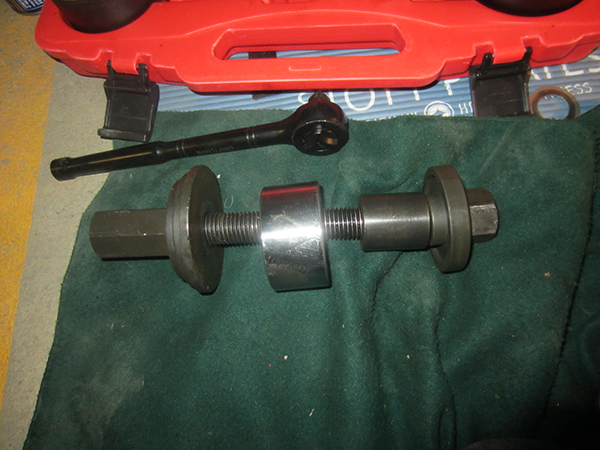
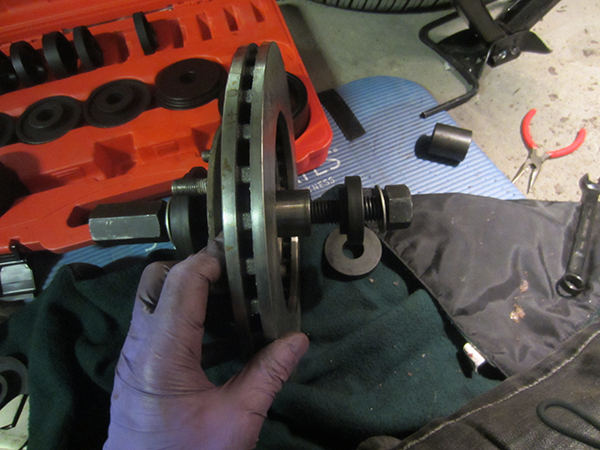
You will need quite a lot of tools to do the job, the most essential is a socket set of ideally 1/2" and a 32mm socket to fit the nut on the end of the drive shaft. A long bar to crack the drive shaft is a must, it will also help with the brake cradle bolts and prying the lower arm. You will need a 19mm ring spanner also with an open end. Definitely a hammer, the bigger the better. A long set of snipe nose pliers, the nose a maximum of about 3mm, overall length about a foot. You will need a hub puller with slide hammer which I chose to hire for free along with a fork set to pry the tie rod and ball joint. The tools I had to buy was a bearing splitter to pull the inner race from the hub and a set to pull a bearing from the knuckle, it also serves as a press, below is a picture of the specialised tools that you WILL need.
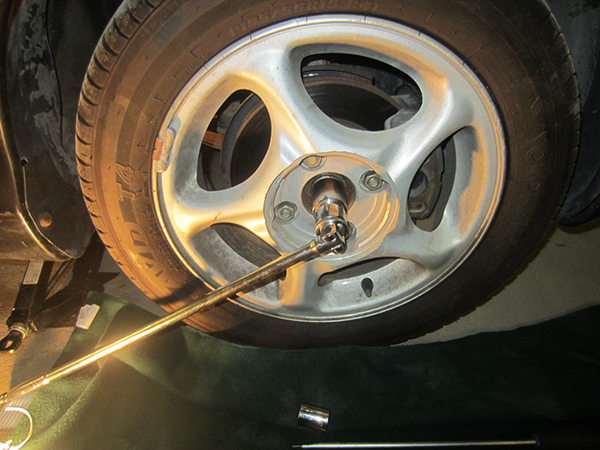
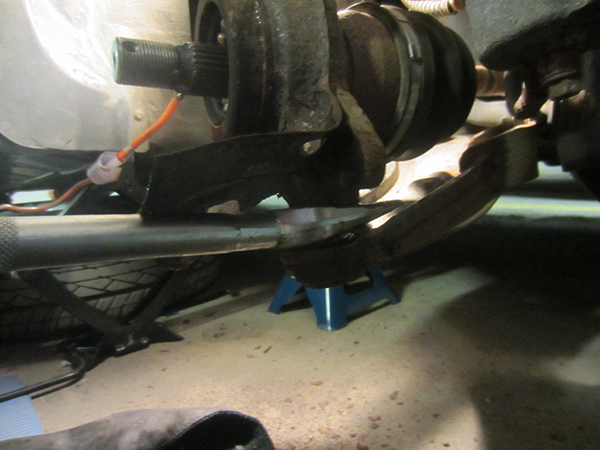
The other option if you don't want to press the bearing yourself is to completely remove the knuckle and take it to a garage to press the bearing for you, it will be cheaper than the tools however you will need the wheel alignment and camber setting afterwards if you choose that method. I have an underground parking spot so I couldn't really leave the car for a day as I didn't want to upset any of the residents, I chose to do it through the night instead. The first thing to do is crack off the wheel nuts along with the drive shaft nut, you will definitely need a long bar, you can completely remove the drive shaft nut at this stage. (Don't forget to remove the split pin first).
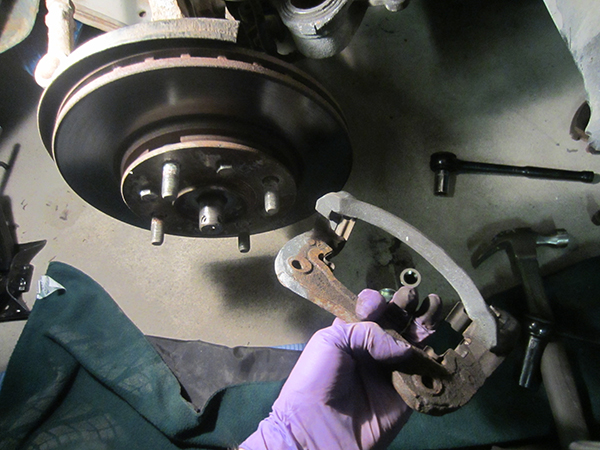
The caliper needs to be removed next, it's just two 14mm bolts, hang the caliper off the spring using a piece of wire, you can use tape like I did just make sure it does not tear. Hanging the caliper with the brake line would work however there is the possibility you may damage the hose where it's crimped, just hang it.

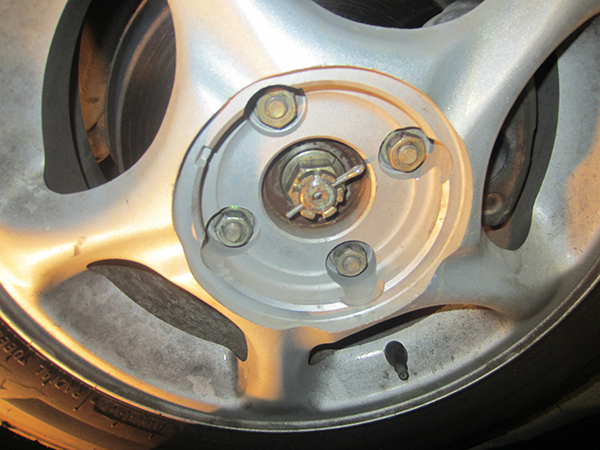
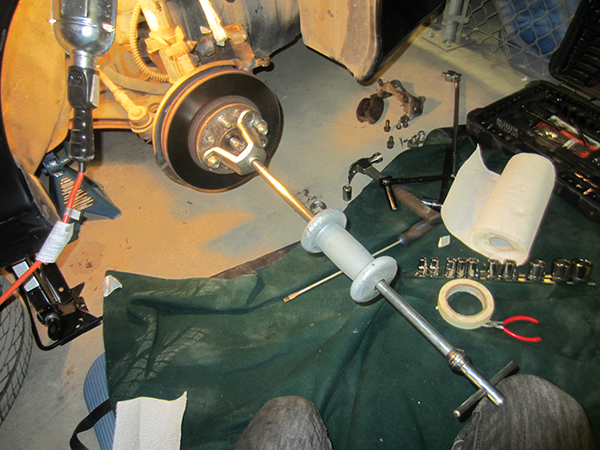
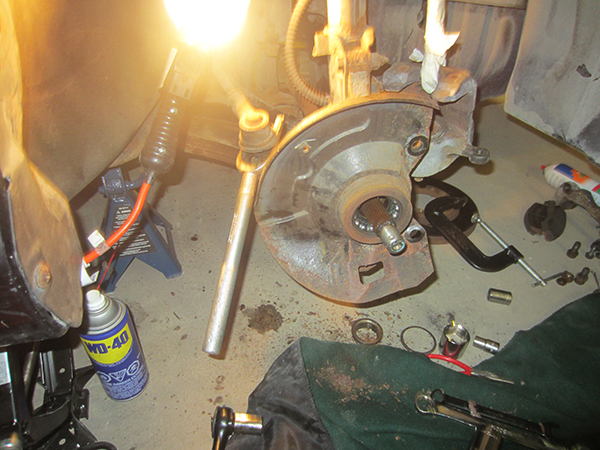
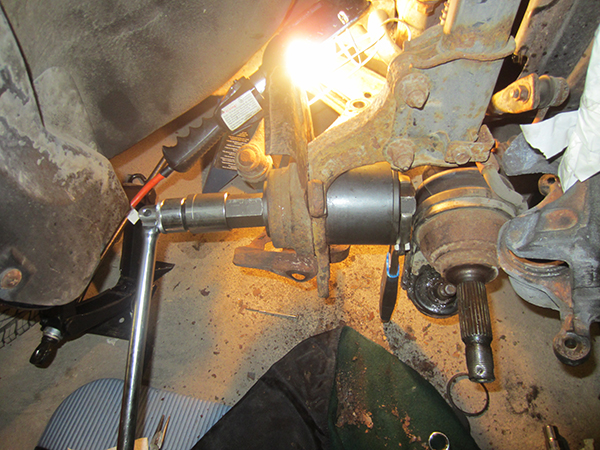
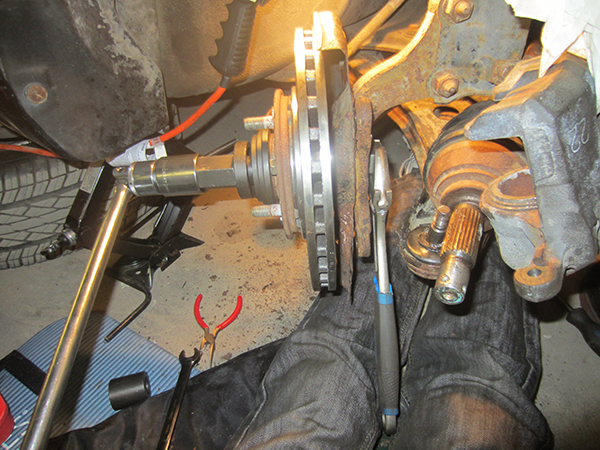
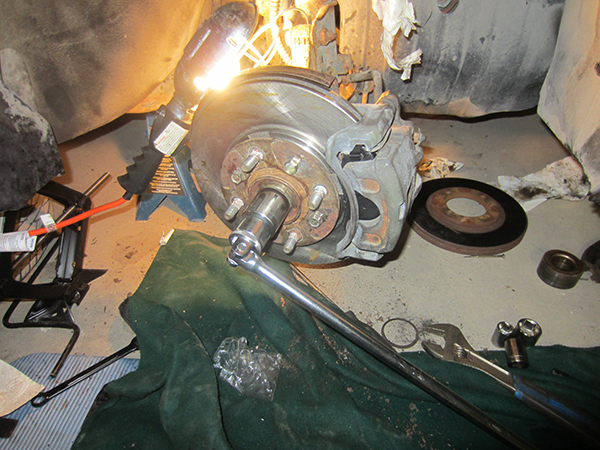
The cradle needs to be removed next, it is likely you will need a long bar for this one as the two bolts holding it on will be very tight. Make sure the drive shaft nut is removed and fix the hub puller to the hub, use the wheel nuts to hold it in place, make sure to put the nuts on backwards to avoid damaging the conical. Slide the hammer away from the hub to pull it, you will have to give it some effort, the hub will eventually come off.
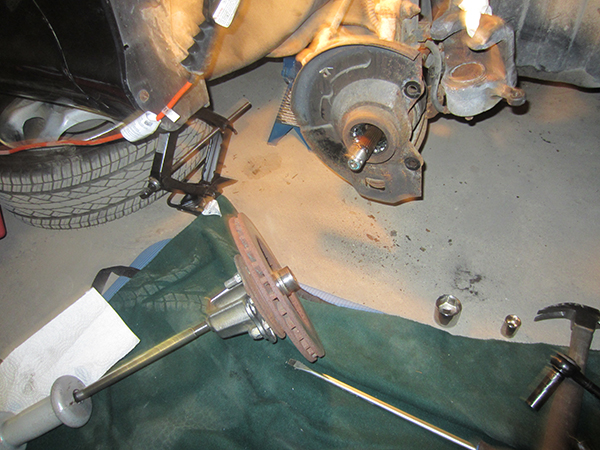
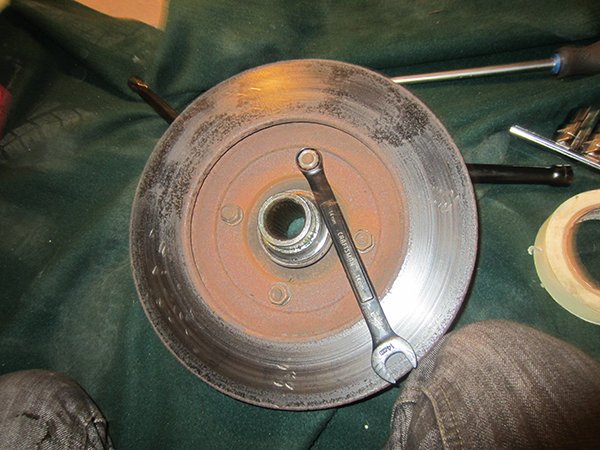
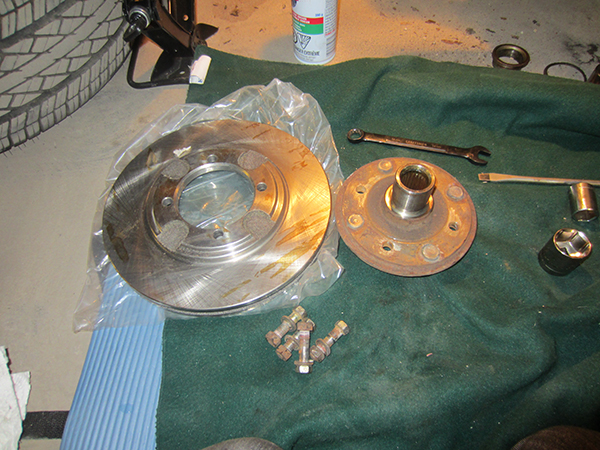
Once the hub is off you need to address it first by removing the old rotor, I found it best to use a ring spanner on the back. I had to use a hammer to crack the bolts, you can either use this method or place the rotor in a vice and use a long bar. I guess the person before me tried to hammer the disc off, should have used a hub puller. You can see the patches on the rotor where it's glazed from the warping.
The inner race needs to be removed from the hub by using a bearing splitter, save the inner race as you will need it later. If you choose to not change the bearings and only the rotors then you don't have to pull this race however pulling the hub will likely have damaged the wheel bearing, it's your choice.
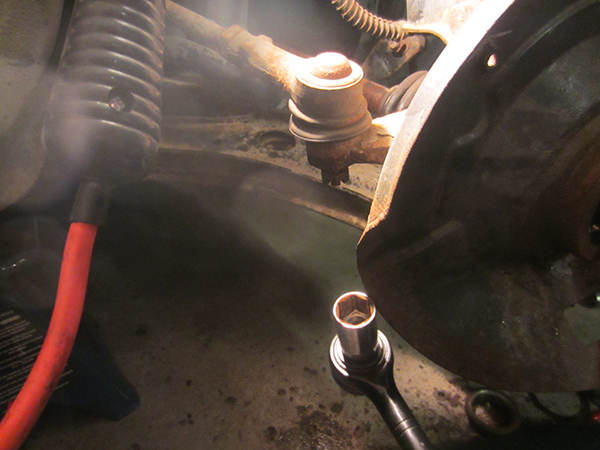
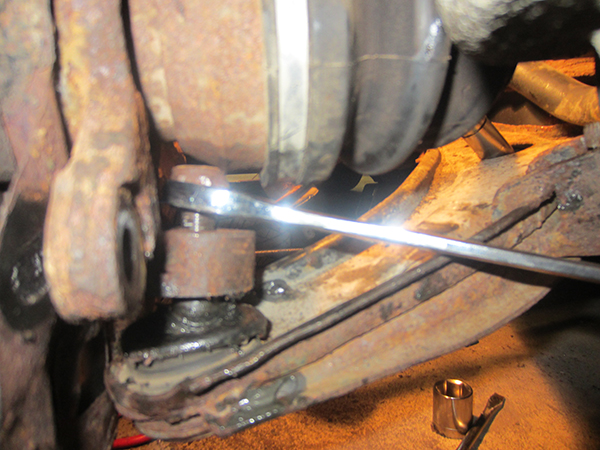
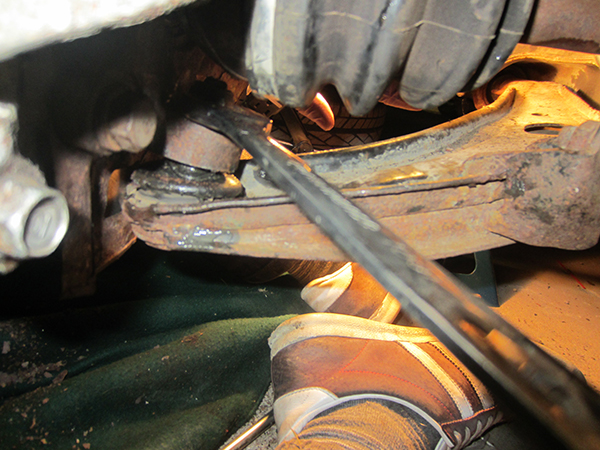
Clean off any grease between the hub and bolt it together, these need to be very tight, you can clean the rest of the grease off the rotor when you install it. The next step is to remove the nut from the ball joint, this was super tight however because the hub has been removed it allows the drive shaft to be raised and a ring spanner placed over the nut. I first shocked the nut with a hammer and then used a very long bar on the spanner to loosen it, this was the single tightest nut I had to remove.
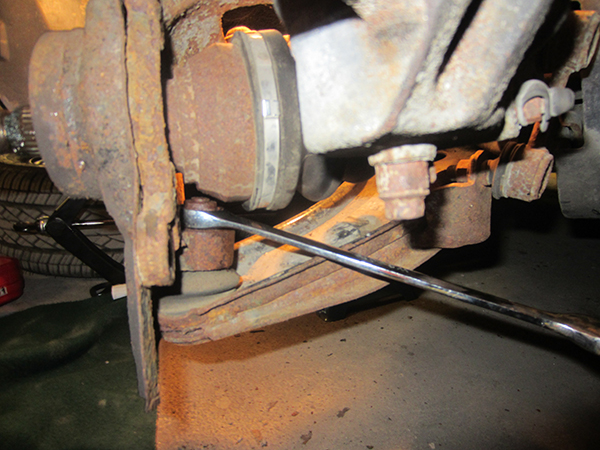
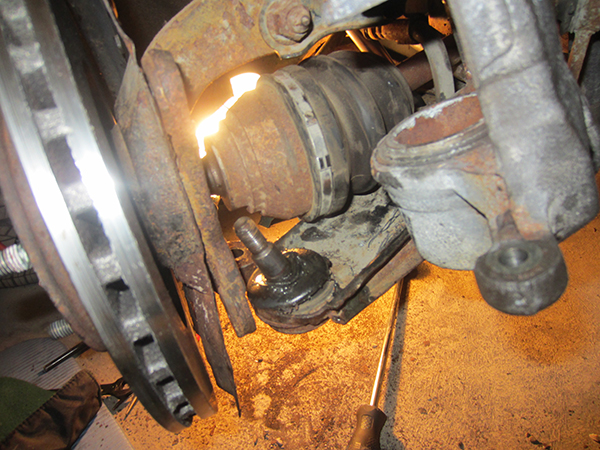
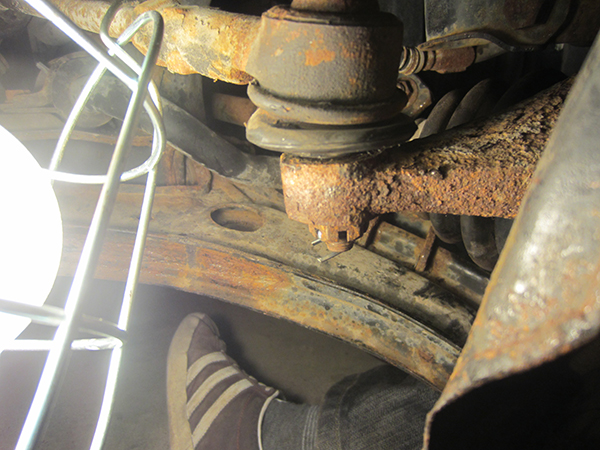
The ball joint needs to be popped using one of the forks, you can try to pop it from the side, I did manage this on one side of the car but this side I had to bend the dirt shield and go in from the front. I only had a small hammer and it took a real lot of effort to get it to pop, a sledge hammer is advisable. You don't pry with these forks, you only hammer them in straight. You will likely squash the seals causing grease to ooze out of them, if you split one then you should replace it, if all you've done is squash it then you'll be fine, this seal only retains grease for the ball joint and stops dirt getting in. The tie rod will have a split pin, remove it and the nut, it would be worth coating it in penetrating oil.
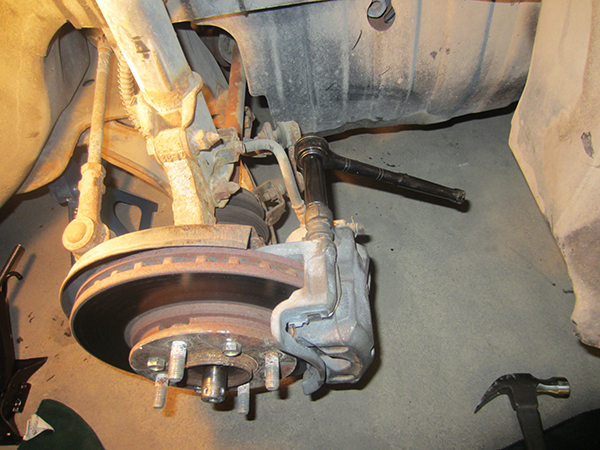
Again use a fork to pop the joint, this one should be a lot easier. Now you will have to removed the lower arm from the knuckle by pushing down on it, you will probably need a lever, there is a hole through the arm so I placed a bar in that. Once the ball joint is free from the knuckle you can now pull out the drive shaft, do not pull from the engine.
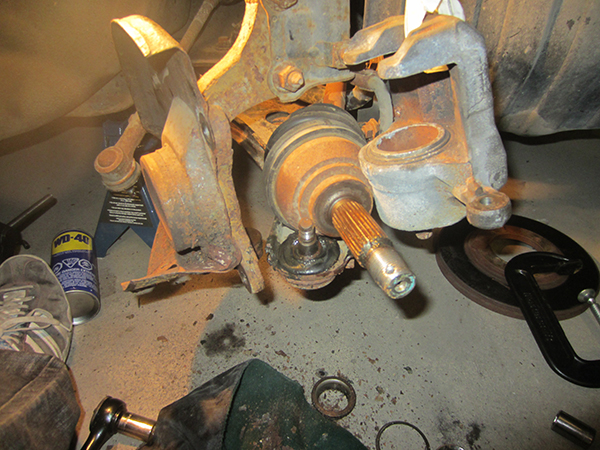
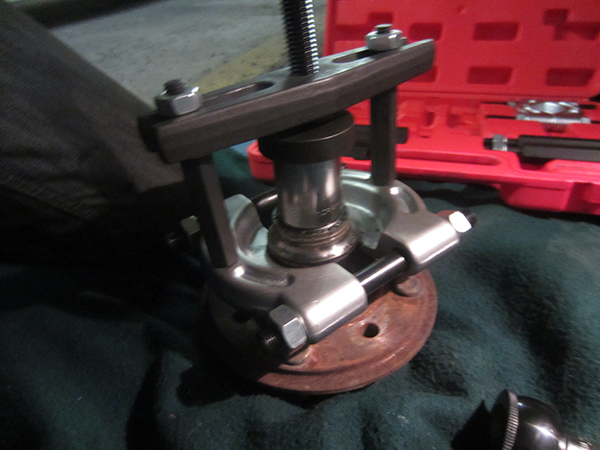
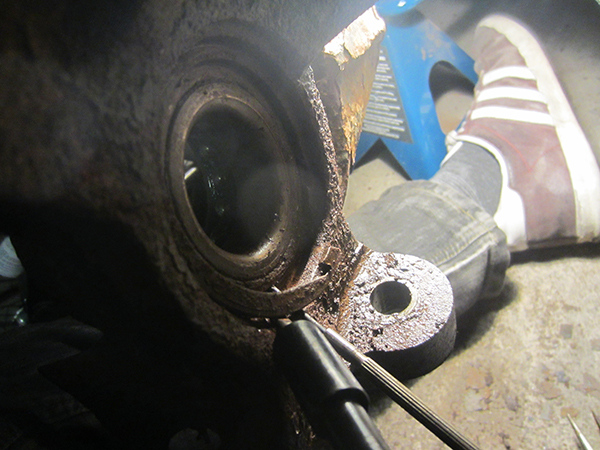
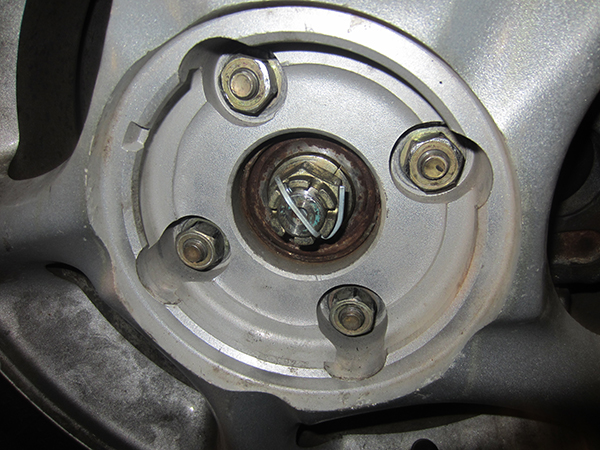
The single worst job is this retaining clip as it doesn't have holes like a conventional circlip, it is known as an internal notched retaining clip. It will likely be rusted in pretty good so I would advise using some penetrating oil. I chose to use a long screw driver to hammer one of the tabs, once I got one side moving I placed some snipe nose pliers between the tabs to open a gap in the groove, I then placed a flat blade screw driver in there to pry the clip away, working my way around the edge I removed the clip. If you can get the clip to spin then just using the snipe nose pliers will be enough, this clip is very thick and sturdy so should be difficult to break. The next step was to remove the bearing using my special set, place the inner race back into the bearing, using a series of washers and a tube you can pull the bearing. The tube is where you are pulling the bearing into (right of picture), make sure your bearing will pass down it first using the new bearing as a gauge.
Before you install the new bearing give the retaining rings groove a good scrape and the bearing housing a good clean. Again you will use a series of washers an a bolt to pull the bearing into the knuckle, ensure you are only applying pressure to the outer shell as applying pressure to the inner will damage the bearing. There will also be a spacer that passes through the centre of the bearing to centralise the bolt, carefully tighten the bolt and make sure the bearing goes in equal. Keep tightening, the first sign of pressure you need to loosen off and remove the inner spacer, then tighten the bolt down again until the bearing reaches the end, you will know as it will get extremely tight.
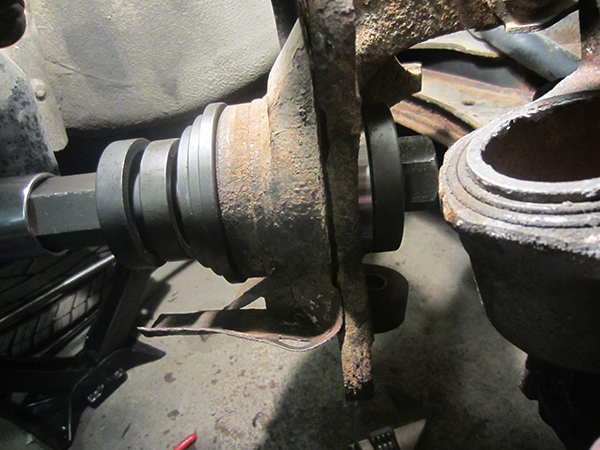
Once the bearing is in you will need to place the clip back in, give it a good clean first or replace it. Using a good set of snipe nose pliers I had little issue getting it back in, I did however on the first side, I had to go out and buy these pliers as the clip is very difficult to compress. These snipe noses are almost a foot long and you may still need two hands to compress the clip. You will need to press the hub into the bearing next, this time you need to ensure your pressing on the inner race and not the outer.

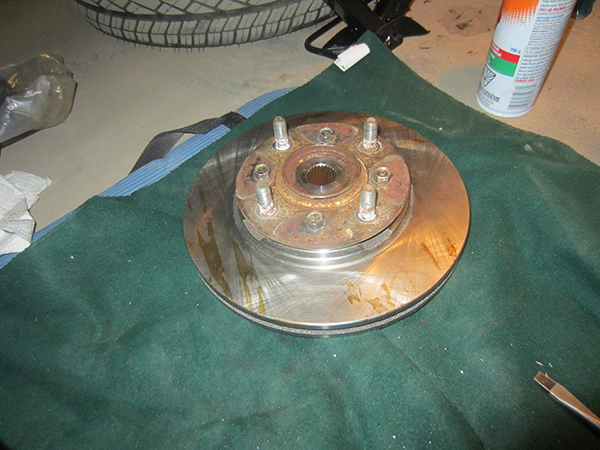
You will find this is a lot easier to align and press than the bearing was, give the rotor a quick spin to make sure it's true, if not then you may have a bent hub or damaged disc (although doubtful). Pull the hub towards you and insert the drive shaft into the hub. Make sure there is a thin layer of grease on the spline.
Again you will need to pull the lower arm down by using a bar to be able to insert the ball joint into the knuckle. Once in you can tighten down the nut, you will have to use an open-ended spanner this time, this bolt needs to be very tight. It is a good idea to clean the taper on the ball joint as you do not want it spinning when tightening the nut, even though you have degreased it, it will not rust inside due to the tight fit.
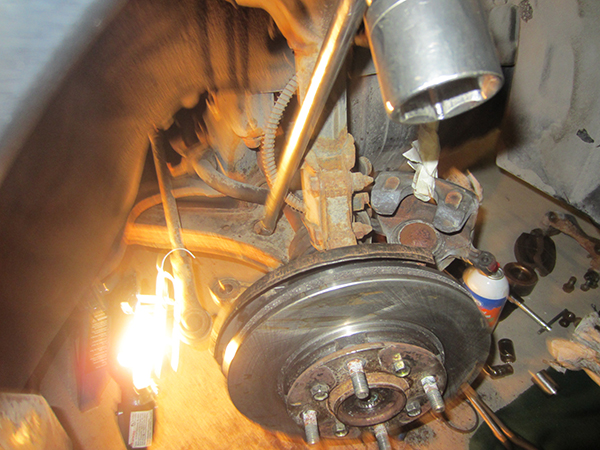
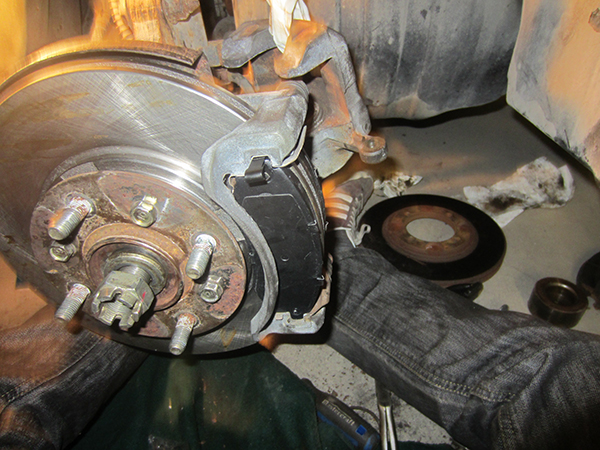
Now you need to degrease the rotor, some grease will stain but this is ok, use a proper brake cleaner. Bolt the cradle to the knuckle, you don't need to torque them down yet, just tighten them. Install the brake shoes, they can only go in one way so it's impossible to get them wrong. Using a "U" clamp you need to push the piston pots all the way in, this would be a good time to check for leaky seals or excessive corrosion. It shouldn't take much effort to push the pots in, if it does then you will need to rebuild your brakes and replace the seals. This is caused by water getting behind the seals, the aluminium furs up and pushes the seal against the pot causing it to bind. I feared this caliper would be binding due to the warped rotor however it was free, so either they drove with their foot on the brake or had a contaminated rotor. Failing to degrease the rotor is an example of a contaminated rotor, it can cause uneven heating leading to warpage or simply because the rotor is ineffective the brake has to be applied harder leading to excessive heat.
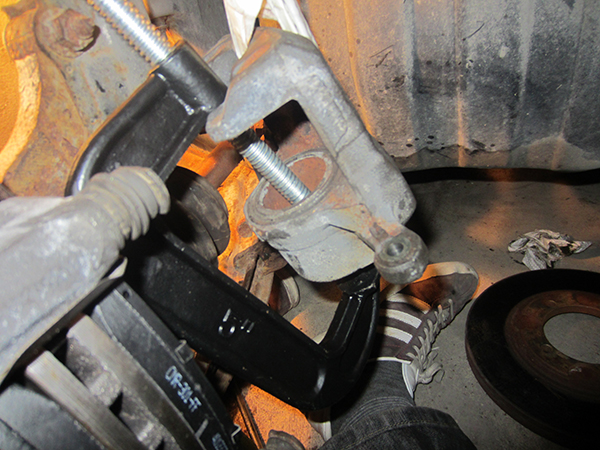
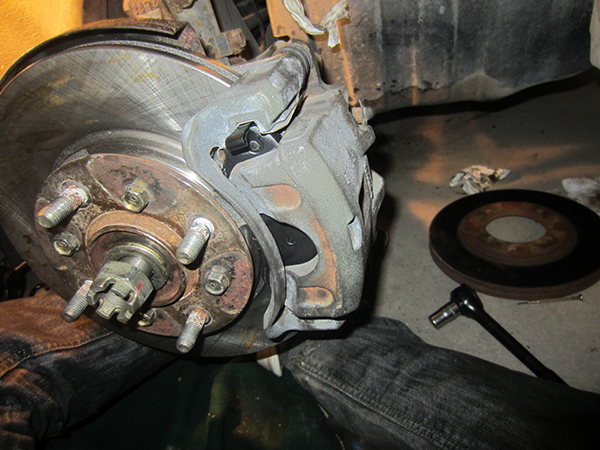
Then bolt the caliper to the cradle, these need to be fairly tight, not excessive. I left the steering rod until last as being able to move the knuckle around makes things a little easier. Degreases the cone on the tie rod end, bolt it down, get it fairly tight and then turn until a slot in the castle nut matches a hole in the bolt. Place in the split pin, the split pin retains to bolt if it comes loose, it is also an indicator to the torque specification of the bolt.
Now that everything is rigid and in place I gave the ball joint one last tighten, very tight. I then used a bar to tighten the bolts behind the cradle, these need to be very tight. A quick once round on all of the bolts to ensure they're tight enough and then finally the drive shaft nut, just nip it up for now.
Place the wheel back on, tighten it up, drop the jack and then torque everything down. Again with the castle nut you need to get it tight and then turn it until the hole matches one of the slots, a long bar is a must. Place a split pin through the hole, bending a leg over the top of the nut will stop the pin from rattling.
I hope anyone reading this has found it useful, I admit this is the first time I have ever seen this kind of setup on a car before. It was still less than half the price of what a garage quoted me and now I have all of the tools to do it again, although I really do not what to do this again. The time it will take will all depend on how easy / hard things are to remove, the ball joints and the bearing retaining clips were a real nightmare and without all these specialised tools the job would have been impossible.
One thing to note is that you should always change brakes in pairs, I changed both sets of bearings and rotors. Another thing to note is to have better brakes on the front than at the back, this is done with a different size of rotors and possibly a restrictor in the brake line to the rear, manufactures design. If you do not have matching pads then ensure your front pads are a higher performance than the rear.
Hello, if you have enjoyed reading this project, have taken an interest in another or want me to progress one further then please consider donating or even sponsoring a small amount every month, for more information on why you may like to help me out then follow the sponsor link to the left. Otherwise you can donate any amount with the link below, thank you!