Electric Supercharger Version 2
This is the second attempt at making an electric supercharger. So the idea came about when I saw a cheap 15W fan on a car tuning website was advertised to boost the intake pressure giving significant increases in power. I thought it be stupid since manufacturers wouldn't go to the extremes of fitting turbo's and superchargers if this was the case. Quite simply around 10kW of power would be required to boost my 2L engine up to 200bhp, so clearly the 15W fan would do little if not restrict power.
The original project started with a 4kW motor at 50,000rpm powering an axial fan, the first design was 2-stage and the latter single stage. It did produce a small amount of pressure but simply the motor could not spin fast enough. I wanted to go with the axial fan design due to the compact nature but of course now I cannot. I have now opted to go for a more conventional turbo impeller design. The issue is that when air is spun though an axial fan it is centrifugally spun outwards which causes friction to the walls and doesn't really make an efficient air compressor. An impeller design such as that found in a turbo centrifugally expels air, it is a very efficient way of producing pressure.
The first idea would be to use the compressor stage of an existing turbo which is what I do plan to do if this project does not work, the issue is that I would need a pretty large compressor wheel to make up for my low 50,000rpm motor. For this project I will mostly utilise 3D printing to find the correct compressor wheel size for my electric motor, once I have found this I will try to source a metal compressor wheel and make the housing also from metal. If all works then in the future I hope to cast the housings.
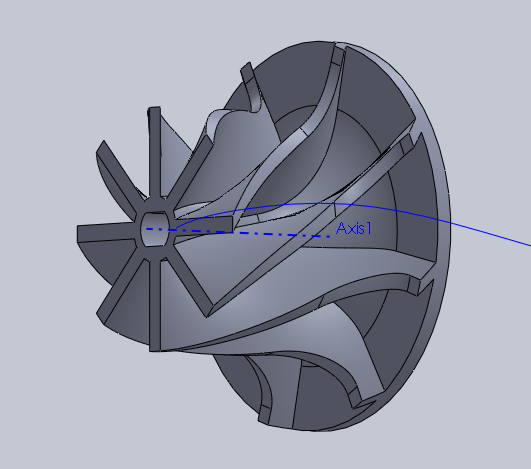
31 July 2017 - I started this project page. I had a play around on Solidworks to try and come up with a suitable impeller design, I think what I have chosen should be sufficient. It is slightly too long for my liking but I wanted to use the drive shaft I used in the previous project.
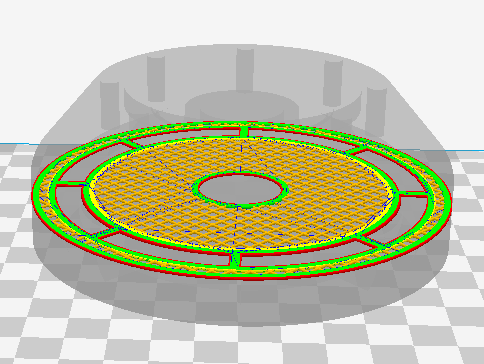
The next step was to 3D print the design, so first it was sliced in Cura to generate the G-code.

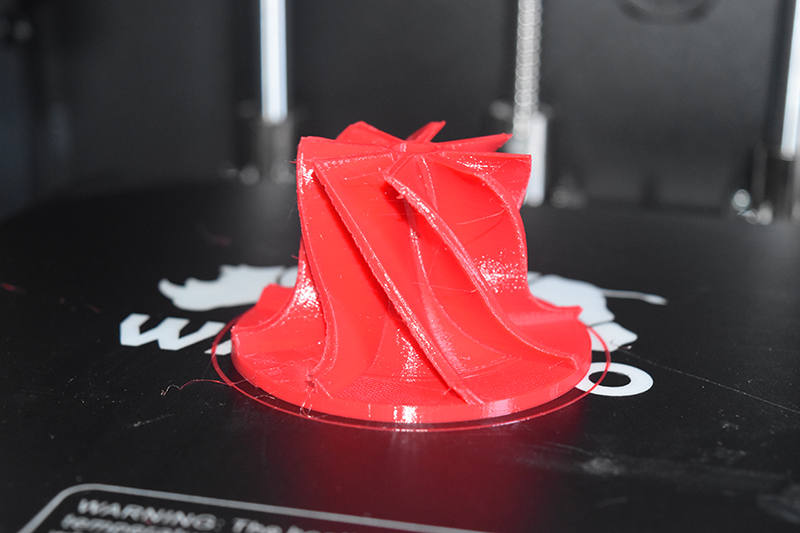
The material of choice was PETG due to it's low warpage and strength. I have found ABS to be a better choice for these impellers since it's more rigid, the only issue is that ABS can be very difficult to print due to it's high warpage. The finish wasn't perfect but my 3D printer cooling isn't adequate so this is the best I could achieve, it is fine for the application.
As a quick test I connected the impeller to the motor, with no housing it drew 500W of power which is quite amazing.
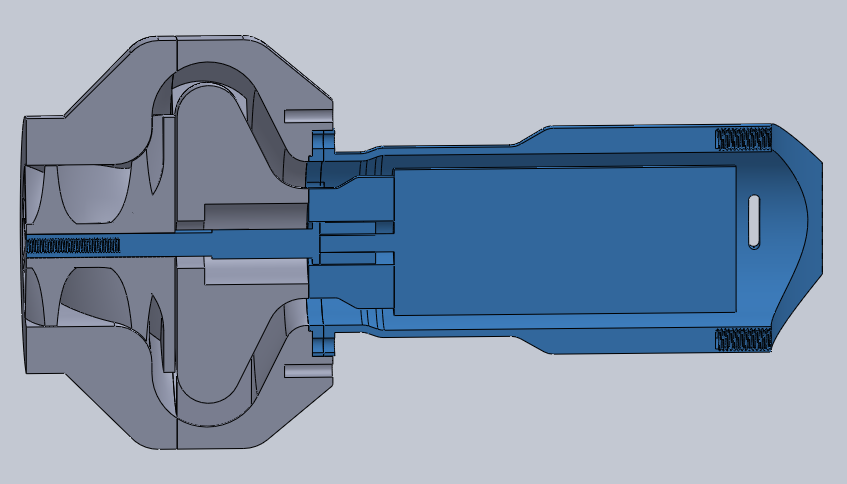
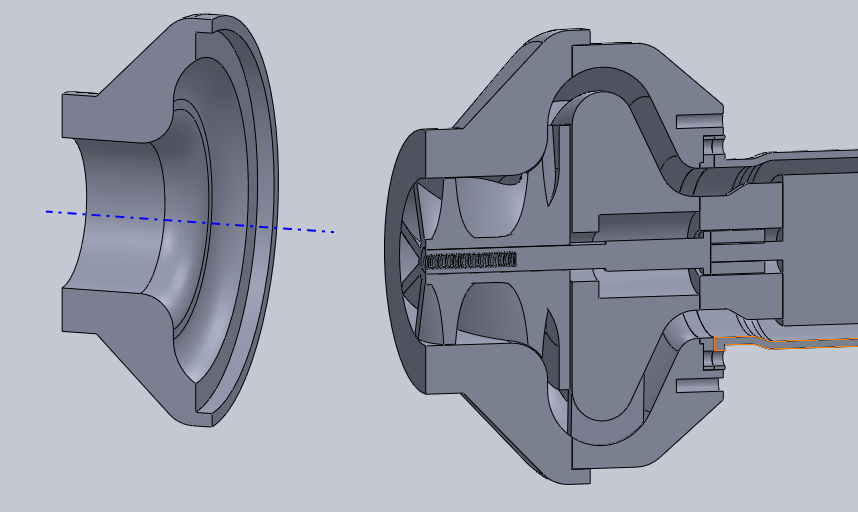
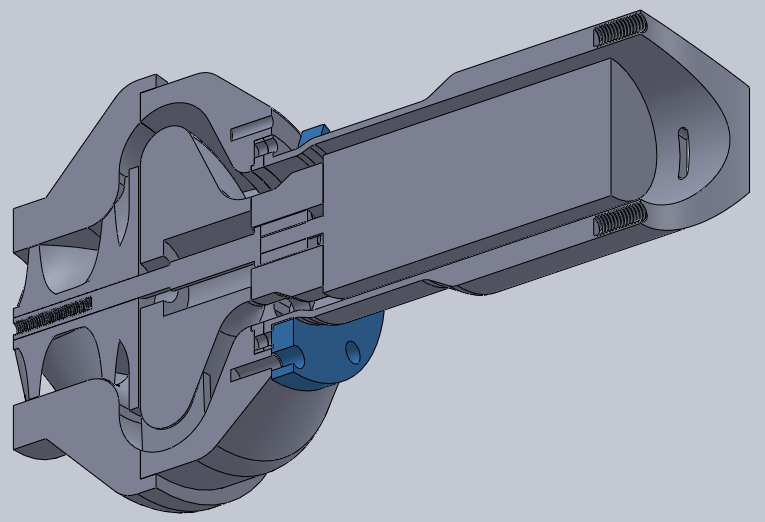
05 August 2017 - Over the last week I have spent quite a bit of time designing the blade housing, it is quite difficult finding a design where I don't have to use bolts, this would be the weak spot. The impeller took around six hours to print so I figured the housing would take around twenty, if it doesn't work I would have to print the whole thing again, I decided glue would be used to fix some parts together. The blue parts are those I already have from the previous project, the design is not complete, it's still a kind of prototype stage.
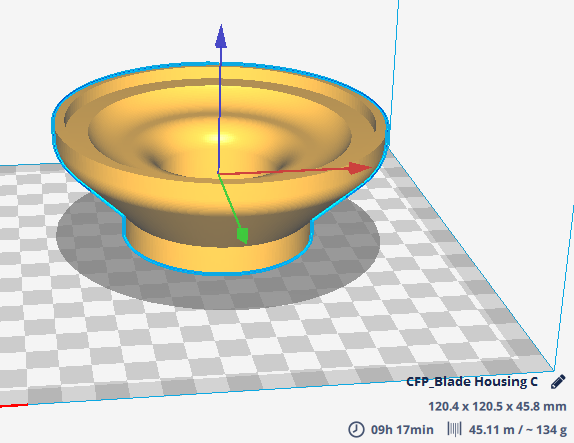
This is the first half of the housing I will be making, the view here is a cross section cut, the part will in fact be a complete circular part. There are a total of eight centralising vanes that keep the part to one piece.
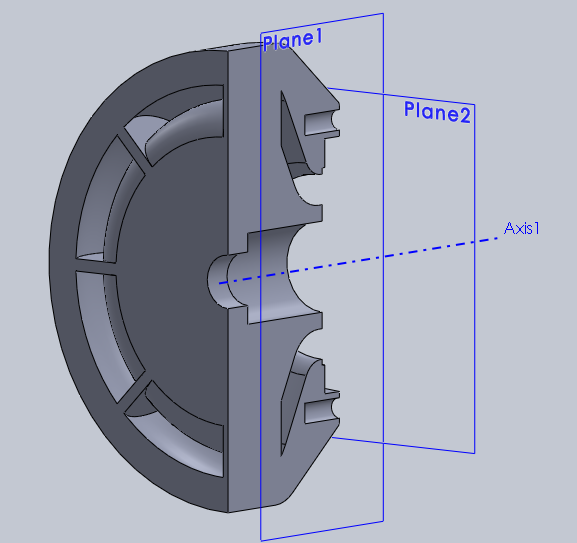
The part does not need to be solid so I left the infill density at 25% with the walls at a thickness of 2mm, even with this the part will use 200g of material and take around 15 hours to print.
The first two prints were actually a disaster, the first lifted from the bed due to warping and the second messed up due to the filament catching half way through the night, I deleted the g-code out of the file up to the point it snagged to find that there was also a flaw in the program, I chose to download the newest version of Cura. I did actually have a design change between the first and second print, both with the vane location and the fill density.
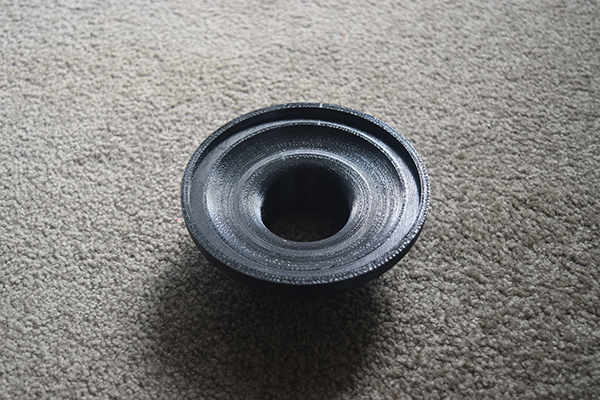
07 August 2017 - The part took around 18 hours total to print, I left it printing all yesterday and into the night. It came out really well even with some very steep overhangs inside of it, which of course you cannot see. One thing I realised quickly is that the glass transition temperature of this plastic is relatively low, I'm not sure this could withstand engine bay temperature but again it's only a prototype.


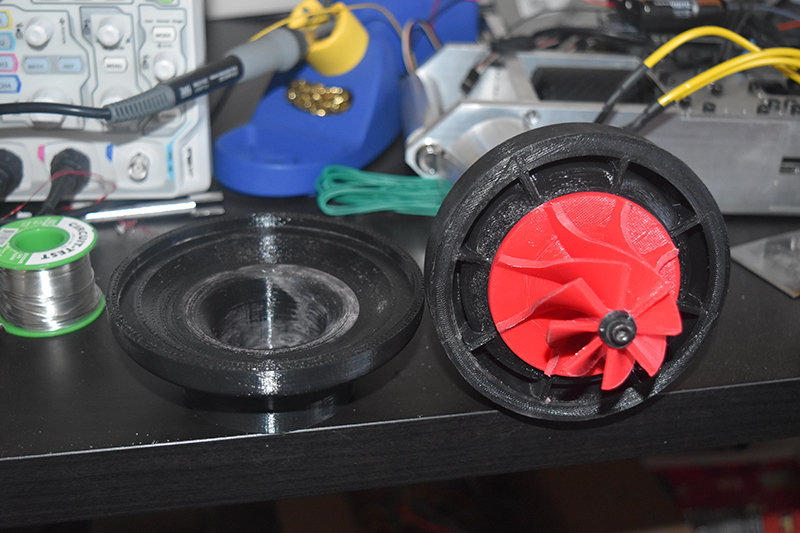
The part fits! I now need to print the other half of the housing and also a retaining plate with holds the housing to the motor.
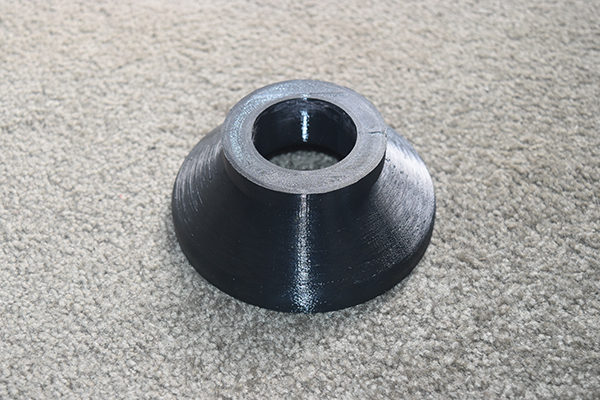
The next piece to print, both of these housing parts will be glued together.
The part being sliced in the 3D printer software, I like how it tells me the time and the amount of material used. I have found that the time is rather inaccurate however and that it normally takes 25% longer.
The part printed with no issues.
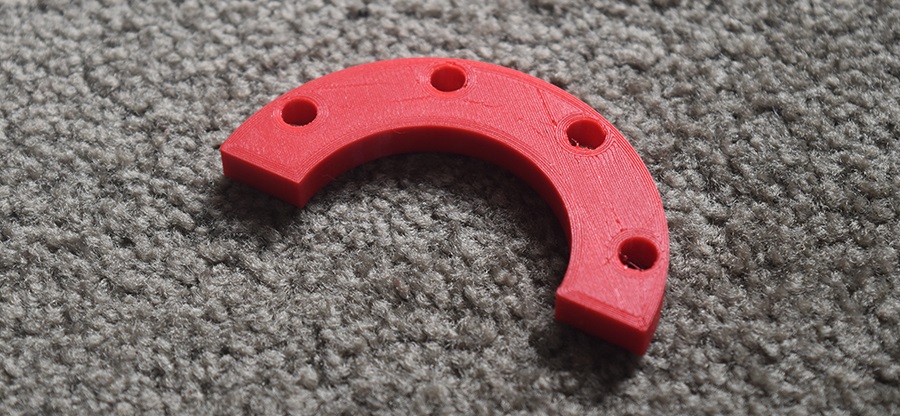
The last part to print was a retaining ring, this will secure the motor housing to the blade housing. The ring cannot pass over the housing so it has been made in two pieces.
The printed ring.
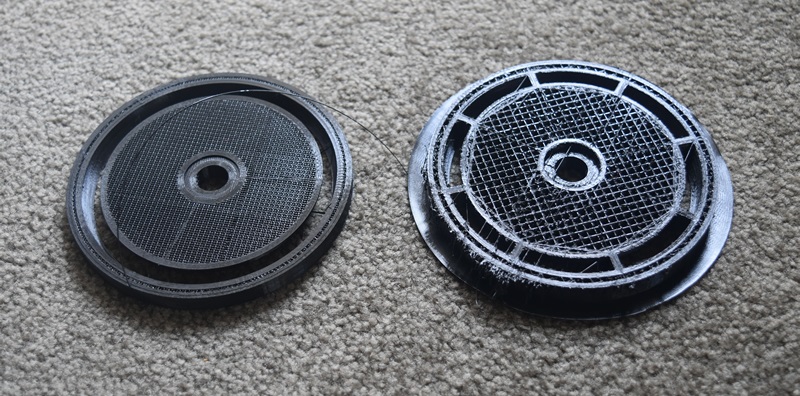
The parts ready to be assembled.
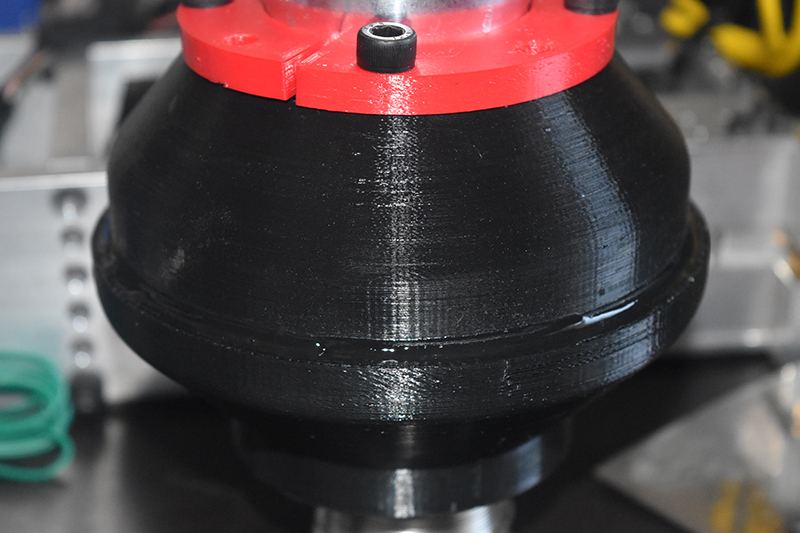
The blade housing was glued together with super glue, no going back now.
I gave the project a quick run but at the moment my ESC is either on or off so I cannot test it properly yet, it does however seem to produce some pressure which is promising.
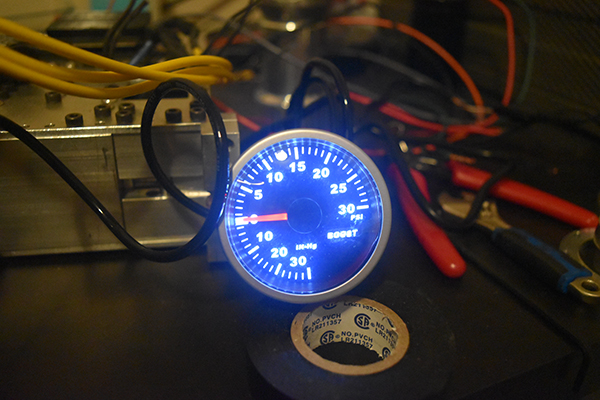
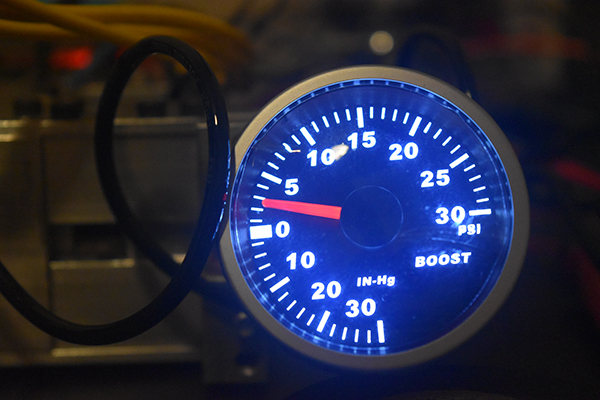
12 August 2017 - I took a trip over to the local hobby store to find a servo tester, this will allow me to control the speed of the motor. I also picked up a cheap boost gauge from a local tuning store, I can now test the pressure of my supercharger. Realistically with the size of impeller and the limited speed of my motor I wouldn't expect anymore than 5 psi, it would be a very good start however.
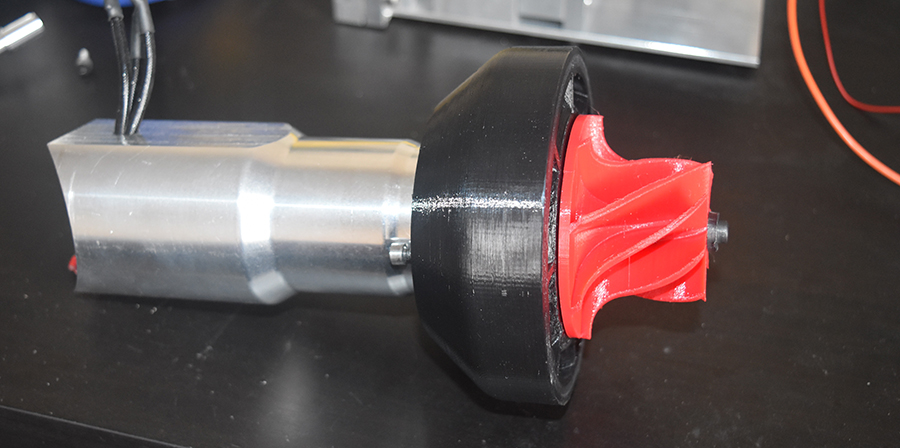
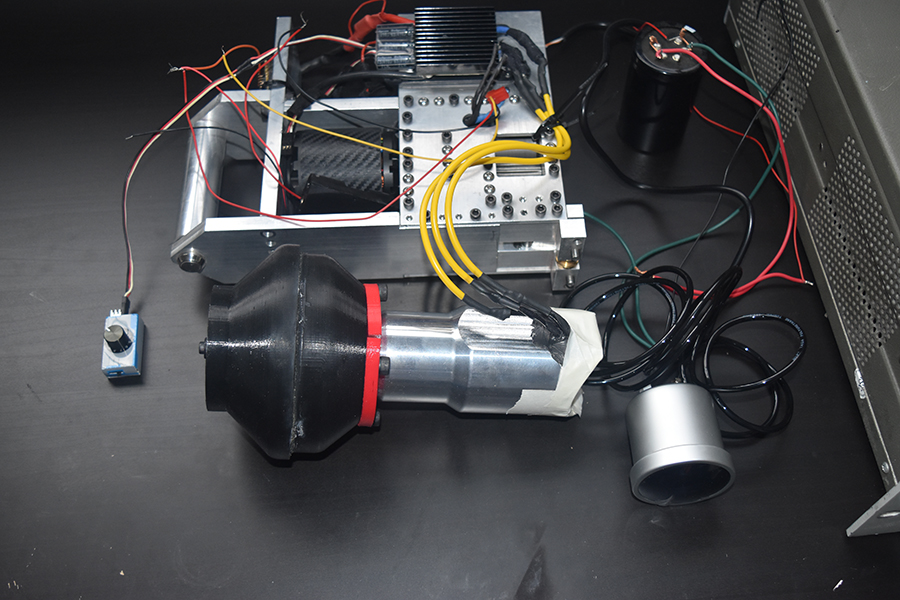
Here is my setup below. I used the ESC off my grappling gun project to run the motor.
I gave the motor a run and took it a little over the rated speed, it sounded like a jet turbine. I quickly encountered a problem with my bearings getting extremely hot, it was either the grease inside them or the rubber dust seals melting. I think I would have to upgrade the bearings for longer runs but since this is still a prototype they'll survive for now. So here is proof that the supercharger works, 3psi !! Ok so it is 2.5psi in the pictures at 36V, it reaches 3psi at 40V.
I will make a quick video to show it working when I get the time.
So would I install it into my car, hell no, for all the noise it makes it still produces very little boost. I think the power increase would be noticeable, it would make my car faster and probably bring it from 140bhp to around 160bhp with a little added lower end torque. So is this the end, of course not. Please check out my electric supercharger version 3 for more progress.
Note: In the process of building this project I'm also working on fitting an intercooler along with making my own composite intake tubes, if I complete these other two projects before the supercharger version 3 then I will test this version out of interest.
Hello, if you have enjoyed reading this project, have taken an interest in another or want me to progress one further then please consider donating or even sponsoring a small amount every month, for more information on why you may like to help me out then follow the sponsor link to the left. Otherwise you can donate any amount with the link below, thank you!