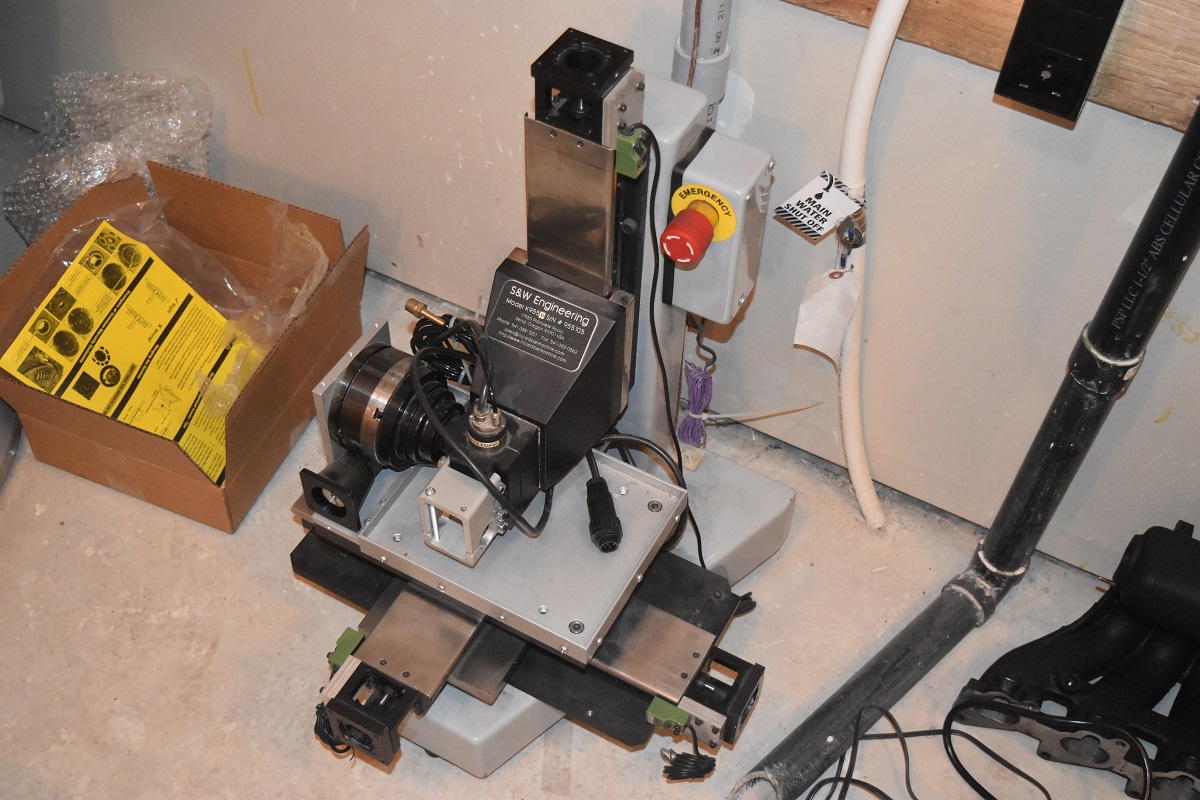
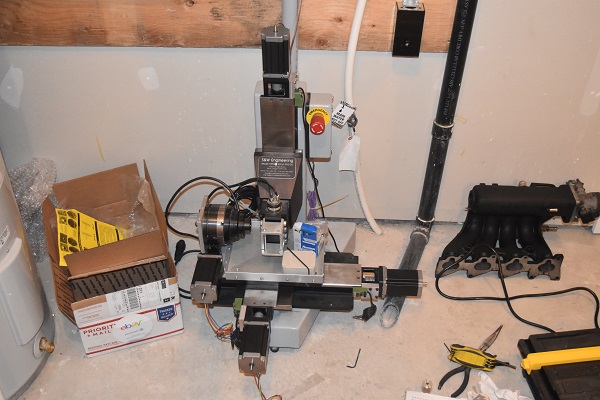
Jewelers CNC Mill / Engraving Machine
I met a jeweler through some contacts which led me to be asked to get a machine working. The machine is a CNC-mill with C / A -axis that's sole purpose is to engrave wax into ring blanks, for casting. He had given a considerable amount of money to a previous person to carry out the work, unfortunately they moved away and never completed the work. My purpose is to get the machine working with modern motors and modern controls, I also want the result to be of a professional standard.
Design
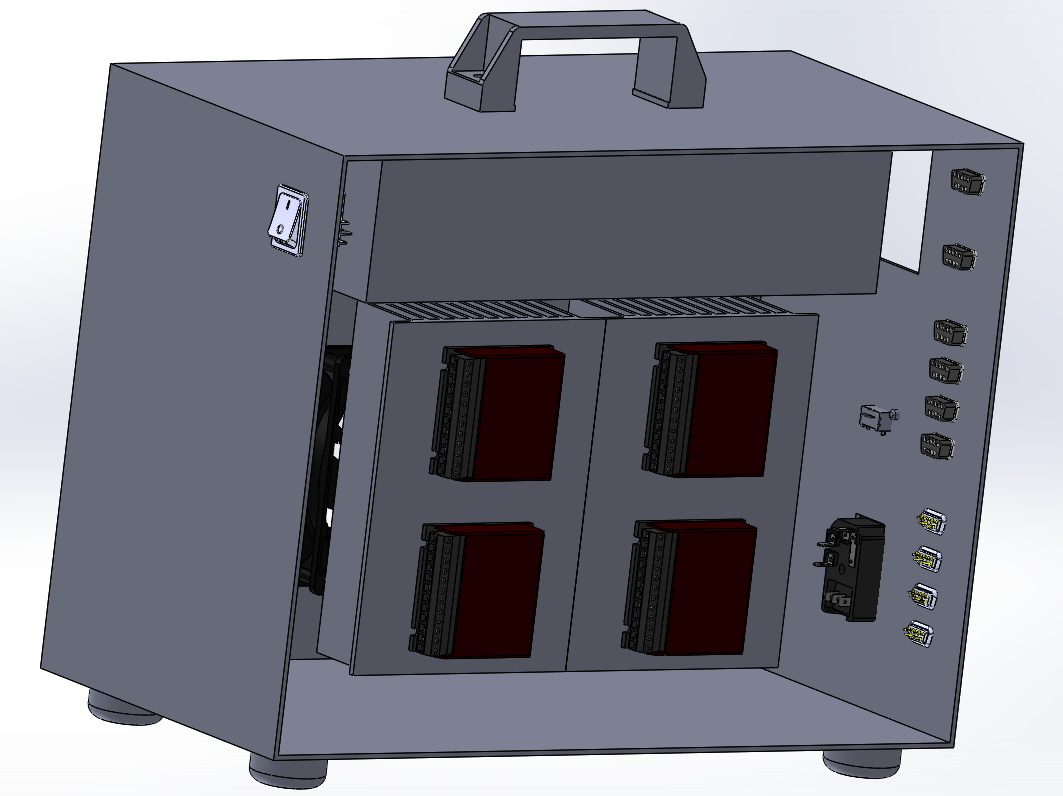
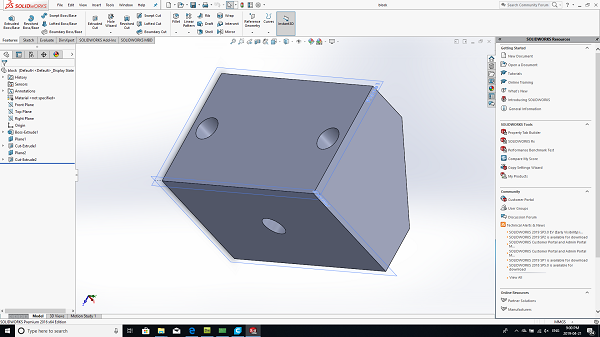
It is always difficult with projects such as these especially when you don't have all of the components right in front of you. The only thing I could do is mock up a design of my idea, of course once I got all the parts this would change. It is always nice to give the end user a visual representation before carrying out the work. I did have the dimensions of most of the internal parts, the ones I didn't have I did not add but they'll be enough room inside. It was only the electronics case that I chose to make a design of since the machine would not change, well, apart from the motors.
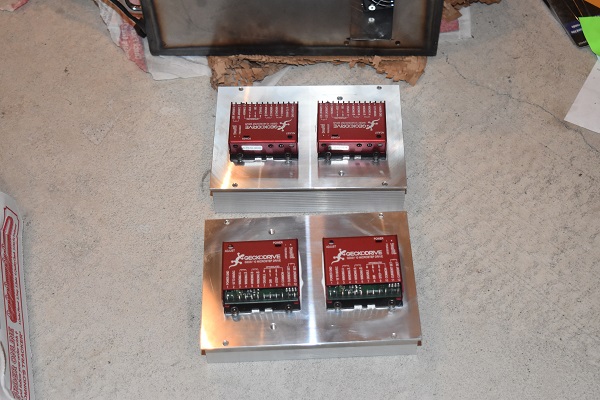
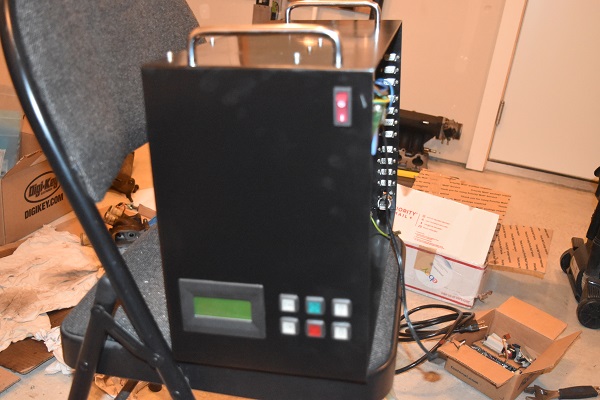
Some parts that I were pretty sure on was that I would need four drives, the ones to be chosen, Gecko Vampire's. I chose that the power switch would be on the front since it's not always wise to fiddle around in the back and disturb wires. A carry handle was a must since this will be moderately heavy and rubber feet to stop it sliding and damaging the work desk. Large heat sinks for the drives, not a must but keeping things cool helps to preserve life, especially other components in the unit such as the capacitors in the main power supply.
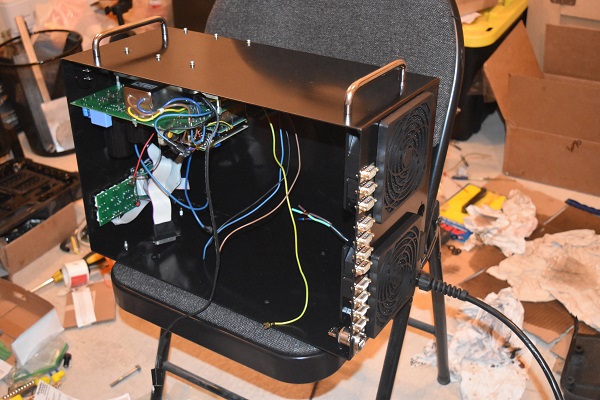
Cooling is an important factor and I would need some fans. At this stage it was not quite decided whether I would use two fans to pull air in and then an exit port on the back to expel air. Or the other option would be two fans, one fan to pull air in and another to expel air, both would have filters, this option also reduces the risk of stray objects entering the system.
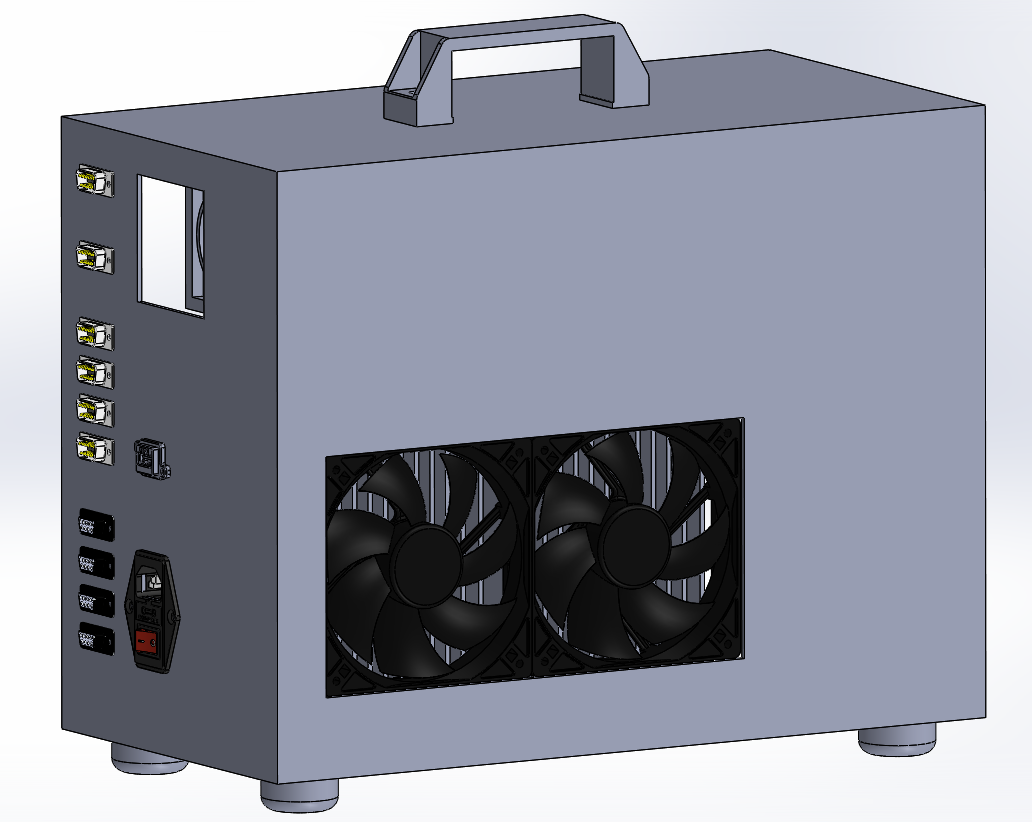
The connectors would be something standard like DB9's since the cables are super cheap, going with something exotic has no benefit whatsoever. The power inlet was not decided on whether to use a cable or a socket, the benefit to a socket is that the cable can be removed for storage and be replaced. The control input would be USB since again this is a very common, cheap standard.
The Build
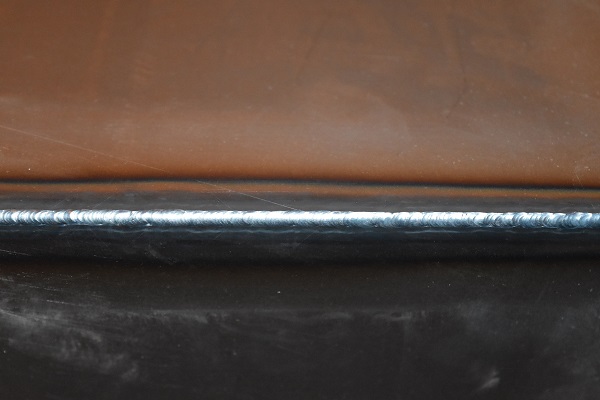
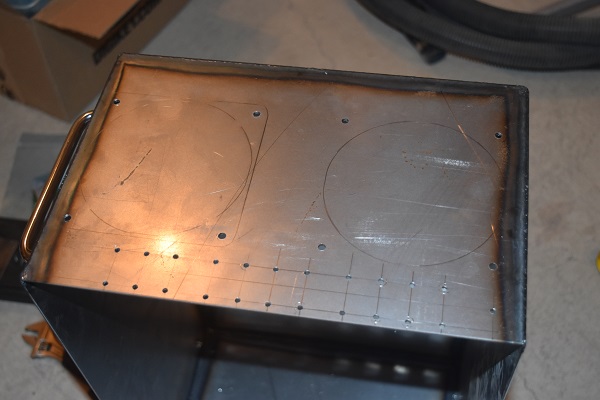
I thought I would increase the size of the box slightly since there were no constraints on the design. I started out by cleaning down the metal with xylene, however I ditched that and used acetone later on. I tack welded all of the sheets together on all corners and the long lengths in the middle.
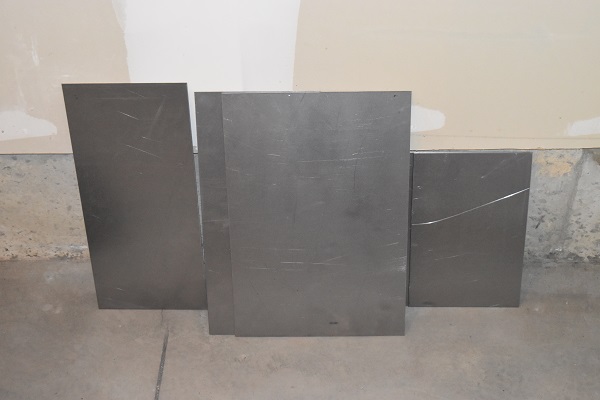
I had recently picked up a TIG welder and hoped that I could do all of the case via fusion welding, using a filler adds extra time.
Once I had got all of the tacks in place I could proceed to finishing off the case. I cranked up the current to around 100amps so that I could quickly fusion weld it together. The majority came out really good but there was a little porosity in places. I found that xylene is good for dissolving oils but it doesn't seem to clean it away like acetone does. There is also a second problem with the process. The stock sheets are coated in a thin layer of oil to stop them from rusting during storage, when they are cut using a guillotine it can push oil into the metal. When welding it is always a wise idea to grind off a little layer of metal as to remove this oil, for this application it did not matter.

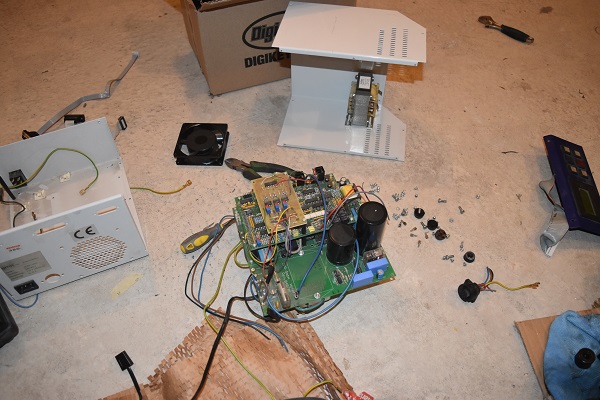
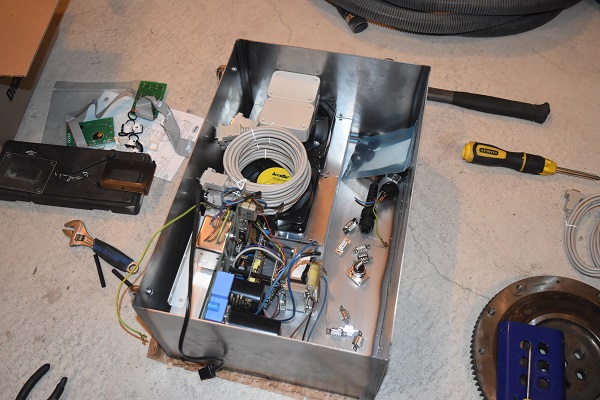
The one thing I did not add to my design was this control box for the spindle as I didn't think it be necessary. I changed my mind, I figured there would just be enough room for it. I really did not expect there to be so much inside of the unit.
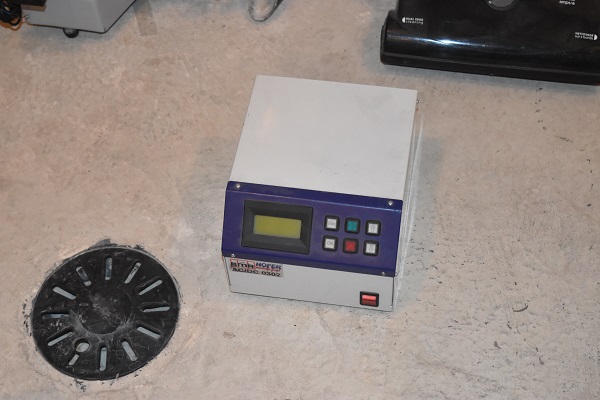
There were a few things I noticed that I could not change since pretty much everything was integrated onto one board. There was clearly serial support, an input board and also an output board. The biggest problem is that I could not find any supporting documents so just chose to ditch these. The mill will be set at a constant speed so I thought this did not need to be implemented internally, the one thing I would like to work out is the start and stop functions. I'm really hoping that I can trace the front panel buttons to the opto-isolated inputs, I fear however these will be separate systems and will pass the microcontroller instead. There still is little reason why I shouldn't be able to work it out through trial and error.
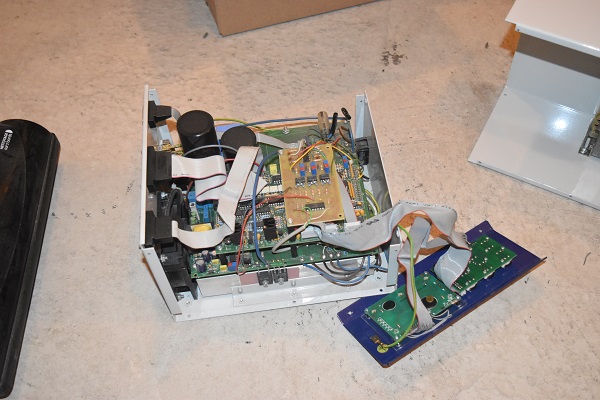
On further inspection I found that the input board was damaged, two of the opto-isolators were black. I traced the inputs to the microcontroller and tried to bypass them, nothing happened. It seemed that the inputs were damaged on the microcontroller, no way that I could fix this, I was pretty amazed that this thing still worked. I could have made something to work with the manual switches but that would be extra to the client, something to decide on at a later date.
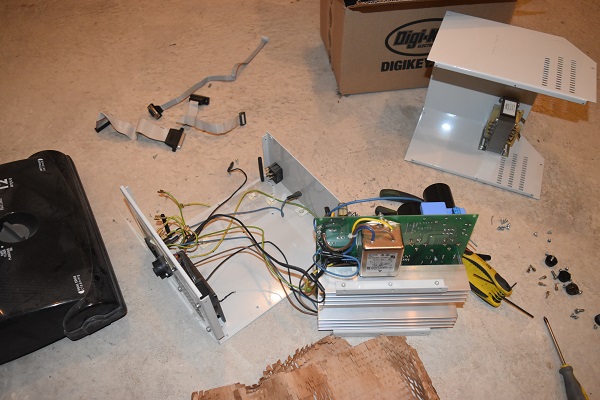
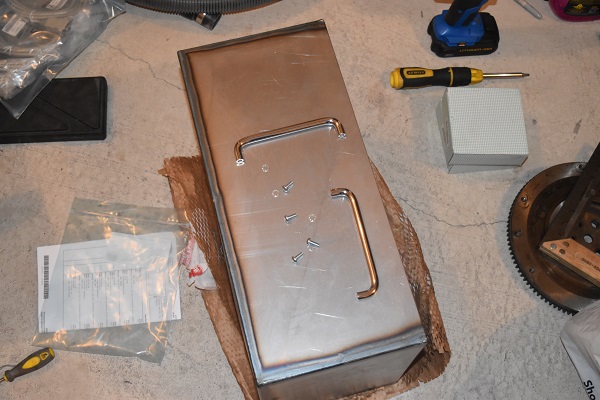
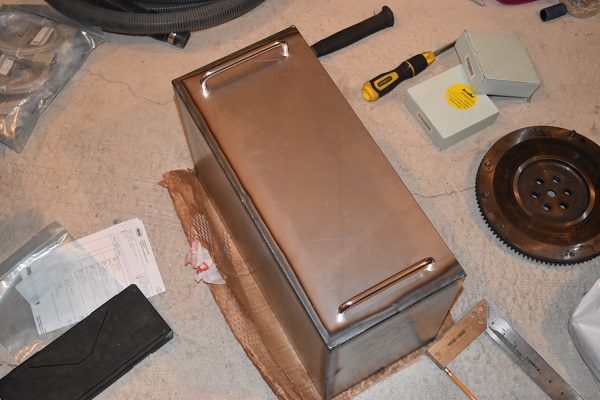
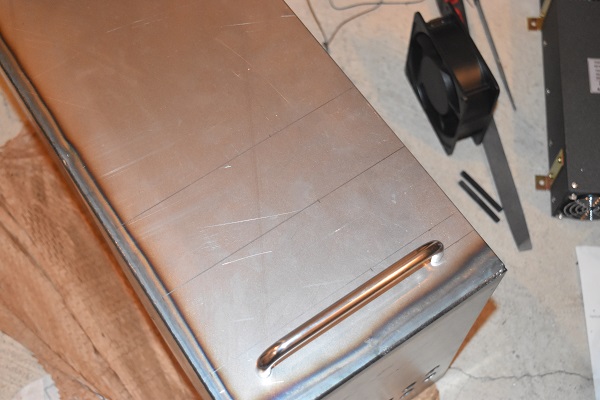
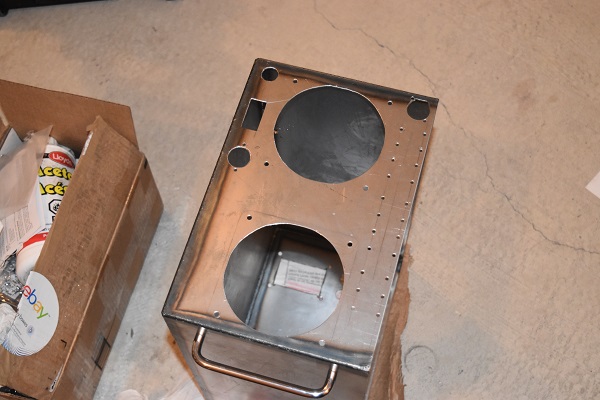
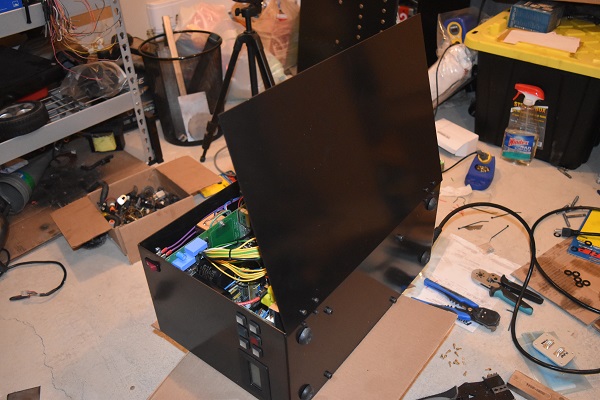
I next started work on the case since this is where all of the parts would be housed. Some nice little chrome handles to move the unit around since it will be relatively heavy when complete.
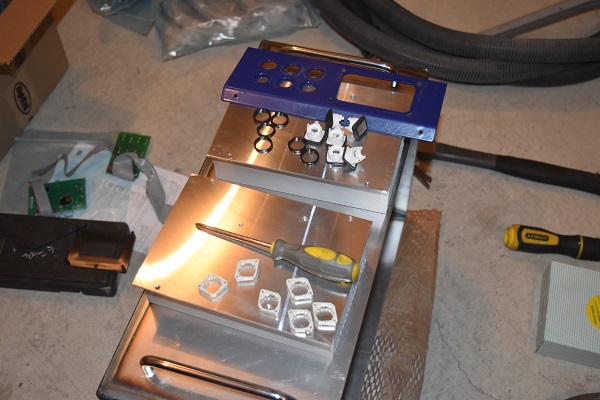
The controls for the spindle controller were mounted on a separate piece. I did consider welding this into the case to save time on cutting holes but I really hate to cut corners.


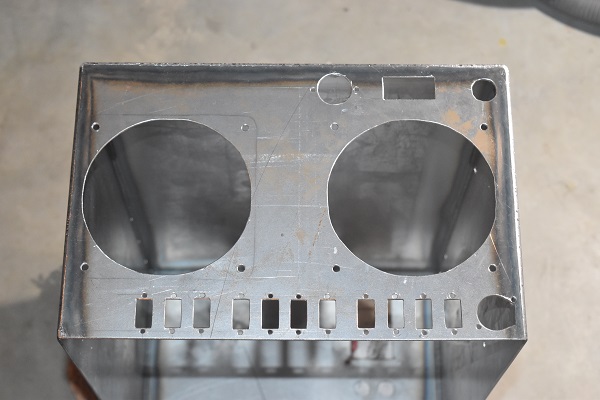
I laid out what components I had into the unit going with the original design.

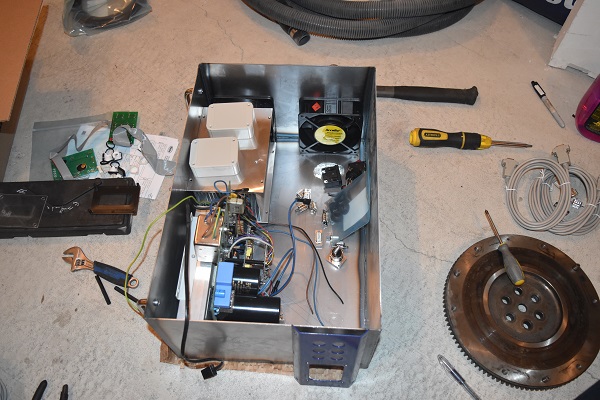
I quickly realised that I would not get sufficient cooling to the spindle controller so moved things around a little. Locating the cooling fans to the back would be a much better idea as the filters would be less likely to get blocked as if they were on the side. One fan draws air in, the other air out. I will have to see the flow of air with some smoke once I get the unit together, it may mean installing a barrier in the centre to control where the air flows.
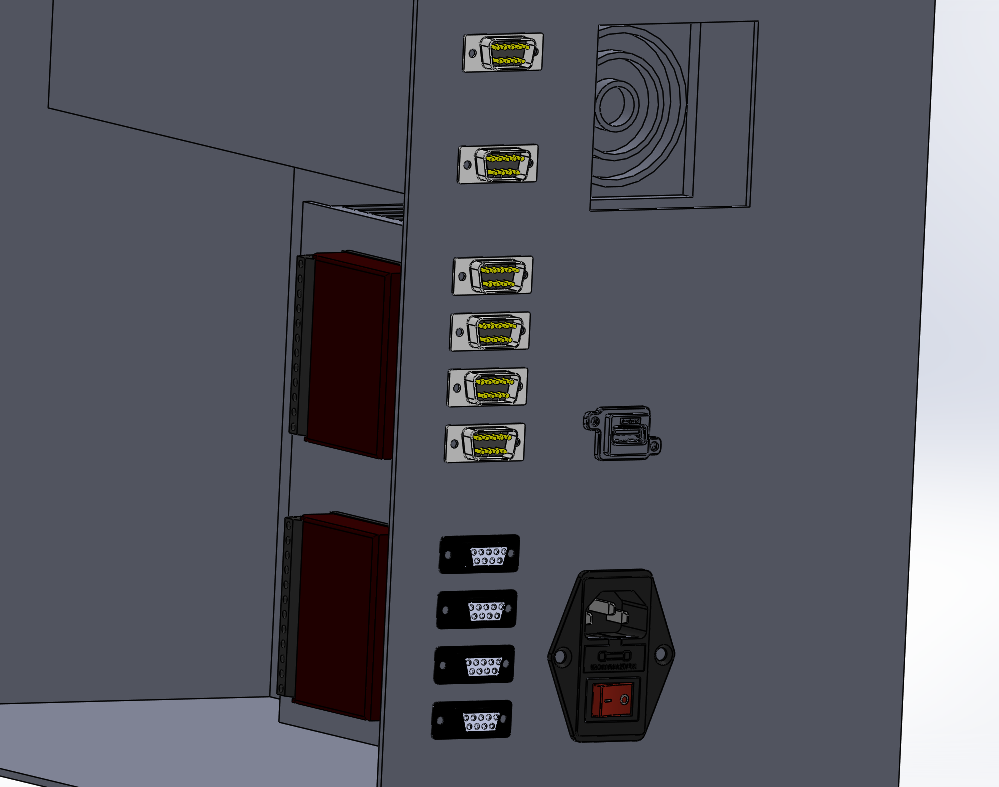
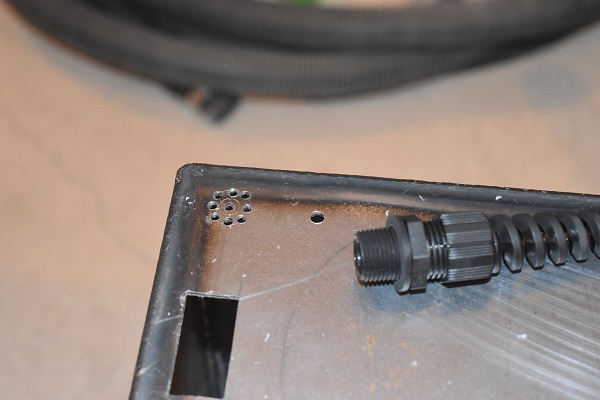
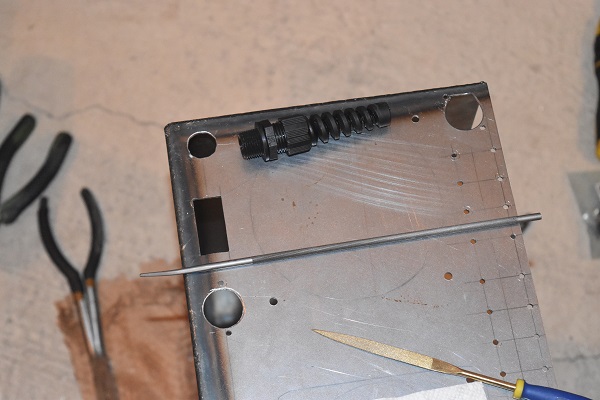
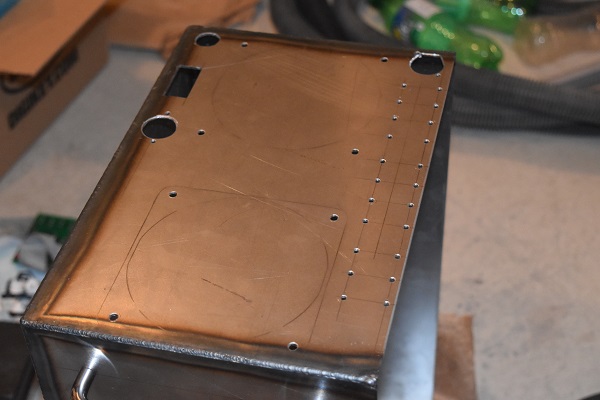
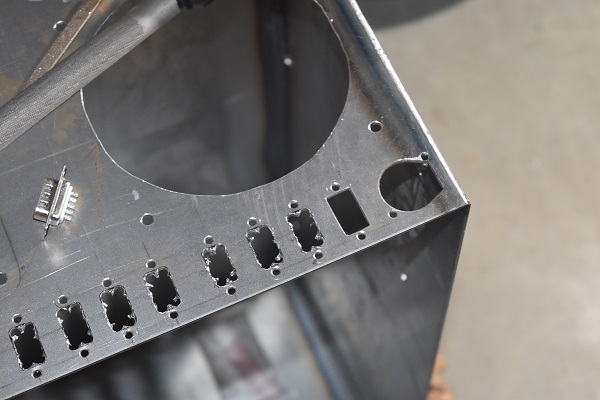
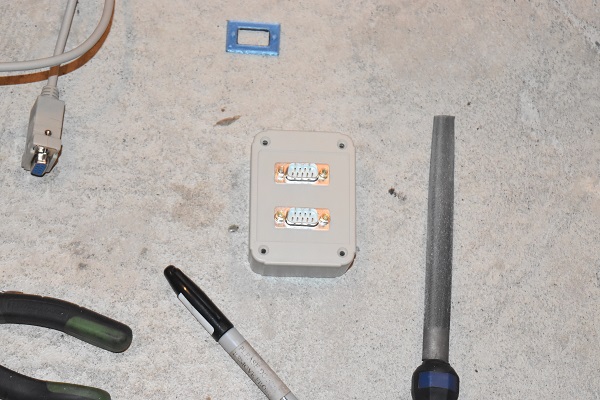
I drilled the holes for the fans mounting holes, I will cut out the larger holes later. I laid all of the sockets on the back to gain an idea where they would go, little had changed from the original design. I thought I would go with the regular DB-9 sockets since they were cheap and are pretty well suited to the application.
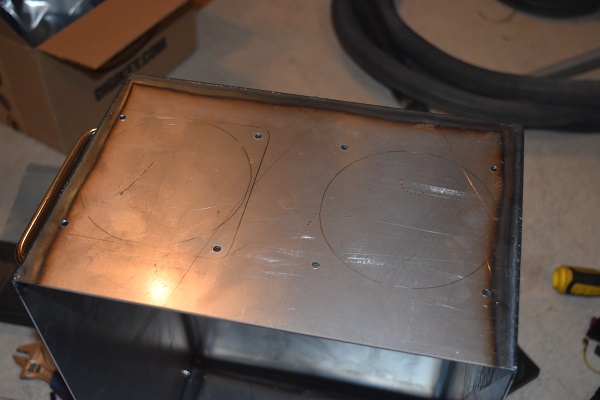
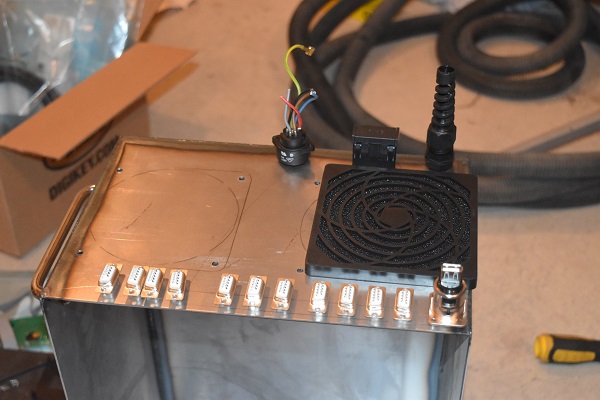
I drilled out the mounting holes for the DB-9 sockets. I then started on making the hole for the fuse holder, a fuse is a must in a system such as this.
It is often quite a process in making the holes for such components, maybe I should have got the sheet laser cut. It is not always the most accurate method in making something by hand, it is not the fastest method but it is the most rewarding.
I should really invest in a drill set above half an inch.
It is quite amazing how round you can get a hole with just a file, it is certainly laborious however when the sheet is 2mm thick.
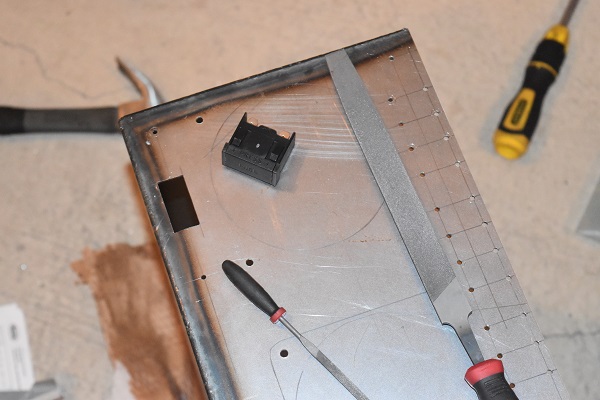
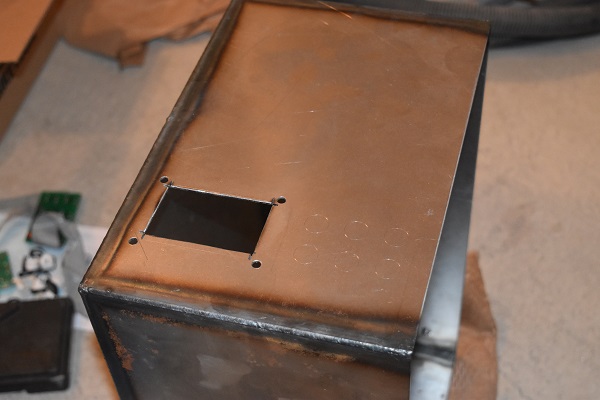
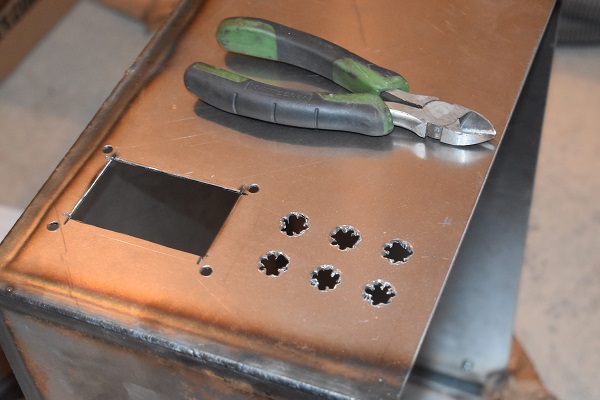
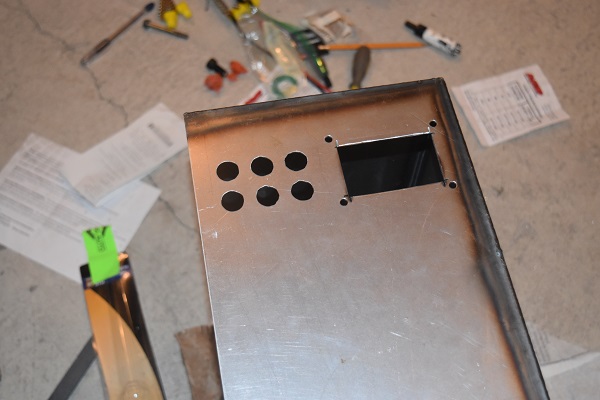
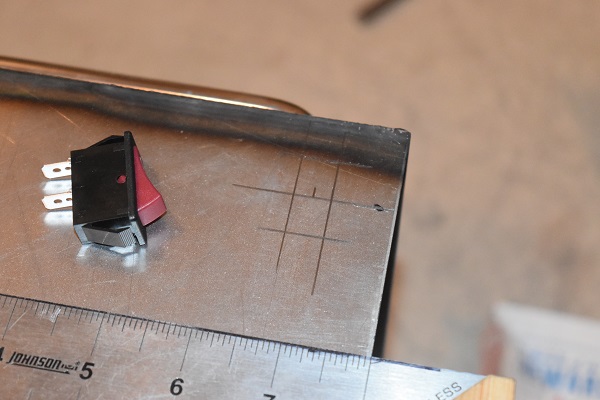
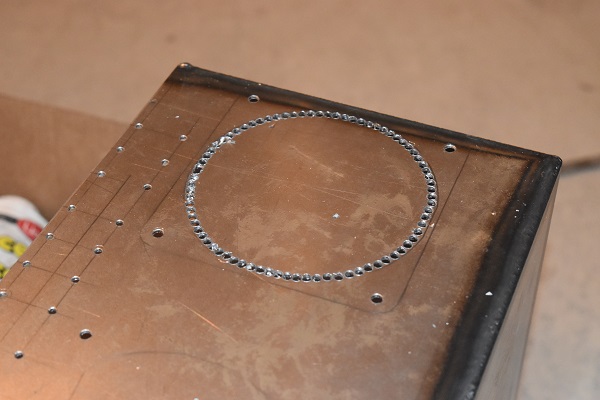
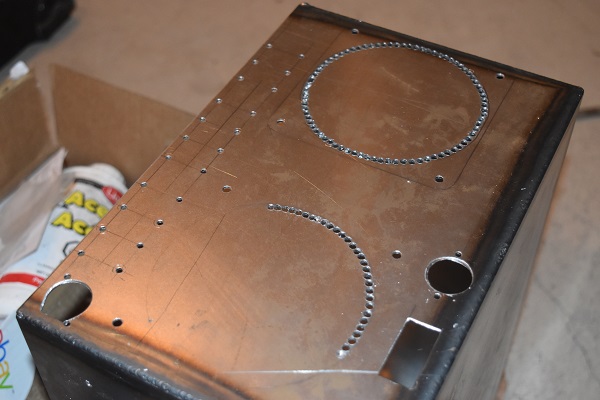
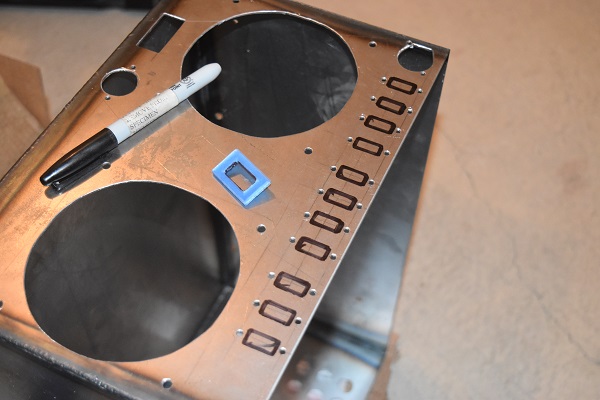
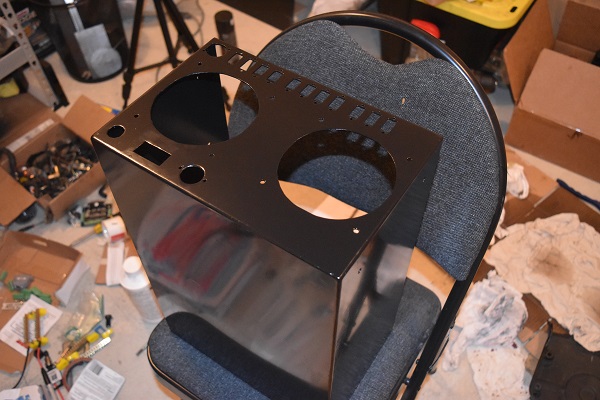
I used the front panel as a template to scribe out the control panel. There is a rather large bezel for the the display so it is a pretty simple angle grinder job. The holes for the buttons is a different story, I will probably drill a series of holes again and use an engraving tool to finish it off.

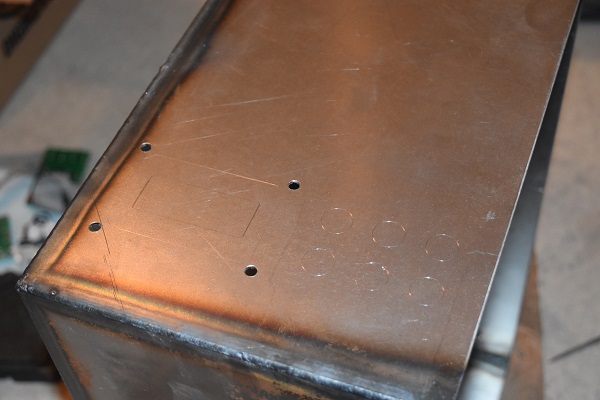
It was pretty late at night so I chose to countersink all of the holes and call it a day.
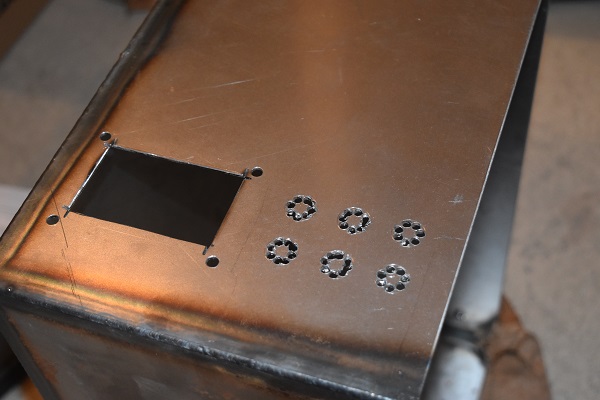
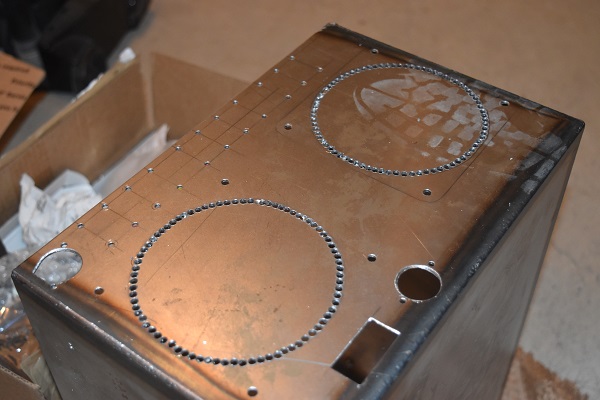
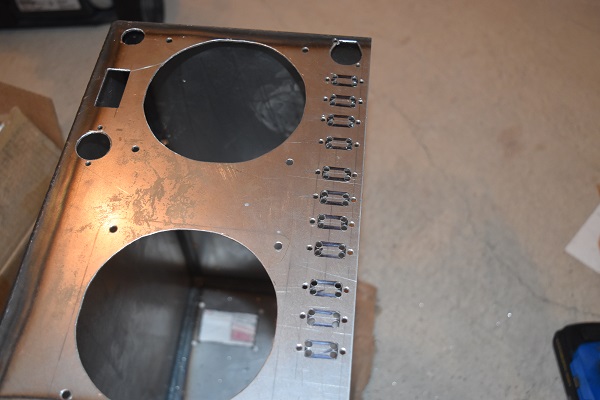
The next day I set to cutting out the hole for the display, I did this with the angle grinder. I did not have any drills the right sizes for the button holes, this had to be done the hard way with a series of holes.
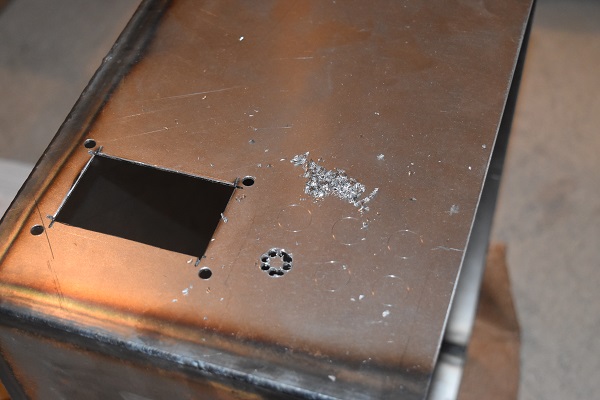
I knew that to file out these holes was going to be a very slow process.
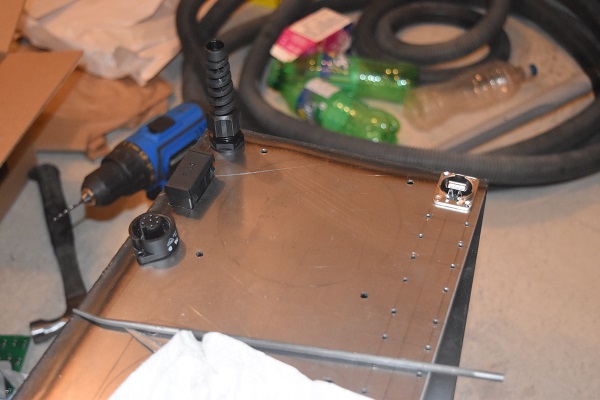
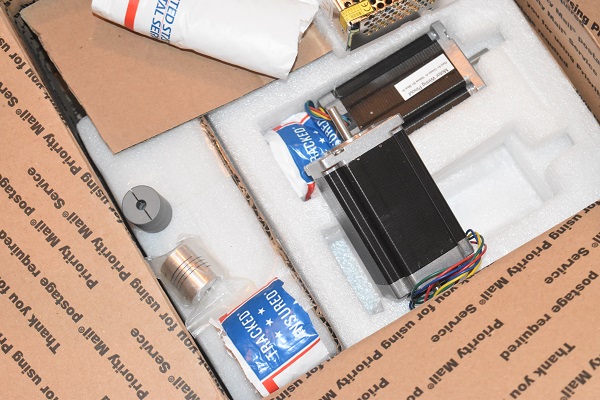
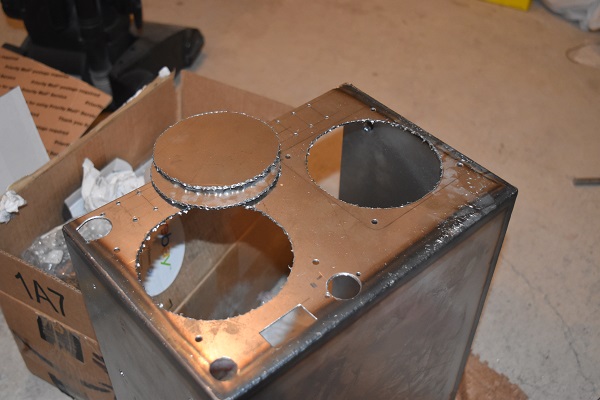
I got the parts through the post, the most important being the motors. The motors kind of look a little over kill for the machine but it will certainly be fast and capable.
Back to the holes, I finished filing them out. I decided to have a rest and do a little bit of the electronics side, the task was to mount the controllers to the heat sinks.
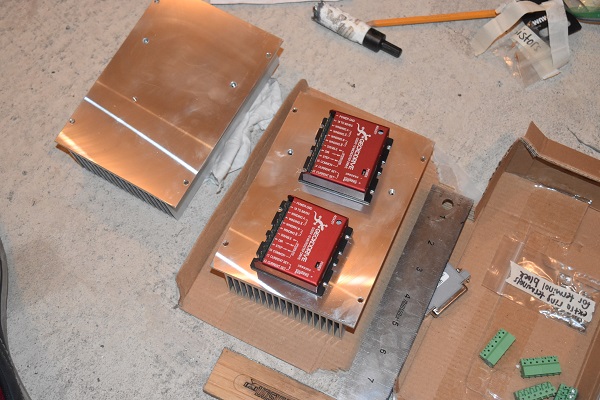
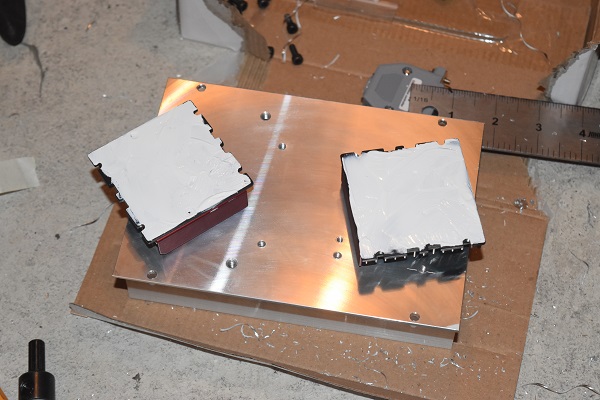
I drilled out some holes and tapped them to M4. The controllers were installed with thermal paste to give them the best possible performance.
I chose to secure the spindle controller via screws from the outside, it is not uncommon on equipment such as this.

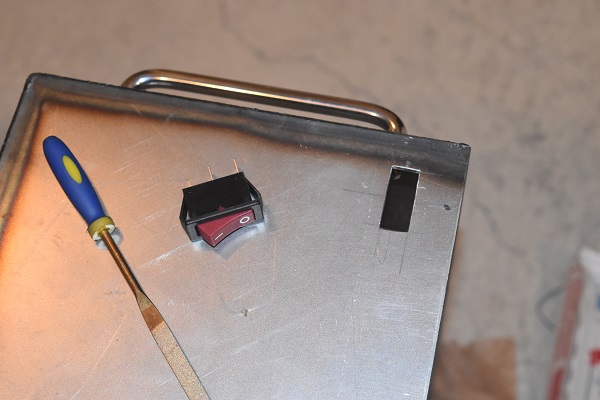
I drew an outline for the power switch on the front of the unit. The hole was cut by drilling a series of holes.
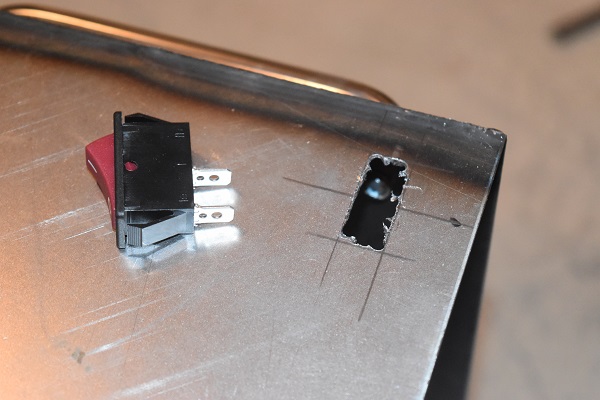
The hole was squared off using a file. I still needed to 3D print a template for the motor connectors so chose to cut out the holes for the fans. I again chose to drill a series of holes instead of buying a large hole saw, the reason, to save on cost.
Lots and lots of holes !
The discs were pushed out and then the holes were filed to remove all of the sharp edges.
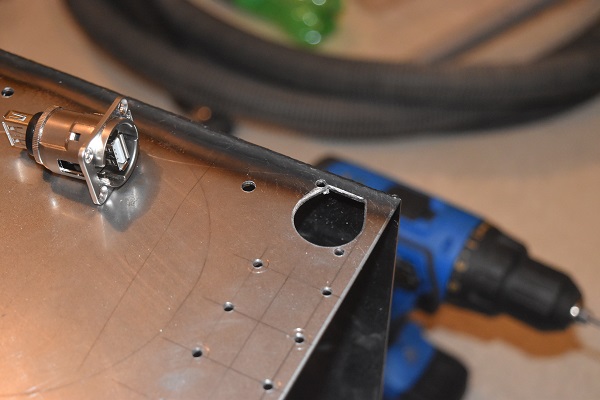
I was really not looking forward to making the holes for the DB9 connectors. I 3D printed a template to make things a little easier, I then proceeded to drill all of the corners first.
I drilled lots and lots of holes before pushing out the centres.
This part was quite laborious to say the least. I seemed to have two extremes of files, a wide coarse one and a thin diamond file. I got there in the end, I used one of the connectors to ensure the hole was the correct size.
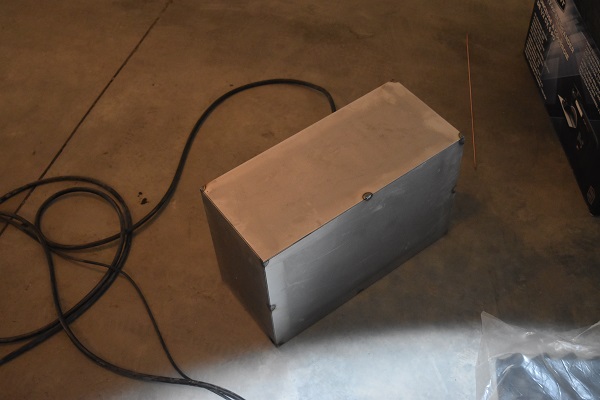
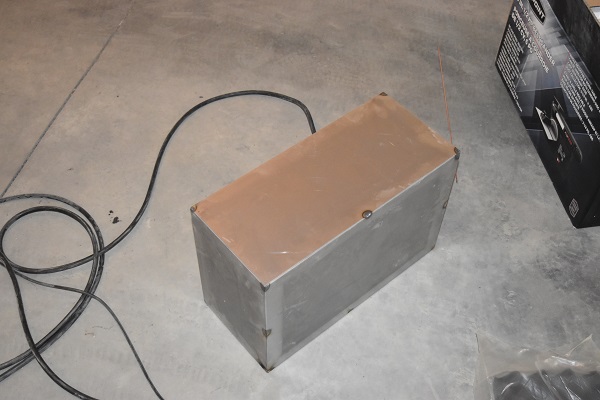
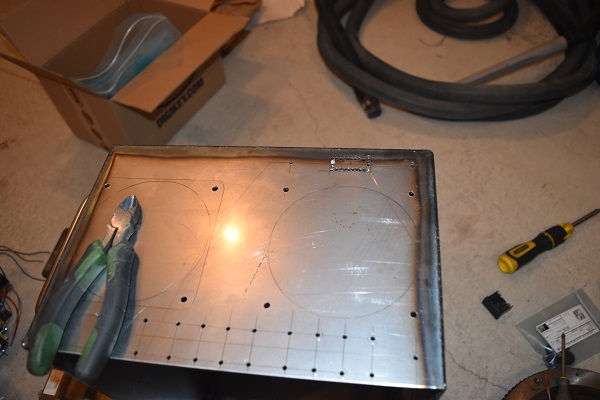
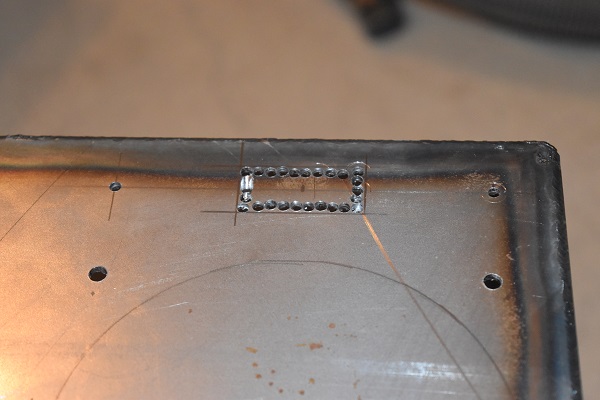
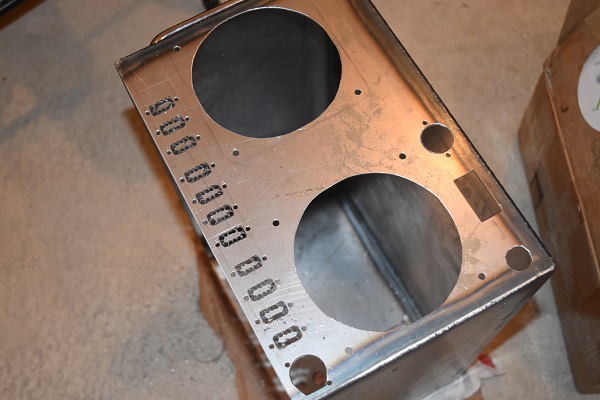
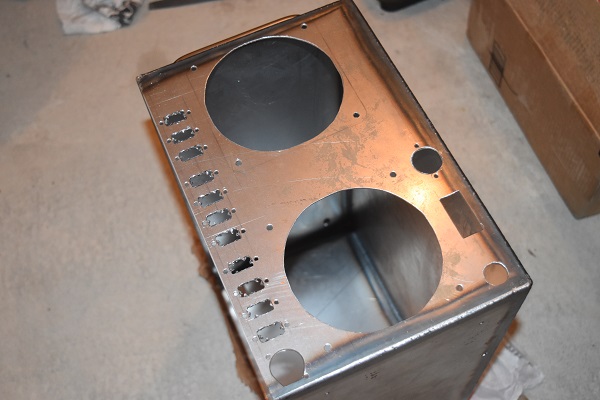
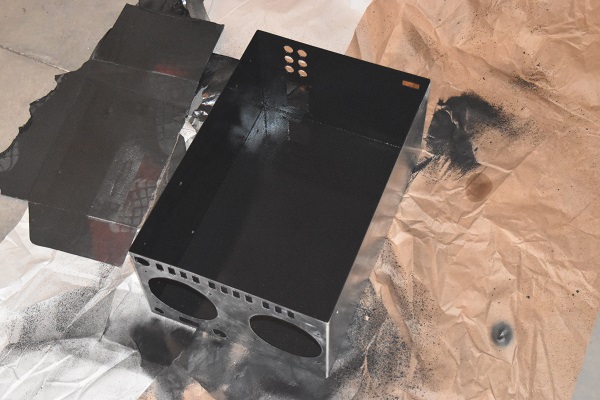
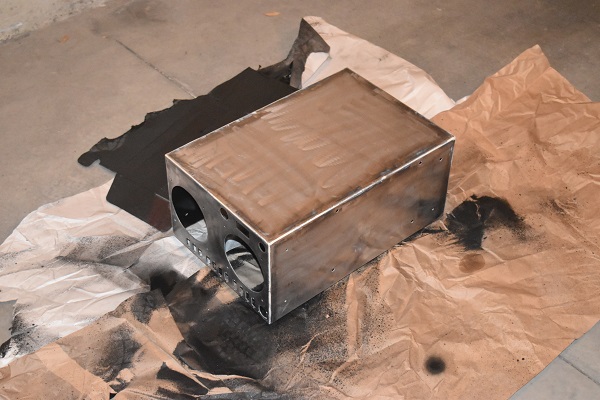
The corners were TIG welded together with little or no filler. To make the corners look all nice I chose to file them and smooth over with filler. I went over the whole case with a flap wheel to rough it up for painting. I was originally going to use a wrinkle finish paint but that would have required curing in an oven, I chose to go with regular paint instead.
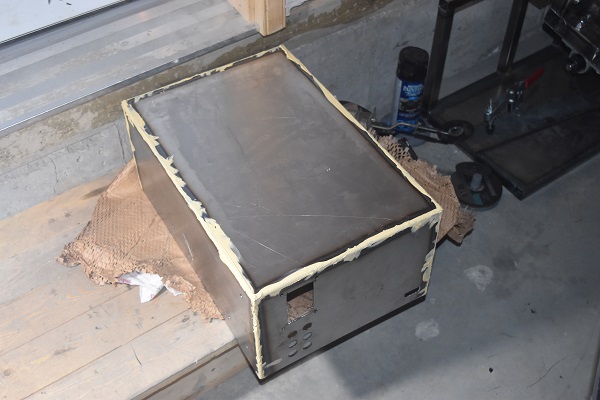
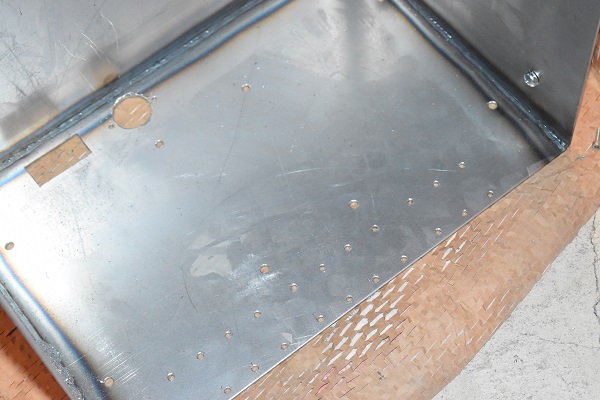
I painted the inside with some left over paint I had, this was just to prevent rust from moisture in the air.
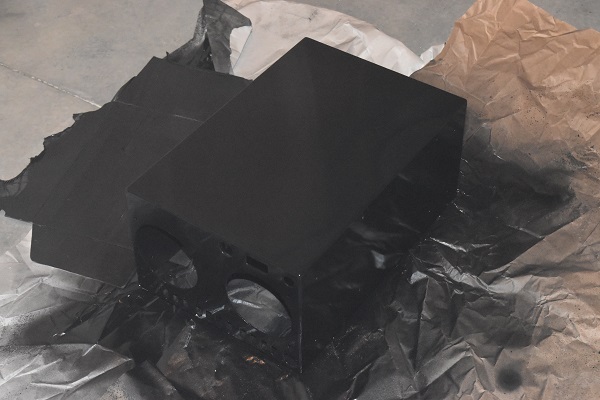
The finish came out pretty good, I was not all that impressed with the paint I had chosen though. The paint was intended for chassis which I would have expected it to be thick and durable. It seems the paint was rather thin and chips very easily, maybe it just takes a while to cure properly.
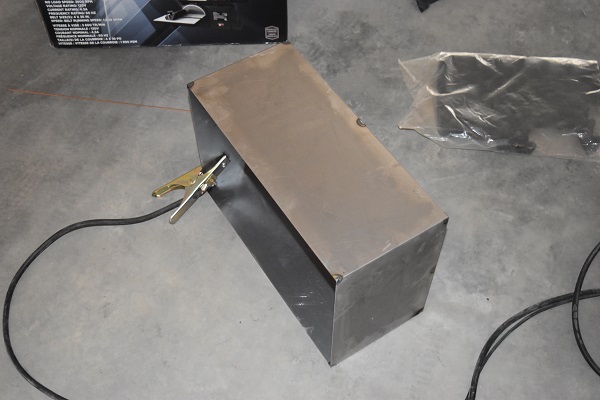
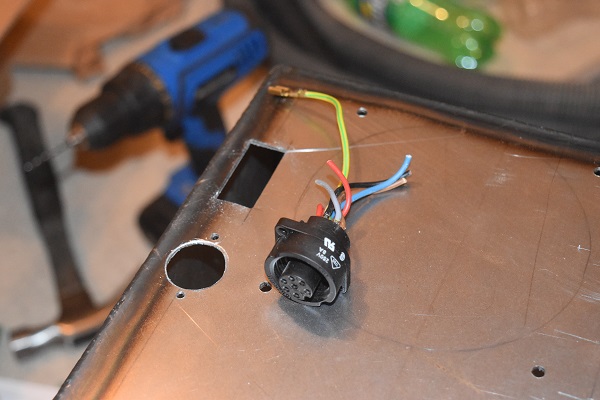
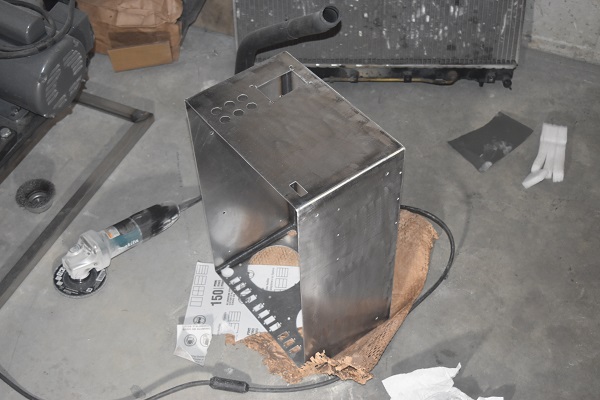
The first step was to install the connectors, buttons, fans, displays, etc...
I had a re-think of how to hold the heat sinks for the motor controllers.
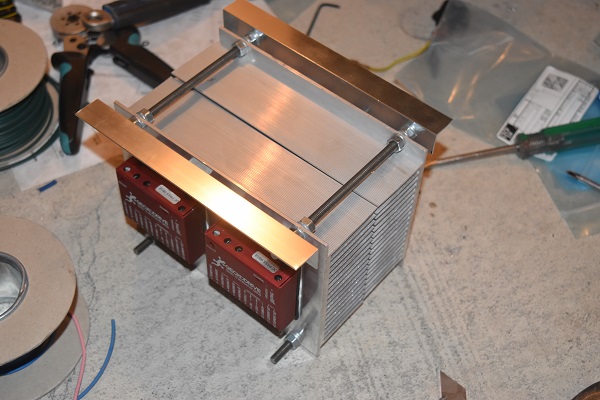
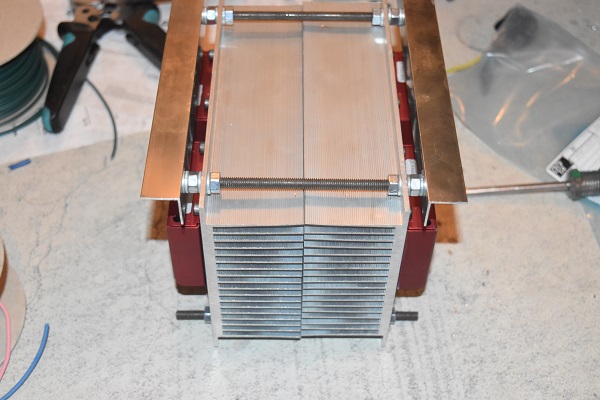
The heat sinks were bolted externally just like many of the other parts.
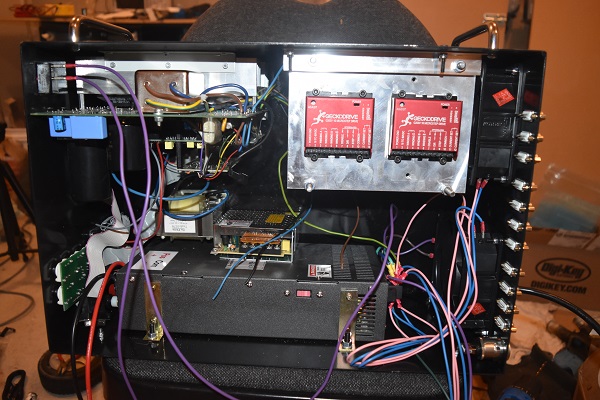
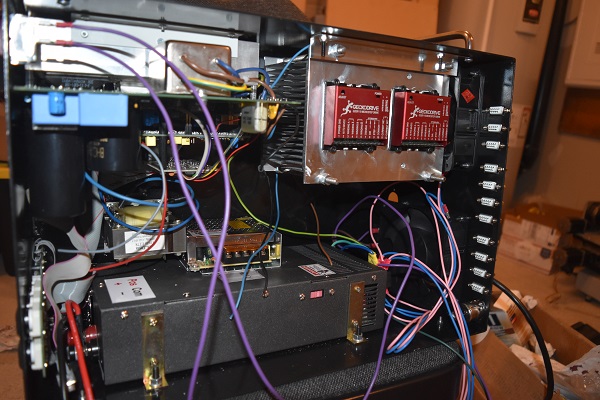
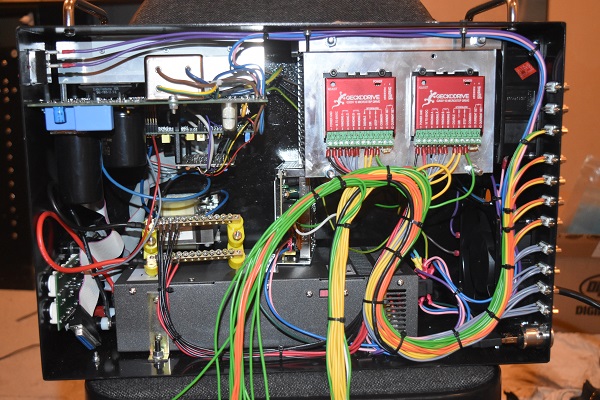
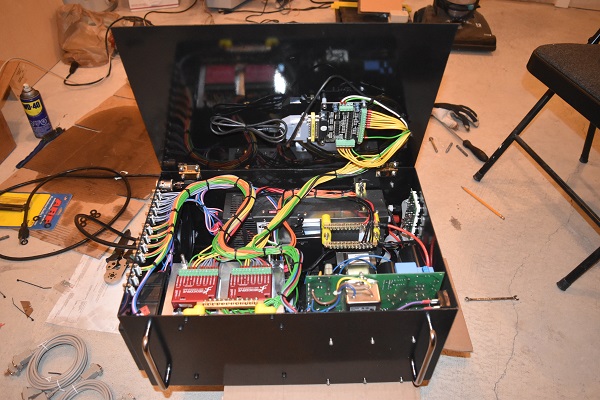
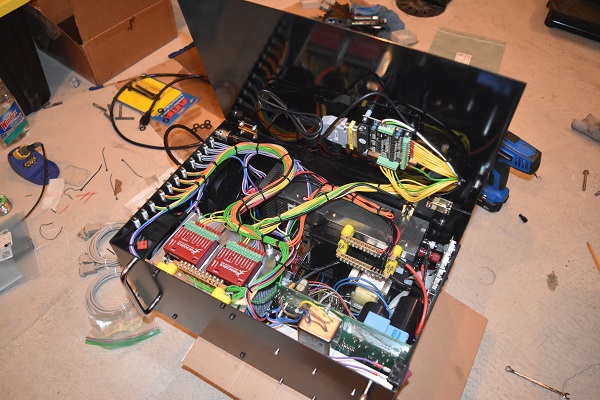
What I really like about these particular drives is that the terminals can be removed, this means the two drives that are hidden can be terminated easily.
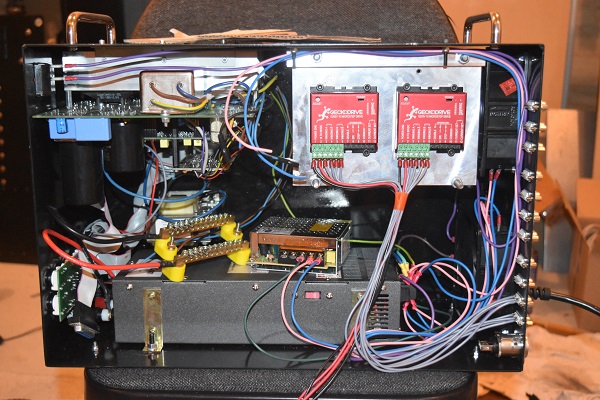
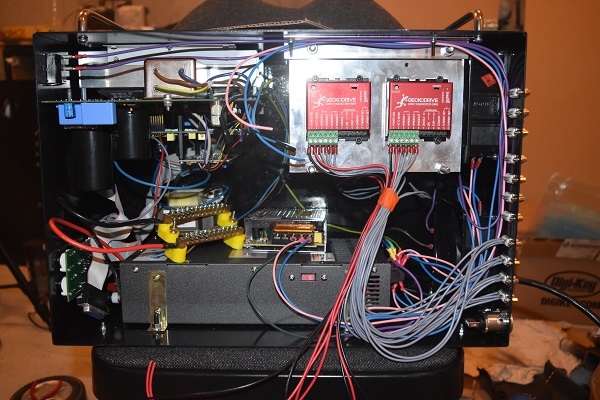
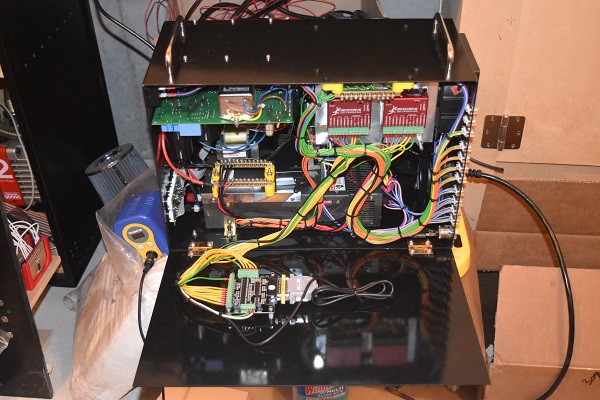
It is quite amazing the amount of wire required for such a simple unit. The reason for looping the wire the way I have is because it looks tidier than creating a spider web, it also allows easier access.
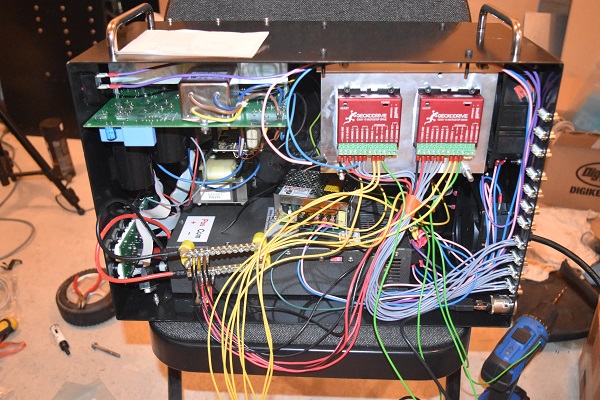

I picked up some cable ties to clean the wiring. I attached a common bus for the control circuitry and also added a bracket for the power supply bus.
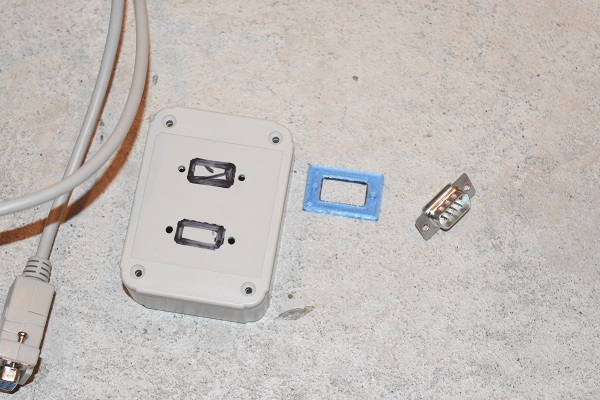
On a side note I got some plastic boxes so that I could terminate the wiring on the CNC motors correctly and also protect them from dirt. I wanted to see how sturdy the connectors would be before I went ahead with cutting all of the holes, they seemed to be ok.
I got some brass hinges so that I could attach the cover, I still need to work out a way to secure the door. The main control board was attached to the door, this is the reason the panel is not a separate piece as to not damage wiring upon access.
I wanted to control the spindle through the control board as well but I could not get it to work. I think part of the board must be damaged since I did find a manual, none of the inputs or outputs worked. It wasn't really a big deal for the application anyway.
I started this project many months ago, the client was in such a rush to get it done so I put in a lot of hours. Long story short I have been waiting for him to order a tool probe. All of the above progress took around a month to complete, so far I have been waiting four months without an update. I decided that I should wait no longer and complete the unit, (I had it complete many months ago).
The first thing to do was get the case sealed up, that meant 3D printing some brackets.
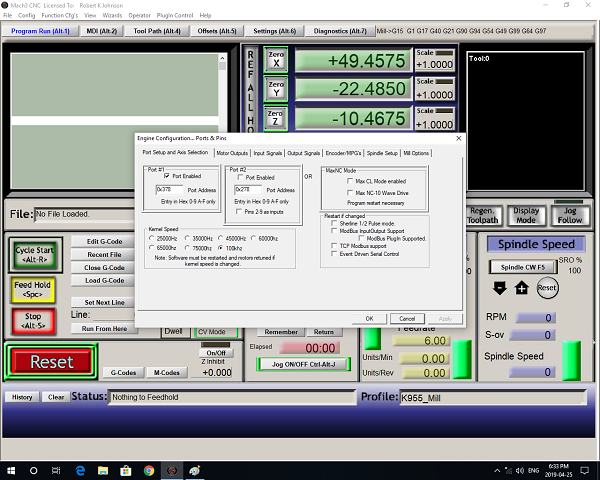
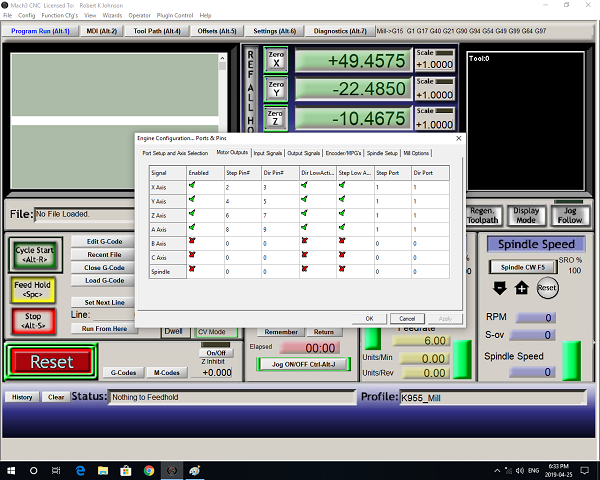
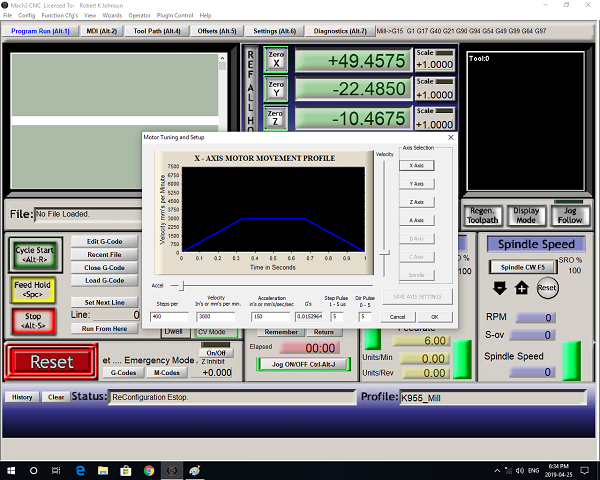
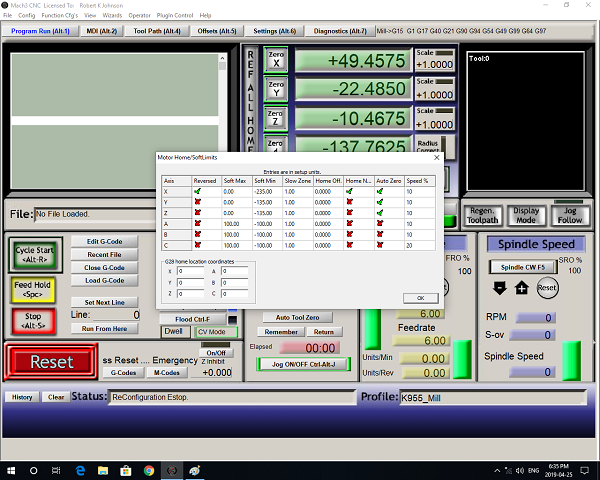
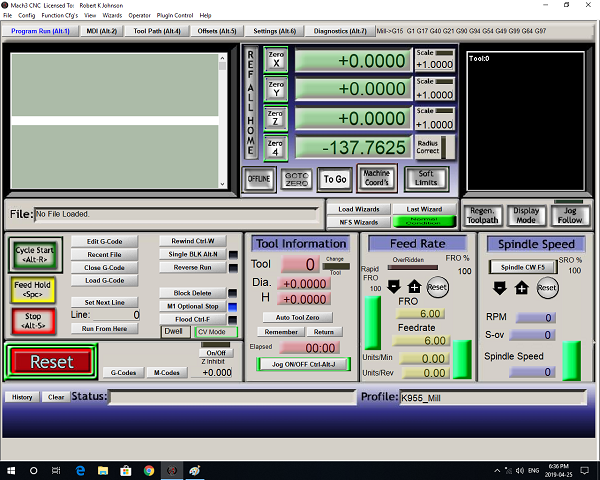
The next step was to configure the software, this was setting up inputs, outputs, motors speed and acceleration.


I gave the client an ultimatum, he would have two weeks to pick it up before I sold it on. Almost immediately he paid me and picked it up.
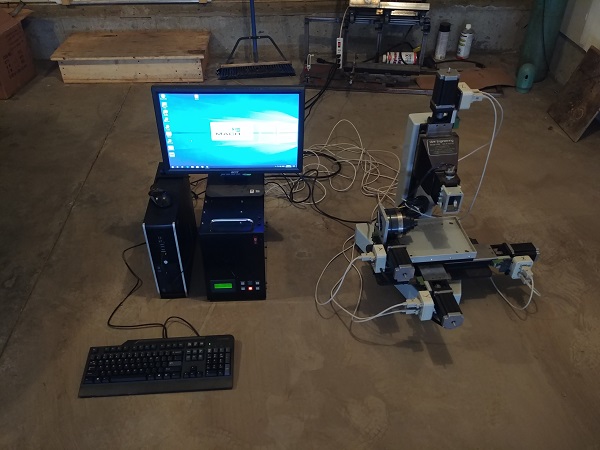
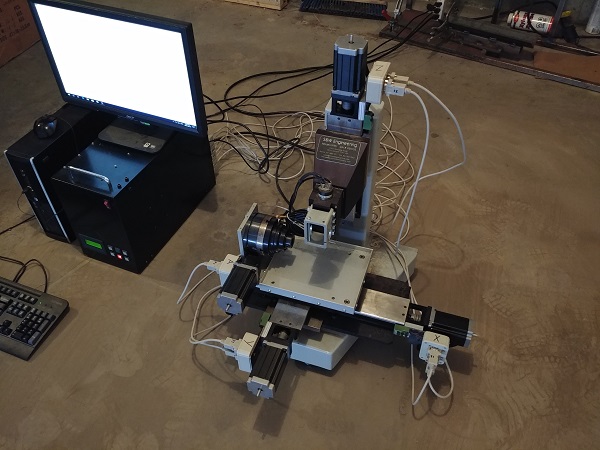
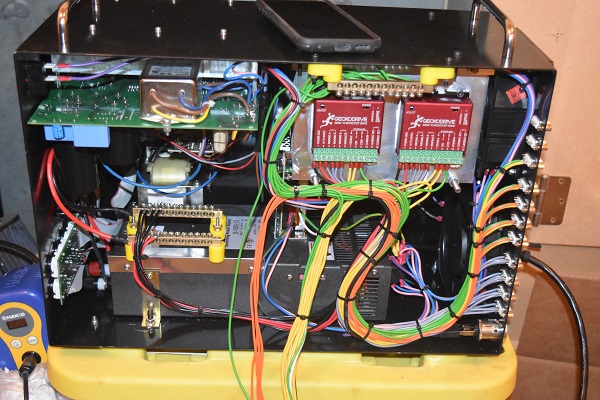
I was really happy with the result since no expense had been spared on the electronic drives. I gave it enough tests that I was happy with the result, it seemed to be fairly fast and very accurate. I built the case to a high standard, that of an industrial standard. It is mounted on rubber feet, equipped with carry handles and built from 2mm steel sheet. There are two filtered cooling fans on the rear, one pulls air in and the other pushes air out. The air in is directed through the cooling fins for the stepper drives, the drives being Gecko Vampire's. All of the connectors use standard cables which can be easily replace and the unit is fused incase of an overload. The only thing I would be even the slightest bit doubtful on would be the drive for the spindle since it was already damaged when I received it.
If the client decides they want more of my time in the project then I would modify the spindle drive so that it can be activated from the computer and not manually. The only other extra would be an automatic tool setting probe.
Hello, if you have enjoyed reading this project, have taken an interest in another or want me to progress one further then please consider donating or even sponsoring a small amount every month, for more information on why you may like to help me out then follow the sponsor link to the left. Otherwise you can donate any amount with the link below, thank you!