Vacuum Mould Modification - 1
Recently at work we decided to get into the compression moulding business and found out that we really didn't know what we were getting ourselves into (January 2018). We were advised on what machine to buy based on our moulds and prior experience (zero). A few weeks after receiving the machine I was struggling to make any decent products on it, some came out great and others were full of air pockets. It wasn't until we got the machine that I started doing some research on the subject as my main job was a machinist so I had no time. After doing the research I realised that the machine should have a vacuum enclosure which is standard and that we should have a pre-forming machine for the raw unprocessed material.
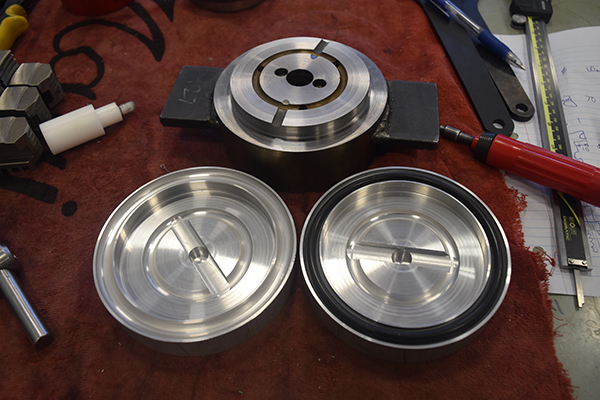
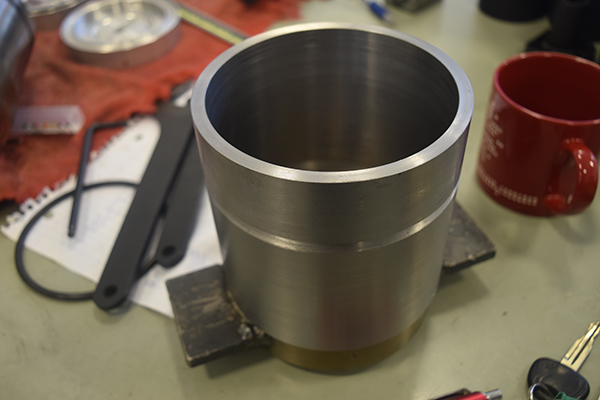
The part I was currently trying to mould had a height of 6 inches and the preform I was using was a sheet of wrapped rubber. The issue is that by wrapping up the rubber I was trapping air, without a solid preform the only way I could think of was to modify the current mould to accommodate a vacuum and draw the air from it. I tried to do this project on the smallest budget possible just to test this theory as not everyone was convinced.
The Design
The design was fairly simple, it was to make a cap for both the top and bottom of the mould connected to a vacuum. The outside of the mould would have a tube passed over it to seal that aspect. The first thing I did was mock up a drawing in my head, there was no real need to do anything official as this was a quick and easy test.
Machining
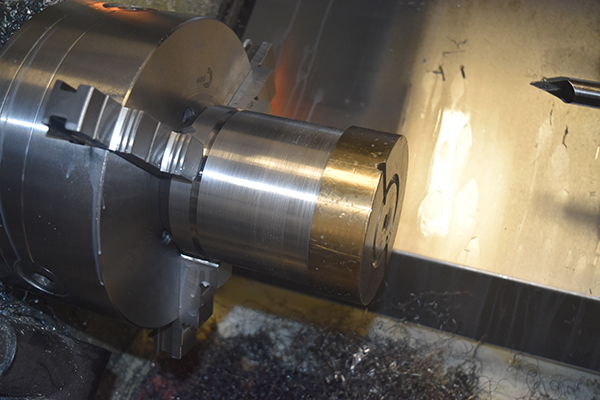
I first started out by clocking the original mould in the lathe, the face was turned to ensure it was true, a very shallow skim.
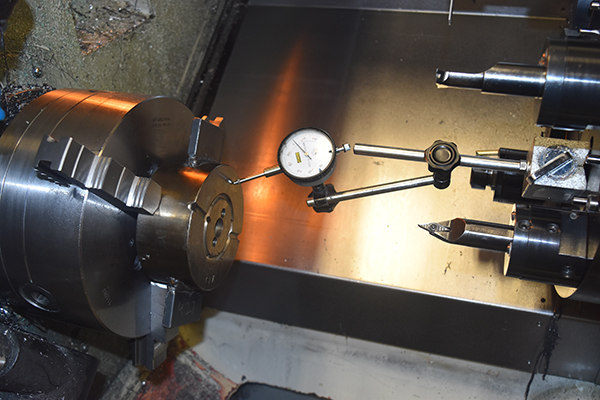

A step was turned on the back of the mould that will allow an end cap to fit. I had two 5" billets of aluminium cut to 30mm long. I started by facing it flat and then I ran a program to cut a groove in the front, I would be using a 5.3mm O-ring so I assumed that 4.5mm deep should be sufficient. I made the groove circular which made it's width 9mm, an extra wide groove helps to locate the O-ring better, perfectly acceptable for a vacuum application.
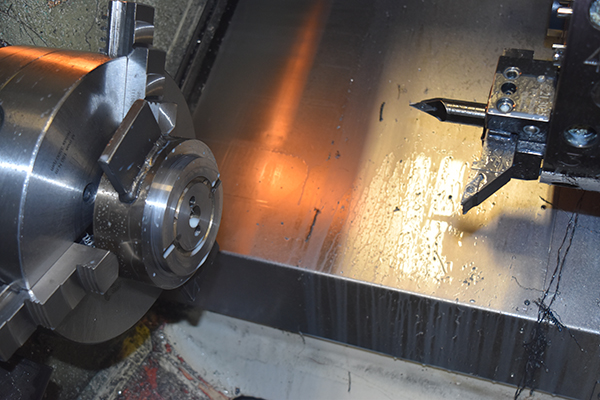
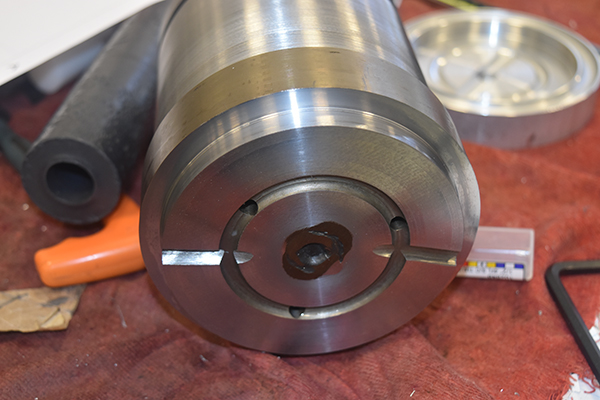
A step was cut to allow the mould to sit in perfectly, some more grooves and channels were cut to allow a passage of air. The back of the cap was turned flat to ensure everything would sit parallel.

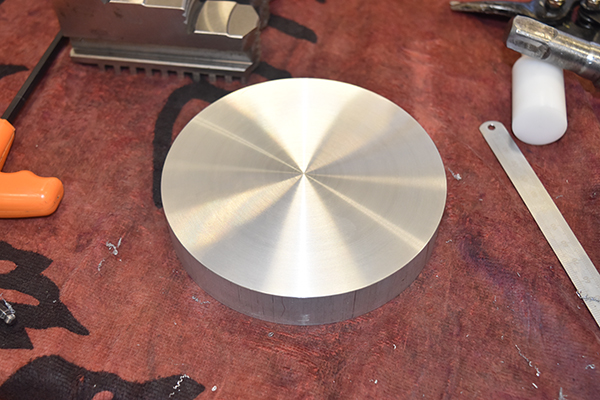
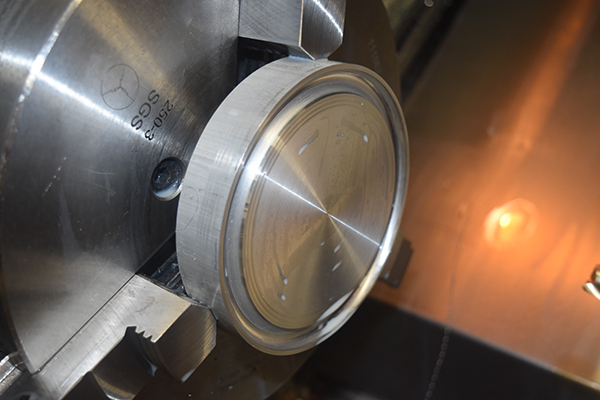
I machined a total of two caps, one for the bottom and the other for the top. I turned down the outside of the other half of the mould, an O-ring groove was cut for sealing. I used aluminium inserts for the whole of the process, certainly not ideal but I did not have any other inserts.
The bottom of the mould again was turned to suit one of the caps.
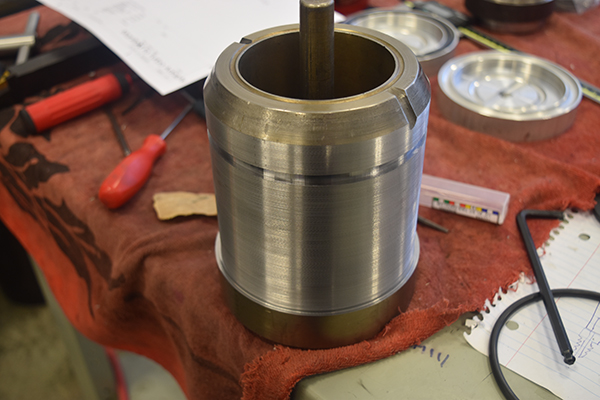
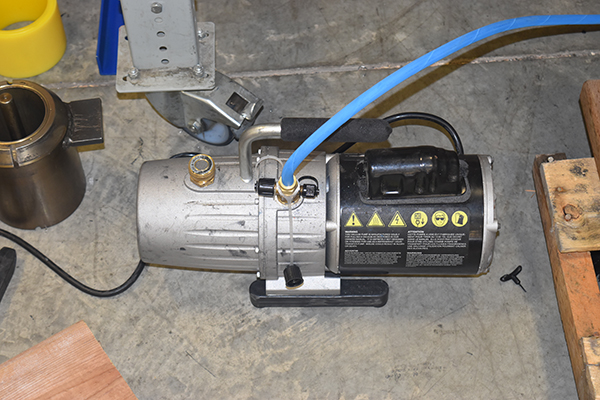
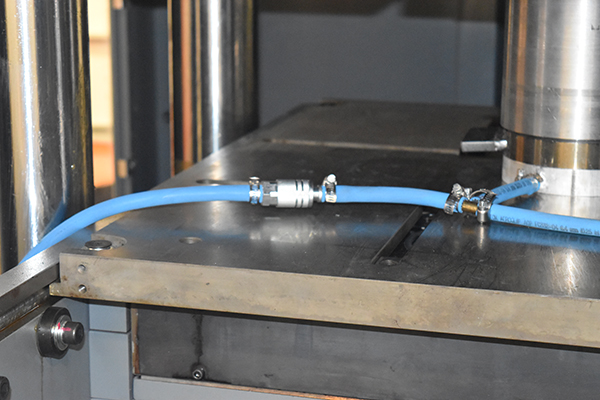
A piece of steel tube was turned to seal the middle of the mould, this was welded to the top half of the mould to seal it in place. I borrow a HVAC pump to see if this process would work, I used a section of 1/4" hose for the vacuum.
I also installed a quick release coupling since the caps would be almost impossible to remove under vacuum, the quick release helps to break the vacuum.
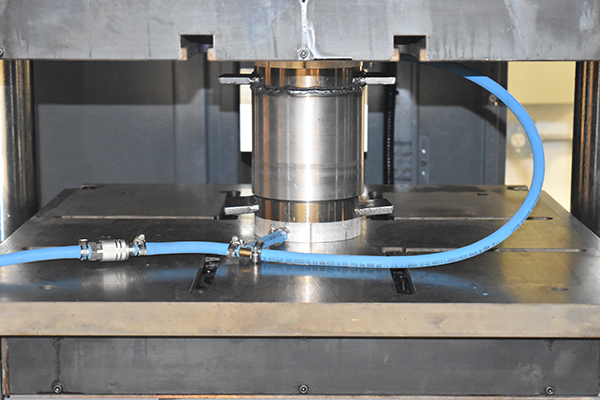
So did it work, well yes and no. The purpose of adding a vacuum was to remove bubbles present in the rubber seal, these were almost eradicated but now we started to have indentations in the seal. There was definitely less air in the mould but still too much to get a good product, I also managed to borrow a high vacuum pump, it had an extremely small flow rate but certainly helped. I've had a bit of experience in high vacuums and I knew that using 1/4" hose was not ideal, nor was the length of hose. Back to the drawing board.
Hello, if you have enjoyed reading this project, have taken an interest in another or want me to progress one further then please consider donating or even sponsoring a small amount every month, for more information on why you may like to help me out then follow the sponsor link to the left. Otherwise you can donate any amount with the link below, thank you!