Vacuum Mould Modification - 3
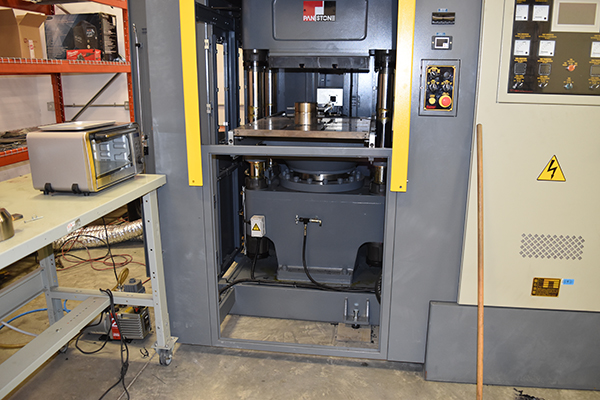
Recently at work we decided to get into the compression moulding business and found out that we really didn't know what we were getting ourselves into (January 2018). We were advised on what machine to buy based on our moulds and prior experience (zero). A few weeks after receiving the machine I was struggling to make any decent products on it, some came out great and others were full of air pockets. It wasn't until we got the machine that I started doing some research on the subject as my main job was a machinist so I had no time. After doing the research I realised that the machine should have a vacuum enclosure which is standard and that we should have a pre-forming machine for the raw unprocessed material.
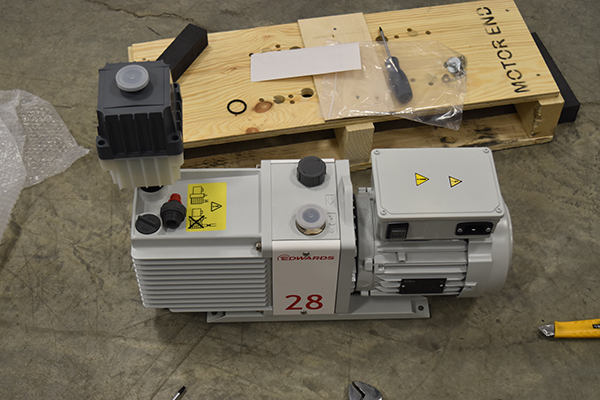
In the previous two projects I proved to my employer that having a vacuum around the moulds would greatly improve the result of the product, I mean if all the machines out there use it then there must be a reason. The next step was to get a larger vacuum pump, I knew of Edwards pumps from the nuclear fusion project and knew how good quality and high of a vacuum they could achieve. The pump bought was an Edwards EM28 which had 14 times the flow capacity of the previous pump I was using.
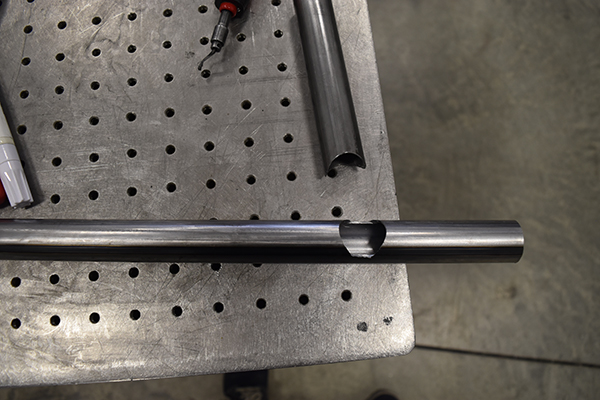
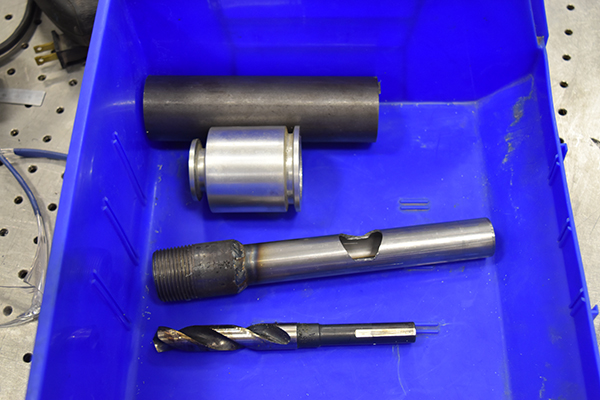
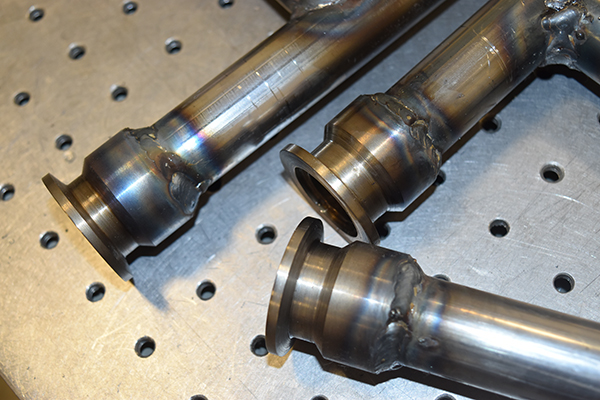
I knew from previously working with a vacuum that I must use the largest pipe possible, using 1/4" like before is a very poor choice for a high vacuum system. The pump came with a KF25 flange which meant that I should use something around 25mm bore tube, I went with 1" tubing which had a bore of around 22mm, pretty close to what the inlet of the pump was. I also acquired some 1" NPT ball valves and threaded sections.
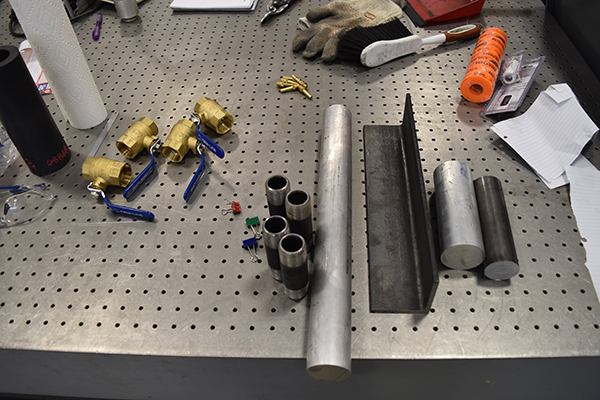
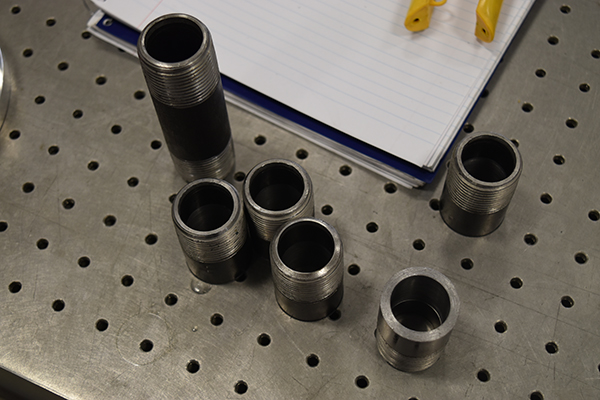
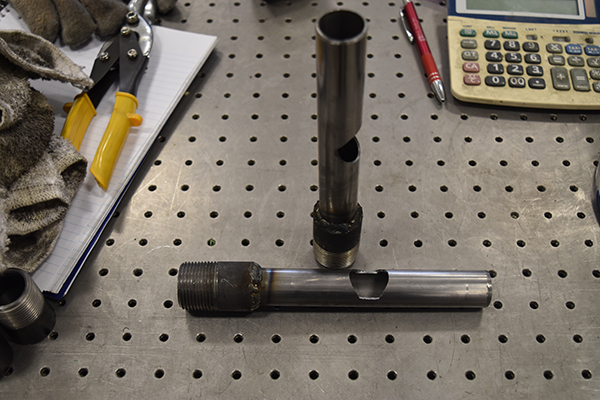
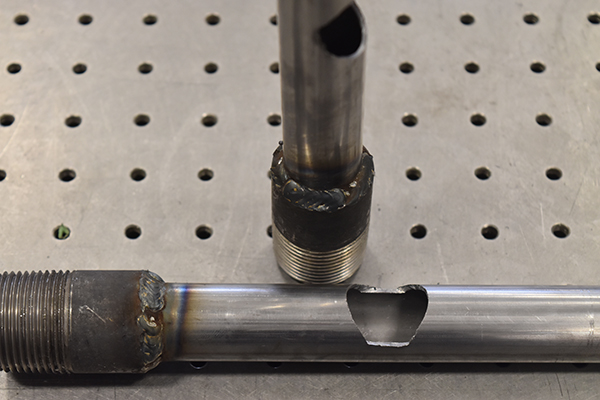
I notched all of the tubes using a hole saw to give the best flow possible and also the largest weld possible to ensure strength. The threaded tubes were cut in half, these are what will be used to screw into the ball valves, the bore of these were 25mm, I had to bore them out on the manual lathe to 1" to suit the tube.
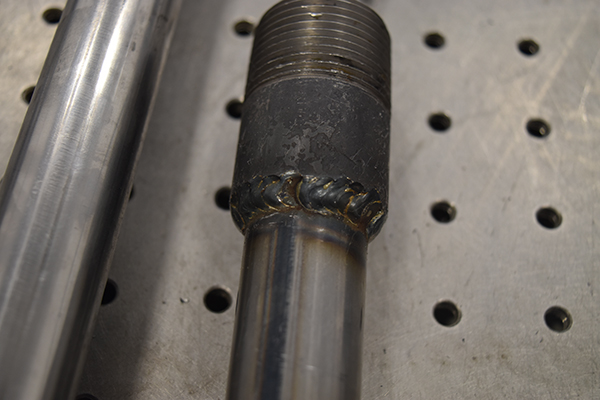
I would have preferred to use a TIG welder when dealing with a vacuum but MIG would have to do, it wasn't as though I was dealing with an ultra high vacuum.
I got piece of steel tube that would be used to make some KF25 flanges, the reason for keeping with flanges was that it was the standard for high vacuum systems and would allow for modification or easier repair in the future. I managed to use the manual lathe at the machine shop next door to where I work, it would have otherwise been impossible on our lathe.
The flanges came out real good and were welded to the remainder of the tubing system
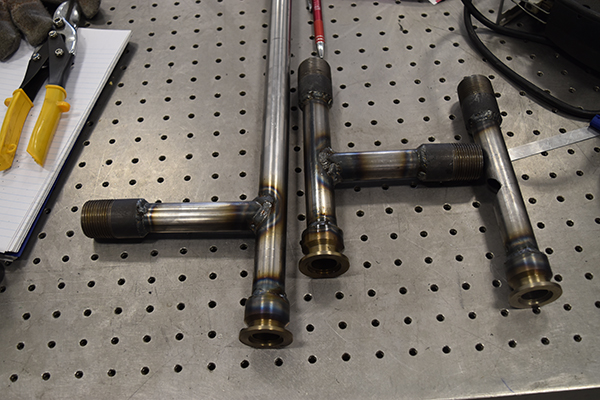
The welds were fairly good, still I would have liked to clean them up with a TIG.
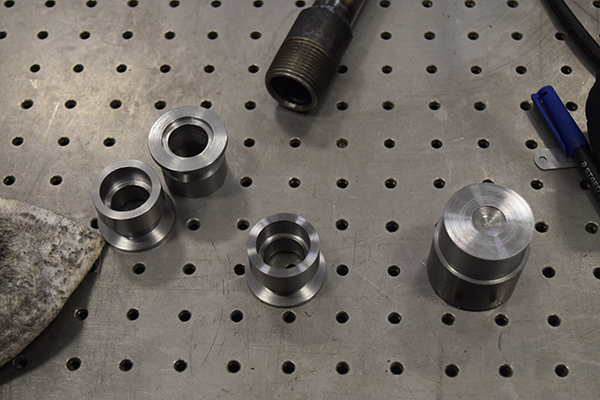
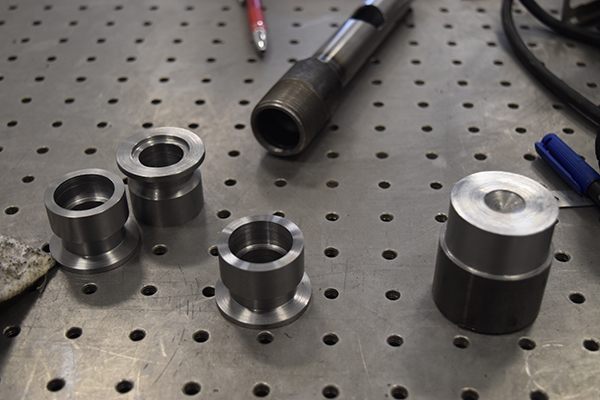
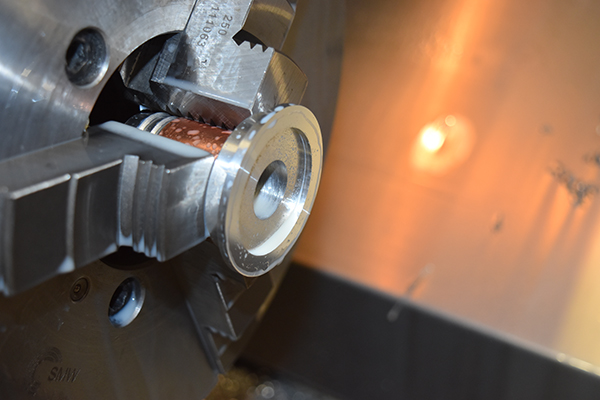
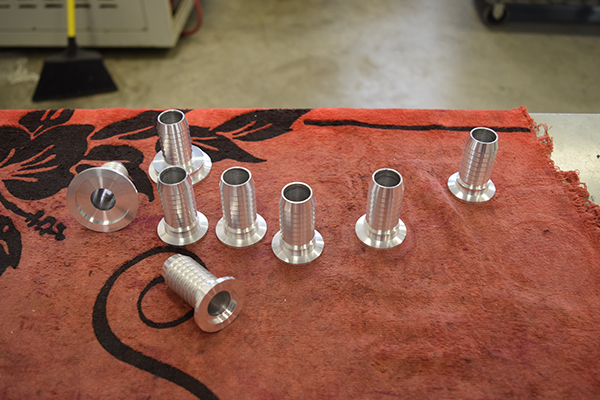
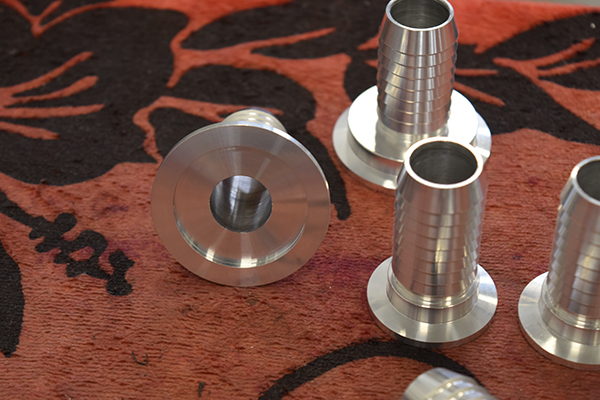
I needed to make some KF40 and KF25 flange to 1" hose adapters since it would be a lot cheaper than buying them. I chose to do them in the CNC since it was so much easier and once the program was set they could be left to run.
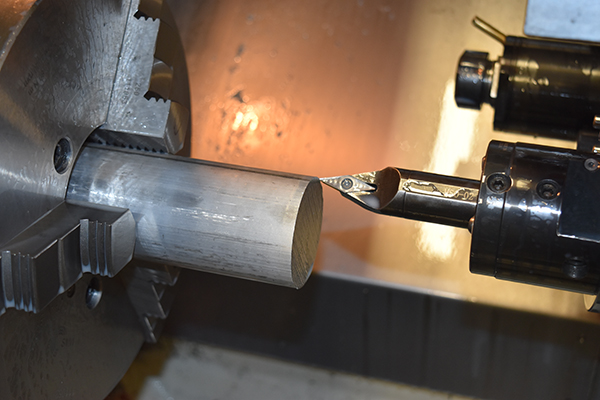

The CNC is of course so much more repeatable than the manual too, for example on the back of the flange there has to be a 15 degree taper whereas doing this on a manual is time consuming unless a form tool is made.
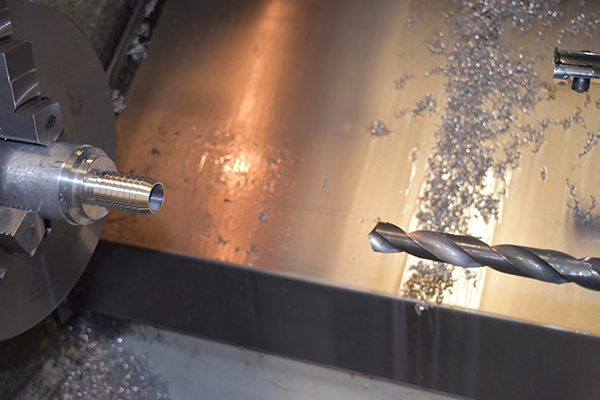
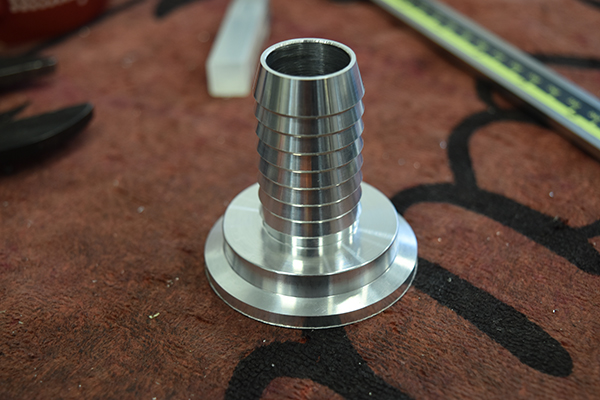
The other side of the flange was machined, this is what will hold a gasket, it is in fact an O-ring and a spacer to stop the seal from collapsing under vacuum.

I made a total of two KF40's and six KF25's, I of course made more than I needed to as to keep some for spare for the future.
The main manifold was complete, apart from the brackets which I welded on later. I did not see any point in completing the right side as I were in a rush to get the system up and running. There are two ball valves, one allows vacuum to the mould and the other is a bleeder, it is better to keep a vacuum pump working hard than to let it bear no load, a vacuum must also be bled if the pump is switched off as to not siphon oil out of the pump.
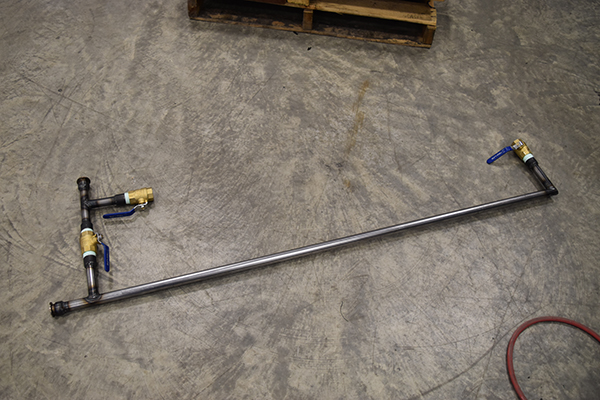

I used Eaton Aeroquip tubing for the system since it was rated at high vacuum and high temperature, this stuff was really expensive but necessary. I modified the caps to allow more suction hoses, it would have been a smarter idea to just make larger caps to accommodate the larger hose but this was not an option at the time.
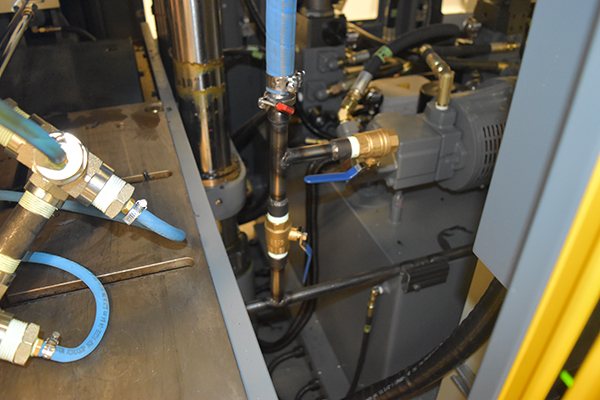
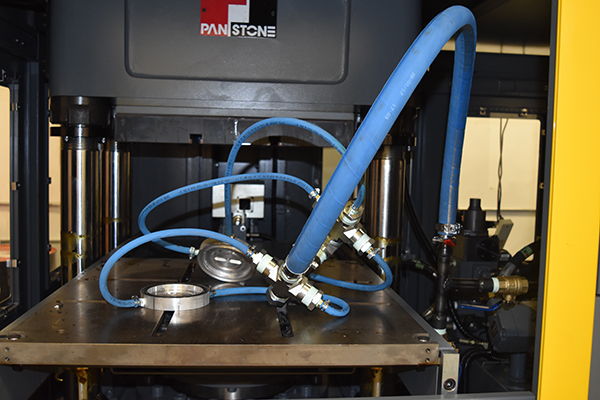
So did it work? Yes. I tried two separate moulds and managed to get a perfect product out of each, so was it a long term solution? No. It looks really messy using all of the adapters, the other problem which I quickly encountered was that the vacuum drew the rubber down the hoses and also between the sealing tube in the middle of the mould. I got the mould stuck together, the press had a 30 tonne pulling capability and even this could not pull the mould apart, guess I'll have to attack it with the angle grinder.
So where do I go from here, well the original idea from before I even modified the moulds. The original idea was to use some kind of bellows to seal around the whole of the mould, this would mean I wouldn't have to modify them and the rubber would be able to freely extrude. So after all of this time and money it confirmed that my original idea of covering the whole mould and using a high vacuum system was the way to go, almost exactly how everyone else does it. I had fun however and got to machine quite a few projects. The next project should have all of this system worked out and I should be making perfect products.
Hello, if you have enjoyed reading this project, have taken an interest in another or want me to progress one further then please consider donating or even sponsoring a small amount every month, for more information on why you may like to help me out then follow the sponsor link to the left. Otherwise you can donate any amount with the link below, thank you!