Machining a Mould
At the time of writing this (2019), I am a mould maker. I am able to show how I make these moulds but unfortunately I am unable to show any drawings on both the finished part and the mould itself. I also cannot show any dimensions, but I will say that all dimensions are machined to within a ± 0.001" tolerance. I am also unable to show the finished product and moulding process. I use this site as a portfolio to my resume / CV, it shows what I can do. I will also try to explain my reasoning of how something is to be machined.
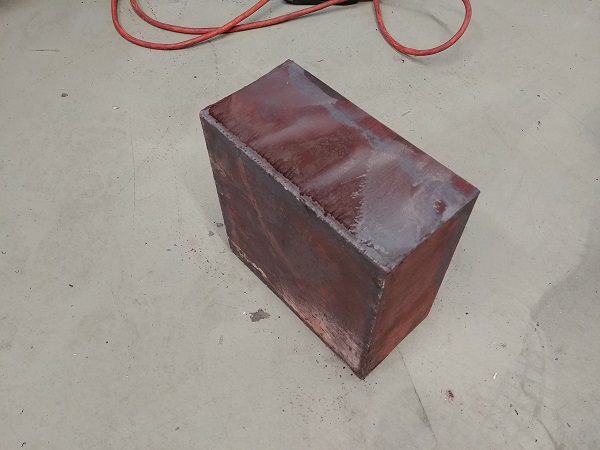
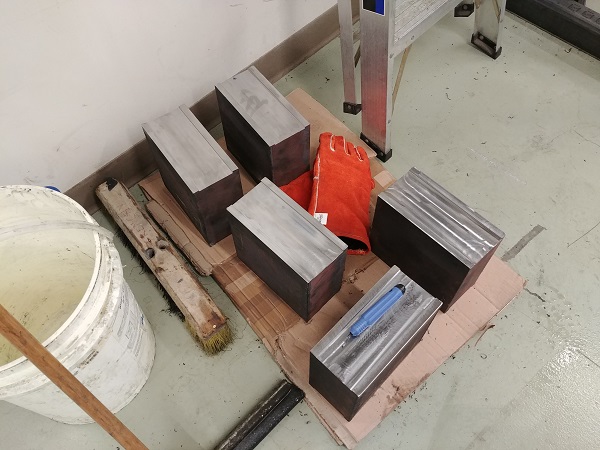
I first started off with some large blocks of 4140 steel. These were flame cut so I specifically asked for them to be normalised, they actually annealed them.
The first step would be to machine all of the edges down to size and square. I always order the stock oversize as this allows for cutting tolerances. Another thing to note with these moulds is that it does not matter what they look like on the outside, all that matters is the finished cavity. Since I have some flexibility I chose to go with the easiest methods. The first would be to machine some steps on the sides of the stock, this gives me something to clamp onto. I'm pretty limited to the work-holding fixtures that I have available, unfortunately I had to go with a vise, not ideal when the mill is not exactly an industrial machine.
After machining two opposing sides on each of the blocks it was time to get the main block to the correct height. This is where these steps came in handy as they gave be something to hold onto. This material is supposed to be 4140 in the normalised state. In general the harder a material is the better the finish, if the finish is torn then surface speeds need to be increased. I found this material to have quite a tough surface but a very soft core, it machined very similar to mild steel but the tool life was that of 4140. I was not at all convinced at the accuracy of this mill but I still managed within 0.001" on the height.
Two of the sides were milled flat and both of the larger areas. Now that all four of these areas were squared and flat I could finish the remaining sides, or just one side in this case. I used the clock to ensure that the block was perfectly square before committing to milling.
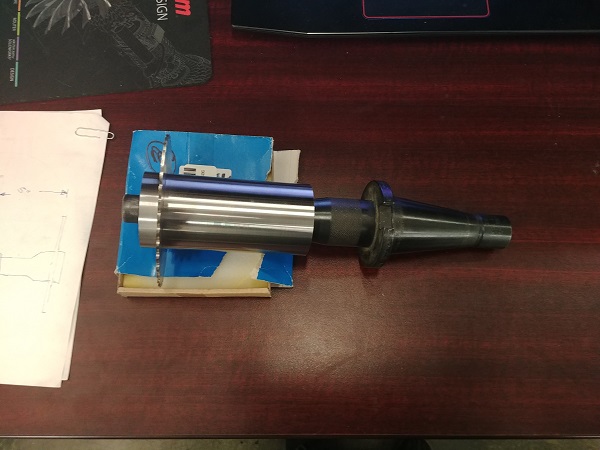
On a side note I was waiting for some drills and reamers to come in. I had already made some parts before I decided to start taking pictures, some of these would need to be split in half. So while I was letting the mill do it's thing I decided to make a slitting wheel holder. I chose to make this from 4140HT as to make it as rigid as possible.

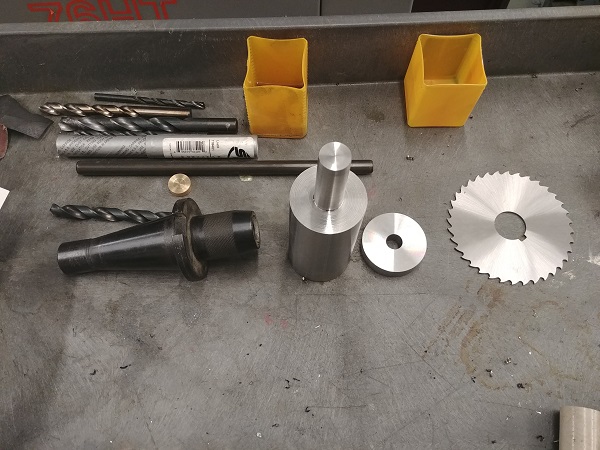
With a splitting wheel of this size I would theoretically have to run it at around 60rpm, any faster and I would burn out the teeth. I finished skimming all sides of the blocks and also got my drill bits in. This is a split cavity mould meaning that it will need some way of aligning, accuracy would be crucial. The mill certainly had a lot of questionability in regards to accuracy, to get around this I would just bolt the blocks on top of each other and drill them out in one.
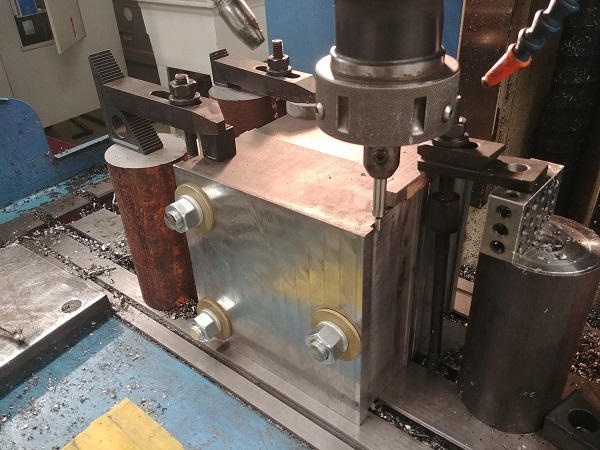
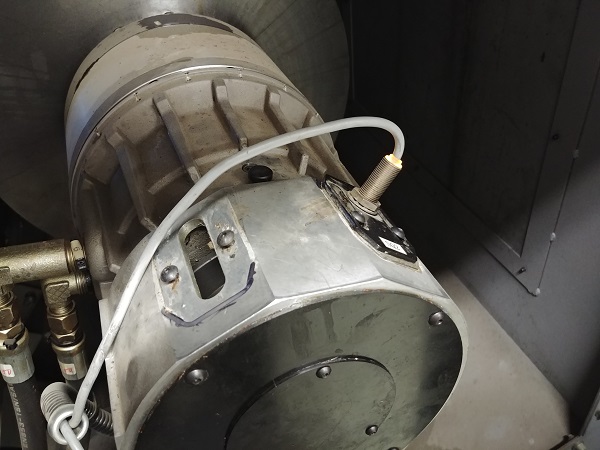
It quickly became apparent that this mill was not adequate for the job. This was originally a manual mill that got retrofitted to CNC, the head would have contained a gearbox with a low and high range. Everything on the mill looked like it still remained when in fact they had left all of the levers on the outside and removed all of the internals. The spindle motor is a direct drive to the spindle, thankfully coupled by a timing belt. I found quickly that the motor had almost no torque at the lower speeds, I also found that the servo drives on the axis's also had little torque.
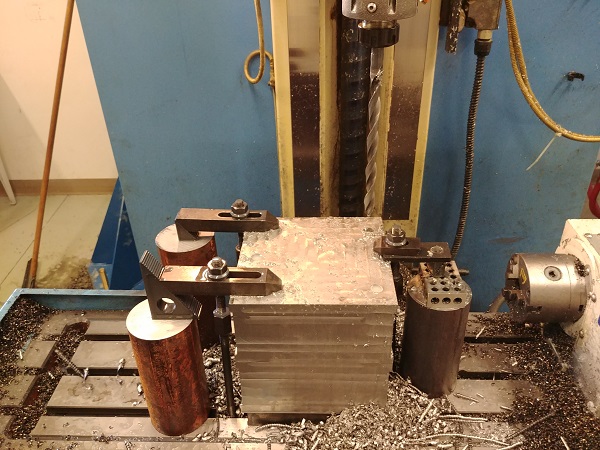
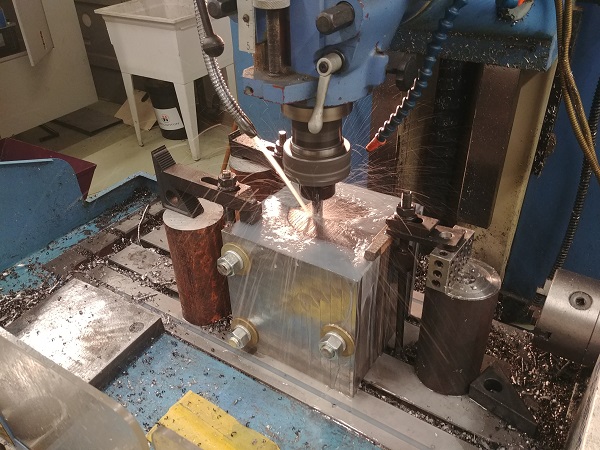
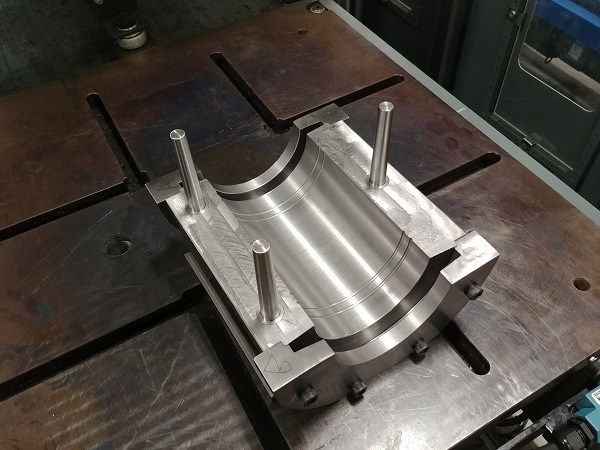
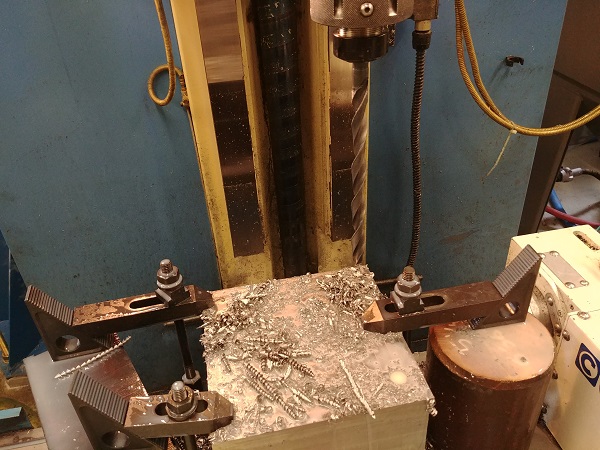
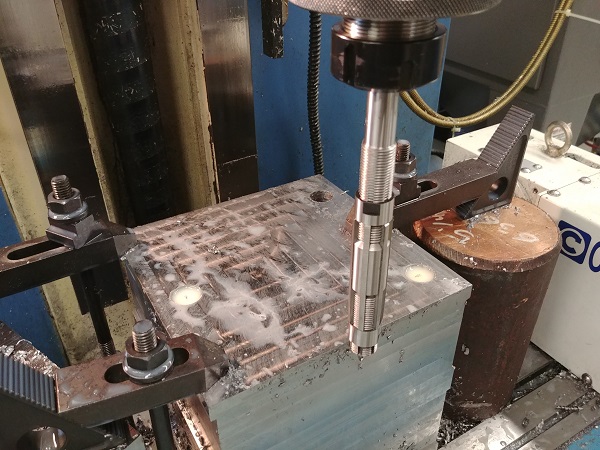
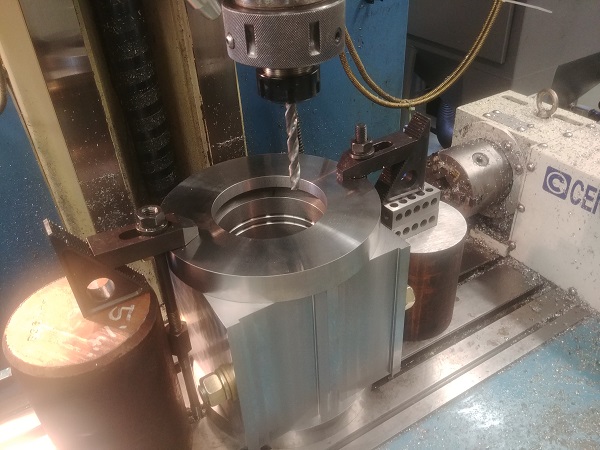
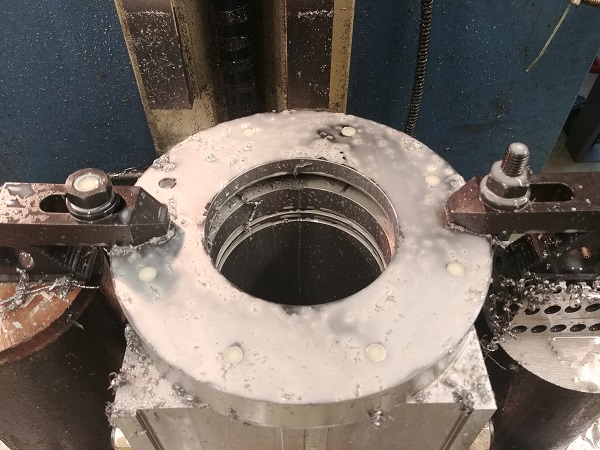
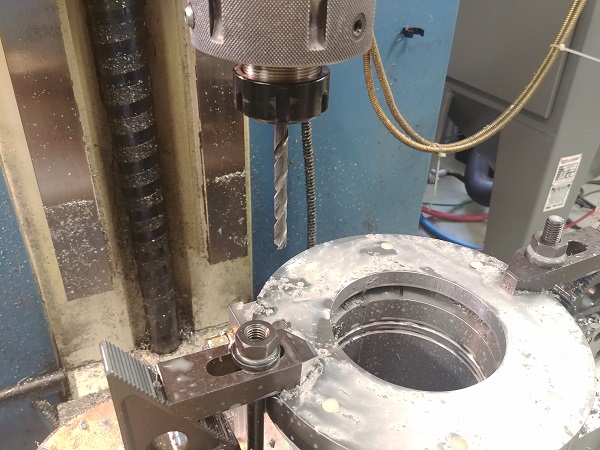
There are three guide pins on this mould which means three very long holes. (I placed some steel plate below the mould as to not hit the bed). The first pilot drill struggled a lot with the Z-axis servo constantly overloading, I had to manually write a drill pecking cycle in the end to fully retract the drill. Once I finally drilled all of these pilot holes I stepped up the drill size, I luckily had very few issues as I reused the program.
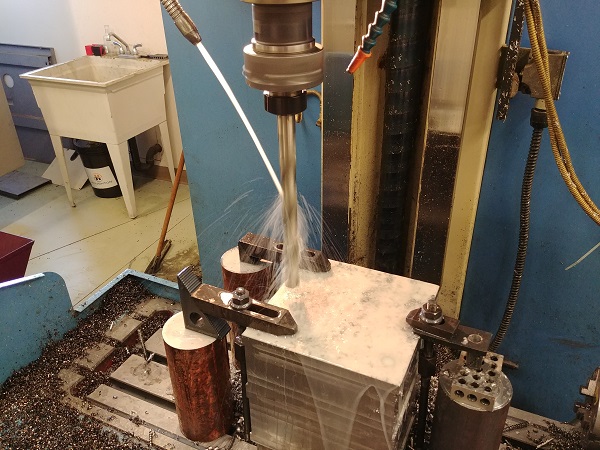
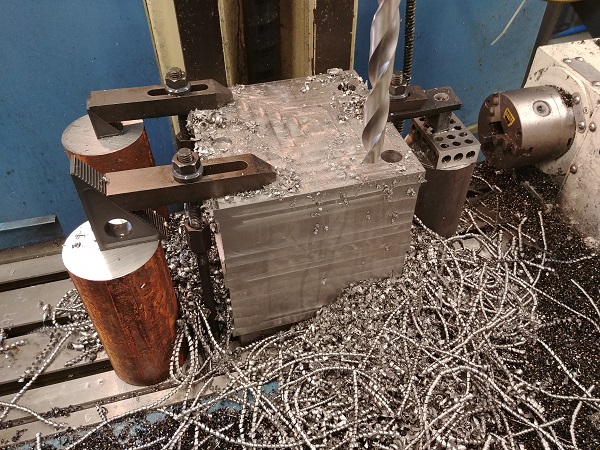
I could only get an adjustable reamer in the short time period that I had, I had never intended to use drills originally. I had never used an adjustable reamer before, I had also heard a lot of horror stories. The reamer was actually really easy to adjust, one full turn on the lock rings equaled 5 thou in diameter. I was not too concerned at getting it to within a thou as the steel was pretty soft, plus I had access to a 250 tonne press, these bushes would fit. I had a huge amount of issues with the spindle stalling as I ran the reamer pretty slow. In the end I had to peck at the bore, I made sure to stop the spindle when retracting and also stopping it when plunging as not to risk any more removal of material.
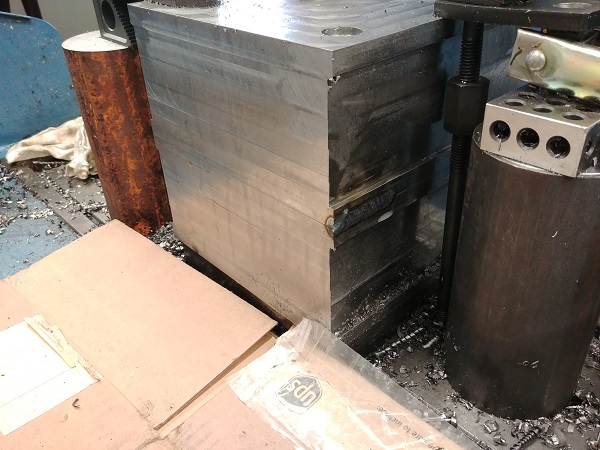
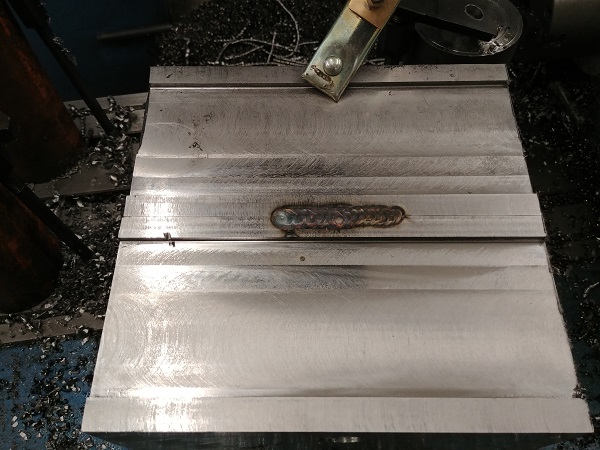
This mould would need to be placed in a lathe and bored out. I was advised that this type of mould should be welded together, I was skeptical just from the shear volume of the metal. I did some research to find this material is very prone to cracking unless heated to a very high temperature. Considering this is 200lbs of steel and I had no lifting equipment I knew that I could not pre-heat it. I gave it a shot at TIG welding it together by first fusion welding both sides and then using filler rod. As expected the welds continued to crack, I had avoided around the edges as I knew these welds would be impossible to machine through. I went to my original idea of bolting both of the blocks together.
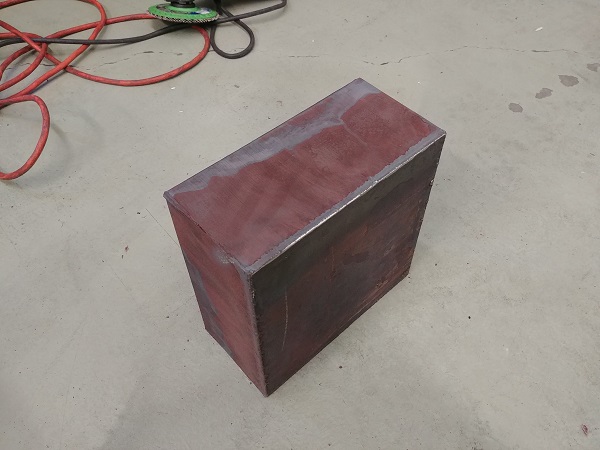
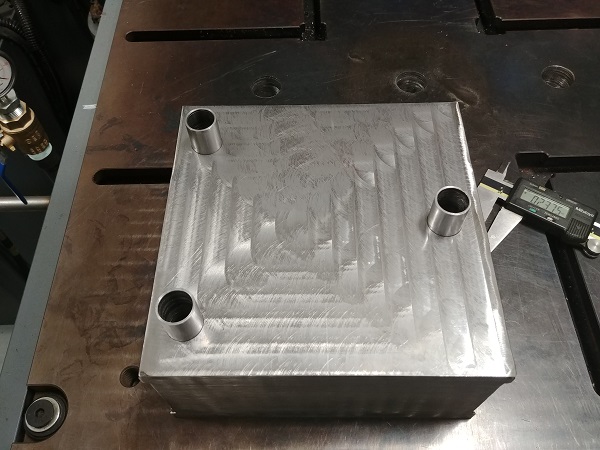
I made some bushings to press into the block, I also ground away my welds as they looked unsightly. I pressed the bottom bushings in, I had no worries about them going any further as I had not reamed any further.
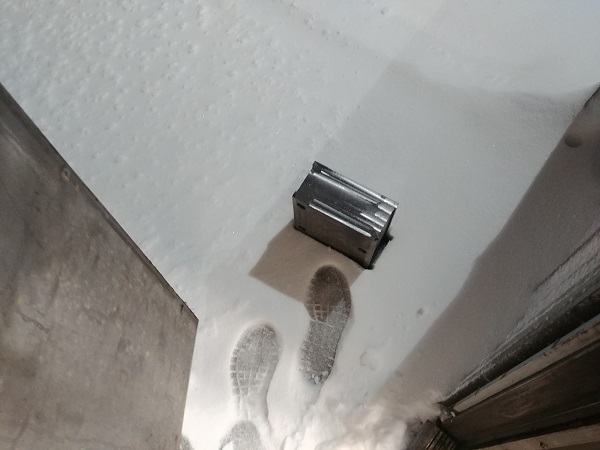
Coincidentally I was still here at midnight when we had a terrible snow storm, it was around negative 15 C. I threw the block outside for an hour before throwing it in the press.
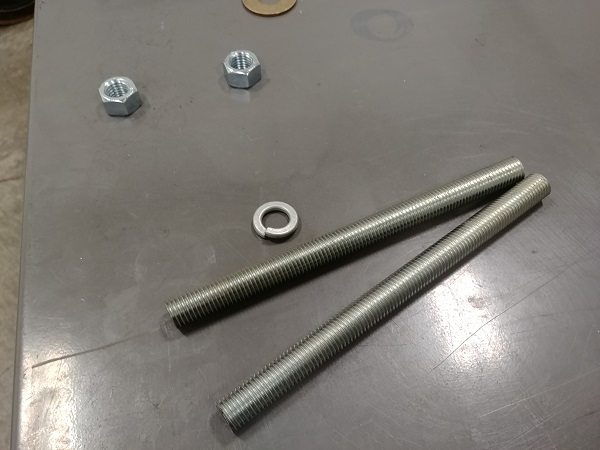
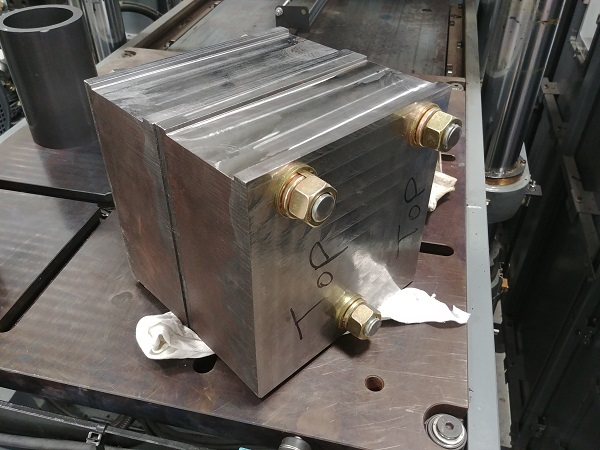
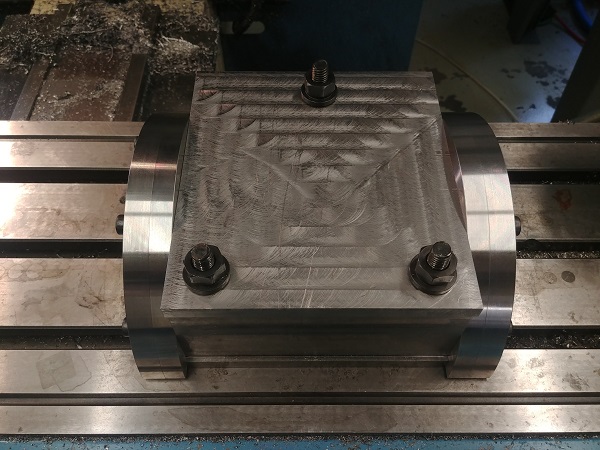
I used some very beefy threaded bar to bolt the blocks together. It took around 20 tonnes of force to push these blocks together and probably around 200ft/lbs of torque on the bolts. I had no doubt or fear this thing would not hold, the welding route would have be suicidal.
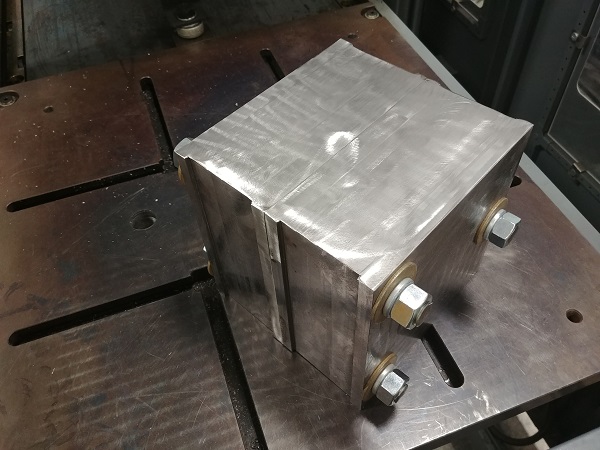
I can lift two separate 100lbs blocks of steel but not a 200lb block of steel. Plus the fact that I was there solo was not a wise move to do anything risky. I used the forklift to transport the mould to a cart and the cart to the moulding room, from there I used a hoist.

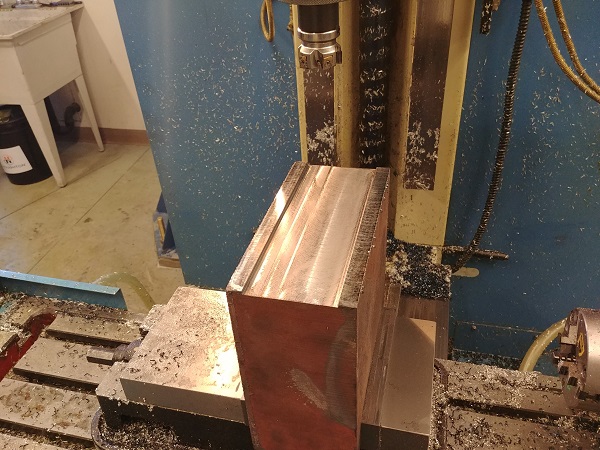
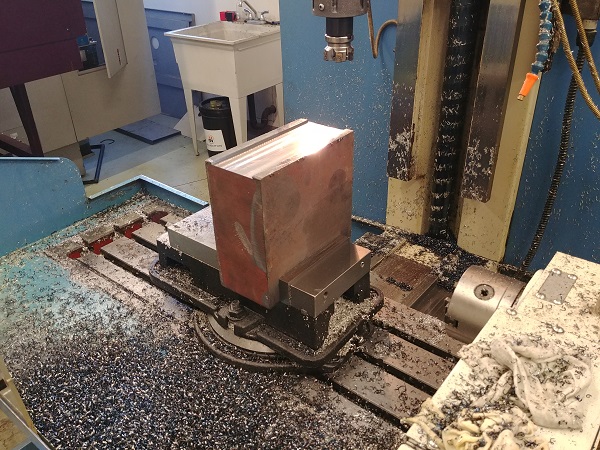
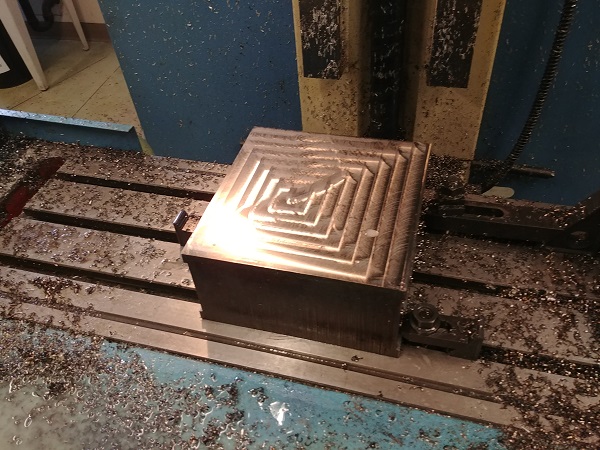
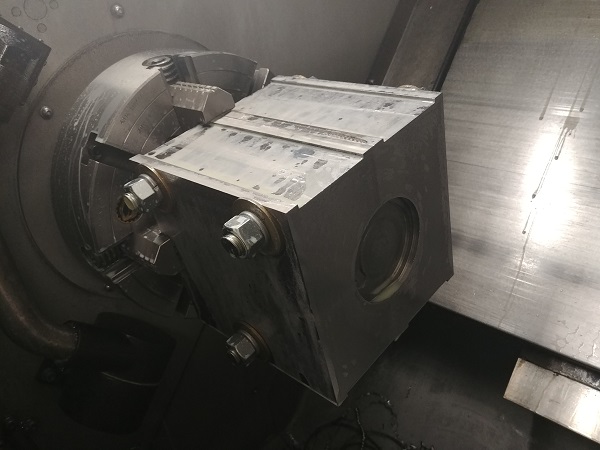
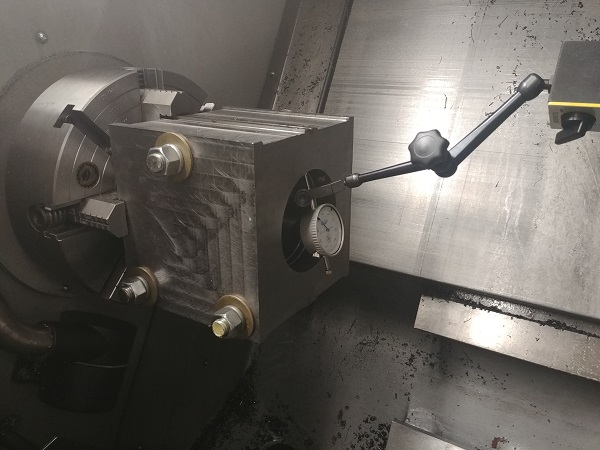
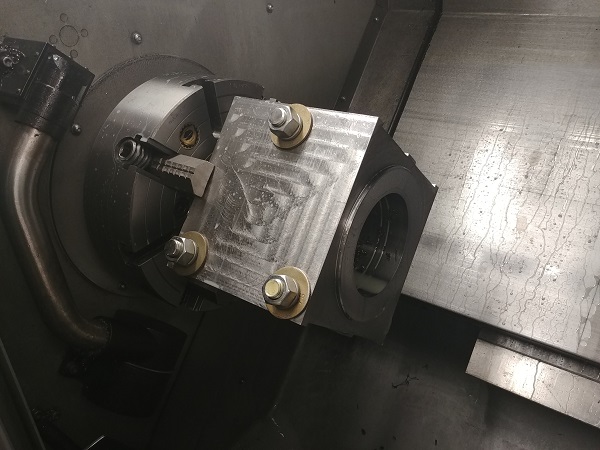
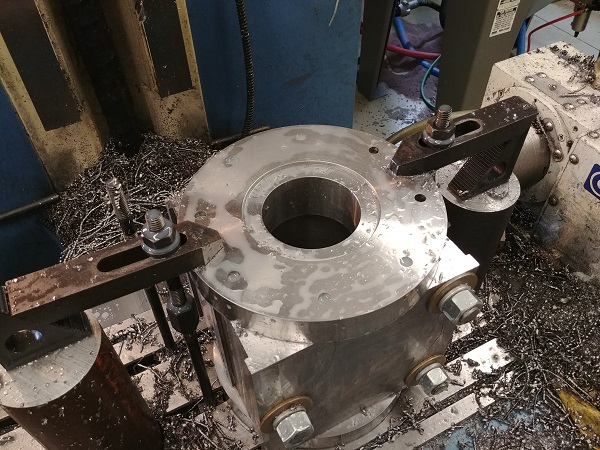
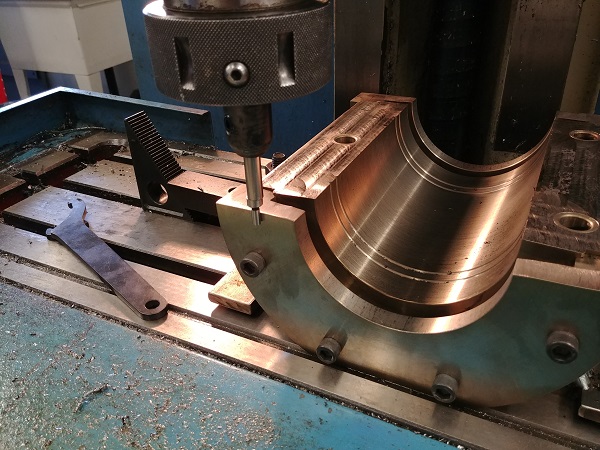
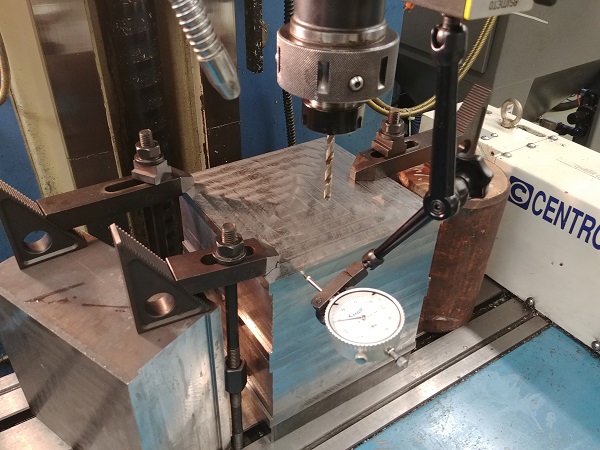
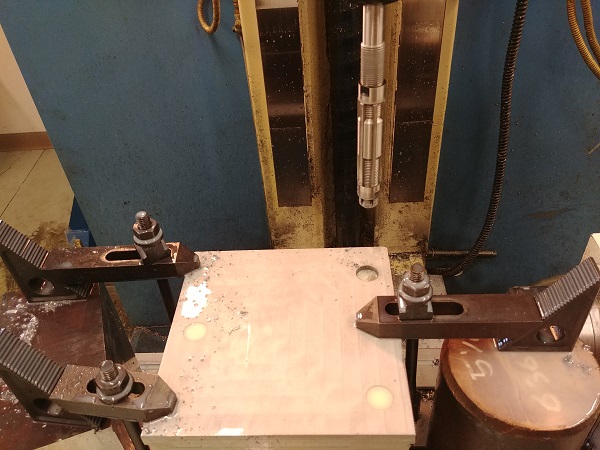
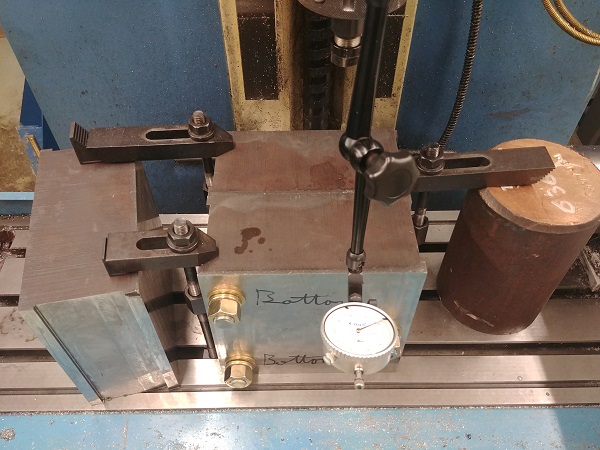
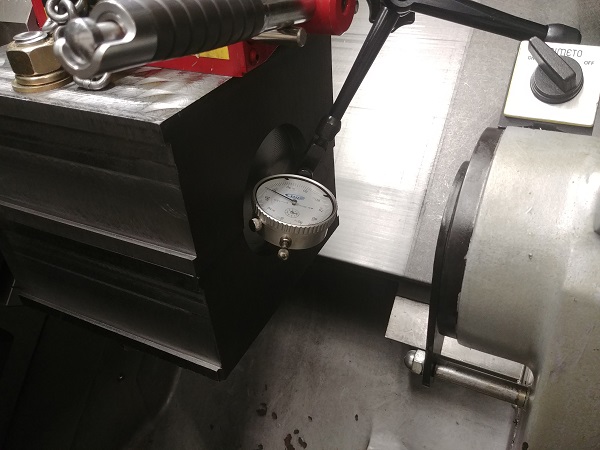
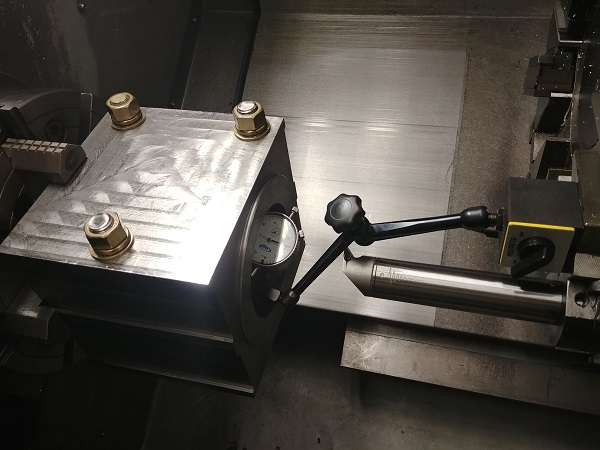
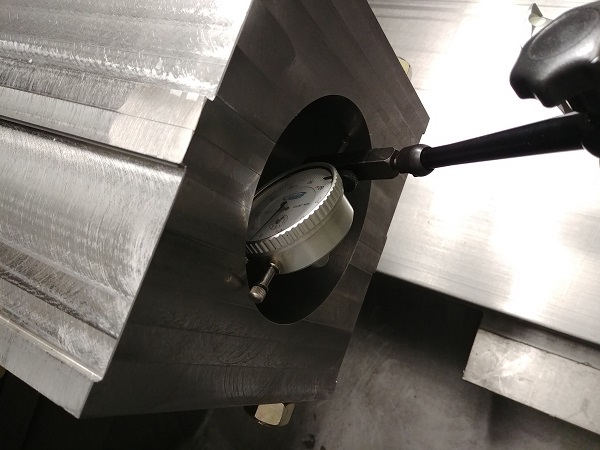
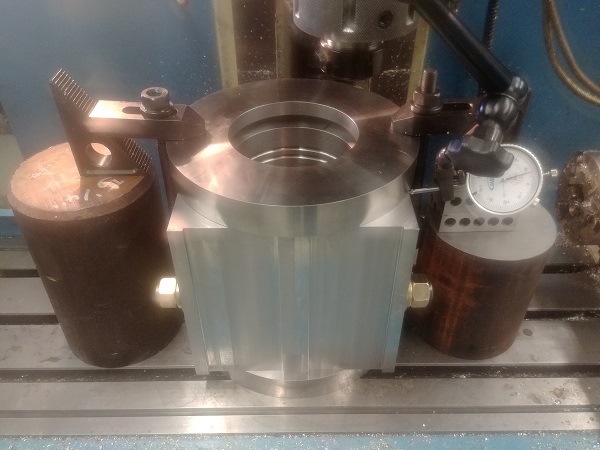
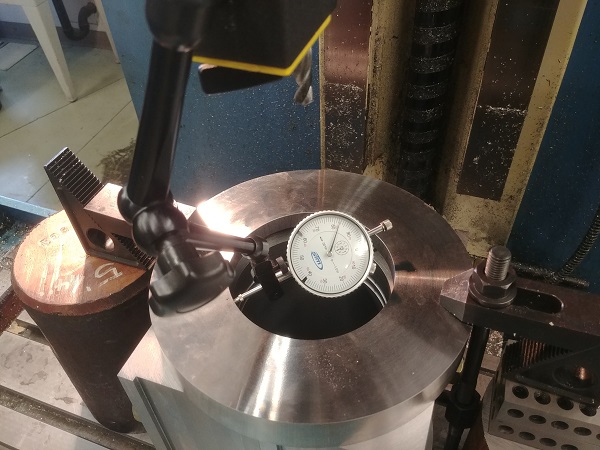
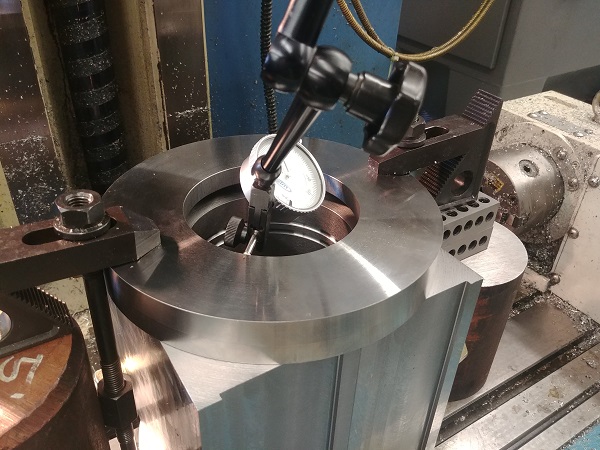
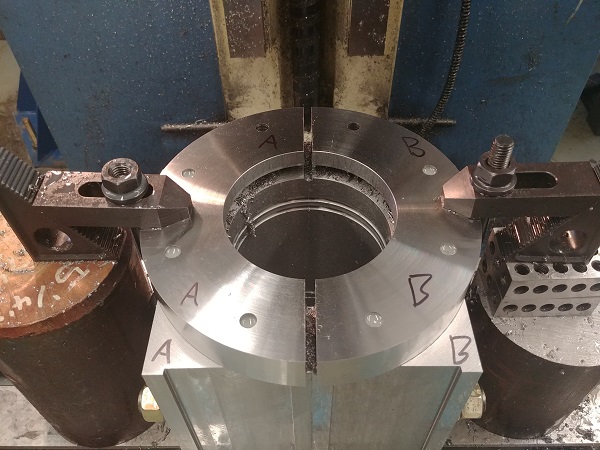
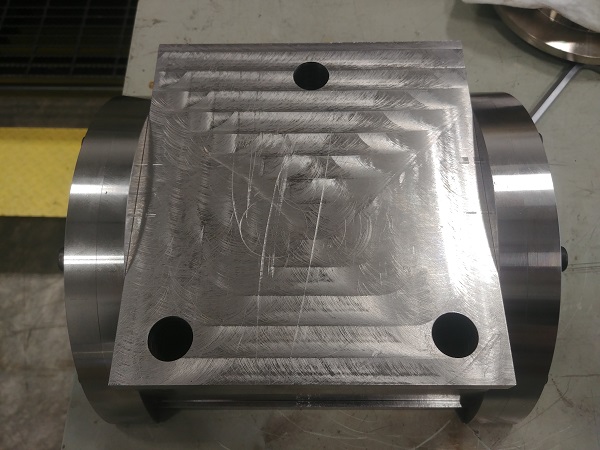
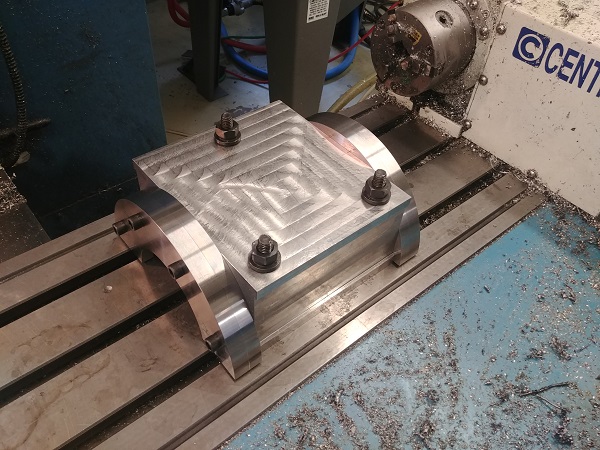
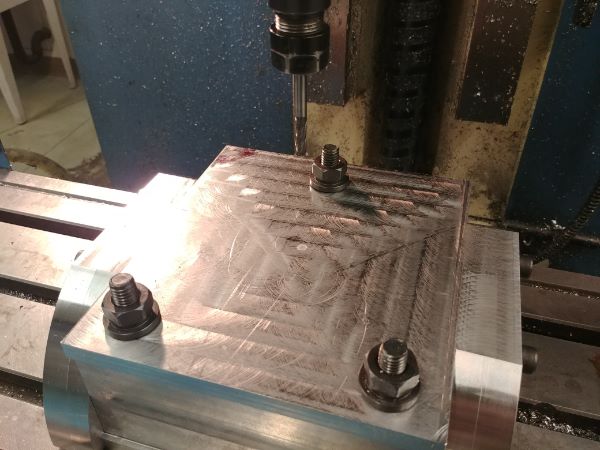
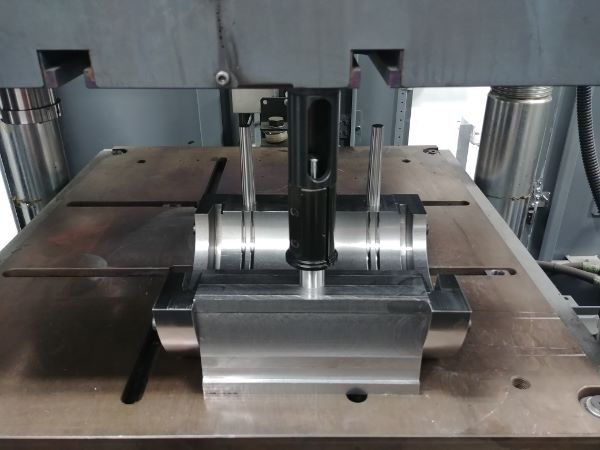
I clocked it perfectly true in the mill, this is where I would have to rely on the mill to be accurate.
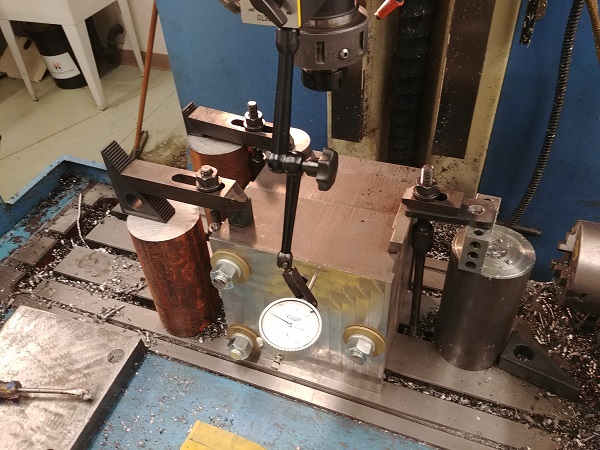
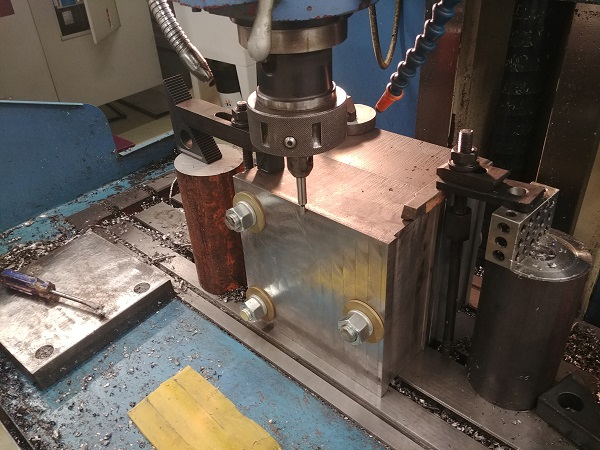
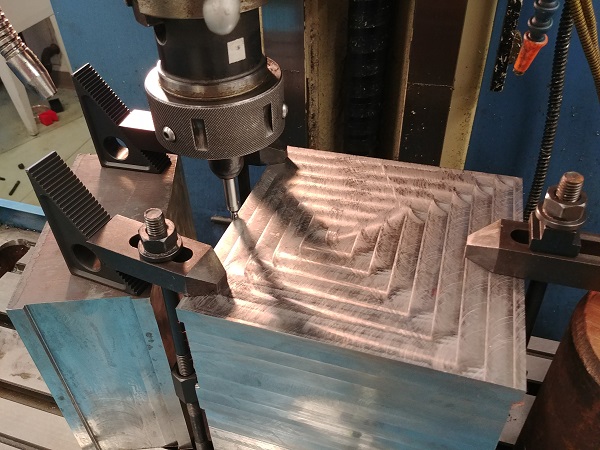
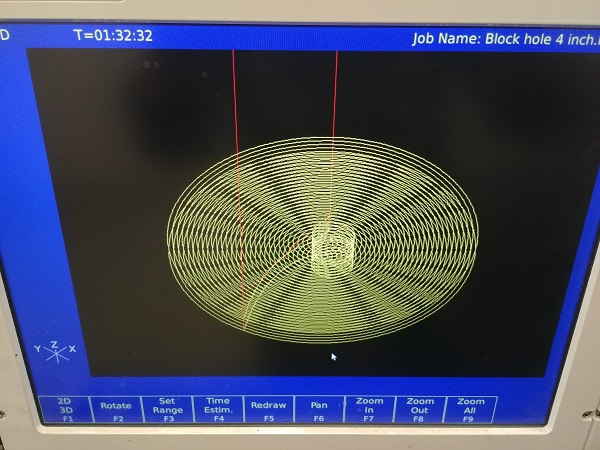
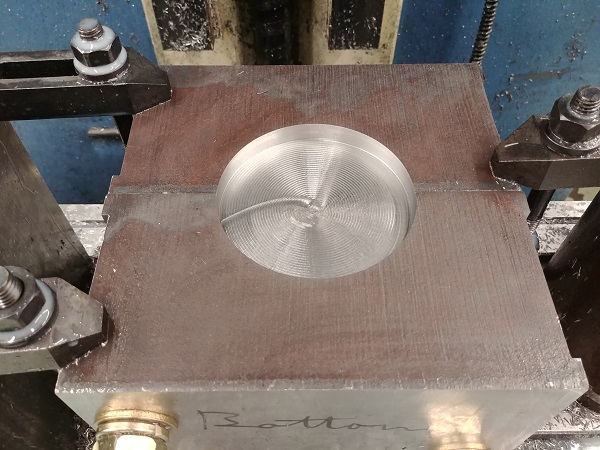
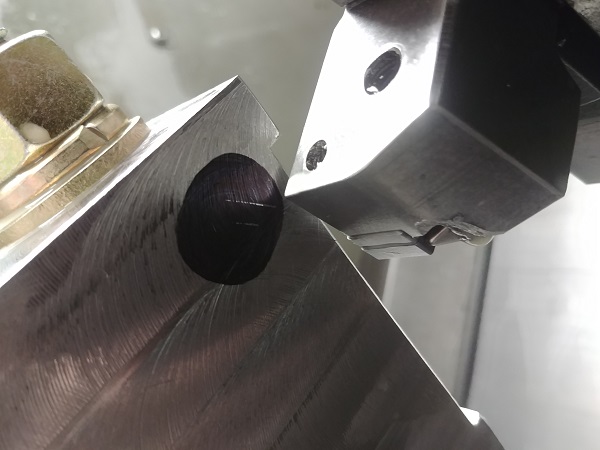
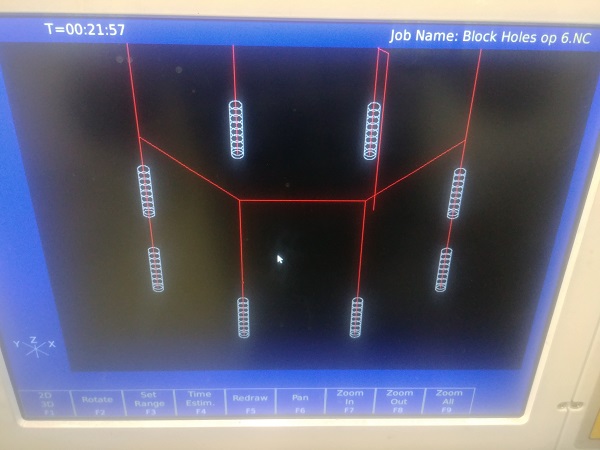
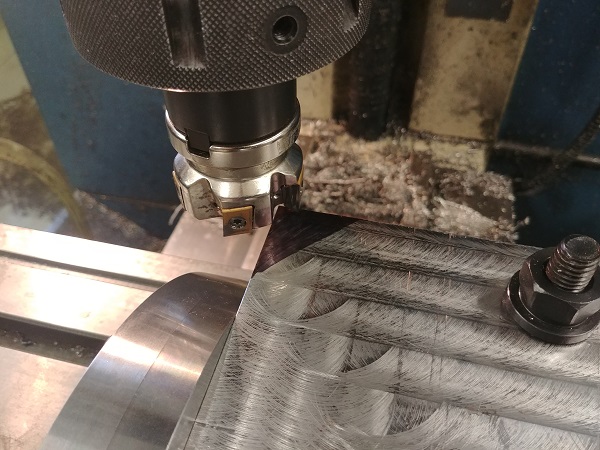
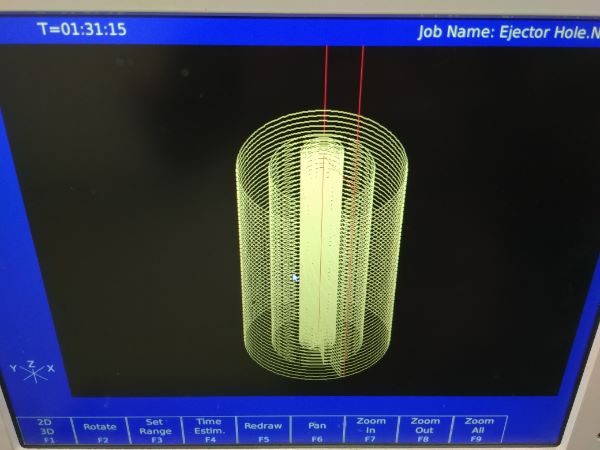
I touched off each edge to find the centre point of the block. I created a CAM program to mill out a circle in the end of the mould, this is how I will centralise it in the lathe.
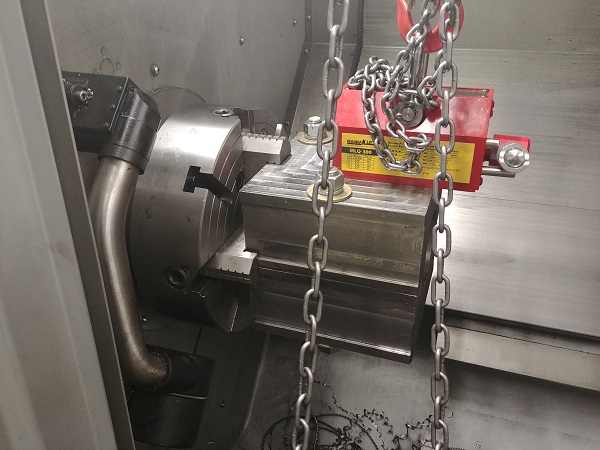
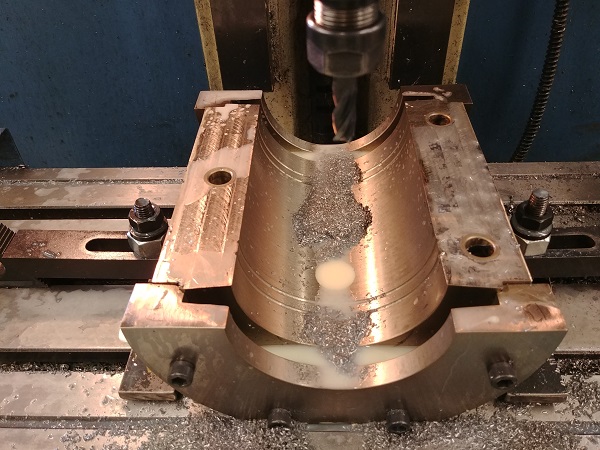
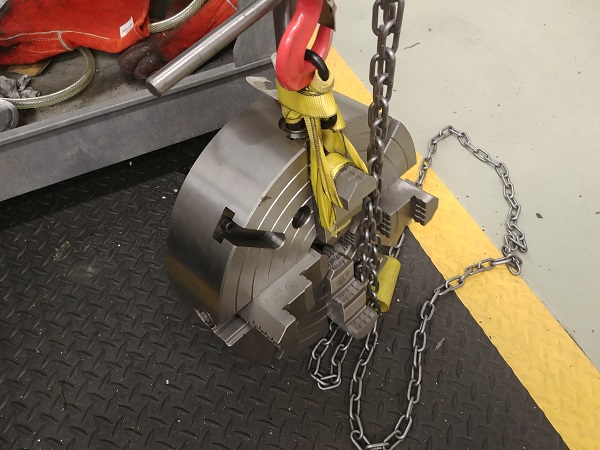
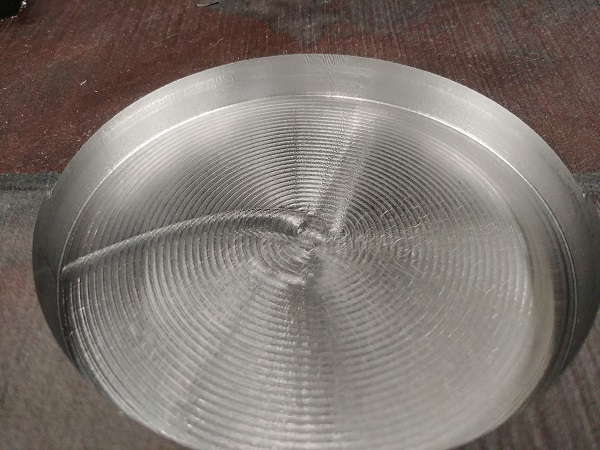
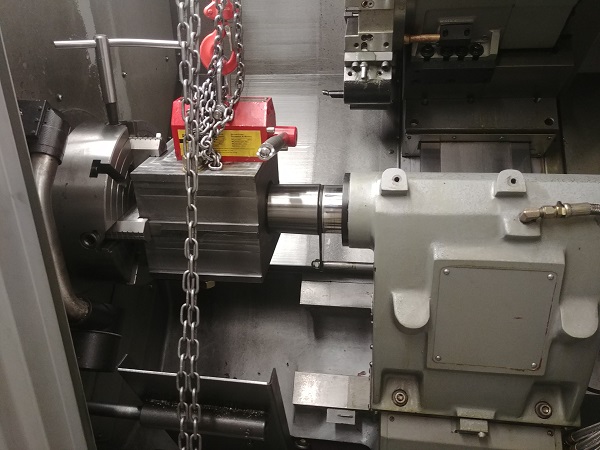
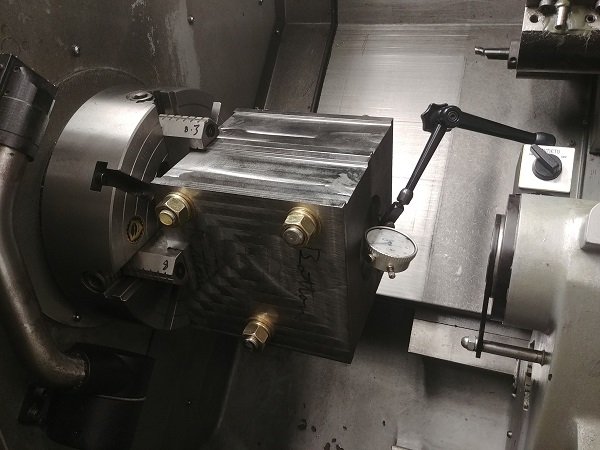
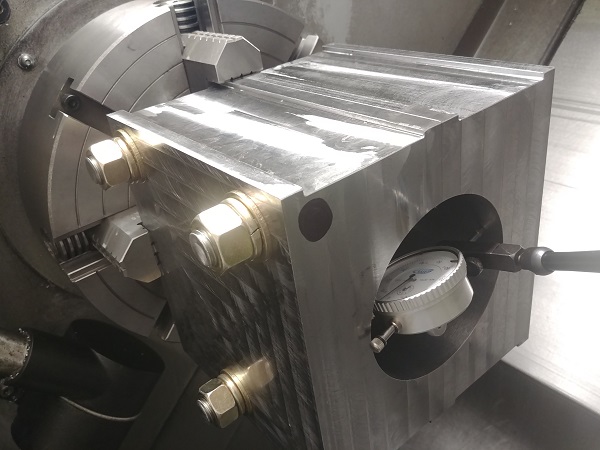
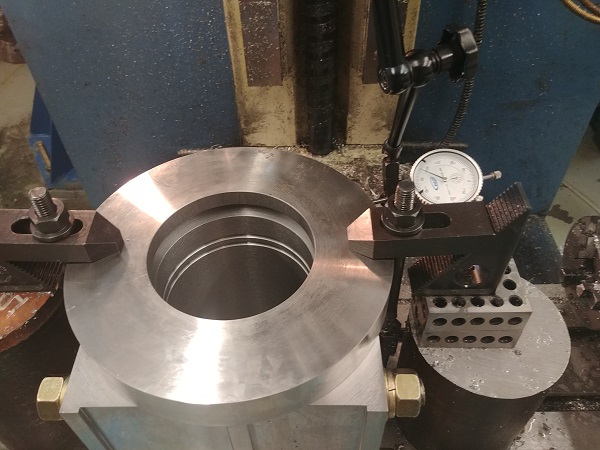
The chuck on this machine is hydraulic which meant that I had to remove the draw bar before being able to mount the 4-jaw. I also had to trick some sensors in the back telling it that the chuck had clamped. A very easy work around on the sensor is to attach a magnet to it. Clocking the block central was surprisingly easy to do considering the weight. I did notice that the milled circle was not perfectly round but I did get it centralised, hopefully the mill did it's job accurately.
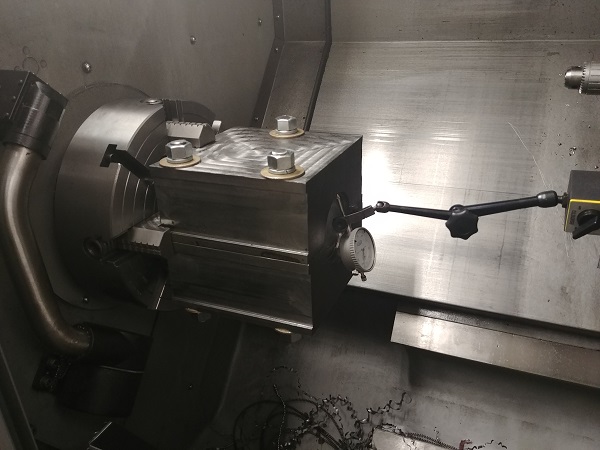
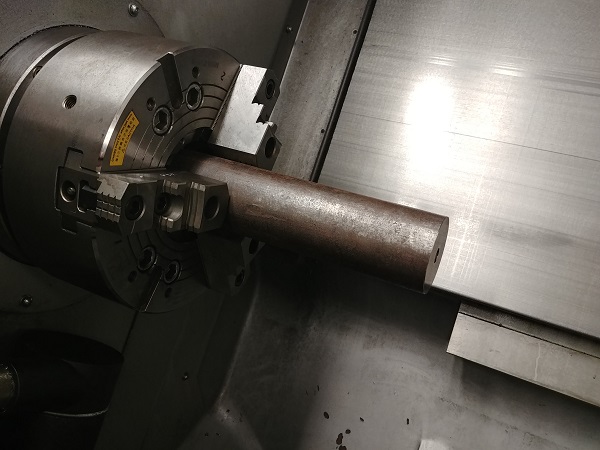
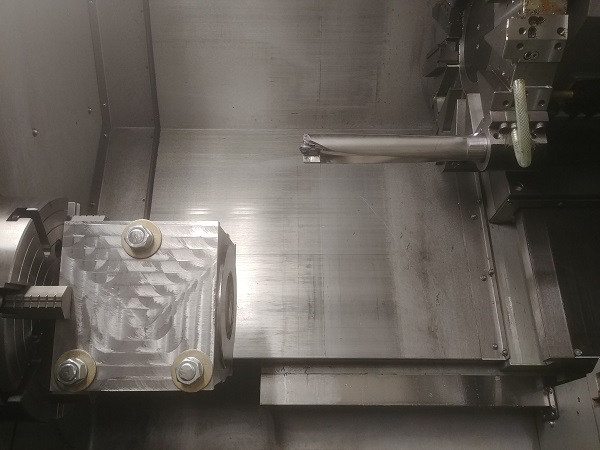
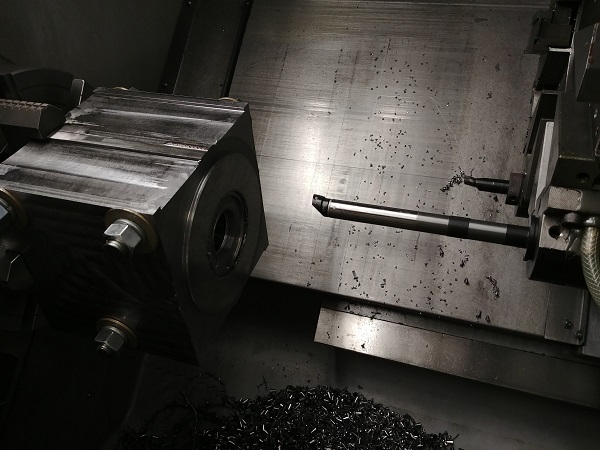
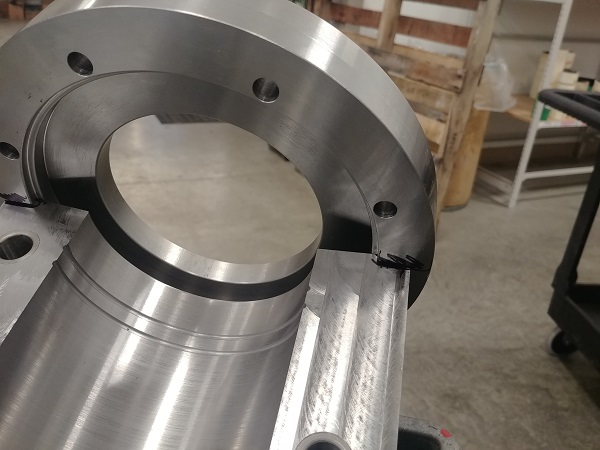
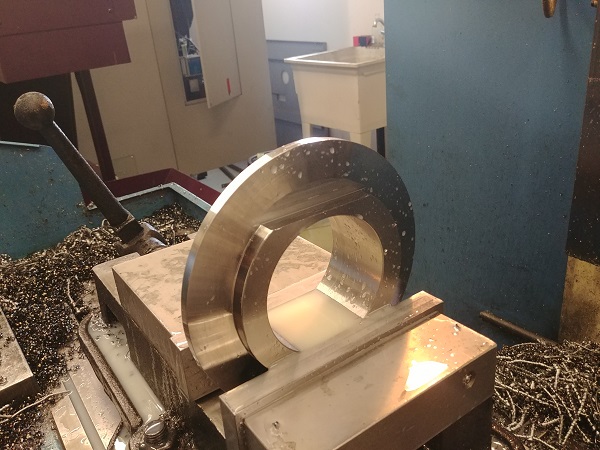
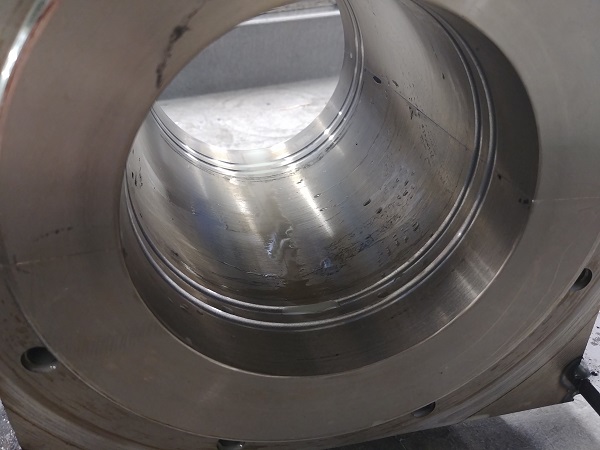
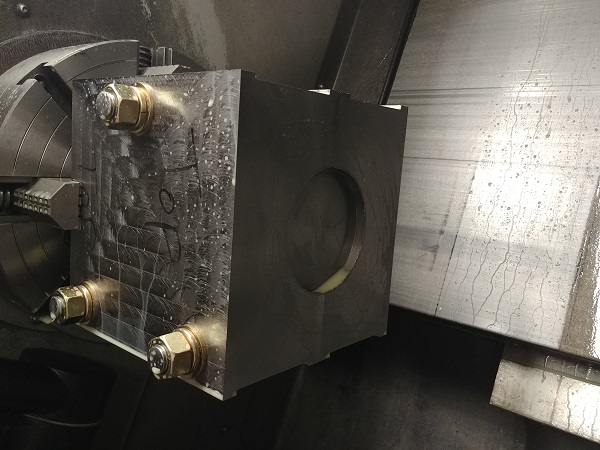
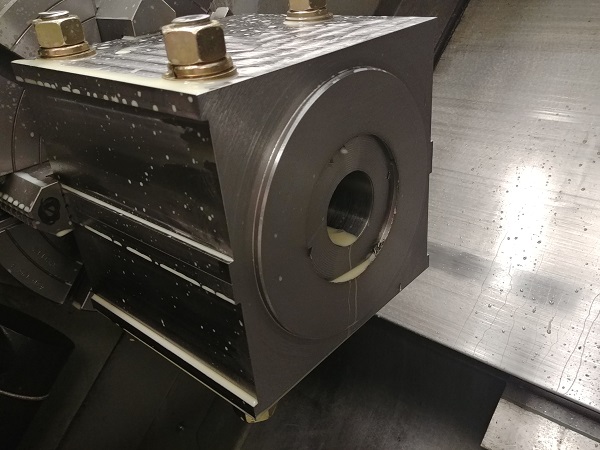
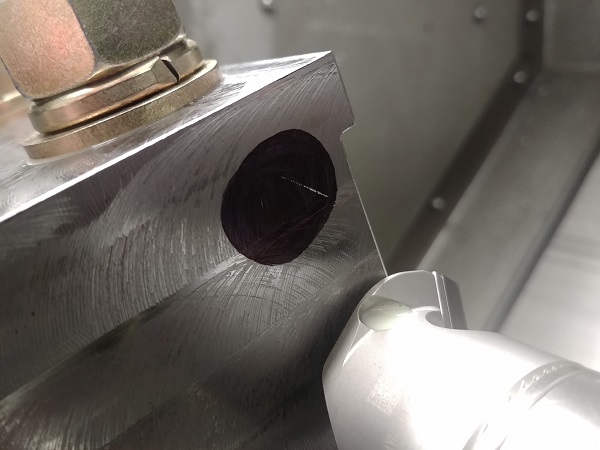
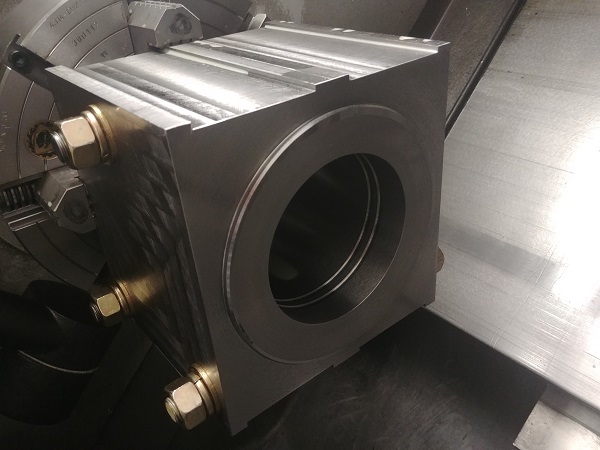
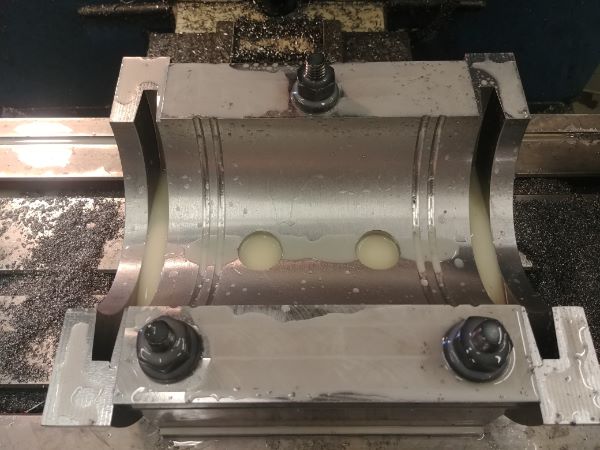
The scary thing about this is that I have 200lbs of spinning steel, I chose to go at a maximum of 800 rpm. I missed a couple of pictures out but I used the lathe to face it flat, I had to machine quite a bit off the face. I also turned a step on the front, you can see it in the next pictures, this is to centralise the end caps (those that are to be split). The most dangerous part of all the operations is boring this thing out, especially if taking large cuts such as from a drill.
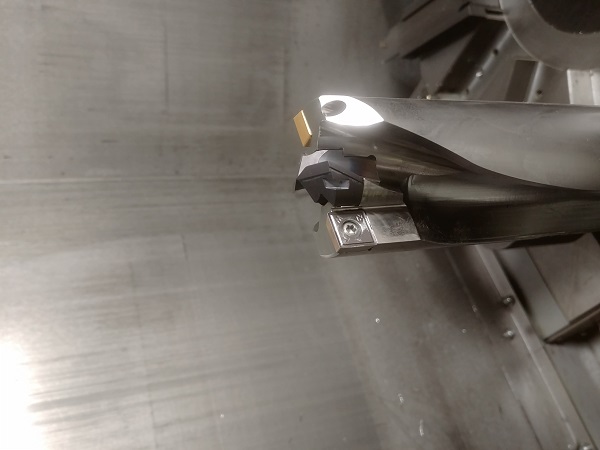
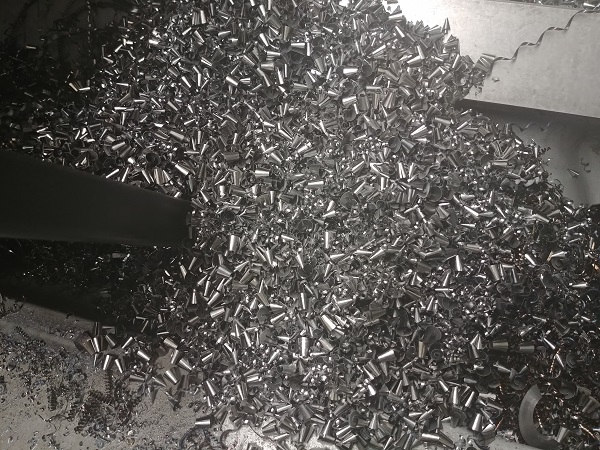
I used a U-drill to bore it out, this drill would have put serious pressure into opening the mould. This was the one operation to where the welds would have failed, it was also the fastest spinning operation.
I got blackmailed into coming in on a weekend to work on this mould, it was 5am at the time I drilled out this mould. I hate being put in these situations, especially when I did have the opportunity to work on this mould sooner. Well after an 11 hour solo shift I decided to go home, I did my best. On a side note I setup an anti-vibration boring bar before I left.
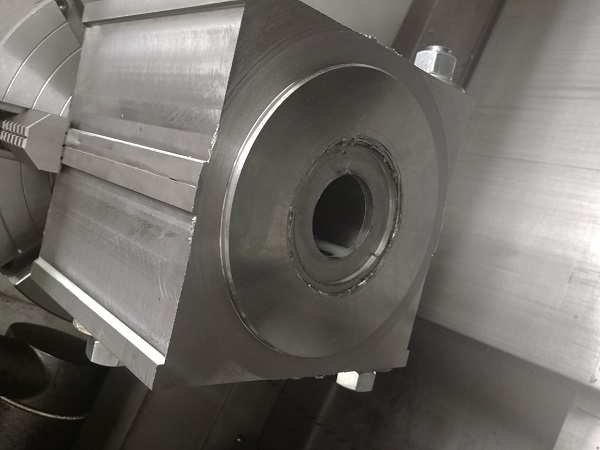
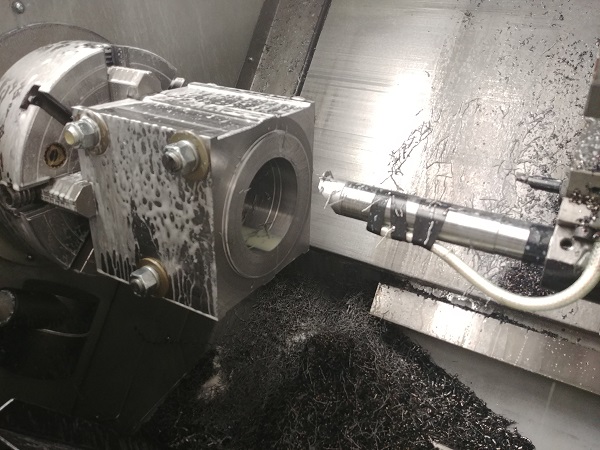
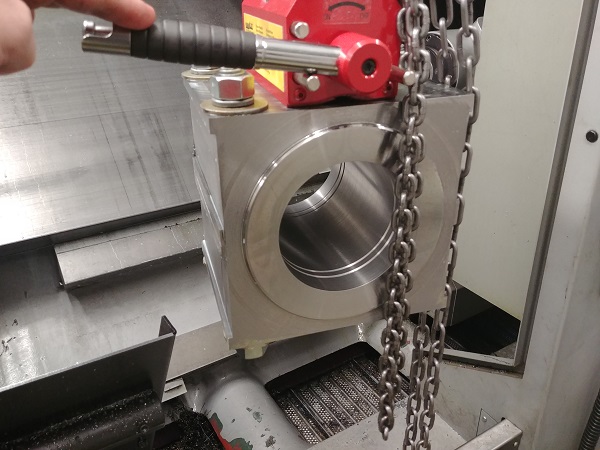
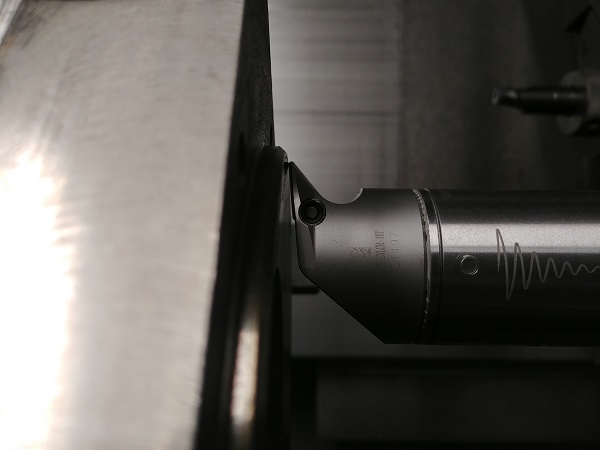
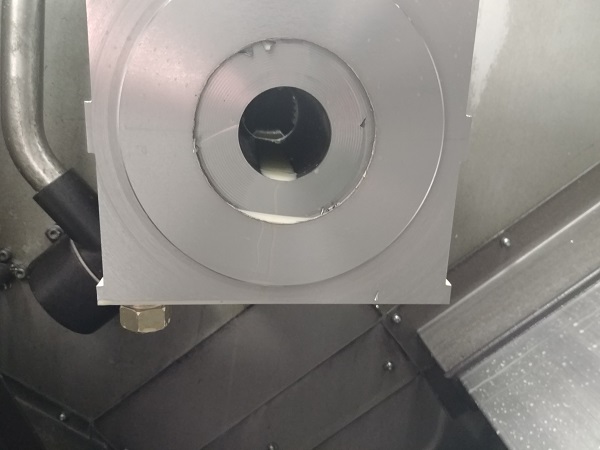
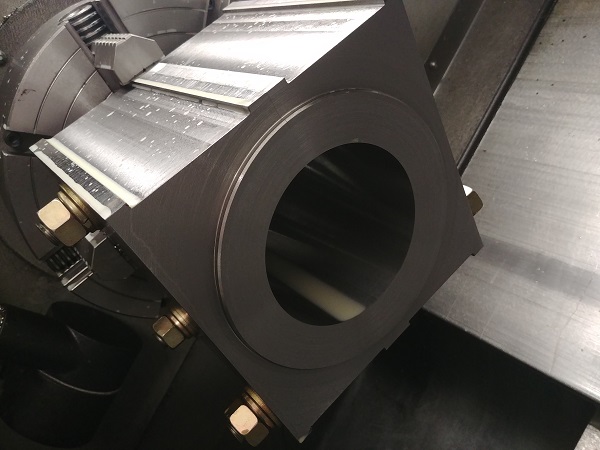
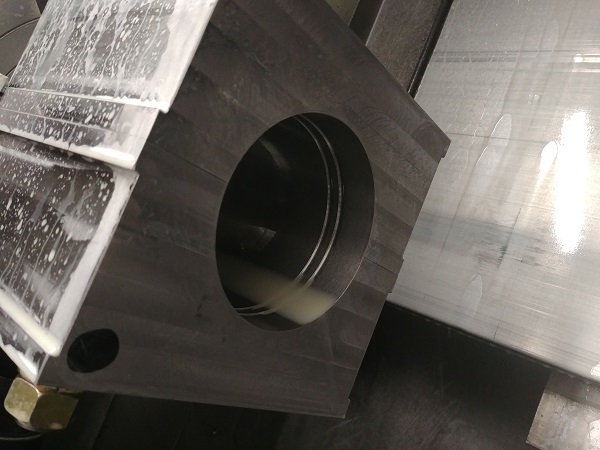
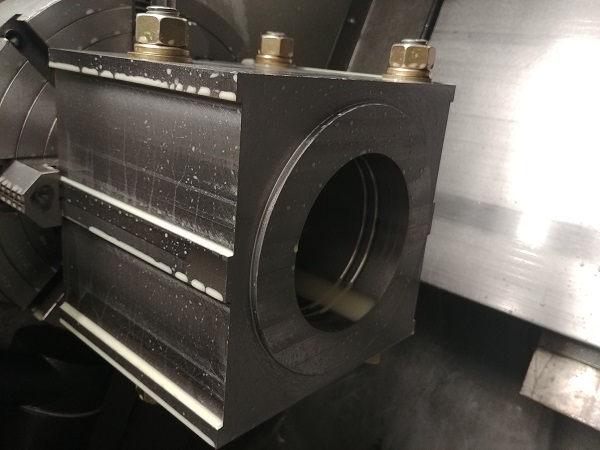
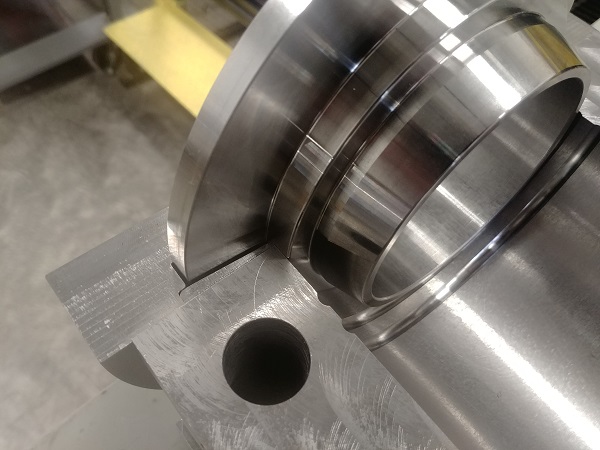
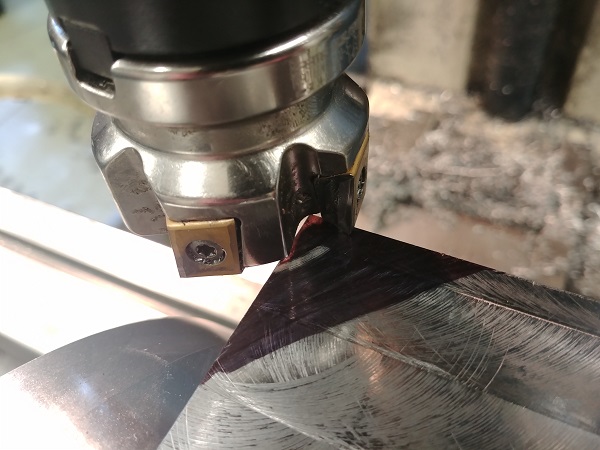
I had ordered a large anti-vibration boring bar to do the cavity on this mould. The inserts for it were pretty standard but I had still not received them. I chose to use a smaller bar to do all of the roughing, I then placed the larger bar in with an aluminium insert to do the finishing pass. I flipped the part in the chuck, again clocking it perfectly central. Even though I didn't show it here, I had to use the hoist, I'm sure this thing was still a good 150lbs.
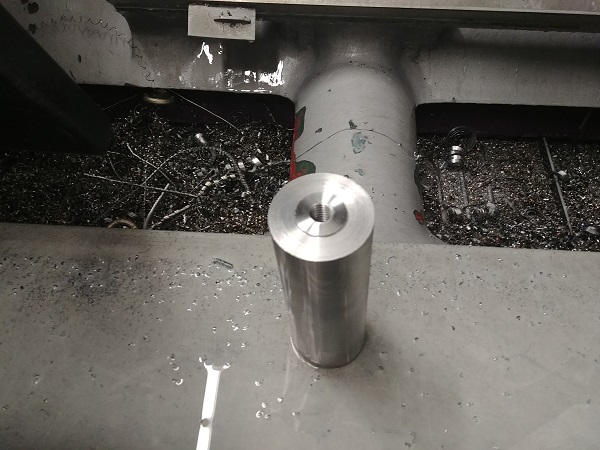
The mould was machined to its final height. I turned the step on the outside, I also turned a taper on the face (not so easy to see in the pictures).
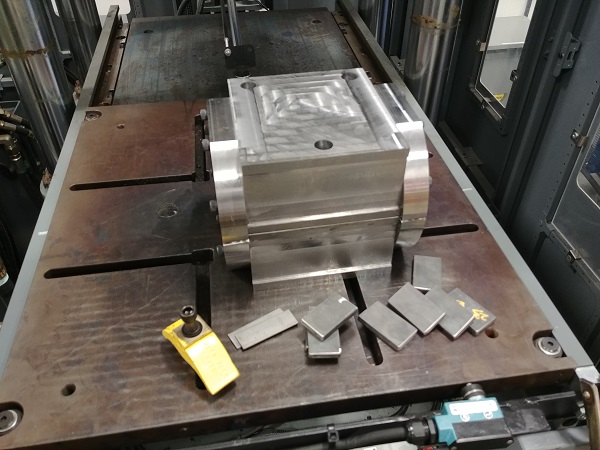
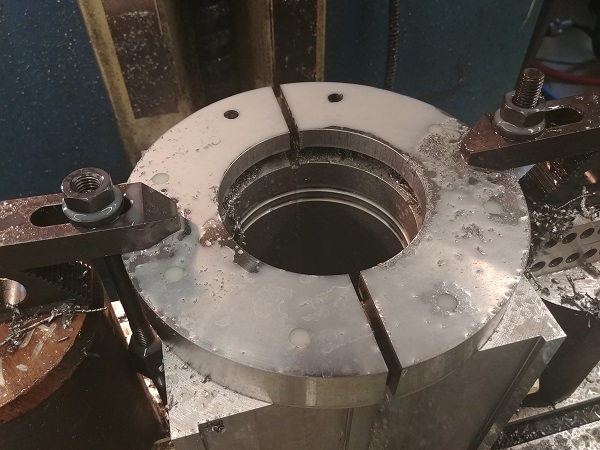
So remember when I said I needed to split some caps in half, well these are them. I did not take any pictures of the process because it was rather stressful. So I placed these caps in the vise and proceeded to split them in half, I could only run 60 rpm due to the saws being HSS. The mill simply kept stalling because the spindle did not have enough torque. I knew there wasn't much I could do, I could speed it up but I'd burn out the blade quickly. I decided that I would later have to use the angle grinder. These caps will be bolted to either side of the mould, I ran a program to drill eight holes.
I drilled the holes on the other side of the mould. The holes in the caps were drilled larger to allow a bolt to pass, the holes in the mould itself were tapped. Once I had completed these holes I could proceed in splitting the caps in half.
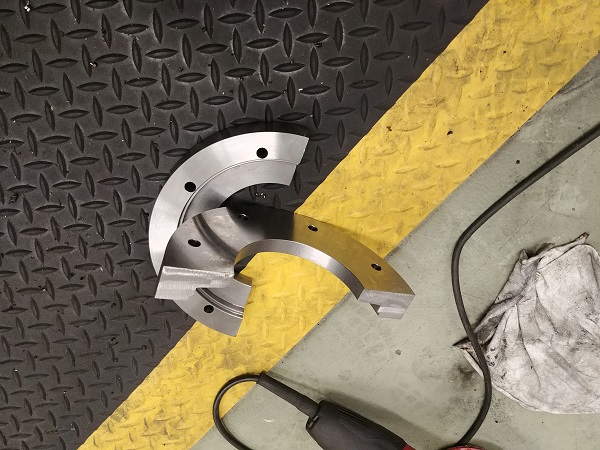
It was time to split the mould back in half. I removed the bolts, they were still extremely tight which is a good sign. I had to use a bar and the press to push out the bushings. I took the time to press in the guide pin bushings, it took a bit of force but they fit great.
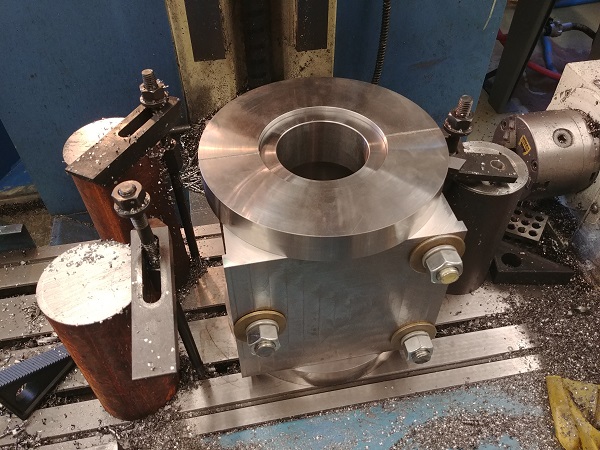
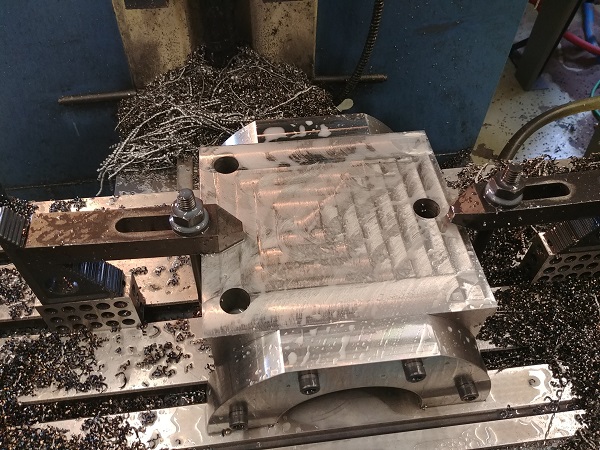
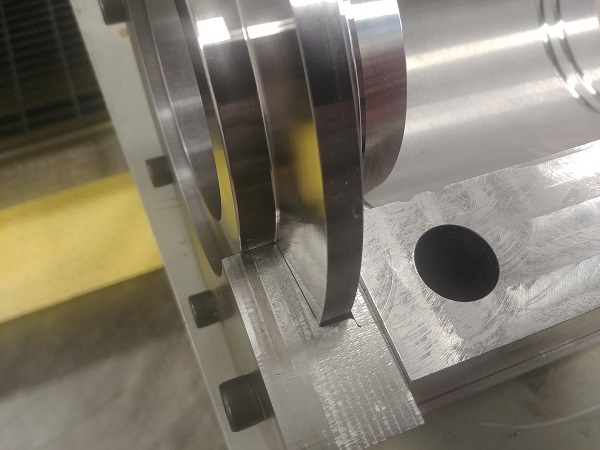
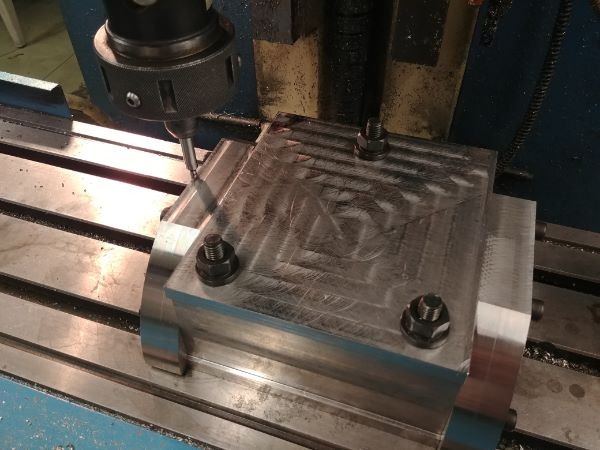
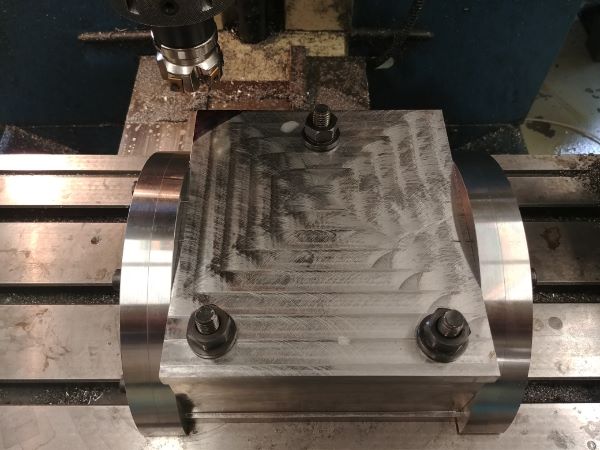
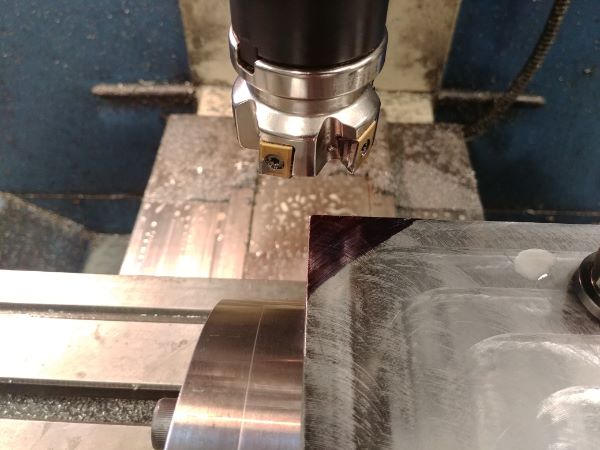
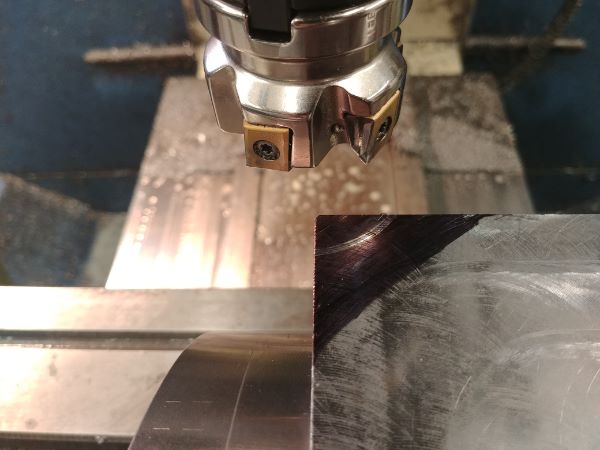
I bolted the half caps to each side of the mould. The mould was placed back in the mill and the caps milled flush with the bottom of the mould.

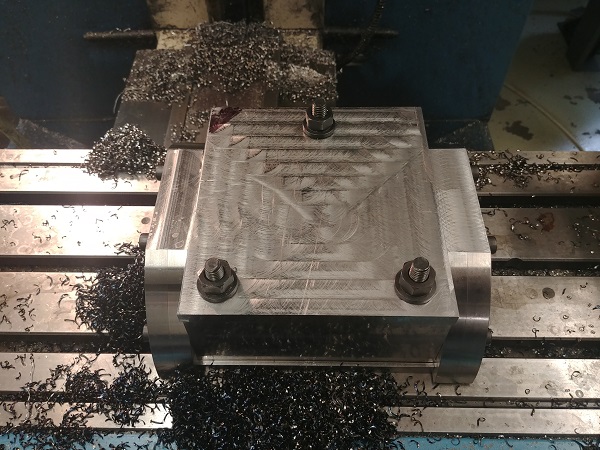
The caps are said to be the same material and temper as the main block. You can clearly see that the finish is far better on the caps than the main cavity. While the mill was busy cutting these flats I made some guide pins in the lathe. I could not make the pins early as I could not be sure how much they would shrink when pushed into the cavity.
I was on a very tight schedule, so had to work over again. I did what I had to do, I used some split collets to drive the pins into the cavity. I did not damage them but if I did have the time I would have made the appropriate tool.
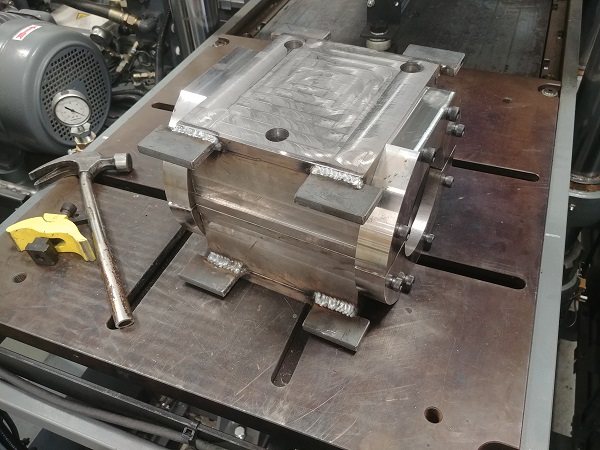
I welded some tabs to both the top and bottom of the mould. This whole thing will be bolted into the molding machine, it automatically locates and presses it together. Welding small tabs using a MIG welder actually achieves decent results. The weld however does not penetrate all that deep, they are surprisingly weak joints, ok for this application.
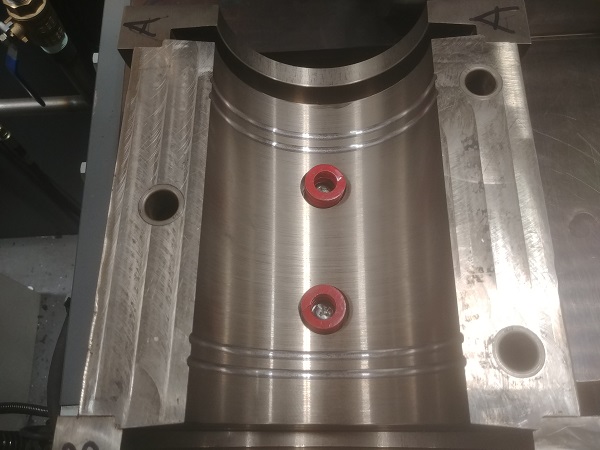
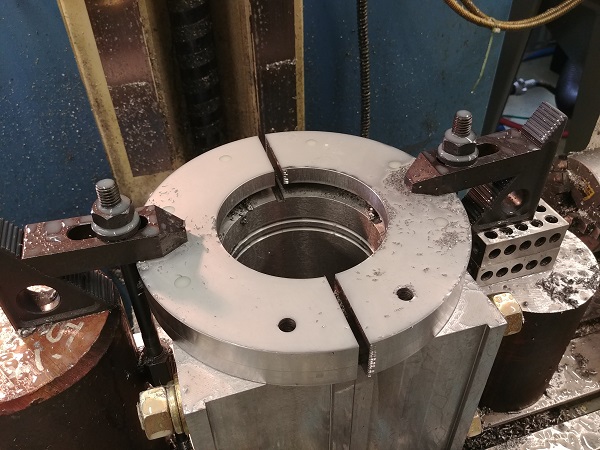
These are some inserts that made earlier, these locate a steel sleeve in the centre of the cavity. I had to modify these with a milled slot, these help the moulder to remove the insert with levers.
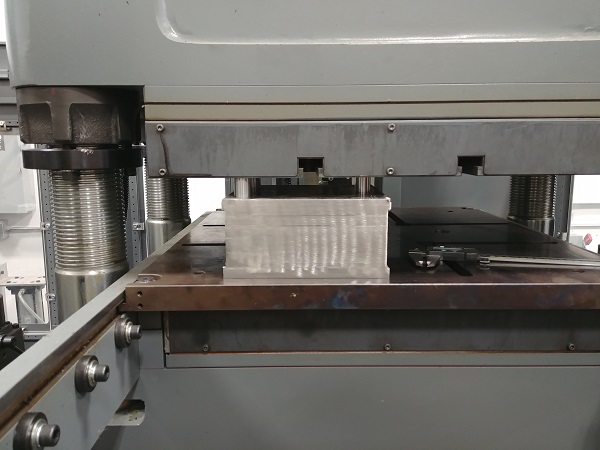
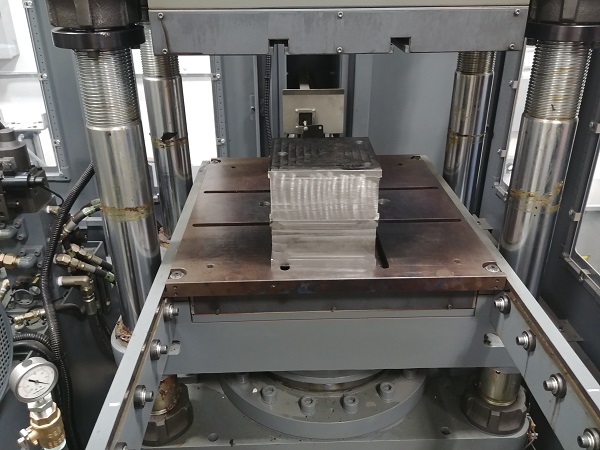
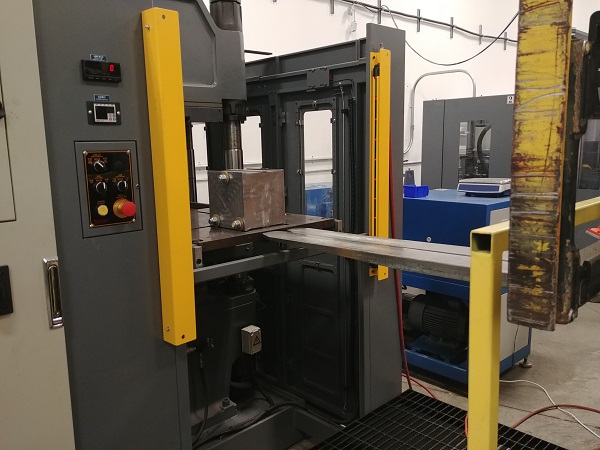
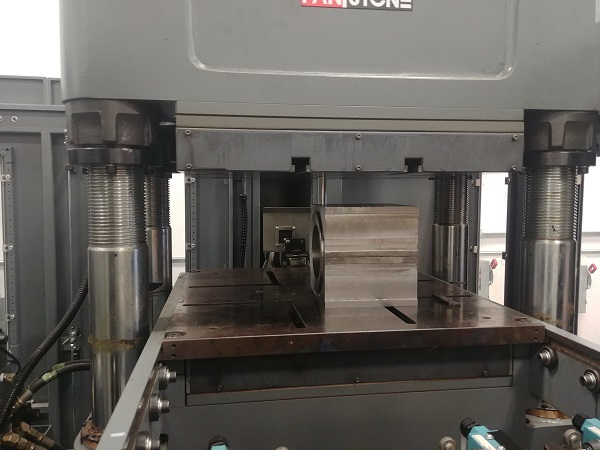
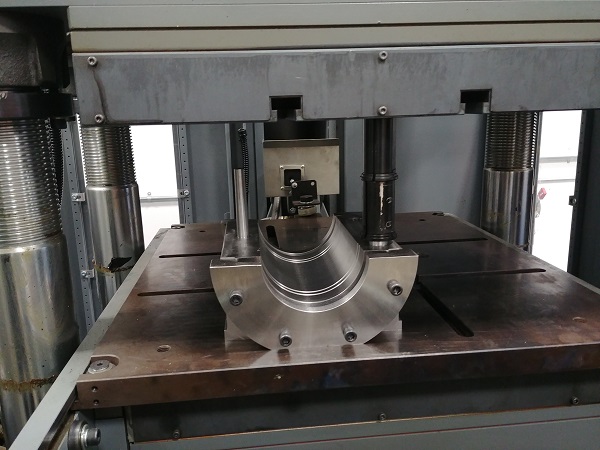
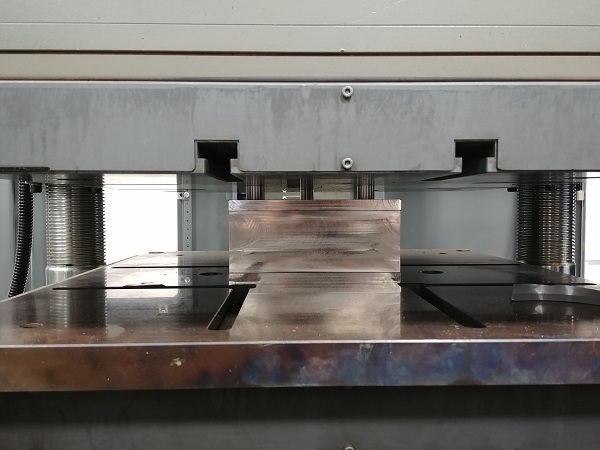
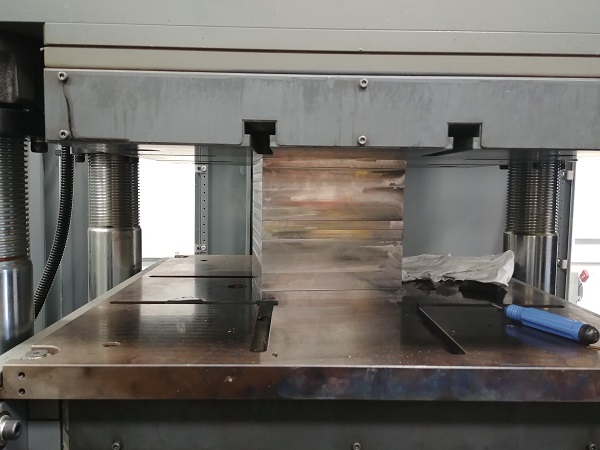
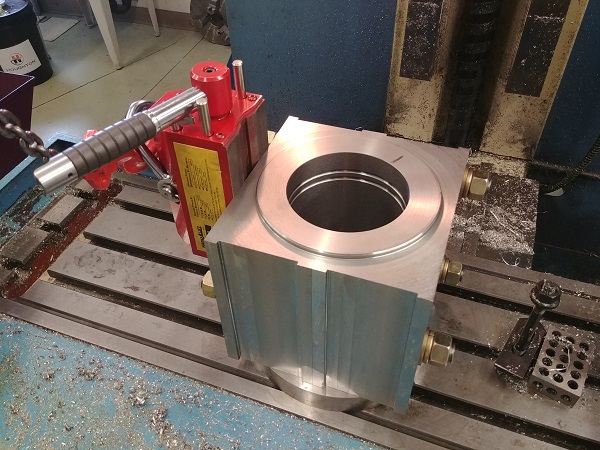
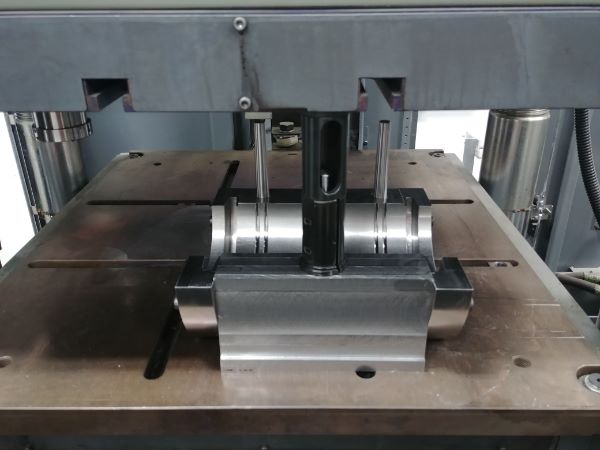
Here is the mould clamped down in the press.
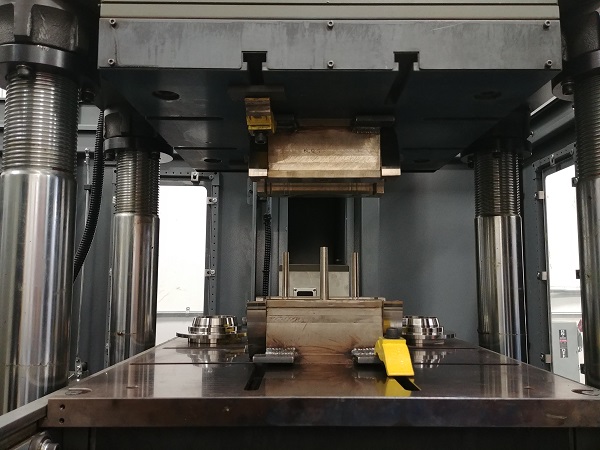
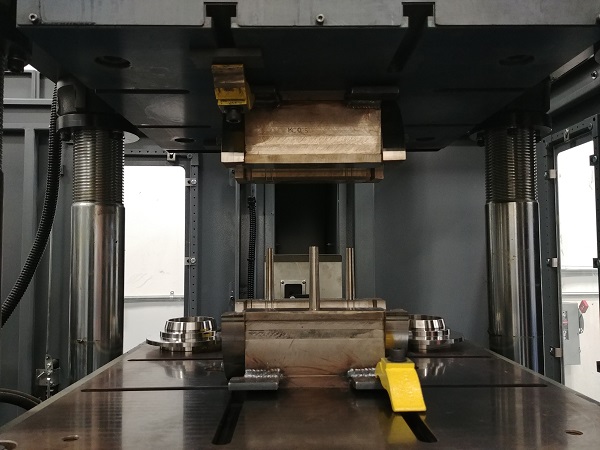
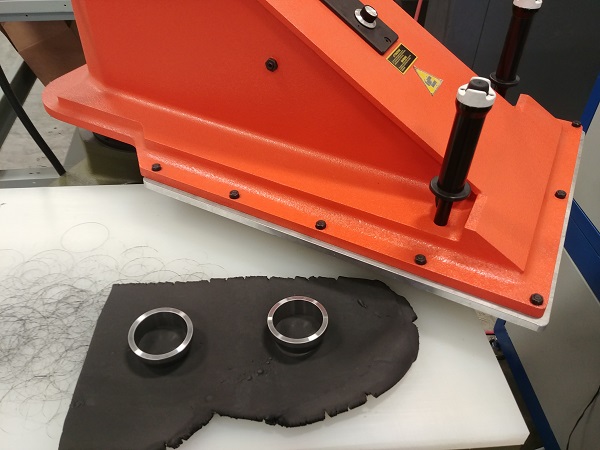
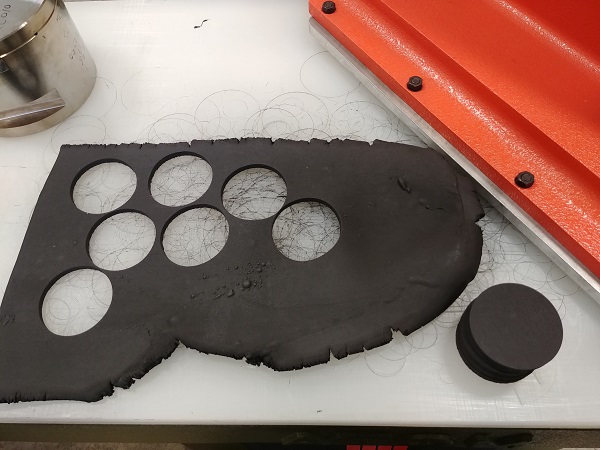
Here I'm using a machine called a "Clicker Press". This is a punching machine powered by a hydraulic motor and flywheel. The flywheel allows it to hold a much greater amount of energy than what the motor supplies. It can release this to press up to 20 tonnes instantaneously. Dies are placed on a sheet or rubber and this machine punches them out. These particular pucks are placed in an extruder, what makes the pre-form for the moulded part, unfortunately I cannot show this.
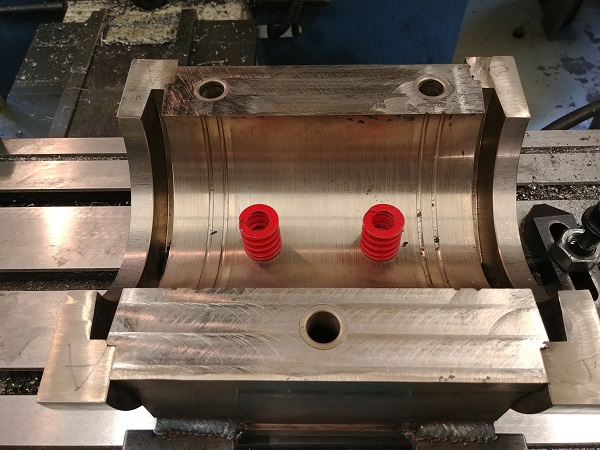
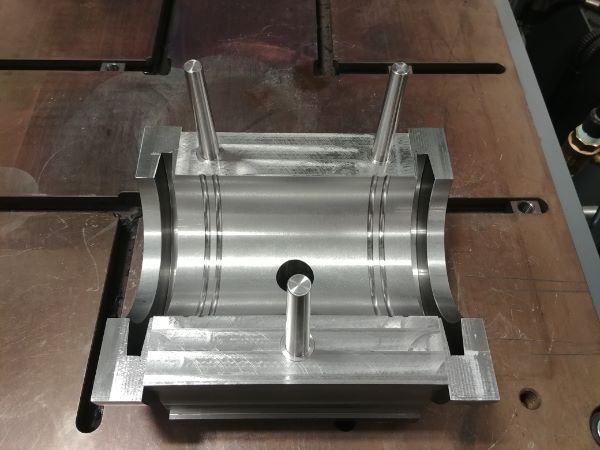
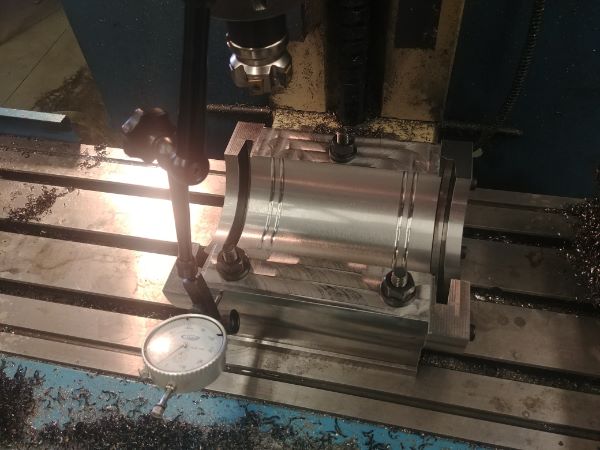
On a totally separate note the mould required some modification. Some springs that prevent the moulded part from getting stuck in the top of the mould, this prevents it from falling and damaging the bottom half of the mould. I first start by clocking the top half of the mould parallel in the mill.
An edge finder is used to find the centre point of the cavity, this was easy since the mould measured perfect.
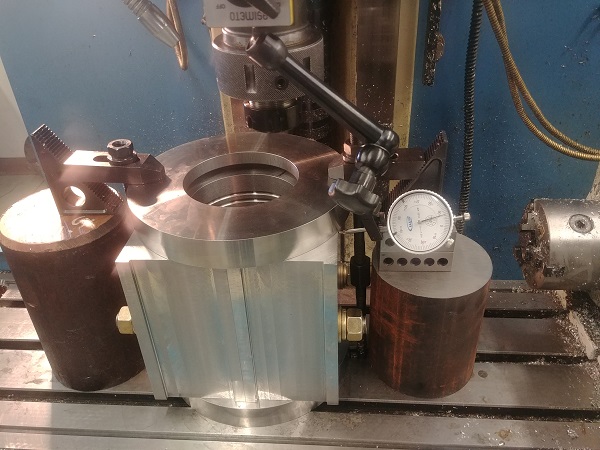
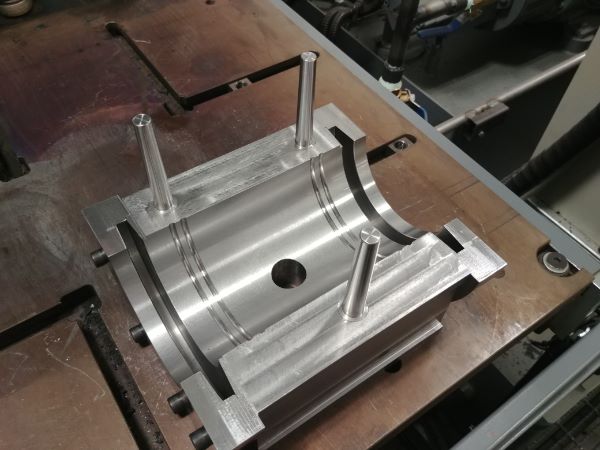
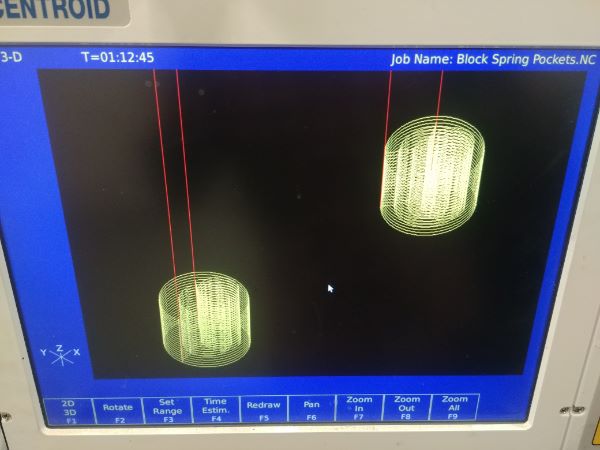
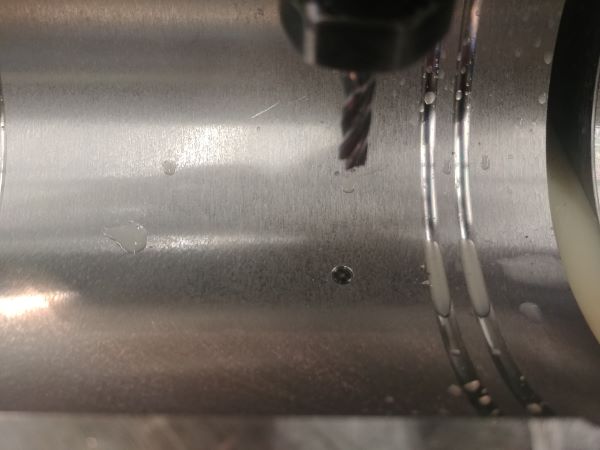
The milling cutter was moved down until it machined away the very bottom section of the cavity, the zero point set. I setup a tool path using CAM software, this is a must for milling work.

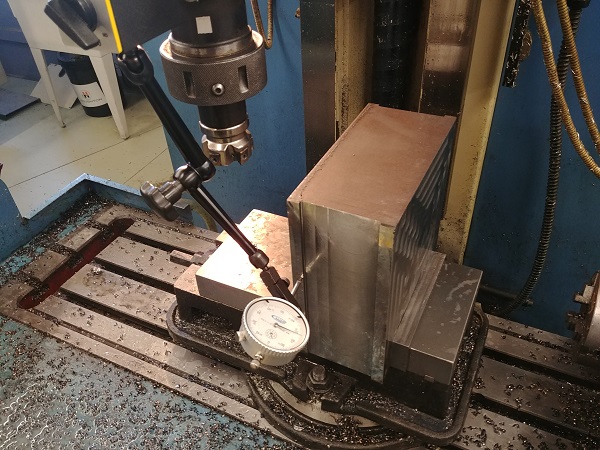
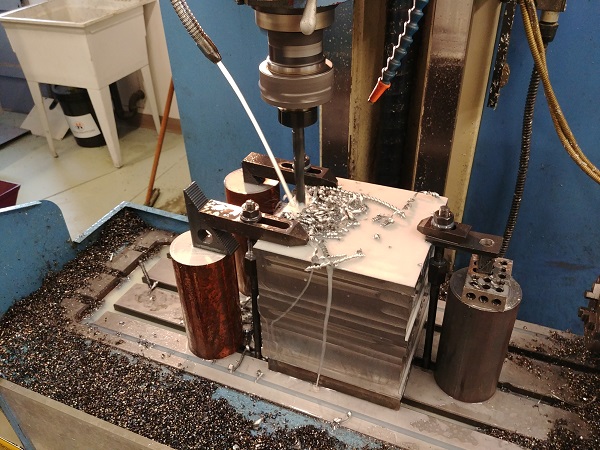
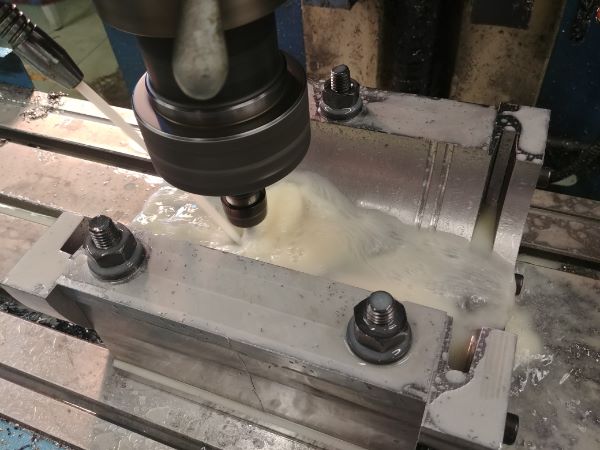
I milled out the pockets before finding out the project had been put on hold again. Since the moulds had been paid for I can work on the second one, the only thing I cannot do is finish the cavity as the customer has to verify trial parts first. I forgot to take pictures the first time around, this time I remembered. The first step was to place the pre-machined billets on top of a piece of steel plate, this will stop me drilling into the bed of the mill. These blocks were matched on top of each other and then clocked true.
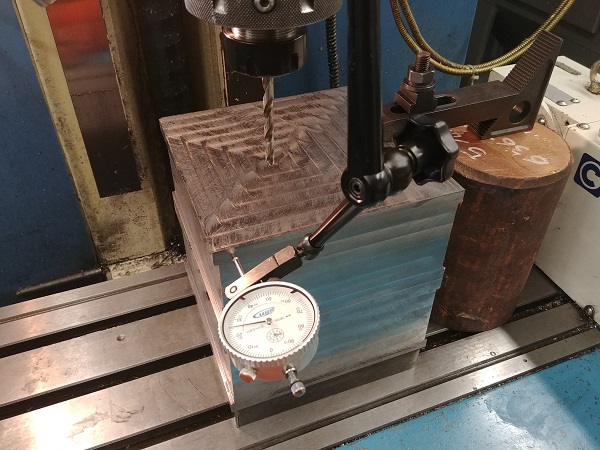
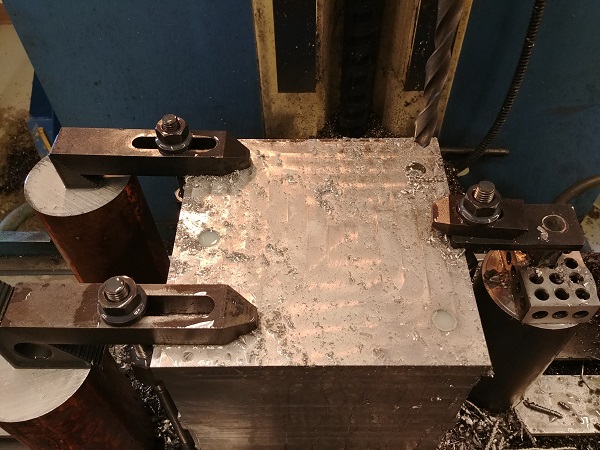
I placed the clamps on the blocks and checked they were true one last time. The edge finder was used to setup the datum point.
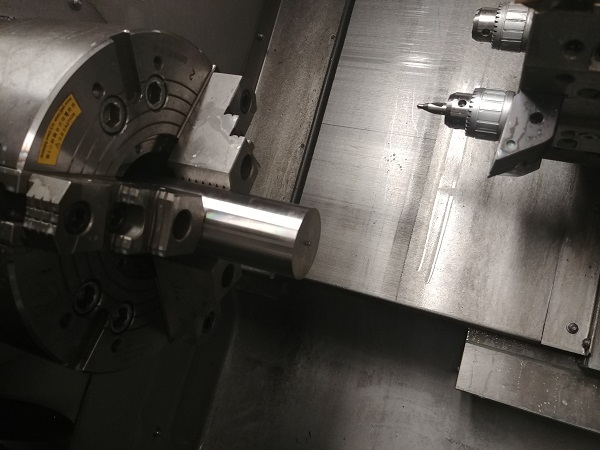
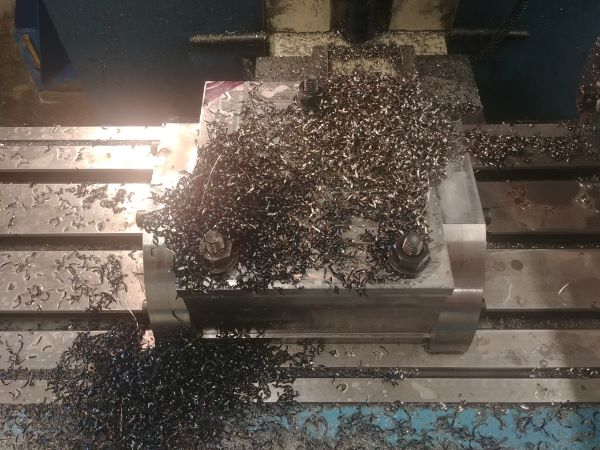
Two different size drills to pilot out the holes before reaming. The first time I did this operation I had a huge number of problems with the spindle stalling or overloading the Z-axis. Since I would never likely use these drills again it did not matter if I wore them out. So I increased the spindle speed (more torque) and reduced the feed. Sometimes this can be counter-productive as the swarf cuts smaller and can clog the drill. A drill is supposed to act like a worm-screw and pump the chips out the top.
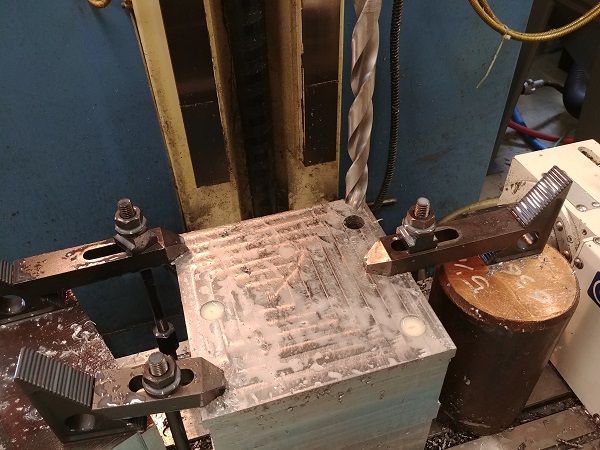
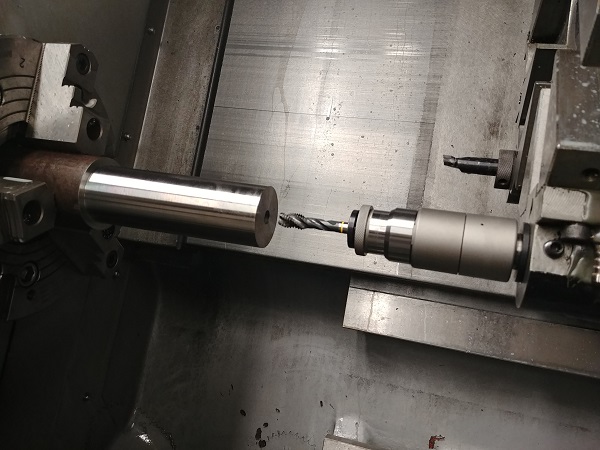
The reamer was the most challenging part last time, as the flutes kept clogging and stalling the spindle. The program I worked out was still saved, it retracted multiple times to clean swarf from the flutes. I still had a couple of issues with the spindle stalling mainly due to that the flutes were worn and the drilled holes were not completely straight. I increased the spindle speed and reduced the feed.
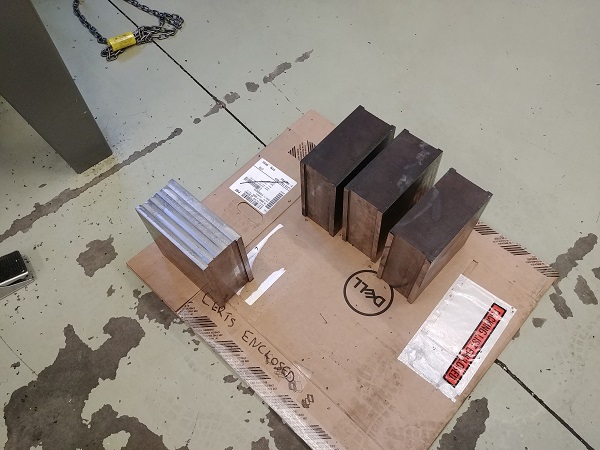
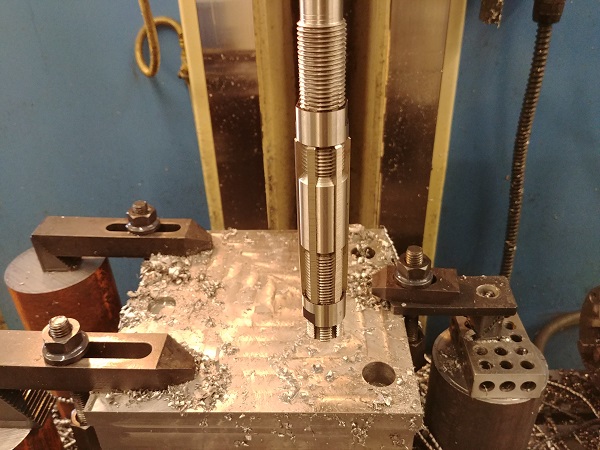
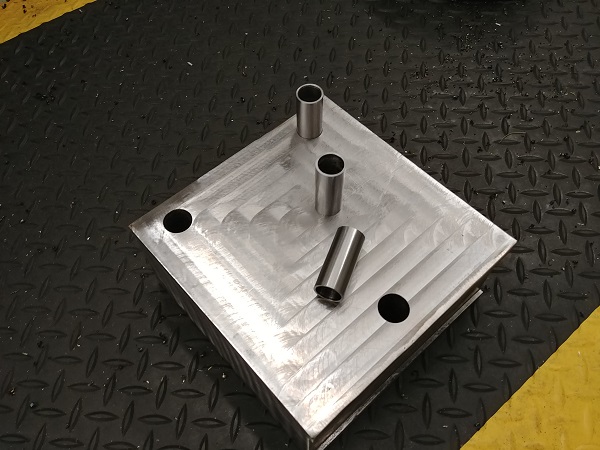
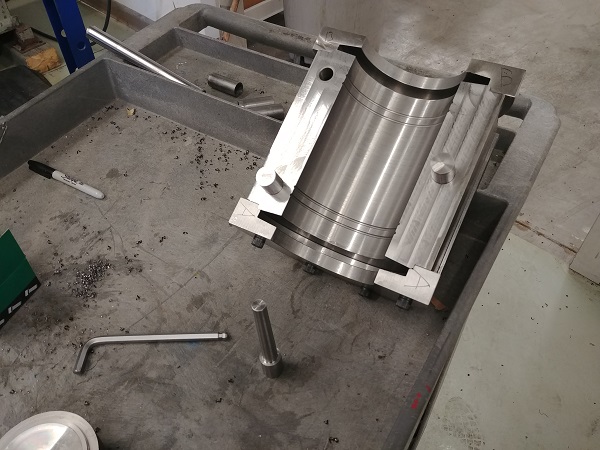
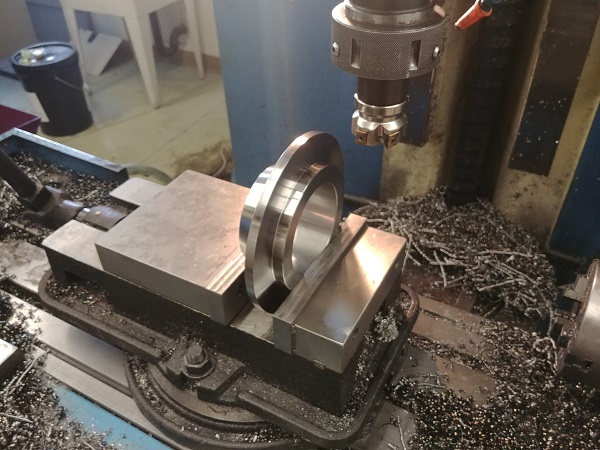
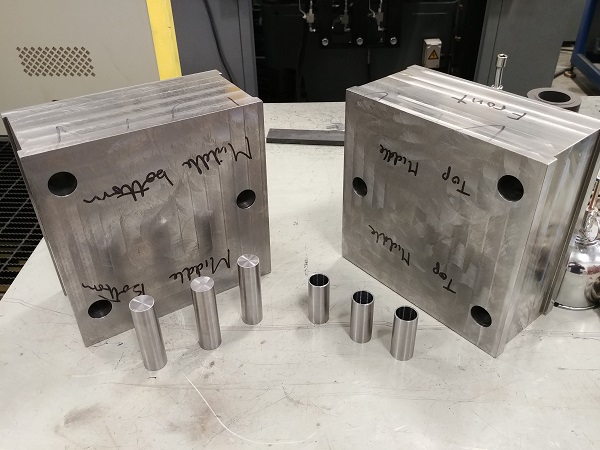
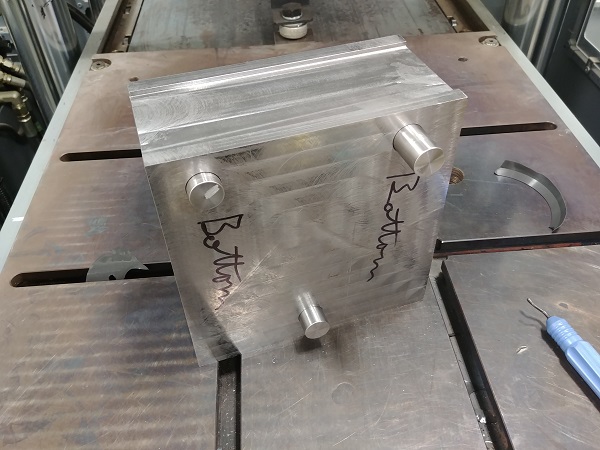
The blocks were removed from the mill and labeled with a marker pen. I made some tubular bushes on the lathe that will align them together. I also made some solid pins that will stop the bushes from pushing into the bottom half when I press the blocks together.

I press the tubes slightly further in than what they should be.
The solid pins will push these bushes back into the middle while the top part is pressed on.
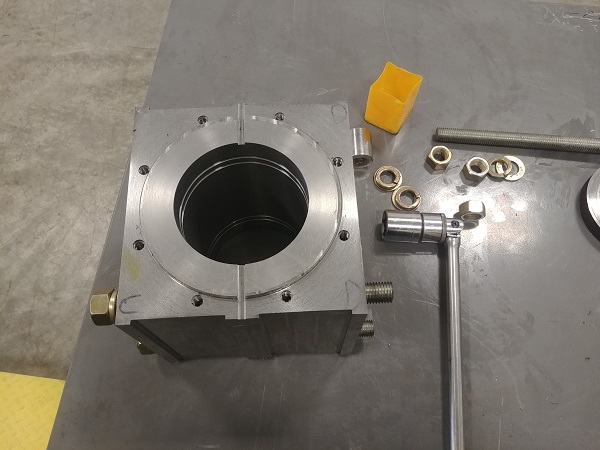
I cut some threaded rod to length and bolt the blocks together. The next step is to place it in the lathe for machining out the cavity. Since this machine uses a hydraulic chuck and I want to replace it with an independent chuck, it means I have to do some trickery. The hydraulic draw-bar pulls backwards when closing the chuck, when it reaches a certain position the machine is happy it is clamped, if it passes this position then the machine is unhappy. The position is detected by a steel disc and a hall-sensor. Simply the sensor is removed and a magnet is stuck to the face.
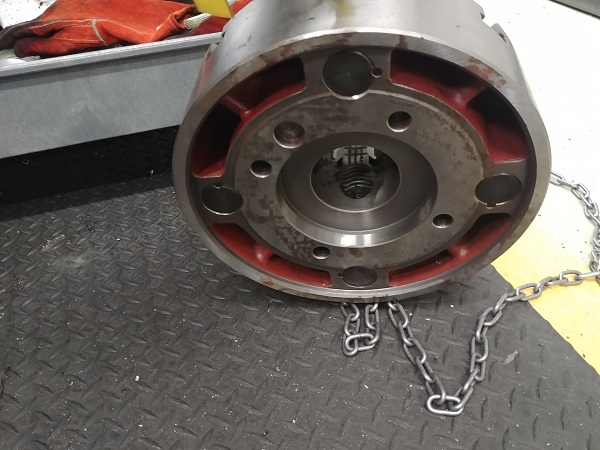
Removing the hydraulic chuck can be quite a task, so much so that I forgot to take pictures. There is a nut on the inside of the chuck that connects to the draw bar, this can be very difficult to remove. It is best to remove all the bolts from the chuck and use a hoist to support the weight. If the height of the chuck is perfect then the nut is normally easy to loosen off, not so in my case. In the end I removed the chuck and managed to unscrew the draw tube. Strangely on the 4-jaw there is no lifting eye so I had to improvise a little.

The main thing when fitting a chuck is to make sure there is no swarf and the mating parts are clean. It is also a wise choice to cover all mating parts including the fixing bolts with a light smear of oil.
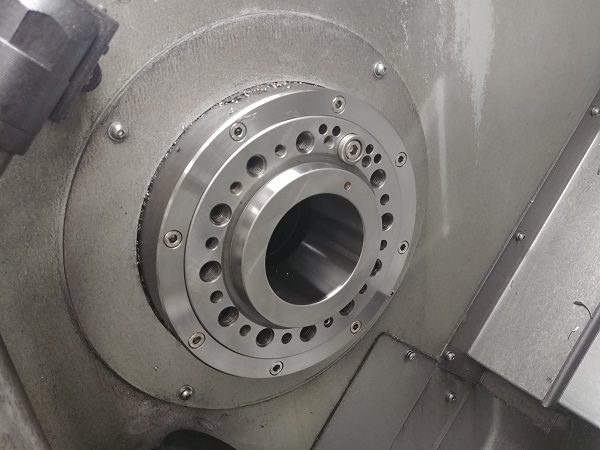
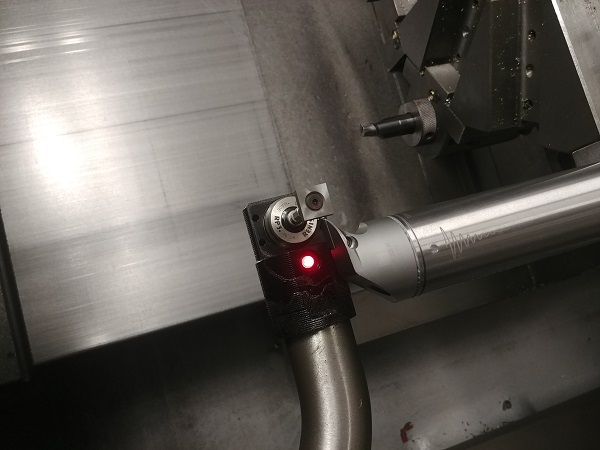
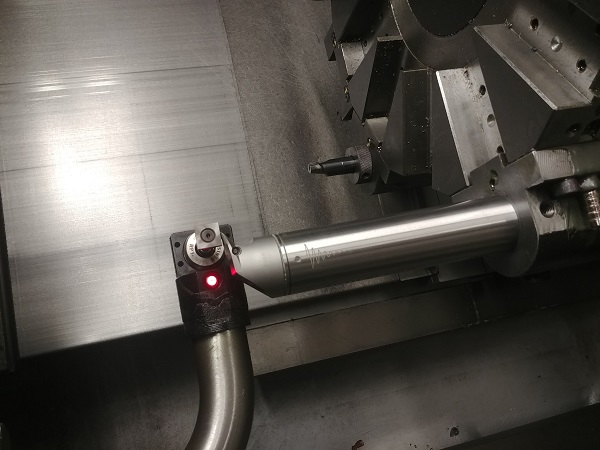
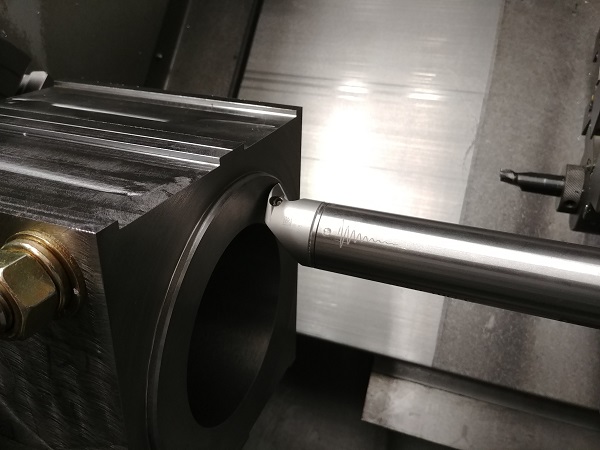
The chuck was bolted to the spindle. Before placing anything in the chuck I chose to set the boring bar to the probe. The main reason for doing this is to ensure that I get the centre height right.
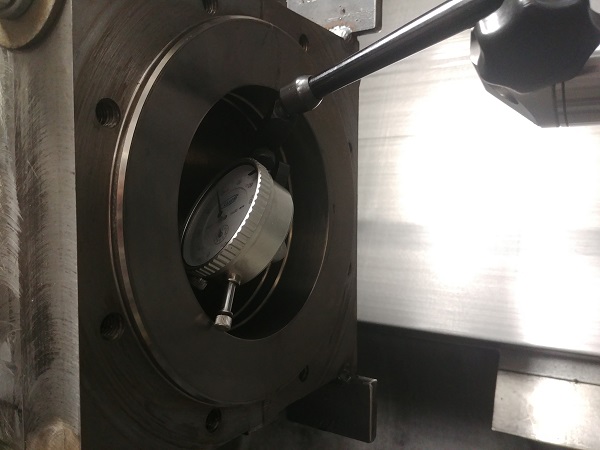
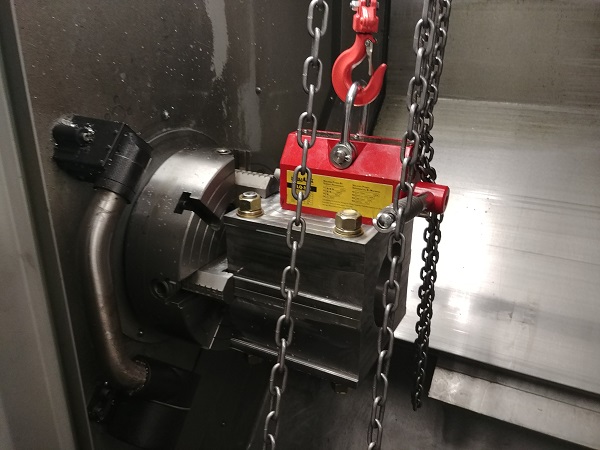
The block lifted into the lathe with the aid of a hoist, I then clocked it central.
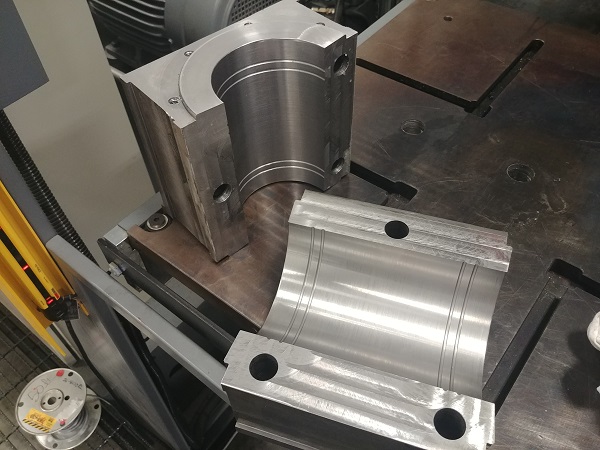
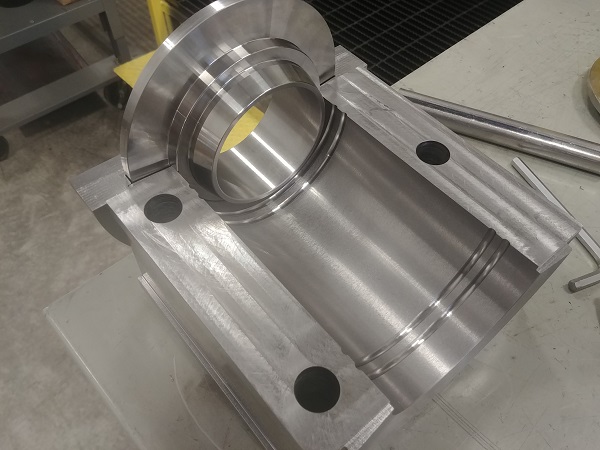
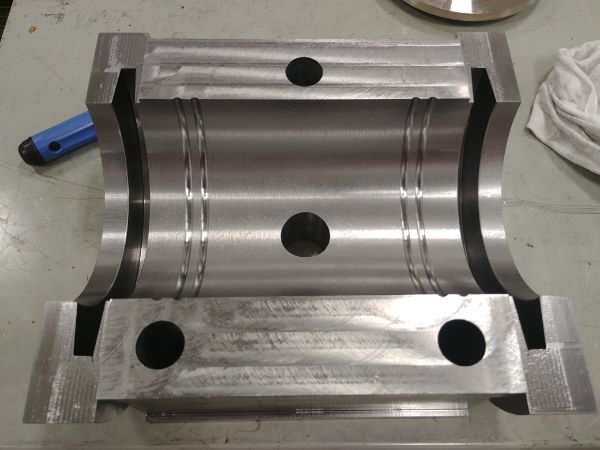
I set the work offset and then turned the new grooves. I flipped the block in the chuck and repeated the process. The reason as to not do this in one operation is that it would be doubtful that the back would be running perfectly true, it had to be perfect.

The mould was pulled apart and then assembled with the pins, bushes and the new springs.
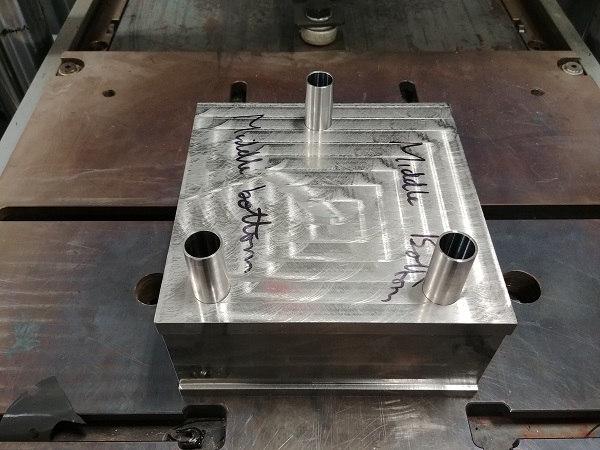
Back to the second mould again. The blocks were placed back into the mill, clocked straight and then the centre point set. I used CAM software to create a tool path.
There are a few other ways to set the block in the lathe but milling a circular pocket makes it much easier and faster.
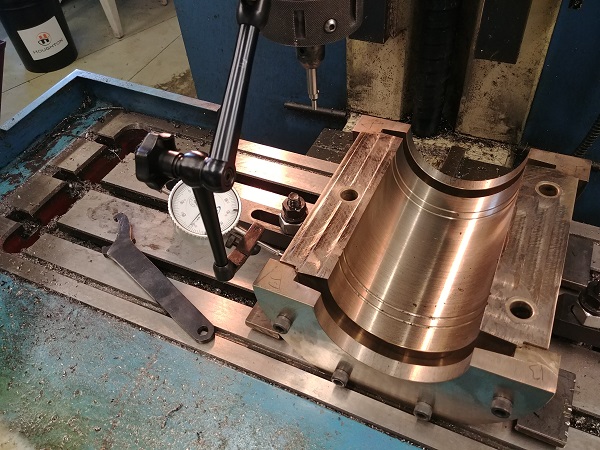
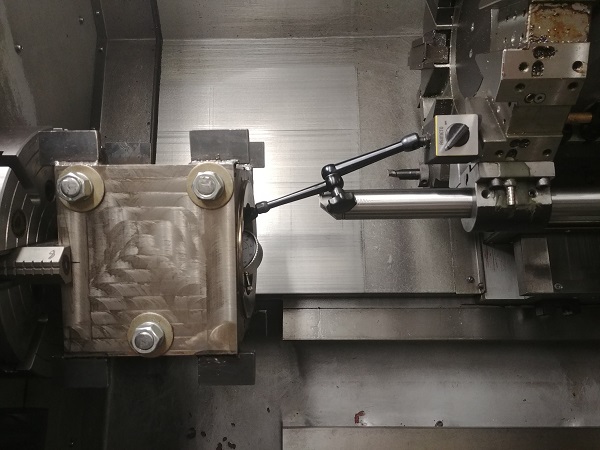
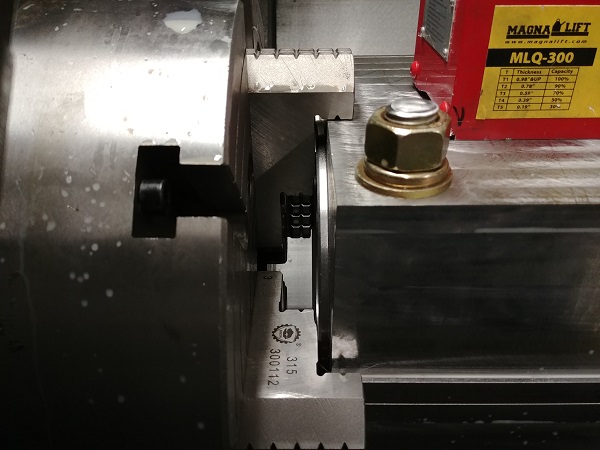
This time I used the tailstock to push the block to the back of the jaws, I then proceeded to clock it concentric.
Once I was happy with the result I got to machining the block, first facing it to the correct height.
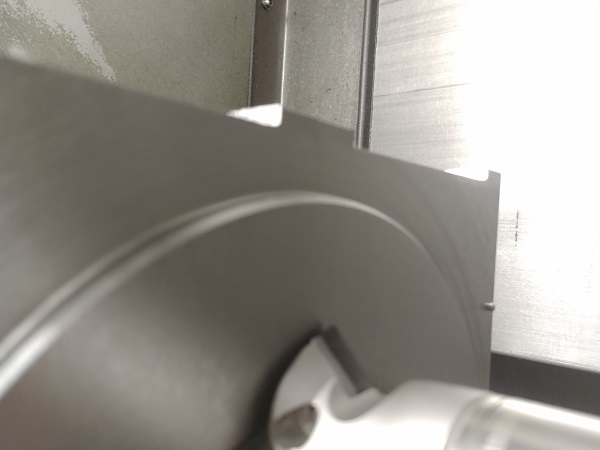
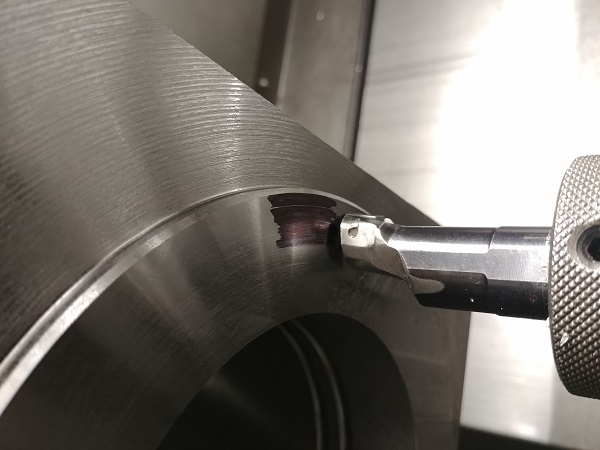
The bore was the last thing to do of the day, since there was no room for the probe I had to do it a different way. The first thing is I knew roughly where it would centre, secondly I had a good reference point. Since the mould is split I can use the line to set the centre height. It's simply a case of moving the X axis up and down while twisting the bar until the insert follows the line perfectly, this is centered. I ran the surface speed a little higher to get a better surface finish since the material was softer than expected. I did not machine the final cavity since the customer had not tested the part yet.
After many months of waiting the customer finally confirmed the product was ok, this meant I could finish the second mould. I placed the 4-jaw back in the lathe, set the boring bar against the probe, placed the mould in the lathe and then clocked it true. I touched the boring bar against the face to set the zero reference.
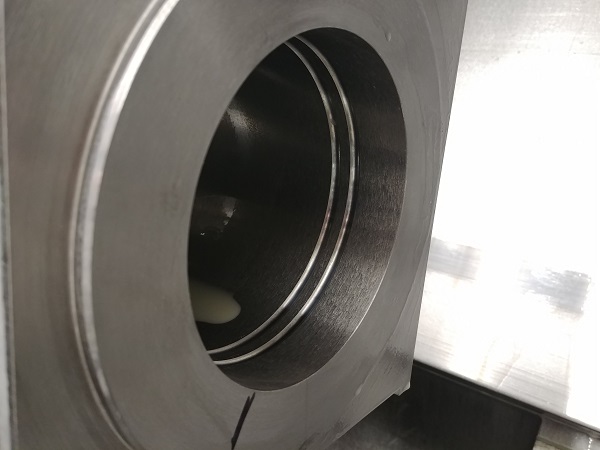
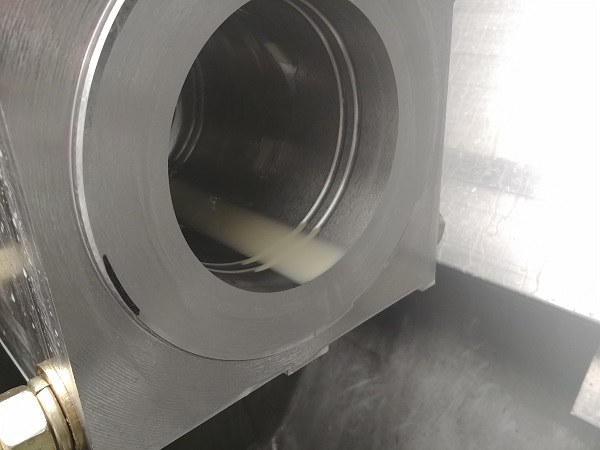
The cavity was machined, the mould removed and flipped in the jaws.
The mould was again clocked central in the chuck.
A little trick I like to use when setting the Z reference is by scratching a marker pen via the insert.
The cavity machined to spec. I did the same trick with setting the outside tool.
The outside step roughed and then finished to size.

There is a minute taper to be machined on the face, I again set the reference with marker pen.
With the mould cavity now complete I could be happy the lathe work was done.
I placed the whole lot in the mill, clocked it straight and then bolted it down. The mill had let me down on the first mould so I knew I would have to split these end caps a different way, something better than an angle grinder.
I clocked the cap to find the centre of the mould.
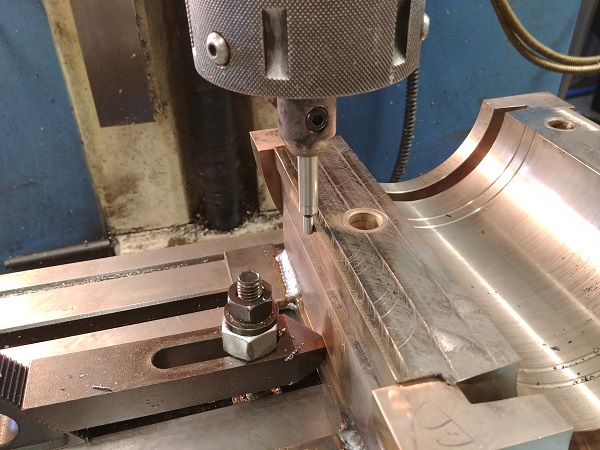
I set to drilling two different sized holes, one for the bolt and the second deeper for the thread.
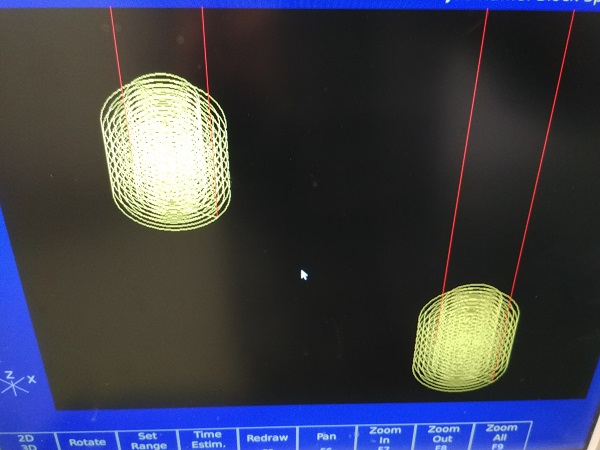
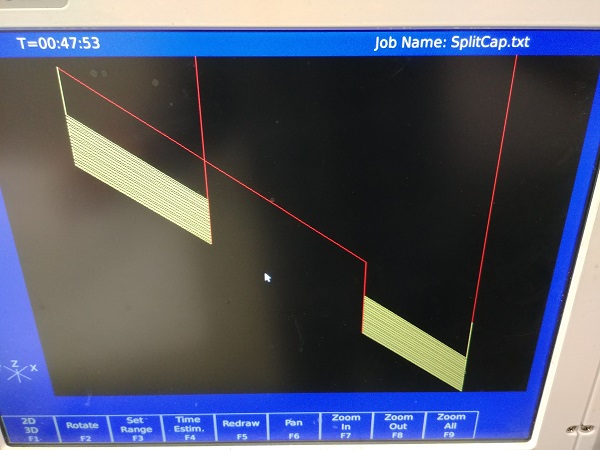
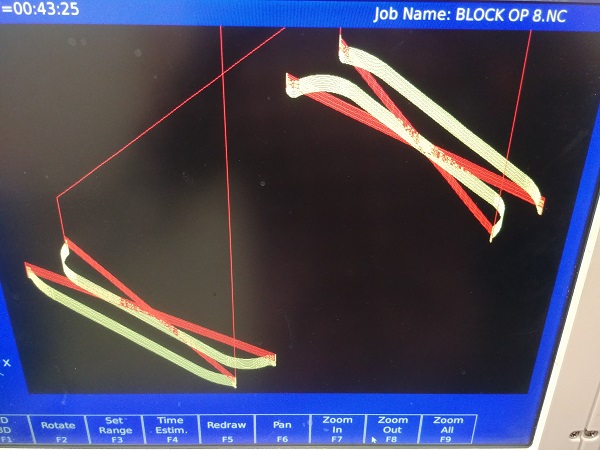
I quickly wrote a program by hand to cut the end caps in half, I ran it through a simulation to see if I had made any mistakes.
I labeled the caps to their respective positions, not really necessary due to the precision I had worked to. I flipped the whole assembly to do the other side.

The cavity of the mould was completed, it meant I could unbolt the assembly and press the dowels out.
The caps bolted to the cavity and then to the mill bed.
I set the depth of the milling cutter.
I created a milling path to cut down the caps flush with the cavity of the mould. I cut a lot of air but allowed me to run a totally different job on the lathe while this ran.
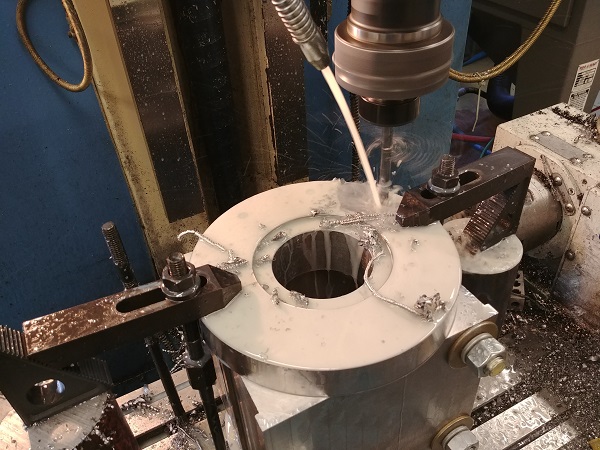
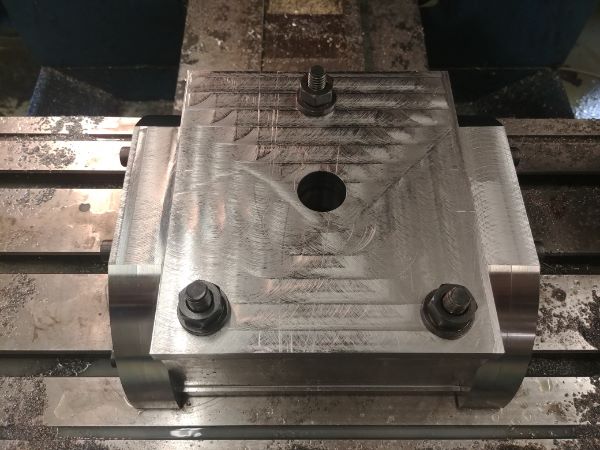
I had removed this from the mill to do another job in between. I placed it back on the mill and used the probe to set the work offset. I created a milling path to bore a hole through the centre, this is to eject the part.
While the mill was machining the other half flat I set to pressing the pins. I can't say that using tool bushes is the way to go but they are perfectly flat, it took around 10 tonnes each to press in place.
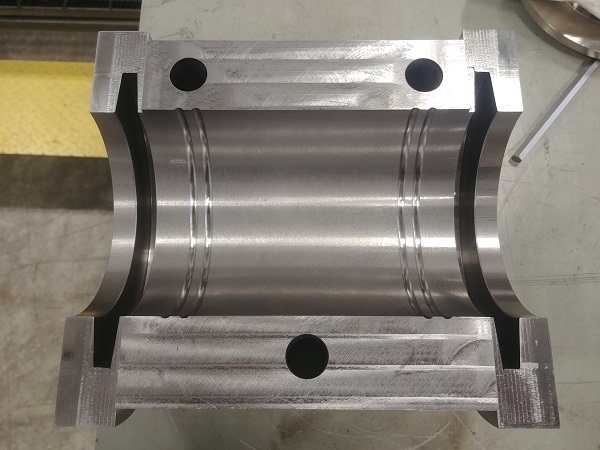
The flats were milled. I flipped the mould, clocked it straight and then milled two pockets that will house springs.
I chose to label this page as complete since after ten months the customer still did not order a part, they paid for the moulds however. The last step would be to weld on the tabs, but I have other priorities.
Hello, if you have enjoyed reading this project, have taken an interest in another or want me to progress one further then please consider donating or even sponsoring a small amount every month, for more information on why you may like to help me out then follow the sponsor link to the left. Otherwise you can donate any amount with the link below, thank you!