The Promethean Classic Mark 2.0
This is the second rifle that I have designed, hopefully a better design than the last.
Specifications
| Barrel Calibre | .22 (5.5mm) |
Barrel Length |
21.65inch (550mm) |
| Power | 11.5ft/lbs |
| Weight | 2.2kg |
| Overall Length | 800mm |
| Stock | Carbon Fibre |
| Airtube Capacity | 130cc |
| Shot Capacity | 90 shots at 200bar |
Build Log
The P22CMk2 is the second rifle that I'm to design. The P22CMk1 was a long learning curve and there were many flaws in the design which is probably the reason why designing some of the parts was such a long and difficult process. The major difference with the P22CMK2 is that the breech will follow the design of the conventional air rifle meaning that either single or multiple shot versions will be available, the scope will be a lot more rigid as it will fasten directly on top of the barrel, the calibre will be .22 using the existing barrel. All of the aluminium will be anodised black, the brass with a brushed finish and the barrel blued.
May 07/05/2012
The P22CMk2 project has now begun.
May 07/05/2012 to June 30/06/2012
The project has been very slow again but to this date it is functioning, unfortunately I have not taken many pictures of the building process.
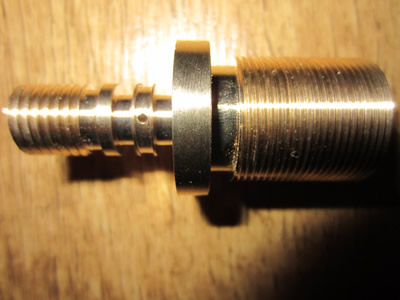
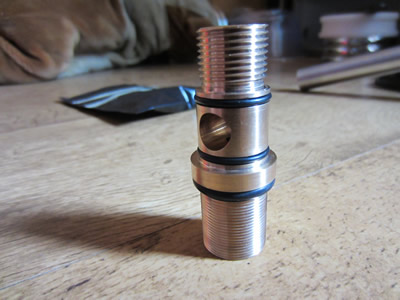
The first part that I made was the filling adapter as I already had the material on hand. Its function is pretty simple, it allows an external filling source to be connected to it and has a check valve to stop the air from escaping.
The thread has been chosen so that the littlest amount material possible is taken out of the airtube to keep it strong, this means that the thread chosen for it is M20.6 x 1.
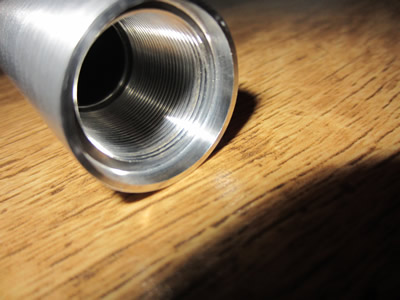
The next step was to make the airtube, this time I made a better job than the last because I chose to use full profile threading inserts. The threads are now to the metric ISO standard and have no rough patches, as seen in the first picture.
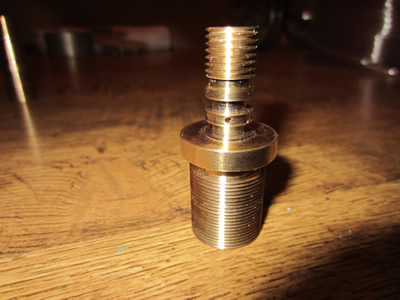
The second picture shows the filling adapter screwed into the airtube and an end cap screwed on to it. The end cap serves as two purposes; to keep dust away and to assist filling - it stops the filling connector blowing off.
The main valve was the next part to re-design and manufacture. I decided to change the design quite a lot which meant that the solenoid sticks down from the rifle instead of the back, this is the reason the rifle will be a carbine as the valve has to be hidden in the butt of the stock.
Various parts of the valve internals I made on my lathe but the seal had to be made at my work, I will eventually see If I can use a stock item for the seal or use my injection moulding machine instead. In my lunch breaks at work I can use the milling machine, so for the last week I have been machining all different parts such as the transfer port which allows air to travel from the valve to the barrel, and the breech. On the 27th I finally got all of the parts together and shot the rifle, it was quite underpowered so I manufactured another seal and also bought a chronograph.
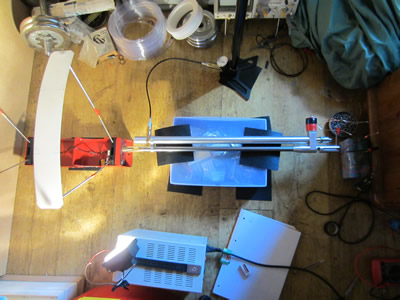
On the left is my whole setup. I have placed the rifle on rubber pads and a box to stop it from moving and keep it above the chronograph sensors. I didn't realise that chronographs need so much light for them to work, hence the spot light. The pump has been left connected to the end of the rifle so that I can do as many shots as I like, I think that when I come to map the electronic system it may be a good idea to purchase a scuba diving bottle as pumping it by hand is quite tiring. The valve is powered by a bank of capacitors and a mechanical switch, when it comes down to the final design the capacitor bank will be smaller (I used old stock parts) and the switch will be solid state (an SCR).
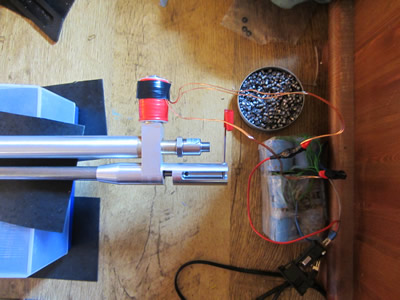
This is a close up of the valve end. Instead of the solenoid sticking out of the back of the rifle I have changed it to stick out of the bottom, this means that the pressure transducer can stay away from the solenoid, electrical interference from the solenoid may disrupt or damage the sensor. This rifle will also have a magazine for multiple shots, I have not machined one yet so it makes loading a pellet very difficult. The action of the gun will be a side lever to save on space, I have not machined this part yet. The blue pack at the far right of the picture is the capacitor bank, using modern capacitor technology I could reduce this to a quarter of its size.
The most awkward thing in testing this rifle is the use of the chronograph as it need lots of light and needs to in the centre of the sensors. Testing my other rifles resulted in many reading errors due to light and misalignment.
For now I'm only pumping the rifle up to 150bar, the design pressure is to be 200bar but I would rather remake the valve as I don't know what grade of brass it is, the minimum strength of brass works out that the valve will yield at 250bar, it is a bit close to comfort. I charged the bank up and recorded shots at 150 bar down to 50bar in increments of 5.
| Weight of pellet (grams) | Weight of pellet (grains) | |
| 0.94 | 14.50608 | |
| Pressure - bar | Velocity - fps |
Power - ft/s |
150 |
607.6 |
11.89437216 |
145 |
589.6 |
11.20007529 |
140 |
586.9 |
11.09773146 |
135 |
580.6 |
10.86075597 |
130 |
574.2 |
10.62263768 |
125 |
572.7 |
10.5672105 |
120 |
566.2 |
10.32870141 |
115 |
557 |
9.995772952 |
110 |
556.7 |
9.985008412 |
105 |
557.8 |
10.02450674 |
100 |
552.5 |
9.834913786 |
95 |
550.5 |
9.763839664 |
90 |
546.8 |
9.633032029 |
85 |
538 |
9.325466017 |
80 |
542.2 |
9.471636424 |
75 |
532.2 |
9.125480322 |
70 |
535.3 |
9.232099559 |
65 |
525.4 |
8.893774819 |
60 |
512.9 |
8.475618312 |
55 |
505.3 |
8.226300861 |
50 |
501 |
8.086888295 |
The power is very close to the legal limit, I cannot exceed this or I will be breaking the law.
The problem is that the valve is opening for too long, this is because the solenoid requires a great amount of current to open, but once open little current is required. As the voltage decreases in the capacitor bank it discharges slower, so to sort this problem the switch must turn on and off in a reasonable amount of time so that the correct amount of air is let out. The type of switch will probably be something like an IGBT (insulated gate bipolar transistor) which can handle high currents and voltages while switching fast.
It will require a lot of time and effort to get this rifle properly tuned, I may invest in a diving bottle.
To map the computer I will have to choose a pellet and a velocity that I'm happy with, usually the pellet is the heaviest manufactured, I found out that one of my rifles only shoots 8.5ft/lb on standard pellets. I will set the open/close time of the valve to be very short and then increase it until the desired pellet speed is met, this process will be repeated in increments of 5 bar. A graph will be drawn so I can calculate the opening times for each bar, this will be programmed into the computer. The rifle reads the pressure inside of the airtube and then chooses the the valve timing. The whole process will probably require about 300 pellets
September 30/09/2012
Its been about 3 months since I have done anything on this project, since then I have had a re-think on the design. The design of the valve was the main concern, it required a lot of brute force to open but did not shut quickly enough wasting lots of air. The largest problem was mapping the opening times for the valve, it was going to take a very long time and I don't think that I could have got it consistent enough. I could not guarantee that after 1000 shots that it would be firing the same power at every pressure range. So instead I decided that I would start again, this is the end of this rifle build.
Hello, if you have enjoyed reading this project, have taken an interest in another or want me to progress one further then please consider donating or even sponsoring a small amount every month, for more information on why you may like to help me out then follow the sponsor link to the left. Otherwise you can donate any amount with the link below, thank you!