Player Piano / Pianola - Restoration / Upgrade
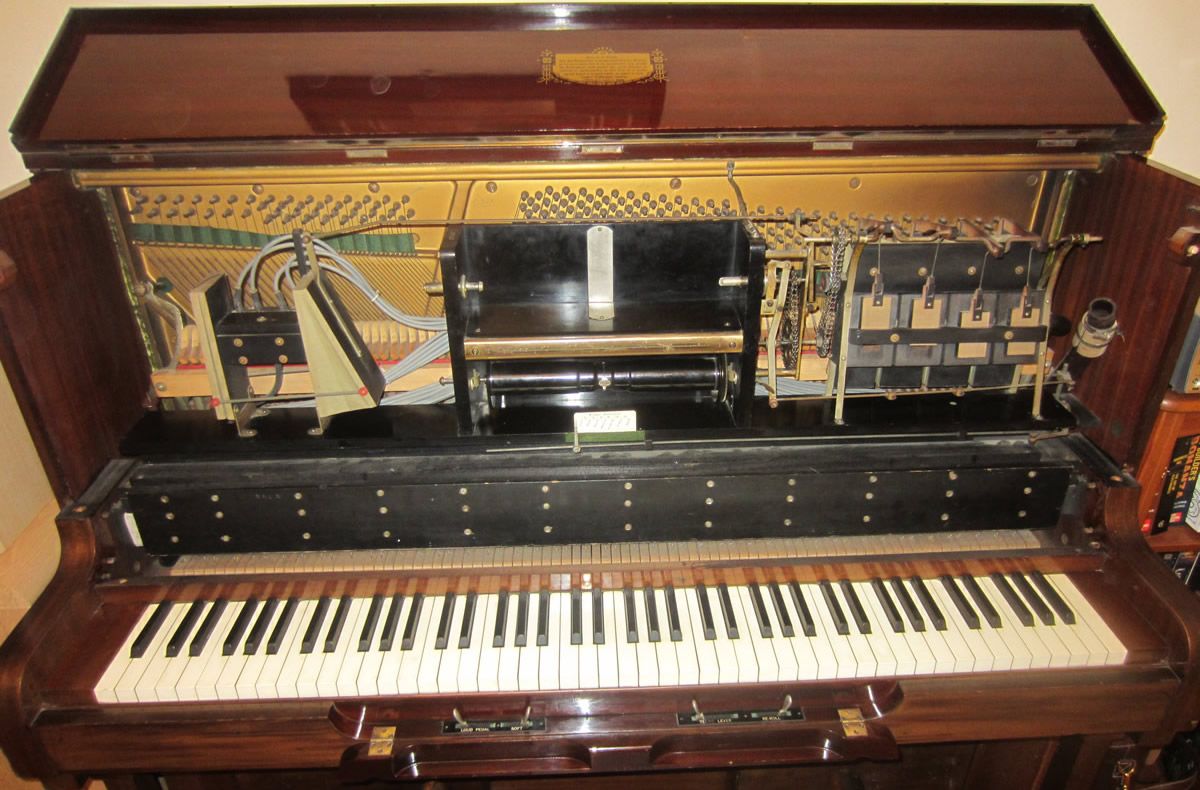
A player piano can play itself through a mechanism that reads a roll of music with perforated holes, it only requires someone to pedal a pump to keep the action going. The piano action is exactly the same as a regular piano, the player mechanism is just an augment and can be left unused while the piano is played manually. The mechanism runs on a vacuum system as it uses a large number of bellows, these were the only option at the time as player piano's were made circa 1900. If a bellow was to be pressurised it would cause it to bloat like a balloon, distort and fail to return to it's previous state. A vacuum can be quite difficult to seal and with a total of 88 bellows (one for each key) that can lead to a huge loss of air if there is even a minor leak, this can also depend of the tempo and the number of notes being hit. The obvious signs are that it requires frantic pedaling and the tempo is inconsistent due to a huge loss of vacuum when a "leaky" note is struck, the vacuum motor that runs the scroll system uses the same air as what is used for the key bellows.
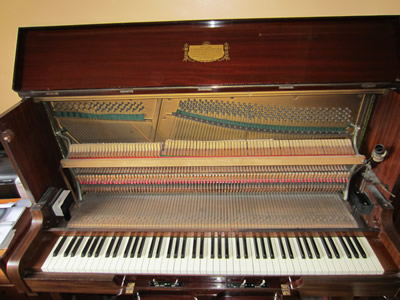
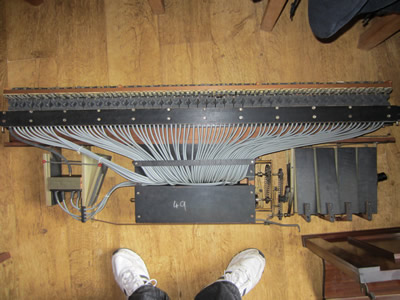
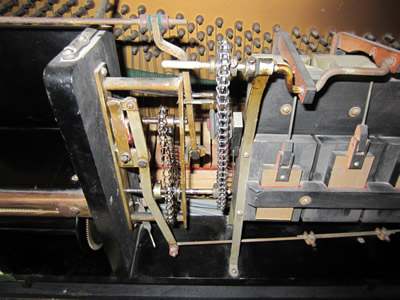
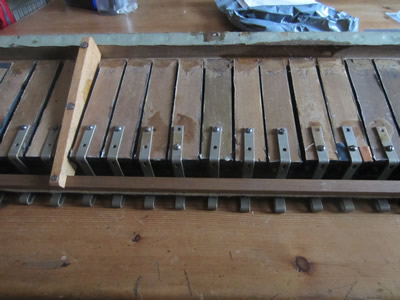
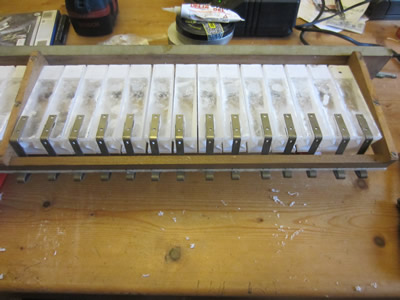
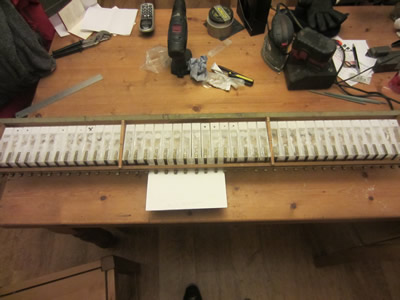
The first picture shows the standard piano action, the difference between this and a regular piano is the added depth of the chest. The pianola mechanism in the centre picture, a pickup, rubber tube, valve and bellow for every key. The bellows to the left of the picture adjusts the piano roll keeping it central in the pickups and to the right are the bellows for the vacuum motor. The right picture shows the vacuum motor and it's mechanism which feeds the music roll and also rewinds it too.
31 - 01 - 2016 - January
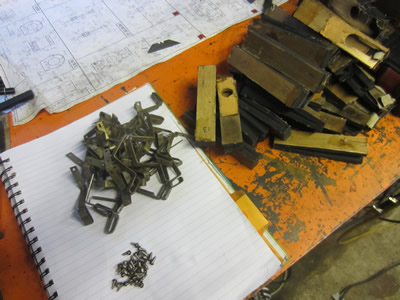
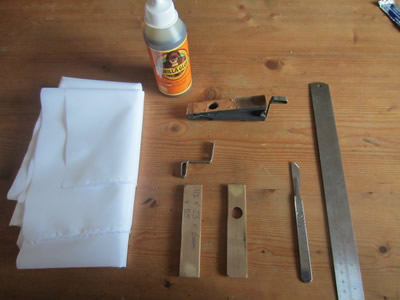
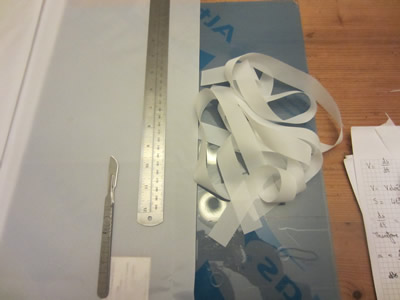
The market for unnamed piano's is very poor and quite a lot are just given away, this player piano only cost me £100 and is made by Steinhardt, whoever they are. At the time of buying it, around 5 years ago, it was just a novelty of the piano playing itself and I just chose to play it manually instead. When I bought it the piano had recently had a restoration of the player mechanism and had been re-felted, I checked to find it had apart from about 35 of the bellows hadn't been restored, it still must have cost over £1000 to get it this far. I just never had the time to restore the remaining bellows up until now and I can certainly understand why they didn't finish them off.
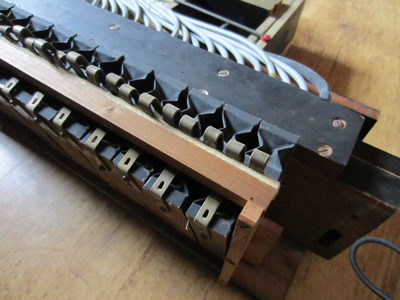
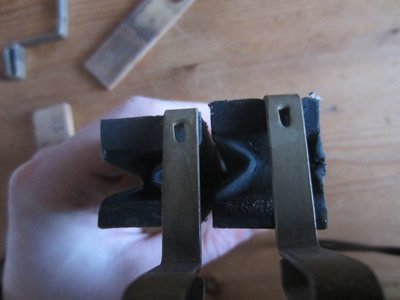
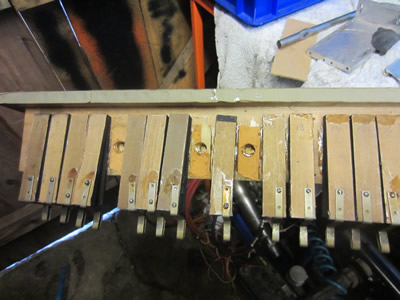
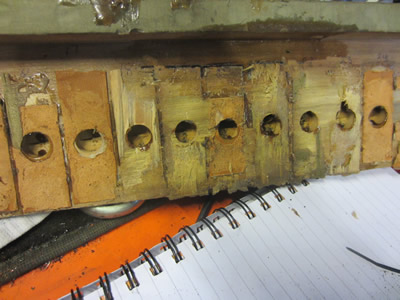
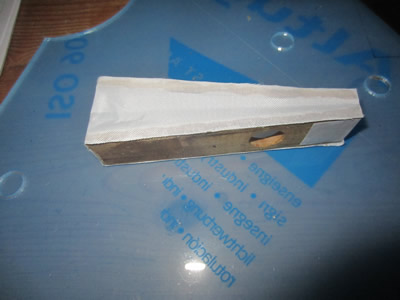
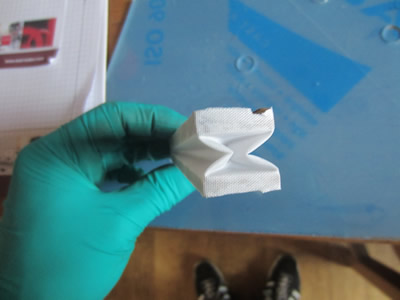
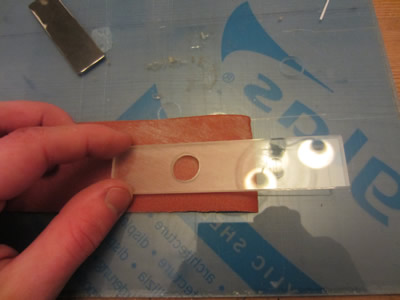
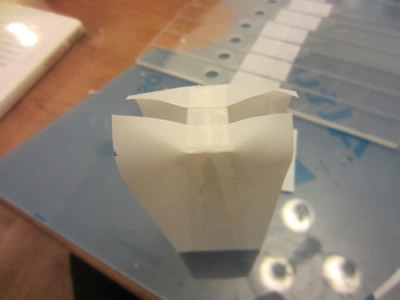
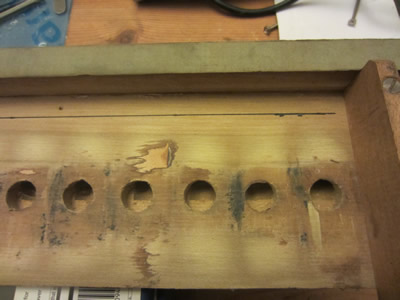
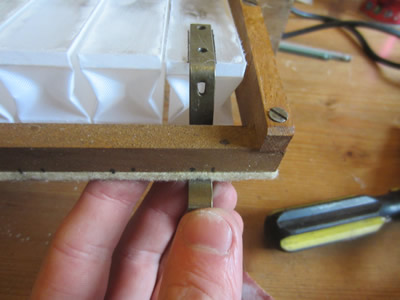
The first thing to do was remove the row of bellows, as can be seen in the first picture there are two rows, it was the bottom row that had not been completely restored. The middle picture shows this row of bellows, it's clear that no jigs were used as the spacing an alignment was quite poor to say the least. It can be seen in the last picture that a good bellow (on left) and a bad bellow (on right) has some differences, the rubber appears to look thicker on the bad bellow. The material used is a cloth coated in rubber, rubber as we know will harden over time, it hardens so much that the bellow can not operate at these vacuum pressures any more, the rubber also cracks and causes leaks in the system.
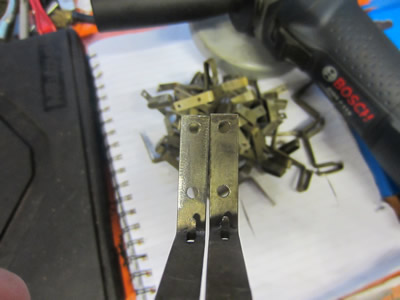
The second job was to remove all of these bellows from the board, the original glue used would have been some type of hot glue and is renound for being stronger than the wood itself. I managed to remove them all but broke most of the wood in the process and managed to strip some wood in a few places from the board. All of the metal fingers were removed and put aside for reuse.
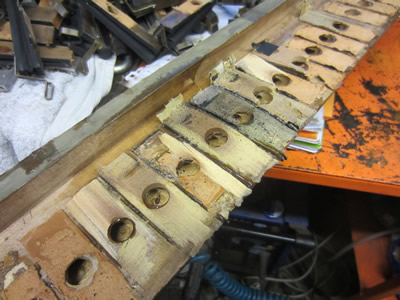
I took the chisel to the board to remove any excess wood left behind from the bellows, the next step was to sand it flat.
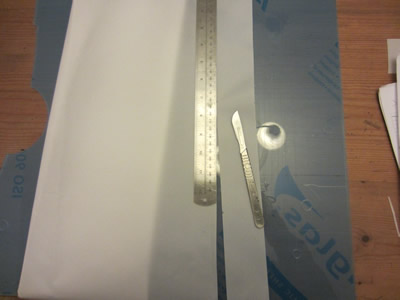
Once the board was ready it was time to remake the bellows, the original fabric was far too expensive so I opted to go for polyurethane coated fabric (4oz), it only cost me £4 for a piece 1m x 1.5m. I also thought about using acrylic sheet instead of pieces of wood as this would also be a cheaper option. I first made sure the material was not porous and would bond to acrylic properly, it did, so I made a bellow from some of the wood to ensure I could make them properly. The bellow turned out perfect so I went ahead and ordered some plastic, costing only £29 for 90 pieces. I bought some Gorilla glue which turned out to be no good, it can however be used to bond the bellows to the board, I instead chose to use a gel based cyanoacrylate glue which worked perfect.
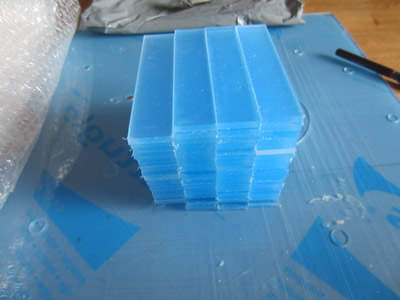
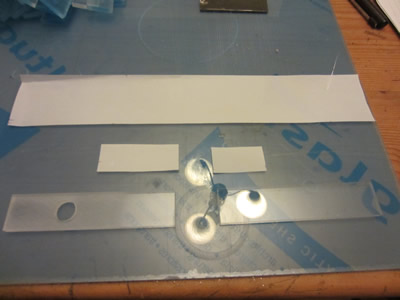
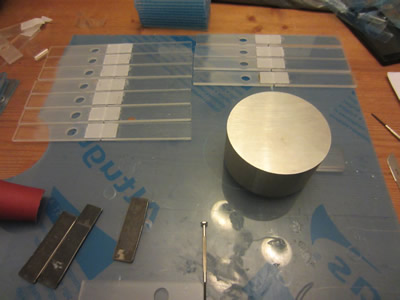
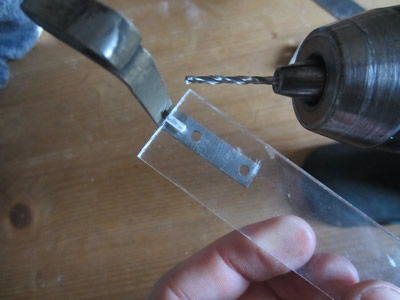
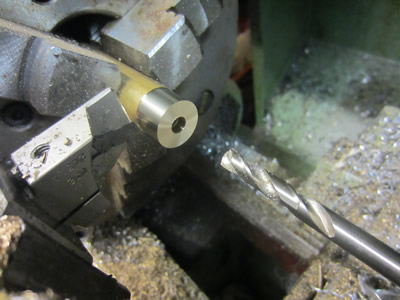
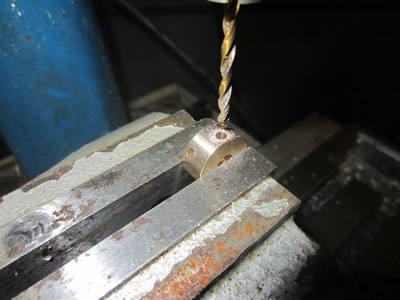
I tried to replicate the dimensions as best as possible but the originals were pretty inconsistent, I firstly drilled out the holes in 45 pieces of plastic, using a 14mm slot drill.
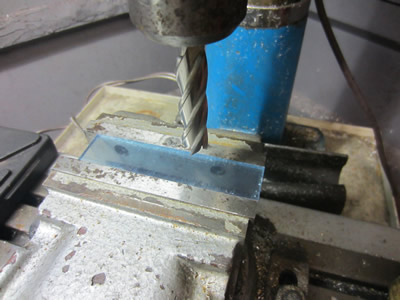
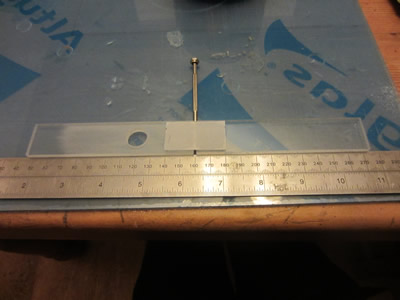
I cut some steel spacers from 2mm sheet, it will be clear later what these are for. A portion of each of the drilled plastic sections were sanded to aid in bonding them to the board.

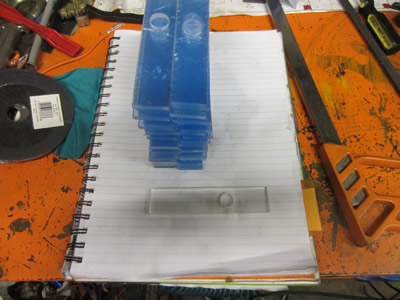
The fabric was cut up into 90 pieces of 20 x 40, 20 x 60 and 50 x 300mm. The whole of this process took about 3 hours. In the last picture shows the parts, two pieces of fabric to work as hinges and one piece of fabric to work as the bellow.
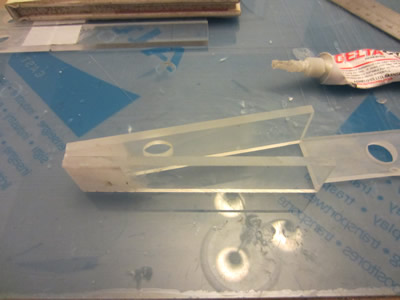
The inside hinge was first glued in place using a 2mm shaft as a spacer, then placing weight on it to ensure the glue would bond flat. After 15 minutes I would remove the weight and glue another hinge. After a couple of hours I would then place the 2mm sheet spacers between the plastic and fold the hinge to then glue on the outer one. The supplier forgot to send me 90 pieces of plastic, instead 80. I was only able to do the 35 which still took a incredibly long time.
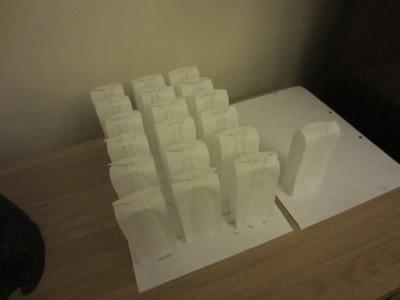
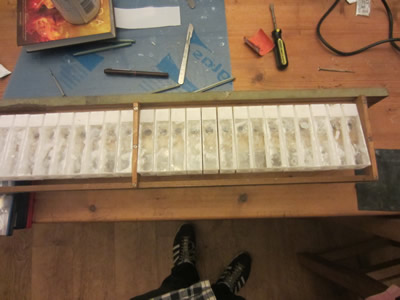
Once I had left all of the hinges to cure over night the next day I set to gluing the bellows, I could only do one surface to begin with due to limitations of holding the fabric. Every half hour I would glue another one, after two hours I was able to finish off bonding the rest of the bellow, then after half an hour I could remove the weight off this below and leave it to fully cure. So basically I got a little rhythm going and managed to complete a bellow every half hour. One down, 42 left to do.
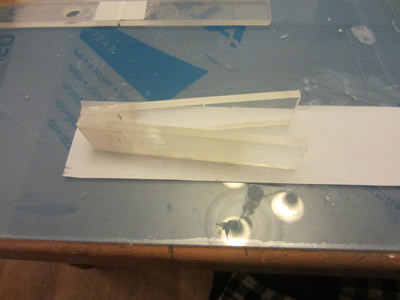
Once these bellows had been left to cure over night the next day I could trim them down with a scalpel, this did take a number of hours too. The last picture shows a total of 33 complete and about 3 days in these alone, I have another 10 to complete which will take another two days. Cyanoacrylate glue gives off a vapour that covers everything in a white powder, a further sanding where they will be bonded to the board was given.

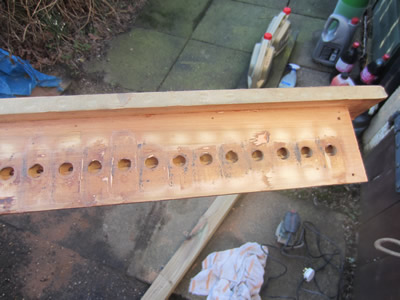
I was still waiting for the rest of my plastic to arrive so instead I set too gluing the bellows to the board. I worked out the spacing which turned out to be about 26.5mm, which was close when my pieces of plastic measured 25mm (even though they should have been 24mm and I specified a +0 tolerance). The holes on the board were not perfectly spaced either so I did just have to go by eye with the spacing and get my judgment right. I chose to use a gel based super glue yet again as it had very fast bonding times against wood.
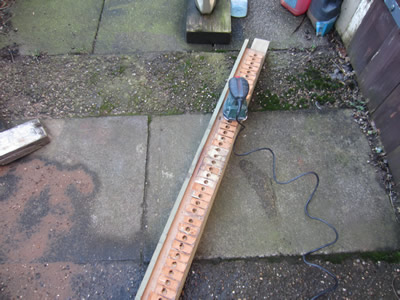
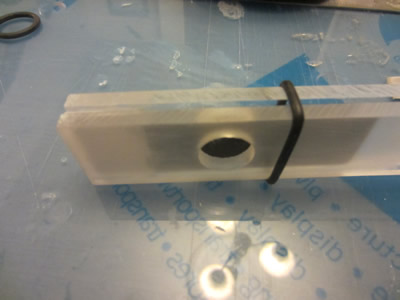
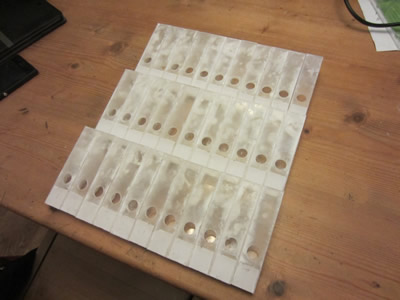
While I was gluing the bellows to the board I was also finishing off the remaining bellows, so the next day I was able to trim them down and glue them to the board, I did it early in the morning as I figured that later on in the day they would have set. While these were setting I chose to fit the metal fingers to the bellows, they had a pin which bedded into the original wood so I had to drill out the plastic. The original were screwed and bonded to the wood, I chose to just bond them, firstly testing a trial piece to ensure the glue was adequate. I also chose to grind the fingers and sand the plastic to ensure that they would key together perfectly.
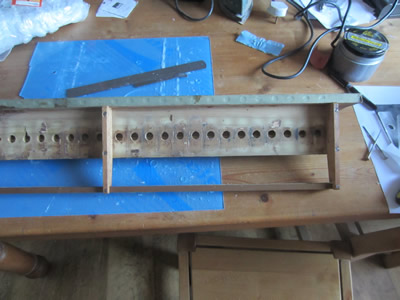
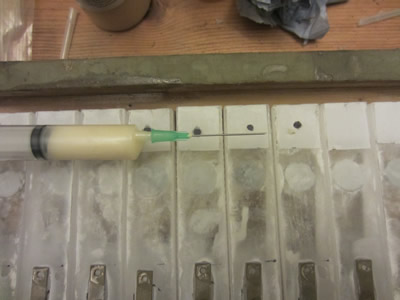
They took me a couple of hours to complete but I got there in the end and was very happy with the end result. I tested each of them for leaks by tapping on the bellow and covering the inlet hole, there was about 8 bellows that were leaking where they were bonded to the board. I mixed up some resin and injected it around the perimeter of the bellows that leaked, problem solved.
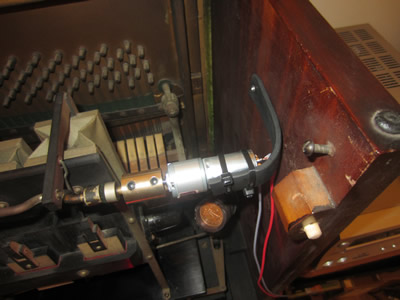
I first tuned a couple of strings and put the pianola back together, the first time it's all been complete in over five years. I placed a roll and began to pedal, the notes sounded crisp but the tempo was a little uneven. I had intended to upgrade this part by installing a little electric motor to keep the tempo smooth and consistent, so this is next on the list.
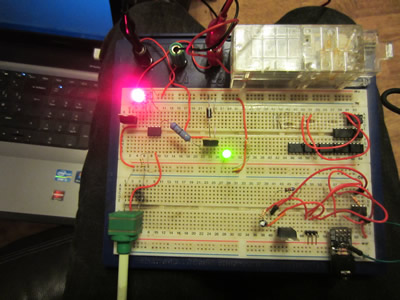
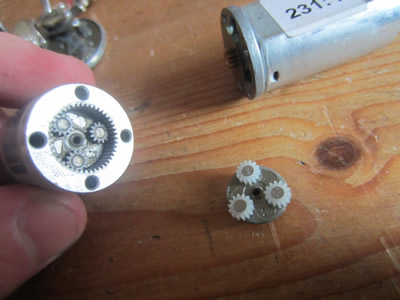
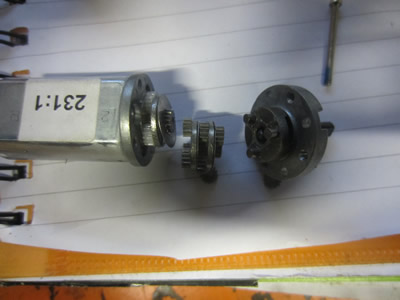
I found a couple of DC motors and created a PWM circuit to run both of the motors, luckily both were 12V. One seemed to be too slow and the other a little too fast but further experimentation was required. I made a little shaft coupling to connect the motor to the vacuum motor, I only want to augment the piano as these things can be removed if required. I then removed the hose connected to the vacuum motor and capped it off, I intend to fix an electric vacuum motor to this pipe so I don't have to pedal. The more volume I have in the vacuum system, the less difference there will be between each note as a fast passage could result in weaker hit notes and a diminishing volume. The motor was a perfect fit and didn't require anything to hold it in place, it was load however and very noticeable when I recorded a song.
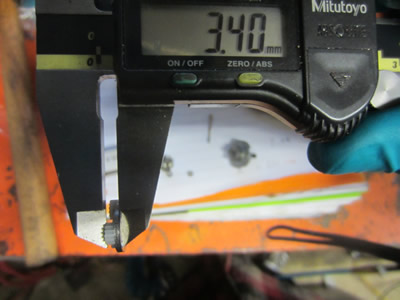
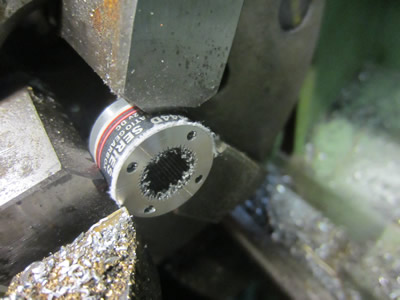
The slower motor was a planetary type which are quiet, but it was far too slow. I took it's gear box apart to see how many stages there were and what the ratio's were, turned out to be about 3.9:1. This means that the output of 33 rpm could be raised to 129 rpm which I guessed would be somewhat right. I first measured the height of one gearing stack so I would know how much metal to take off the body.
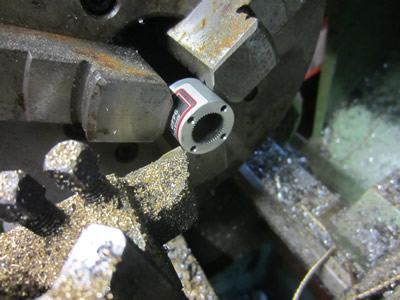
I shaved 3.5mm off it, gave it a good clean and assembled the motor. I had to make another insert for the coupling which meant that the whole thing didn't end up perfectly true. When I fixed it in to the pianola I used a piece of rubber as a support, it allowed everything to flex and reduced any vibration which could make have made it louder. I gave it a little test and the rpm range was perfect and there was enough torque that it was smooth but not enough to cause any damage to the mechanism if things went pear-shaped.
I also noticed that it was slightly easier to pedal, still a brisk pace which means that the main pumping bellows may be leaking somewhat. At the time of writing this I'm not 100% sure whether to bother with a vacuum motor and spending a lot of effort on trying to silence it. I think the next thing on the list would be to get a test roll so I can work out the tempo and install a potentiometer on the tempo lever. I did manage to get the tempo right to what I thought for the song, so here are a couple of video's;
First video, "Honey" and second, "Grand Polka de Concert Op.1 "
First video, "Monica's Blue Boy" and second, "When Buddha Smiles".
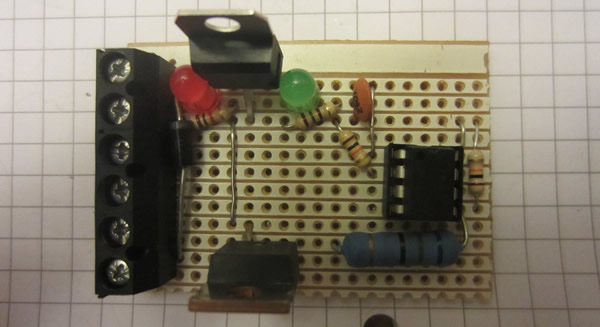
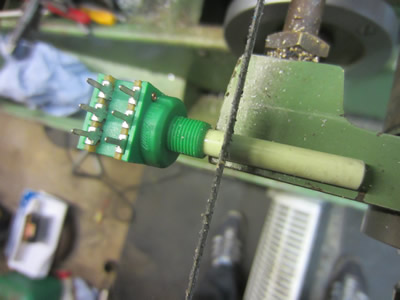
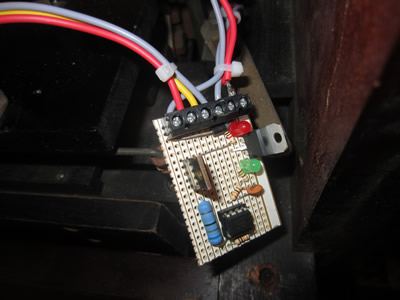
I finalised the circuit onto a prototype board and made sure it worked correctly. I had made sure the microcontroller I used could be removed so that I could program fine adjustments if necessary.
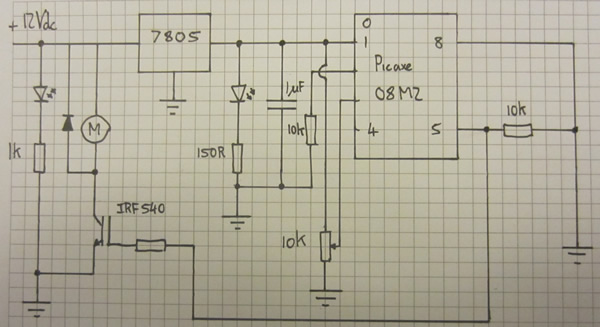
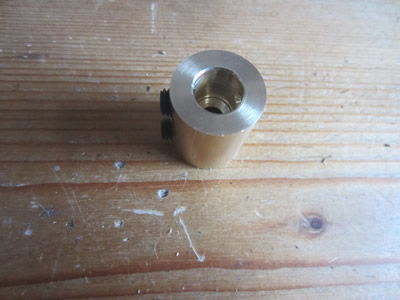
The next task was to fix the potentiometer to the tempo mechanism and then program the chip to suit the tempo indicator on the pianola itself. There wasn't much room for the potentiometer so I first had to make a collar to connect it to the tempo mechanism, I chose brass as it was easy to machine and tap.
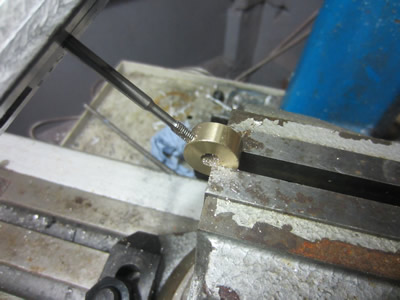
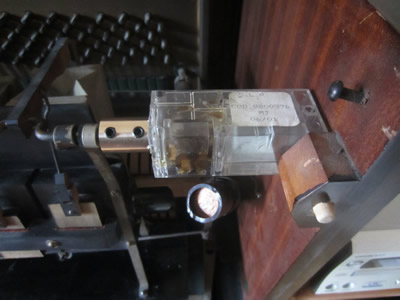
The potentiometer had to be cut down so that only 4mm of it's shaft was protruding, it was fixed to the mechanism and connected up to the wiring. I used some epoxy putty to hold it in place as this method wouldn't damage the wood if I needed to remove it. The potentiometer turned about 300 degrees whereas the tempo mechanism only moved about 90 degree, without a test roll it would have been very difficult to get right. It took a bit of trial, error and some calculations to get it perfect.

I had bought a test roll that tested every key and the playing capacity of the pianola. The roll moved at 8ft per minute, so using a stop watch I managed to fine tune the tempo to within a second. I did however notice that when playing the test roll that it did miss a couple of notes although most were keys not often hit. Below are two more video's, the test roll on the left and "Scenes Fantaisistes Op.18 No.1" on the right.
Overall this process took me about a week and it was quite a laborious process to say the least. I'm really happy with the result and chose to put as many rolls through it as I could before I ran out of time.
Hello, if you have enjoyed reading this project, have taken an interest in another or want me to progress one further then please consider donating or even sponsoring a small amount every month, for more information on why you may like to help me out then follow the sponsor link to the left. Otherwise you can donate any amount with the link below, thank you!