Turbo Tiburon - Manifold, Mounts, Pistons, Clutch - Page 2
Here is page two of the conversion. So far I need to fit the clutch but I'm waiting for the pressure plate bolts. Once I get the bolts I can get the transmission put back in. Once I get the head studs it can all go back together. The only things left are the solid engine mounts, exhaust system and some intercooler piping, simple !
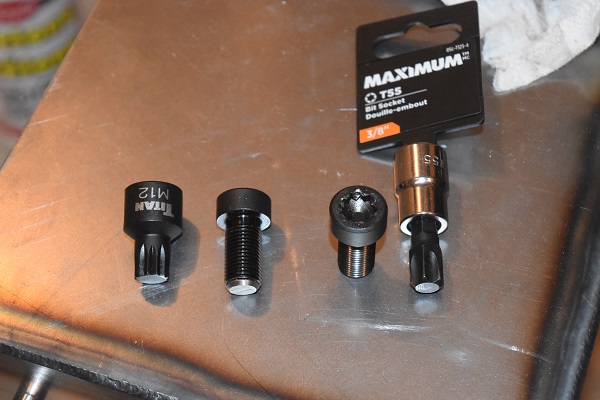
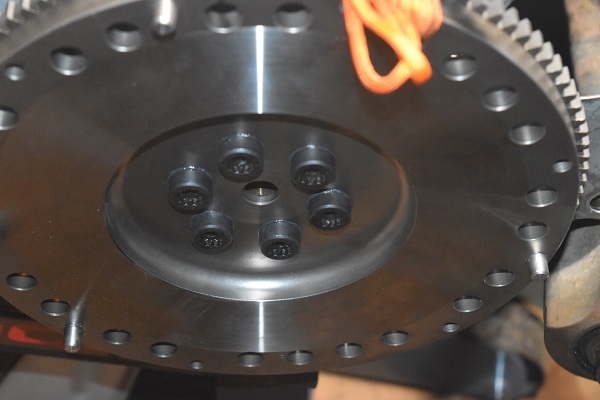
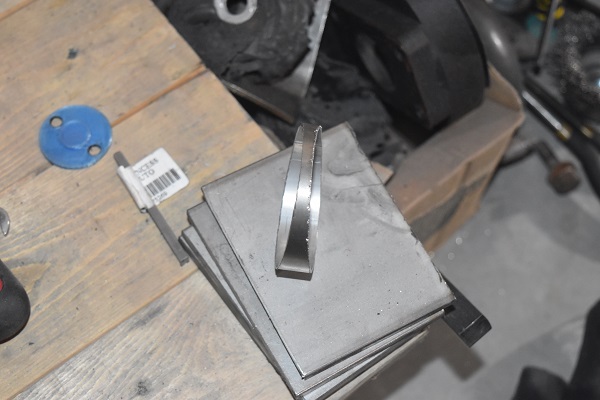
08 October 2018 - I got some aftermarket flywheel bolts, these are to be torqued at 110 ft/lbs. The bolts are not actually intended for my exact model, I had to grind 2mm off all of them, I took care as to not get them too hot as this could change their properties. I got a total of seven bolts but only needed six of them. To the right shows the two bits that would fit the bolts, only the one on the left would be suitable for such a high torque application.

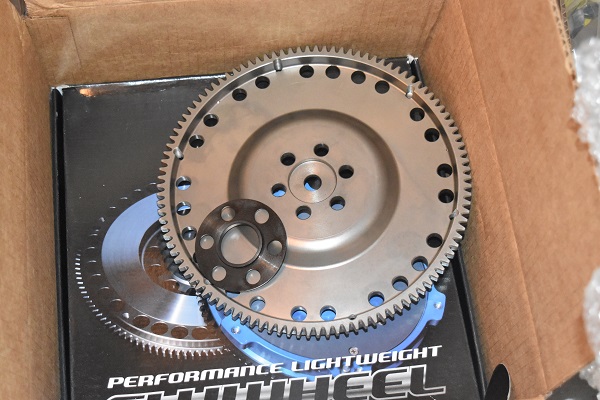
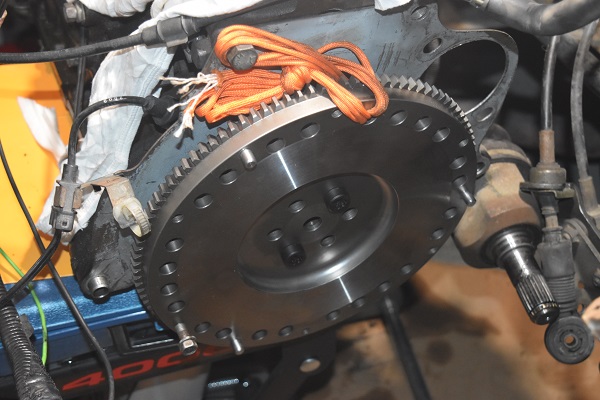
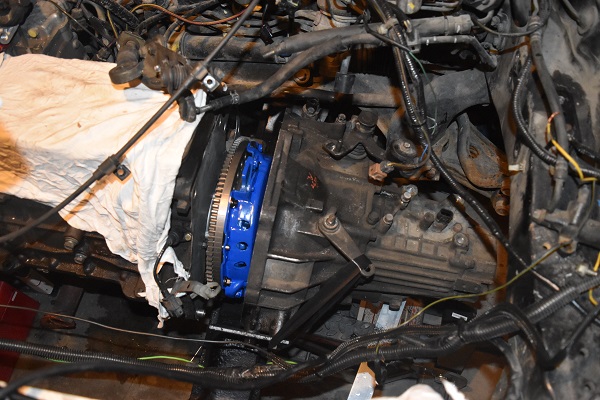
The flywheel came with an adapter for the other year models, didn't apply in my case. The flywheel weighed about half of the stock one, it will result in faster engine response. I used a piece of rope and a bolt in the block in order to torque down the bolts.
When bolts are to be torqued they must be lubricated with assembly oil, engine oil also suffices. These particular bolts came with a paste to be placed under the heads so they would torque down accurately.
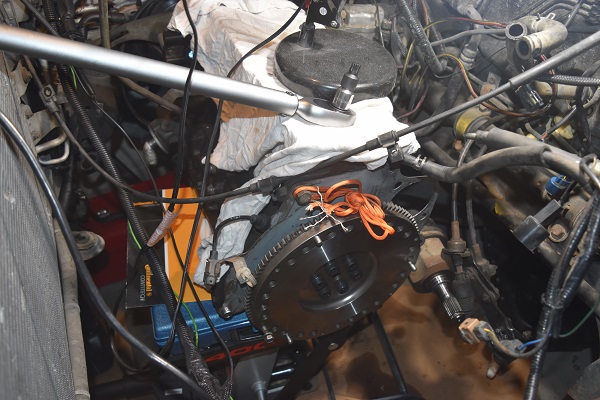
11 October 2018 - I picked up some bolts for the pressure plate, these were thread locked in place for extra security. I damaged one of the seals when I removed the drive shaft, I should have suspended it with rope but forgot.
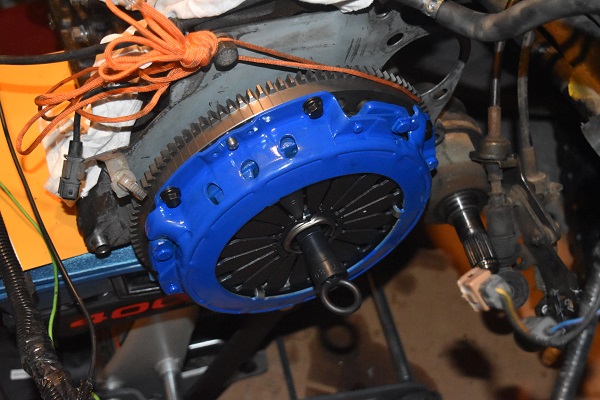
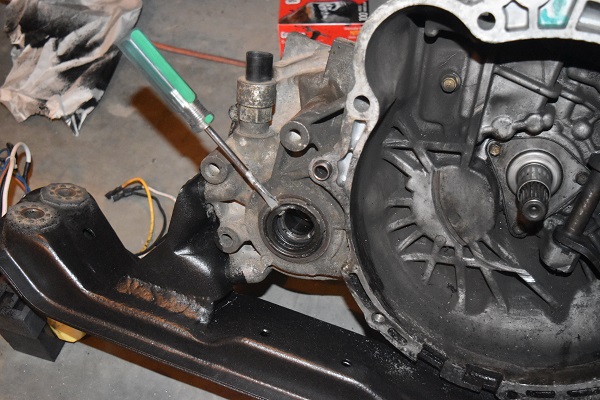
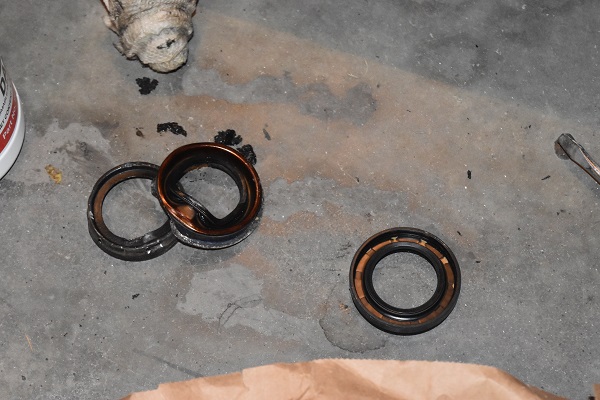
The replacement seal was a lot different from the original but it would fit. The only thing I did not like about this new seal is that the lip is just so far to the inside that I fear it may not lay over the shaft properly. The thing is that there is no pressure inside of the transmission and the seal has two lips, I guess I'll just have to see if it leaks or not. I lubricated the whole of the clutch bearing assembly and installed a new bearing.
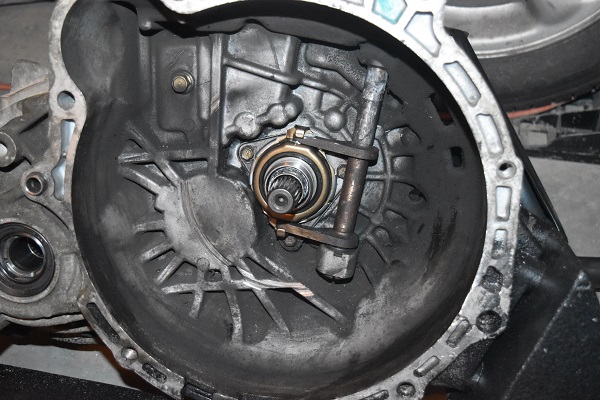
This is a pull type clutch so I taped the lever to stop it from releasing the bearing.
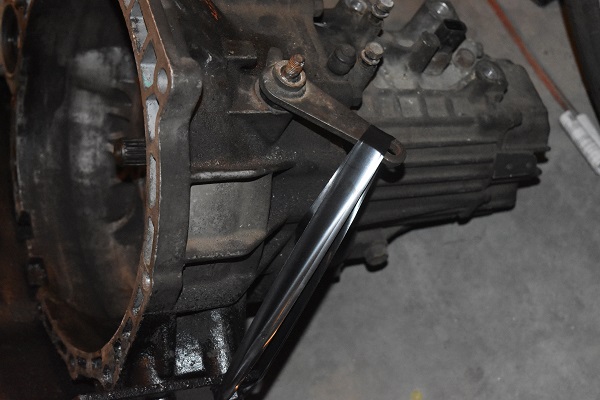
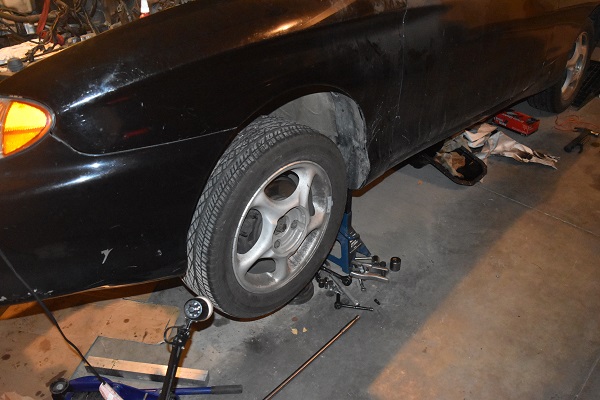
It took quite a lot of effort to fit the transmission, I believe I'm well equipped to do it again in the future. The drive shaft back in and the wheel back on, now I don't have to worry about it rolling off the stands.
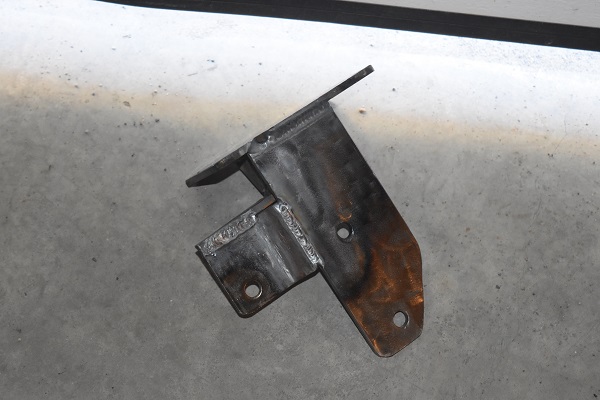
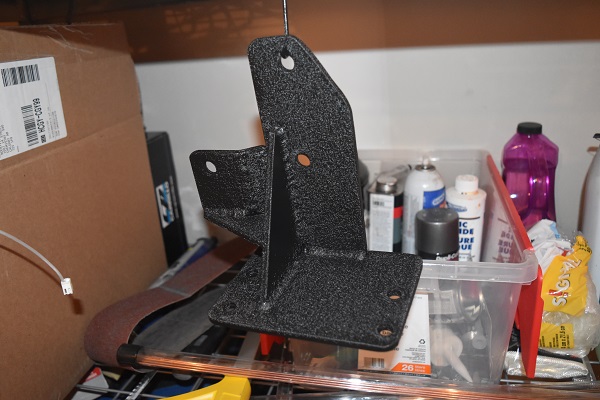
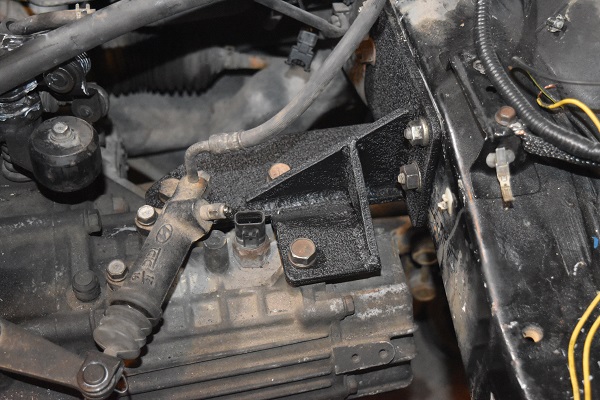
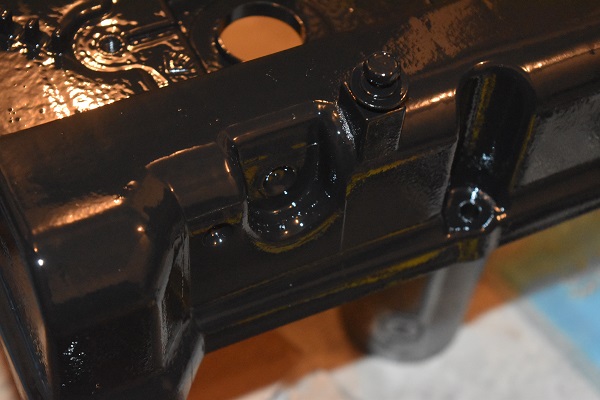
12 October 2018 - Since I chose to go with solid transmission mounts it meant that I should also do the same with the rest. This particular mount is between the transmission and the chassis, on the top. I had some left over quarter inch plate to make the mount from.
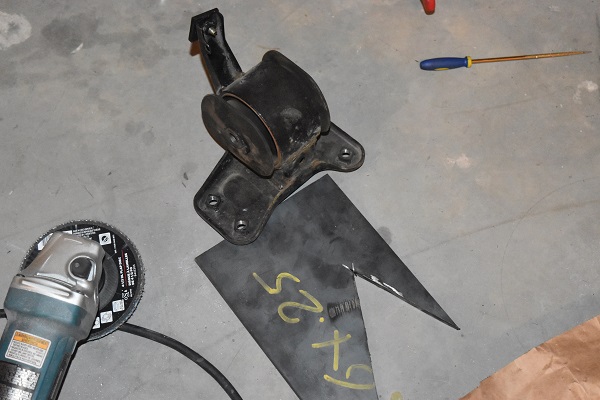
I had to grind off the mill scale in order to get a nice clean weld.

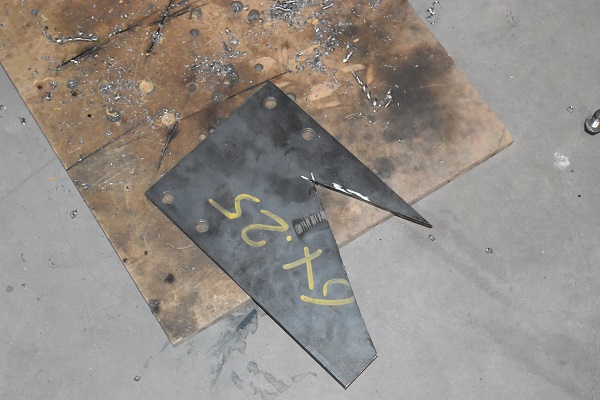
The problem with welds is that they shrink after cooling, it is always a very good idea to weld everything fixed in place.

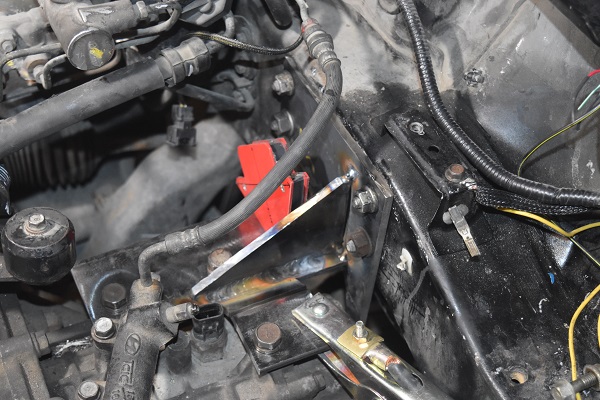
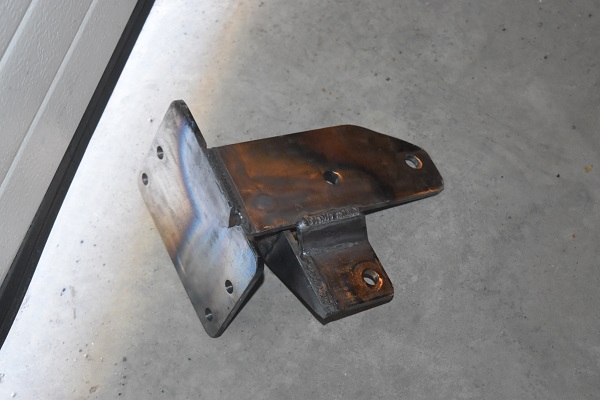
Since I only had access to a TIG welder it was very difficult to get into all of the right places without having to remove parts.
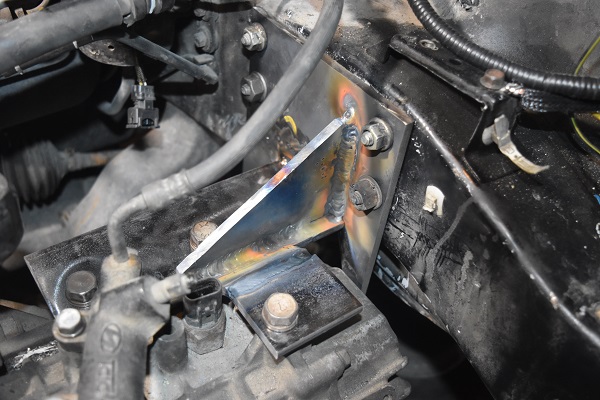
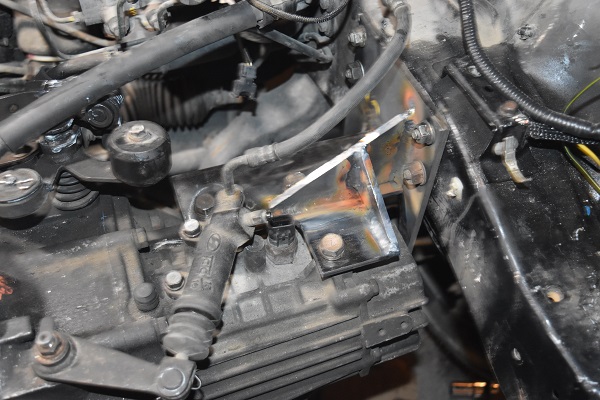
Some of the welds underneath could only be done by removing the bracket. I welded a few supports in place to try to minimise warping for when I would finish the rest off. I also rounded all of the corners and edges to make it look a little nicer.
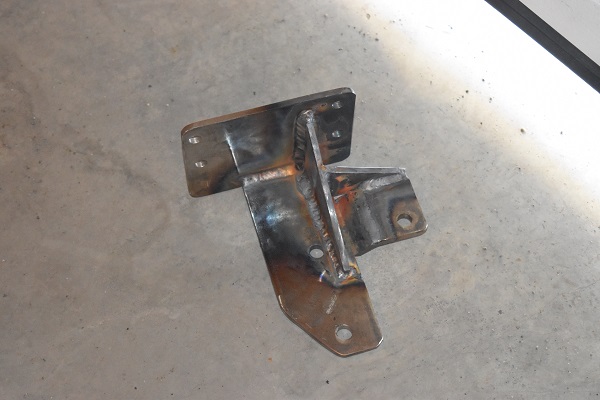
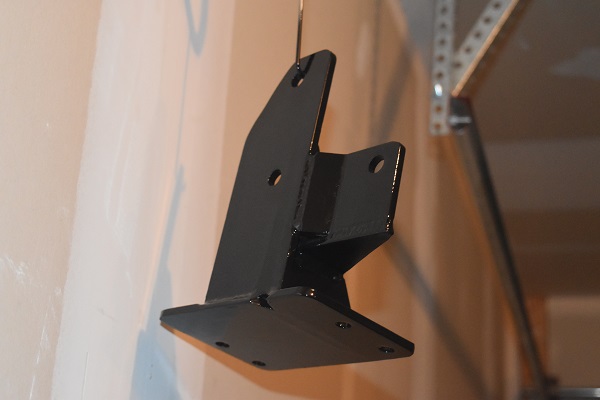
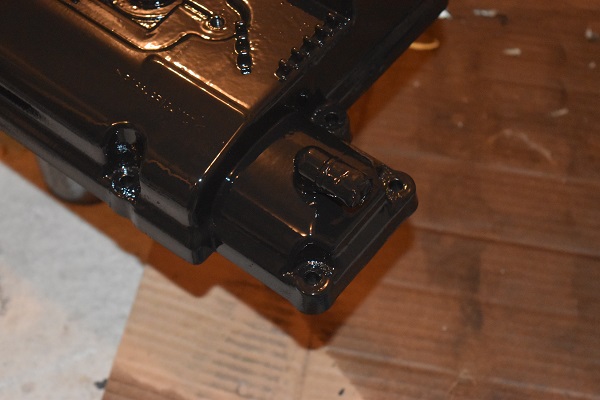
I gave the whole thing a grind down with the flap wheel to ensure there was no scale left. I used acetone to remove any residual oils or greases. I decided to go with the wrinkle finish paint again just because it looked so good.
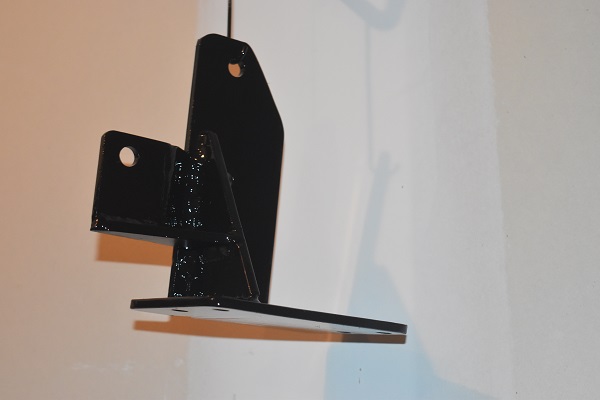
The paint is supposed to be cured by heat but residual engine temperature should achieve that. I don't think it would have really mattered what paint I chose because either came out looking great, I think the wrinkled finish gives it a professional look however.
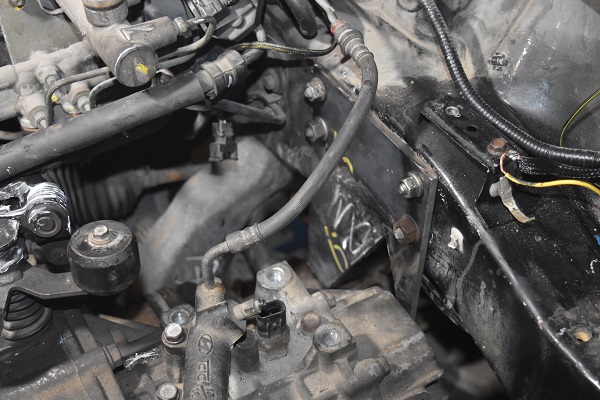
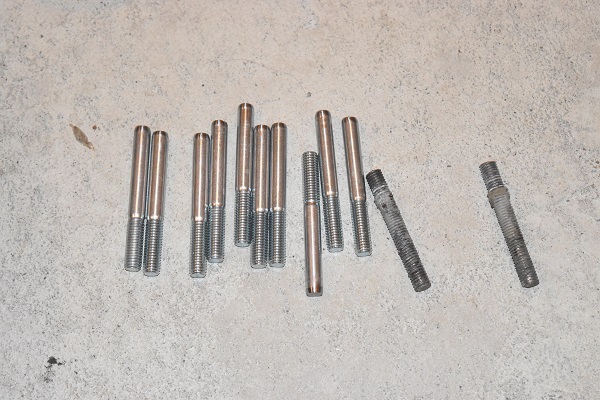
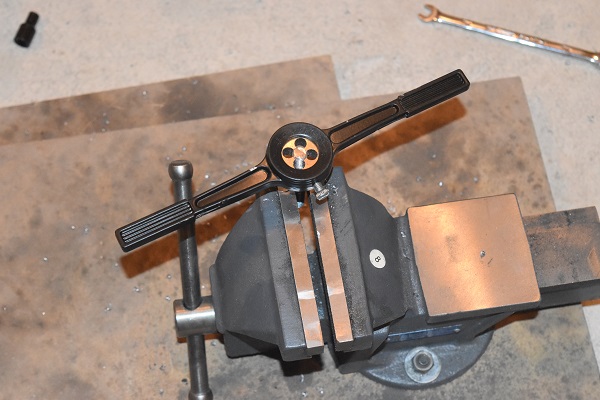
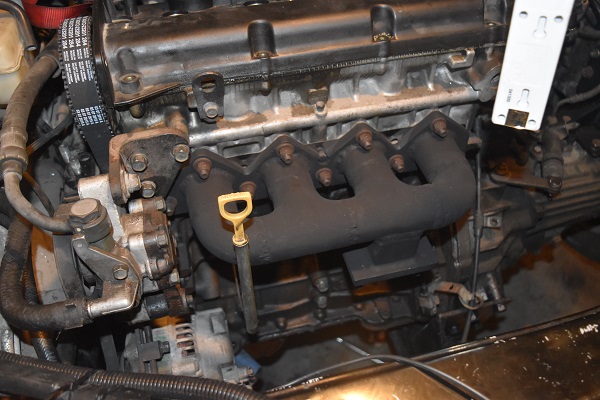
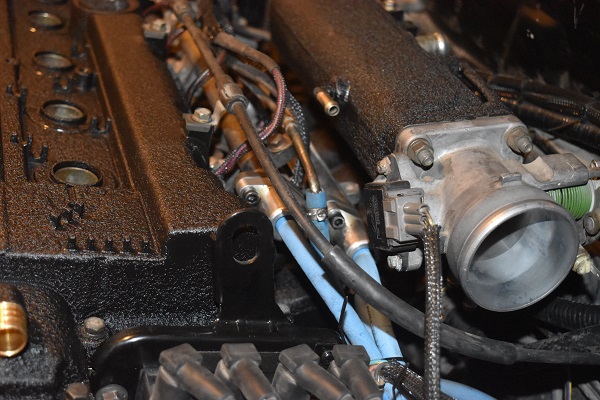
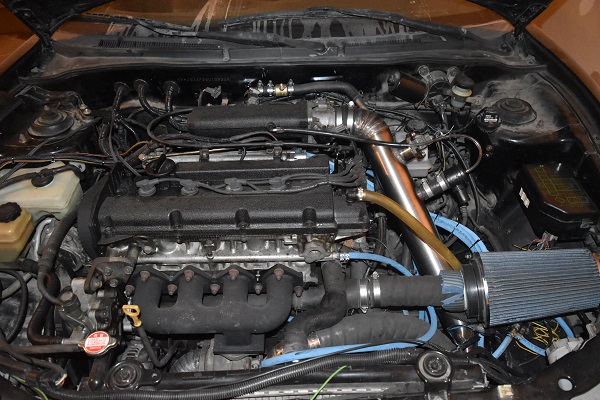
24 October 2018 - I kind of got a little carried away and forgot to take many photos. I found out that to get the studs it could take another month so instead chose to grind down three of the bolts. I torqued down the head, set the timing and attached the alternator. It is now time to start putting the car back together, I thought I would start with the intake. So on this car I have a secondary set of injectors which means that the original intake studs were not long enough, I chose to used threaded rod. The issue with threaded rod is that it stops at the bottom of the hole, it can potentially put strain in the wrong areas. I instead chose to make my own studs by chopping the heads of some bolts and threading them with a die.
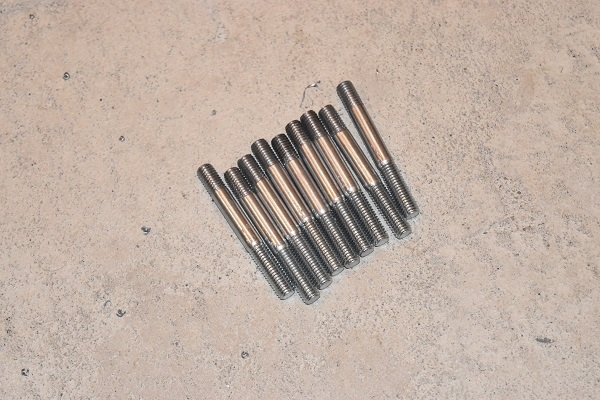
The studs looked really good, plus the only part able to rust will be buried in the head while the rest is galvanised. The intake was installed without issue, the studs worked perfectly.
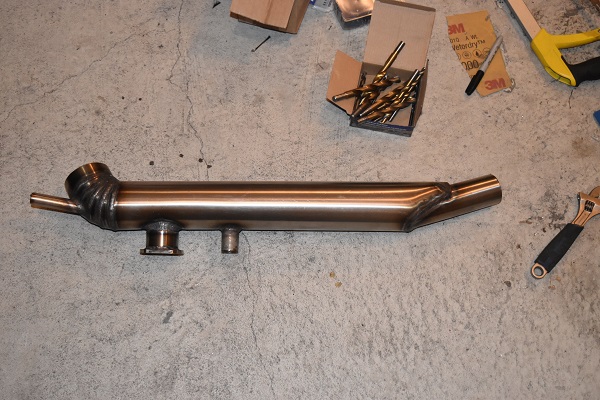
Here is the transmission bracket to the left, the wrinkle paint looks so good. I took to the turbo header with a wire brush in the angle grinder.
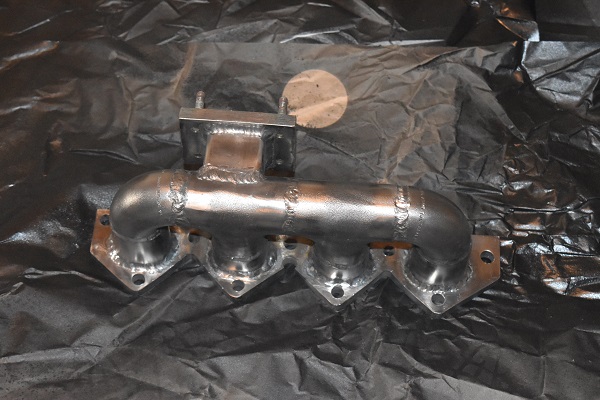
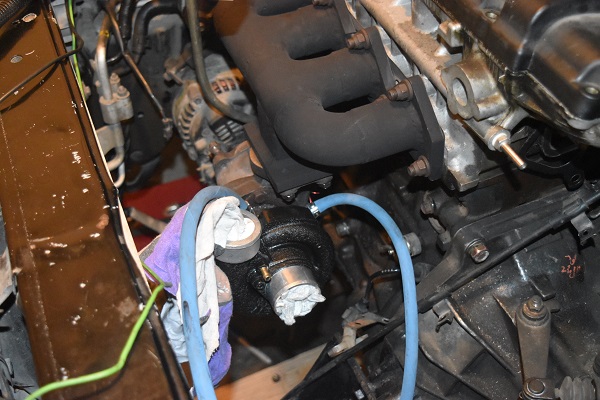
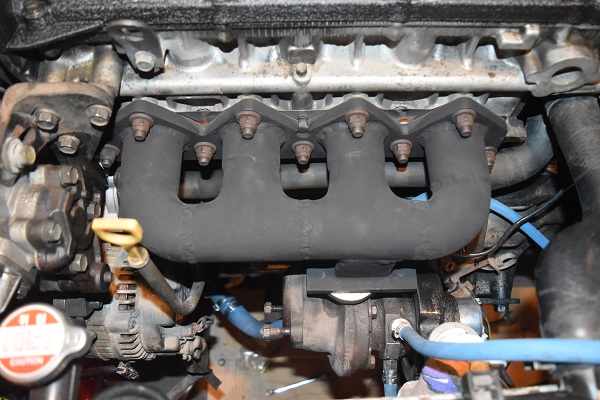
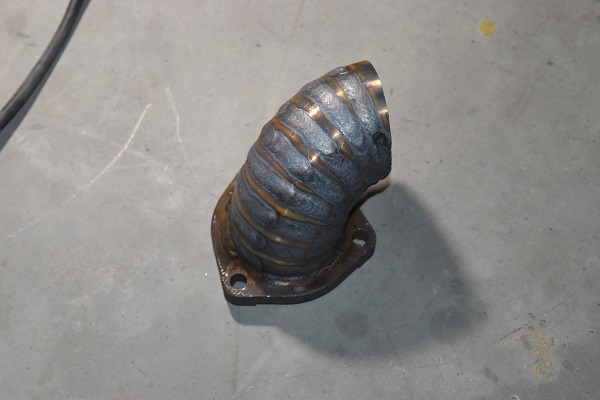
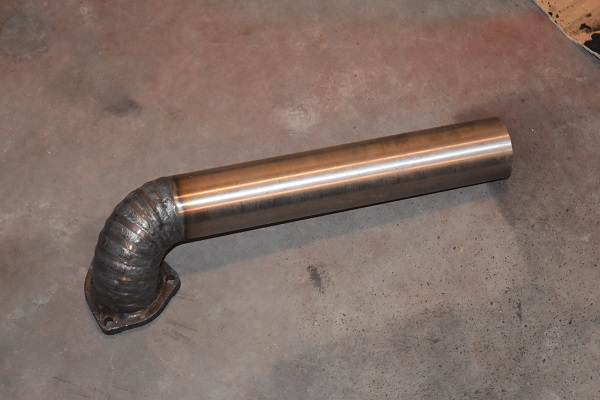
I got some flame proof paint that's good to 1200 deg C. The header was cured in an oven at 300 deg C, this particular paint is ceramic based. The reason to paint the header is to reduce the chance of corrosion, it also looks a lot better. The header was installed on the block with a new gasket. The power steering pump has to be installed after the header in order to fit the header. I have seen quite a number of people remove power steering completely to make the engine bay look cleaner, not sure what the torque steer would be like but I'm certainly in no hurry to find out.
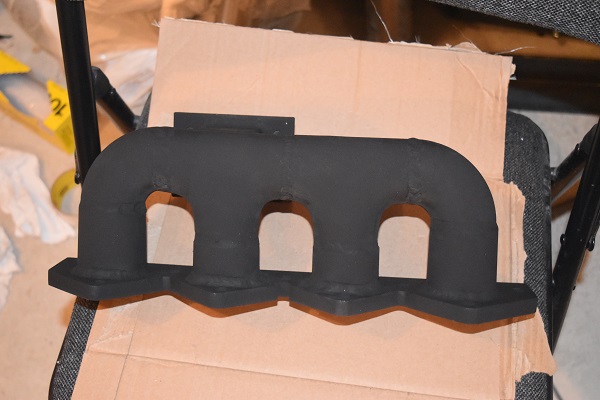
I still find it quite amazing that the header came out this good with basic power tools, it should be suitable for higher power builds too. I really love this wrinkle finish paint so chose to do the compressor on the turbo. I will also be doing the valve covers pretty soon. I will be attacking the turbo with the die grinder soon as to improve gas flow on the exhaust side, it is quite a design flaw as you'll see soon.
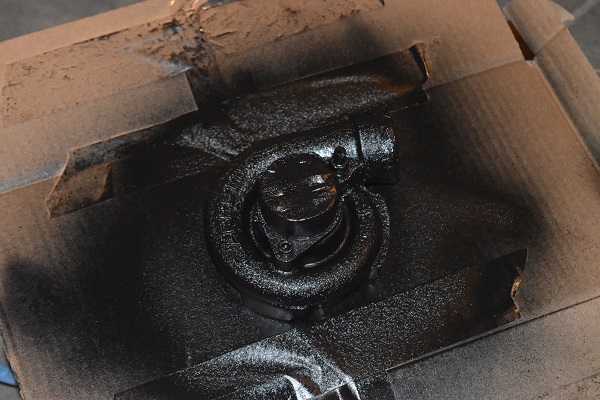
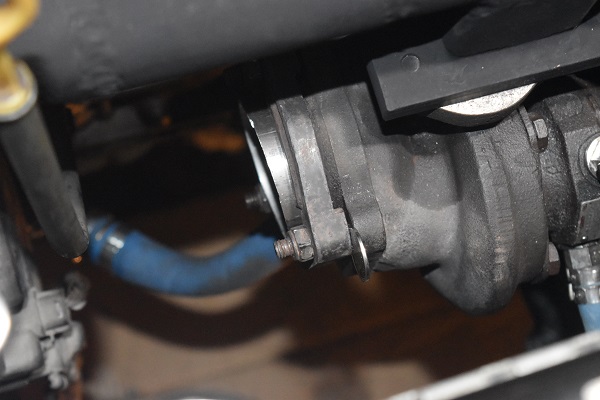
27 October 2018 - The turbo I have is a T25 flange but the hole is much smaller, a sharp edge leads to poor gas glow. The casting is not all that thick so I did not want to grind into it too much. I used the die grinder to break the edges, hopefully this should increase efficiency a little.
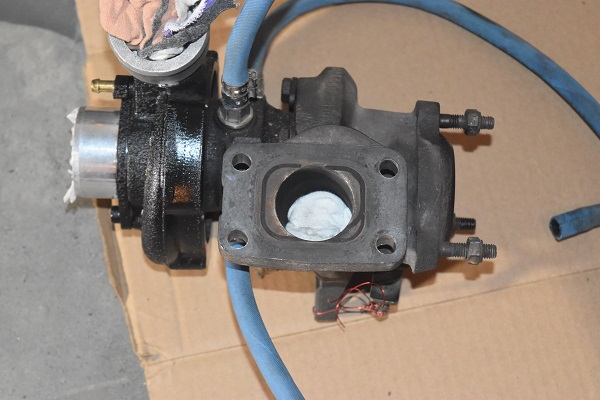
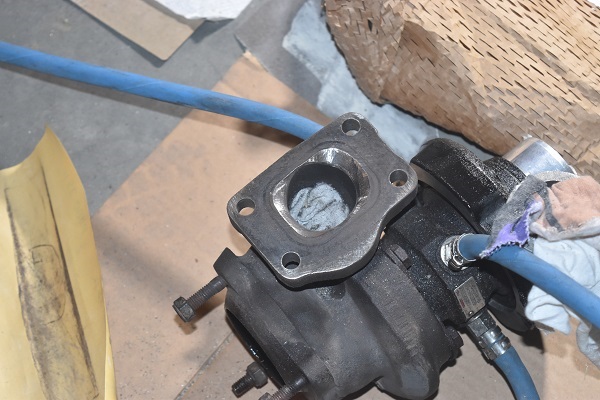
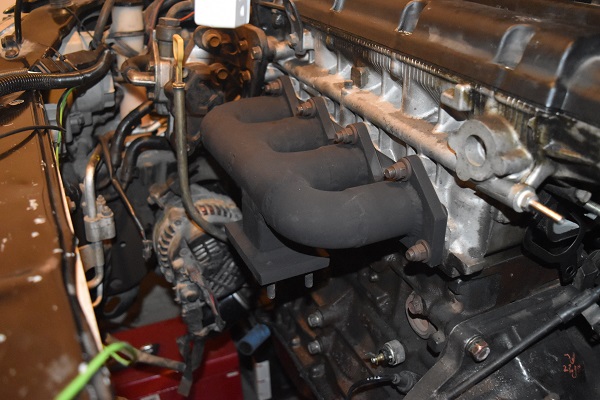
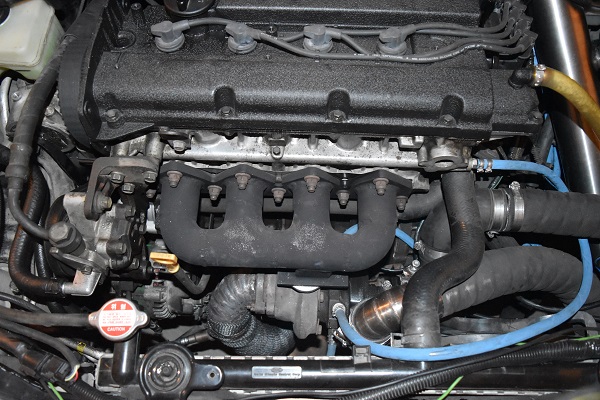
I installed the turbo on the manifold. A reason that a lot of manifolds will fail or the reason a lot of stainless ones crack is because people often hang the weight of the turbo off them. The turbo has a lug to allow for a support bracket, this is something I will not miss. I covered the valves and then installed the injectors, it makes access so much easier on the secondary rail with the cover absent.
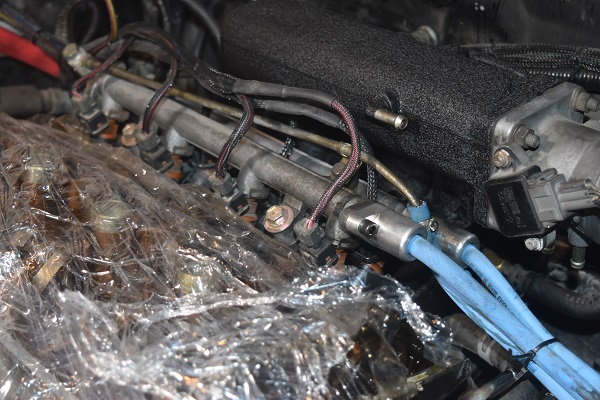
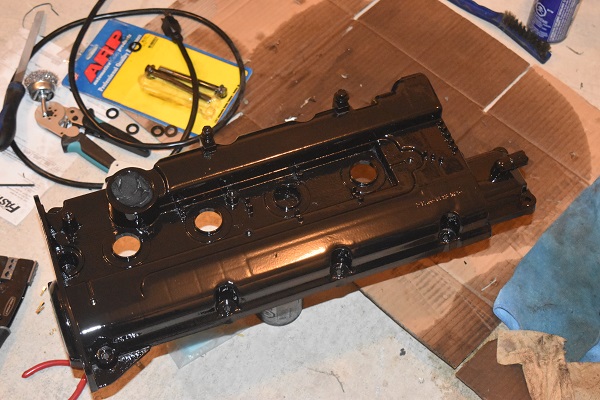
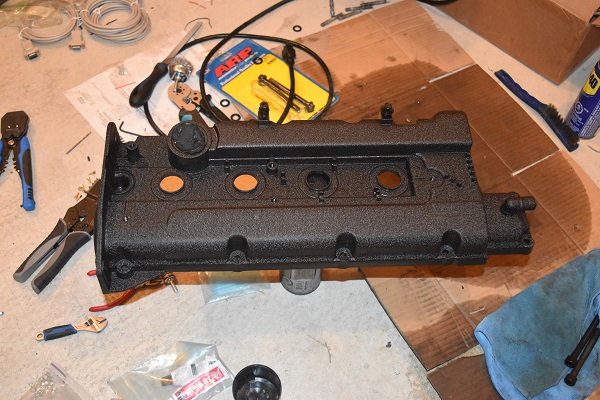
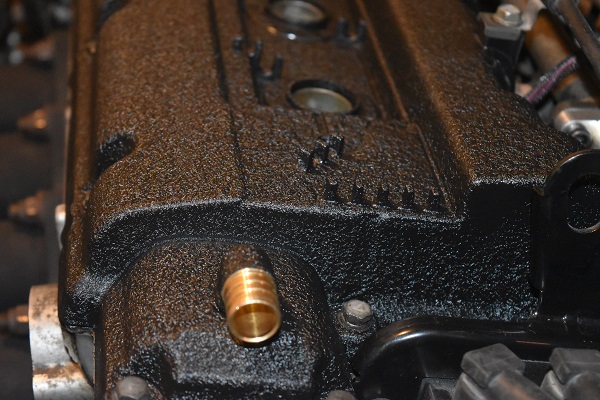
One thing I'm not all that happy about at the moment is the fuel supply and return pipes. When I return to work I will machine a manifold, it just means it looks a lot tidier. On a second note I chose to paint the valve cover in the wrinkle paint. I first degreased all I could with acetone.


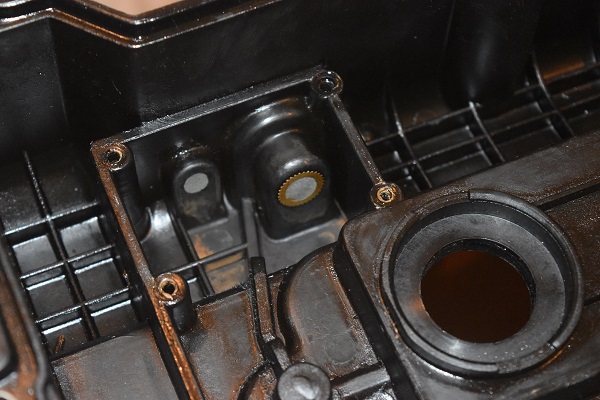
I installed a much larger breather since there will be a lot more blow-by due to the larger piston ring gaps. The original breathers were also in the way of the secondary fuel rail, I removed them both and filled the holes in with steel reinforced epoxy.
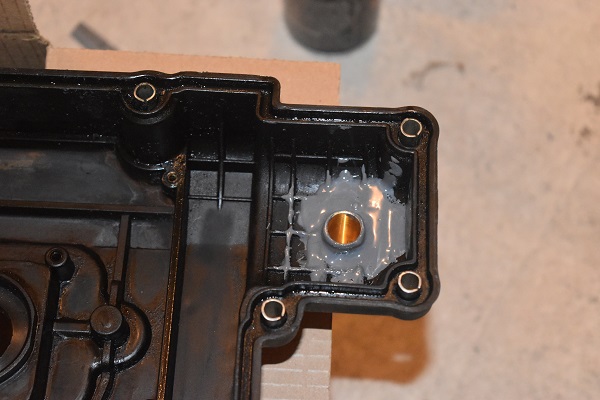
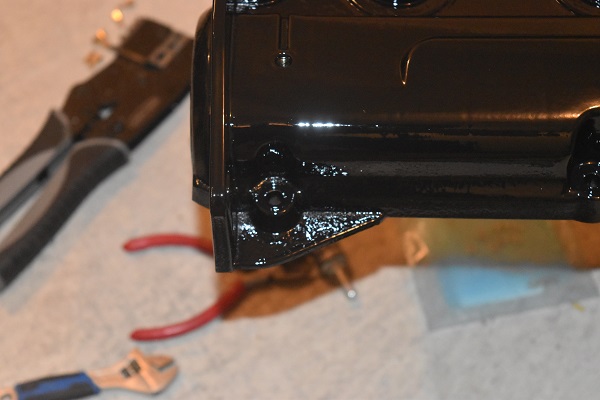
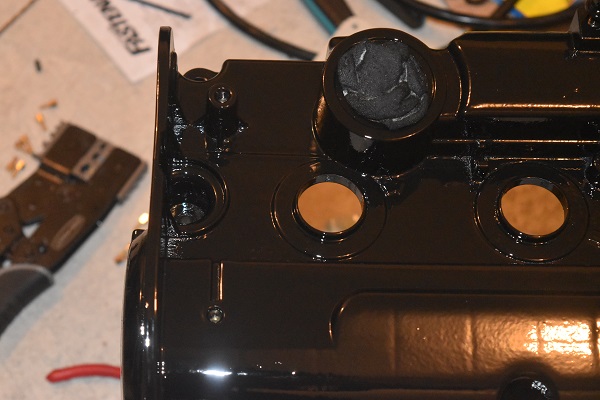
Paint does not like to stick to oil and plastic tends to be quite absorbent of oil. I knew that I might run into some issues of painting the cover, luckily the parts that did react slightly will be masked by a second cover.
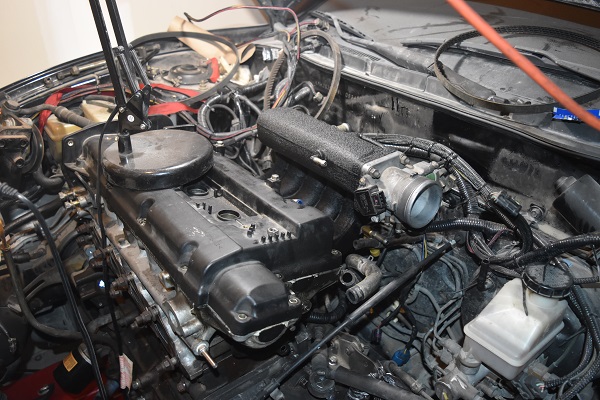
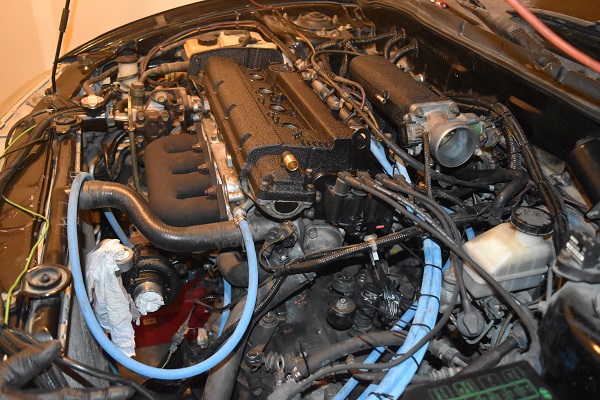
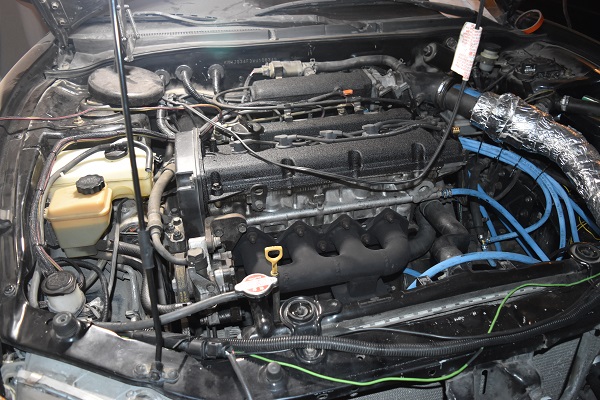
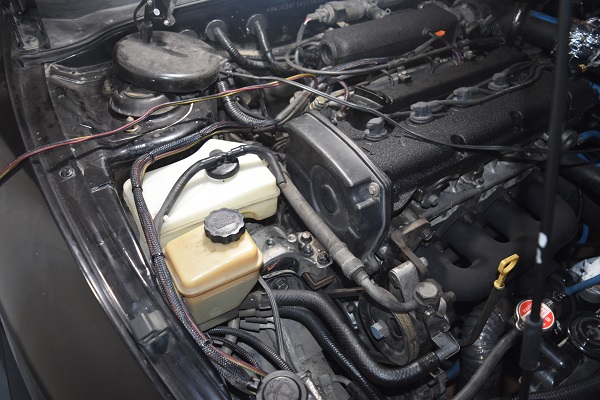
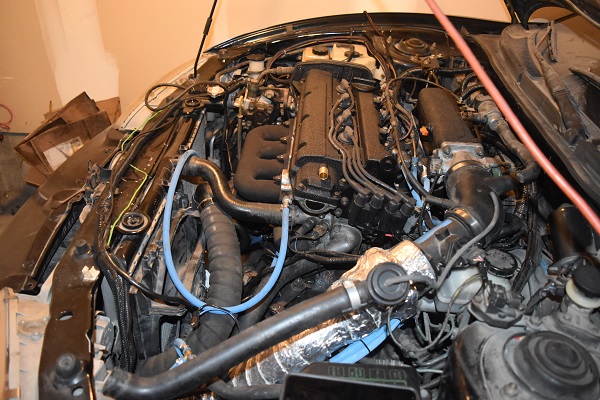
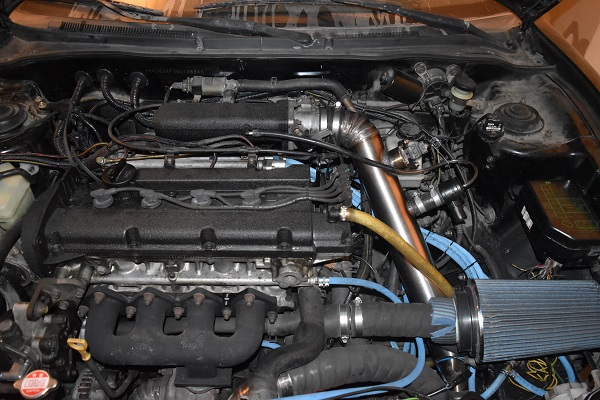
The engine bay is certainly looking a lot better than it did a few days ago. I often think about functionality over aesthetics but it really is starting to look a lot better, I wish I could keep it clean but it is my daily driver. There are a few things I can do however. The coolant and power steering containers will be replaced with stainless ones, I will make them of course. I can install the splash trays under the car again to stop dirt splashing up. I will also make some covers to try and hide some parts I really cannot change.

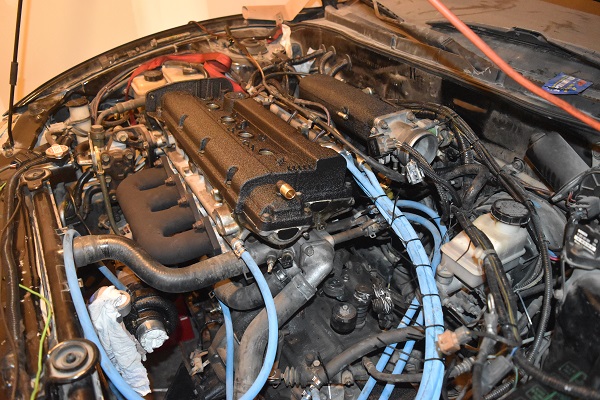
07 November 2018 - I gave the engine bay a little clean, nothing drastic, I was just taking pictures to send someone the progress.
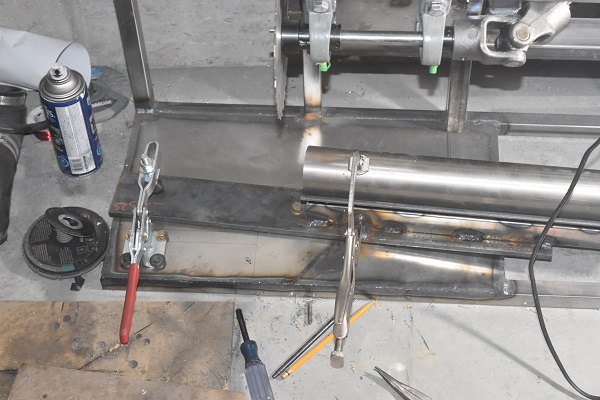
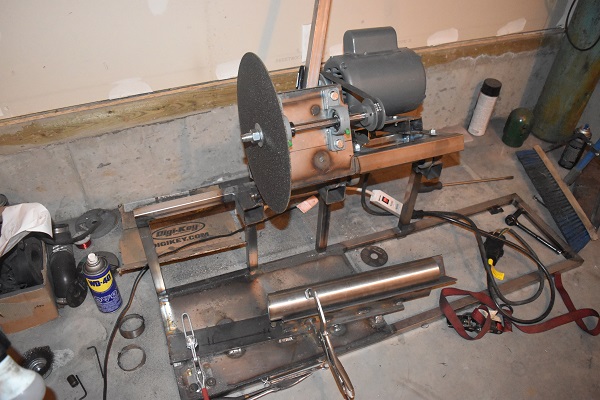
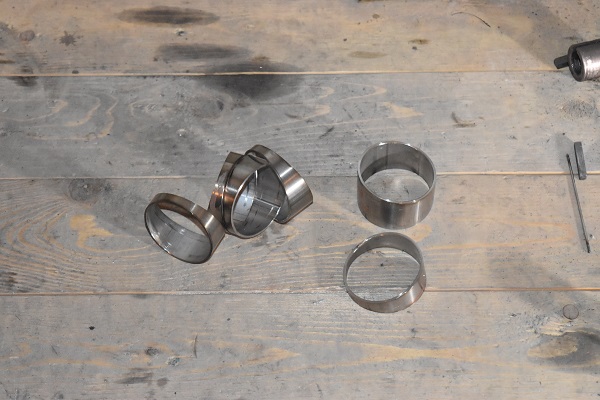
In a side project I built a saw to make pie cuts for the exhaust, the blade here did not have a fine enough pitch.
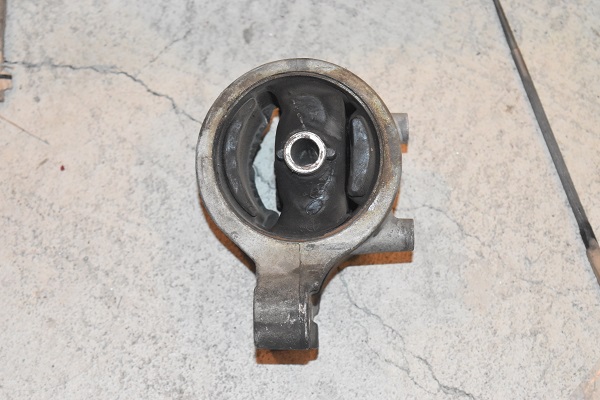
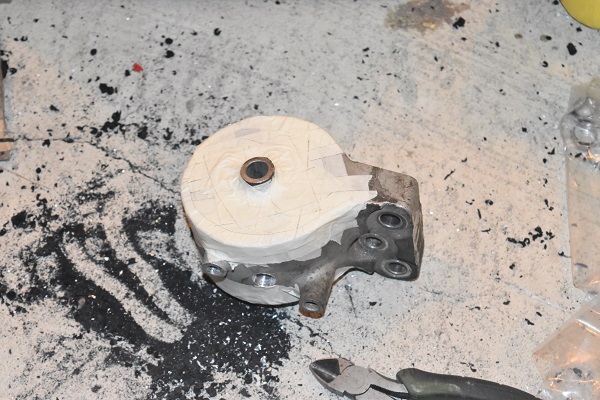
I thought a fast way of making the engine mount solid would be to fill it with resin, so that's what I did. I made sure to install it on the engine before pouring the resin.
I used a finer tooth saw for the pie cutter, it worked but still was not ideal.
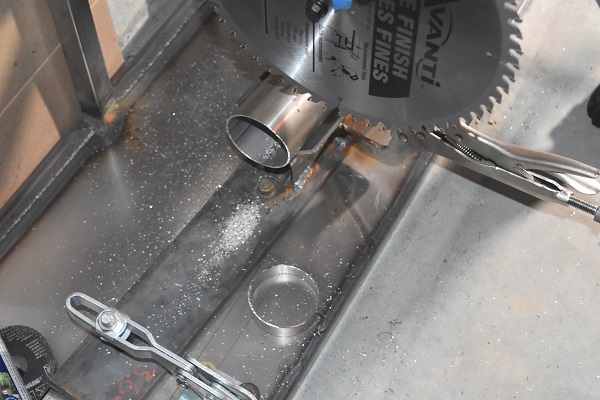
The idea of the saw was to make accurate pie cuts with a tiny of burr as possible, which it did. The issue is that there was so much slack in the U-joints that it did not cut smoothly.
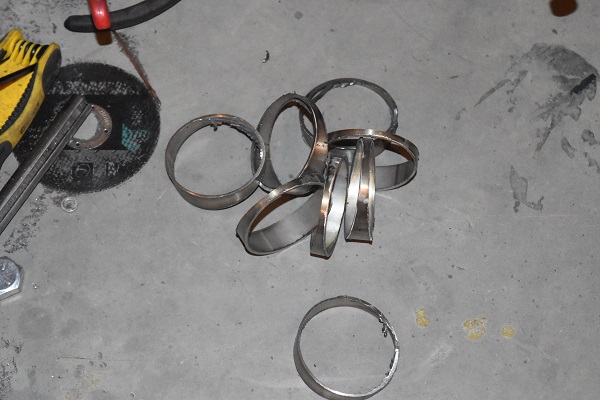
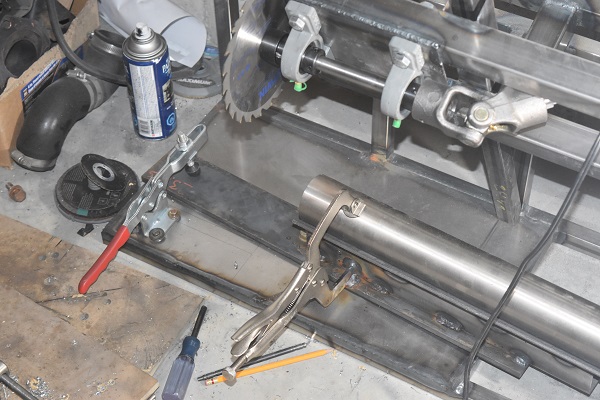
I chose to completely redesign the saw to use an abrasive wheel, it was a lot faster but I spent a lot of time removing burrs.
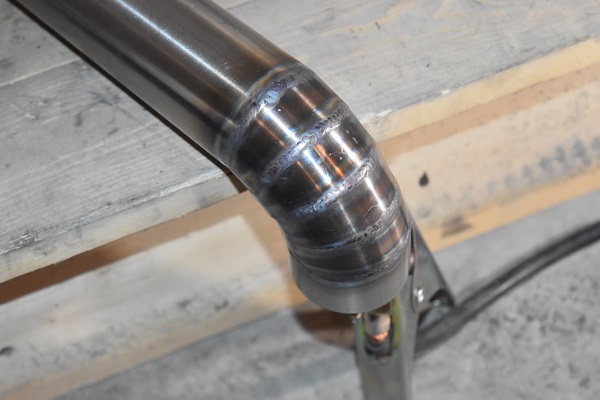
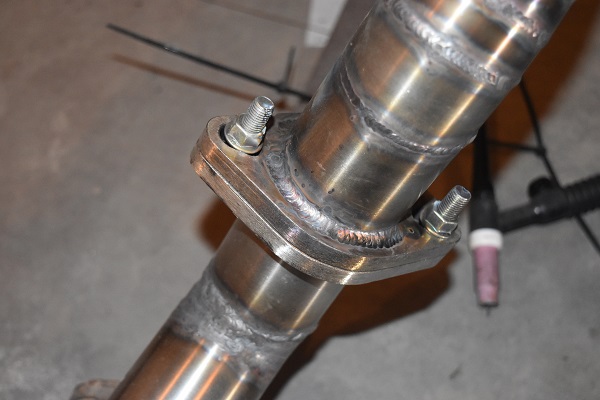
I started work on the down pipe. I chose to weld the tube and then pass over it again to ensure penetration and even welds. I turned up the power for the second pass which was a mistake.
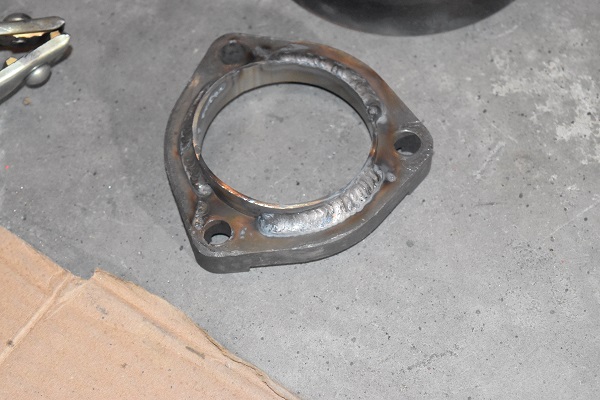
Those that are familiar with welding will know that these are not ideal. The first thing is it looks like there is too much heat in the part, there is and that is something I know I should have corrected. The second is that I simply did not use enough gas, that is because I'm reluctant to have another refill. I also chose not to back-purge the welds since this is an exhaust and it's not running at terribly high stress levels. The real issue is that I kept contaminating the tungsten which is an excellent way to burn welds. I really really wish I had a bench to do this work on as kneeling on the floor is costing the quality of my workmanship, I also don't weld very often so I need to get some practise in too.
I put the cam cover back on the head since I would not want stones getting inside, I will paint it in a week or so. I filled the car with oil and coolant before giving the car a start. The engine fired up almost instantly, that's quite a relief considering it's been rebuilt. The exhaust system needs to be complete before I can give it a real run, I'm just happy knowing the internals are now lubricated.

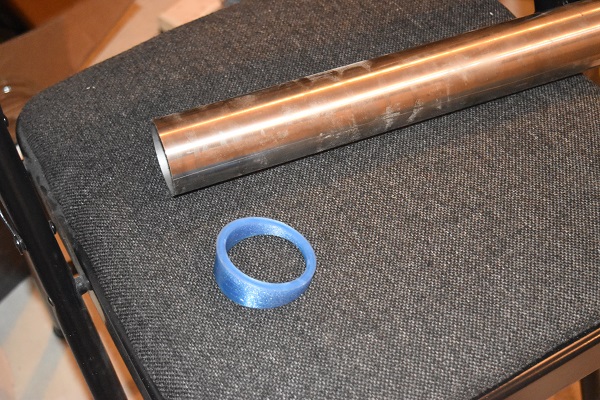
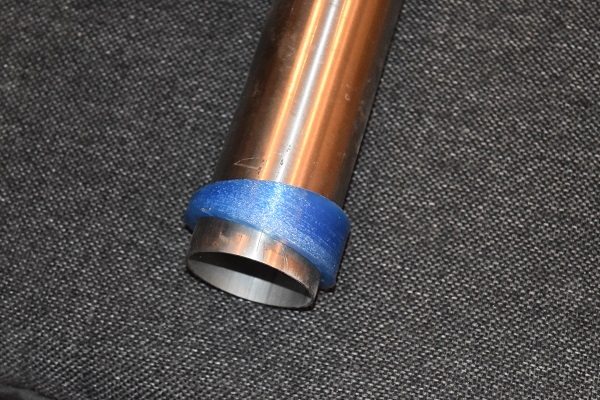
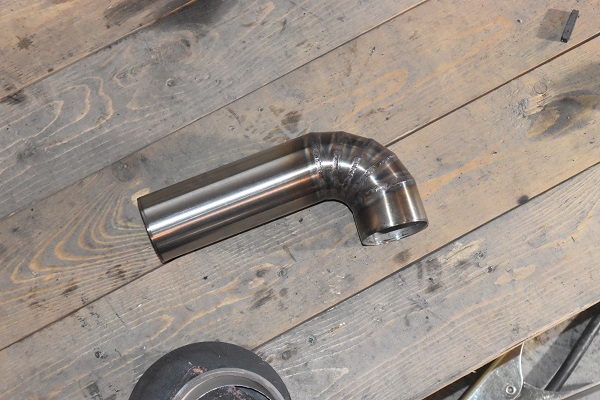
I will finish off the intake tubing before I choose to complete the exhaust. I originally made my pie saw to cut any angle but instead I welded it at a set angle for rigidity, that was before the abrasive wheel. The tube running from the turbo will be 2 inch and will require slightly larger angled cuts. I chose to 3D print a template, they are at 18 degrees. This tube will peak at 20psi maximum so I should be fine with fusion welds, I will also turn the current down and the gas up this time.
08 November 2018 - I chose to start work on some of the intake piping, the first being that from the turbo to the intercooler. I made sure this time to turn the current right down and turn my gas flow up, much better welds.
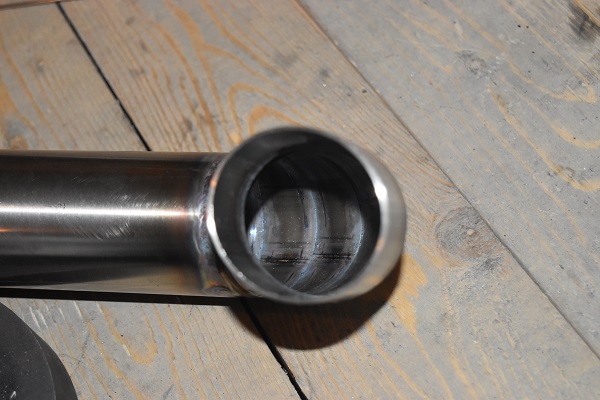
Since this was for the intake I had to make sure there was no sugaring on the inside, there was not. The pipe was made at slightly more than a right angle in order to point in the correct direction.
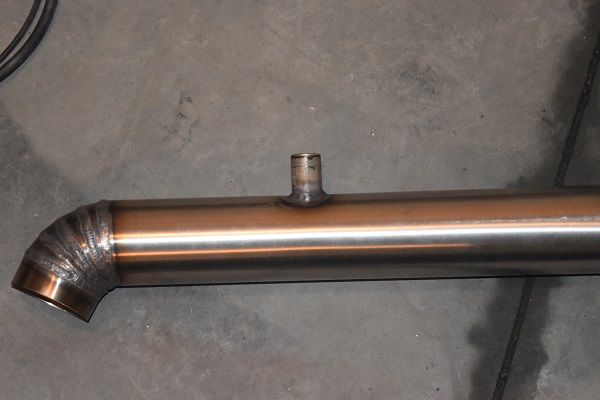
On a side note I also welded a bung on the down pipe for the oxygen sensor.
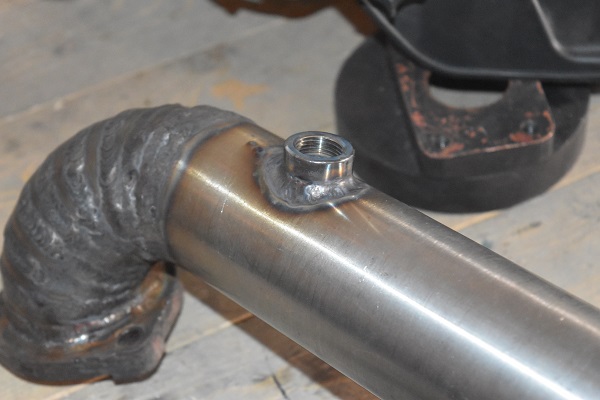
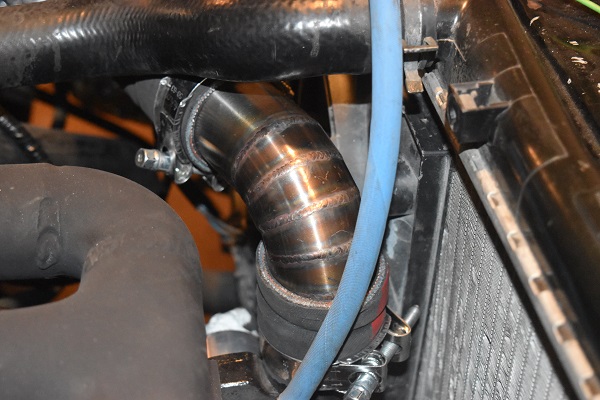
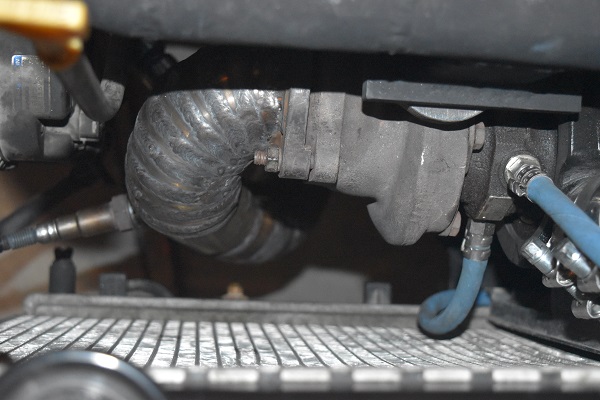
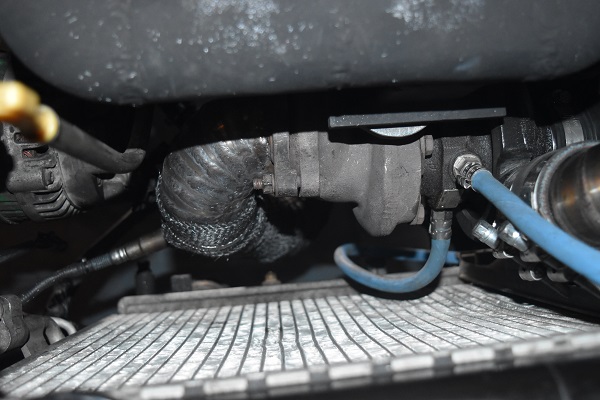
The welds look a lot better in this picture, they are golden which means no overheating. I chose to recycle the flexible hose from the turbo to the intercooler simply because it passes behind the radiator cooling fan, it won't absorb heat like a metal pipe would.
12 November 2018 - I chose to run the car without an exhaust system since I just wanted to make sure the engine was good. I held down the waste gate with a piece of wire and left the nipple on the compressor open as to not boost early. I took the car for a drive, the boost did not kick in until around 4000rpm due to the purposeful leak. The roads were wet at the time but it would light up the wheels in third gear soon as I hit 4000 rpm.
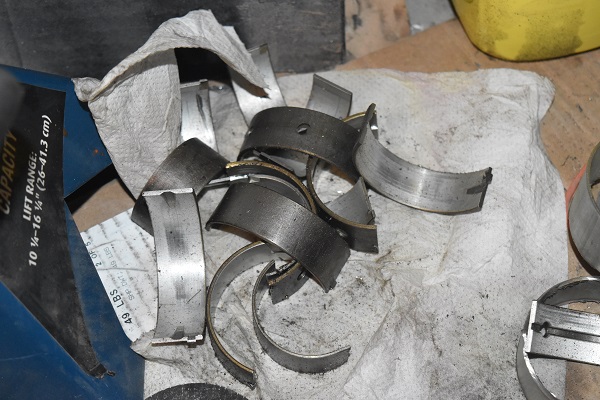
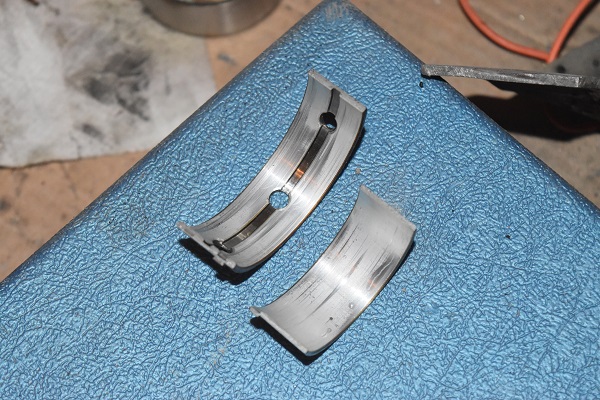
I was having a bit of fun and cut a corner on an industrial estate, unlucky for me I hit a lump of concrete and put a hole in the sump. The oil light flickered briefly before I cut the engine. I didn't want to risk anything so I chose to rebuild the engine again over the next day. I removed the cams first, gave them a clean and installed then again, I could see no visible damage. I removed the oil pan, bearing caps for both the crank and the rods. I replaced all of the bearings, here you can see there was some light damage to them. I did not have to remove the crank, I simply spun the bearings out of their housings.
I got the car back together and it ran great, thankfully no damage was done.
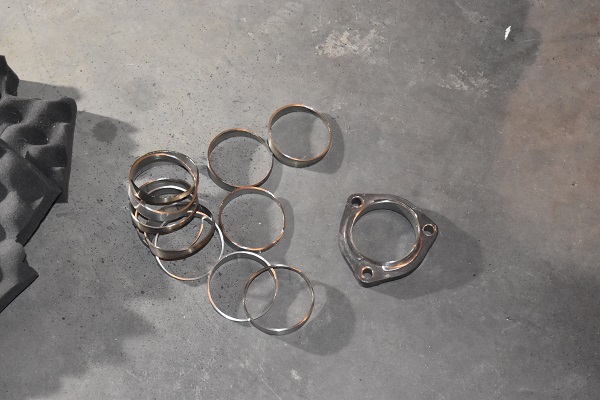
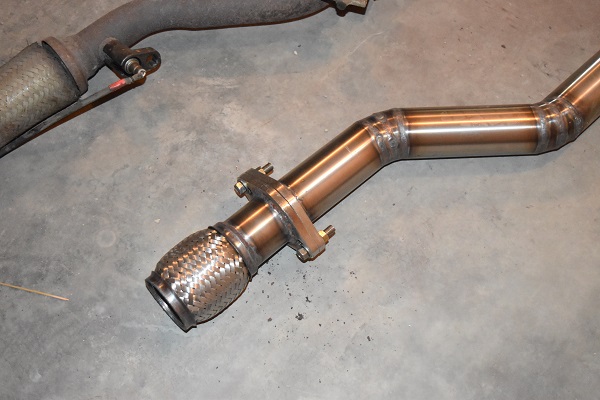
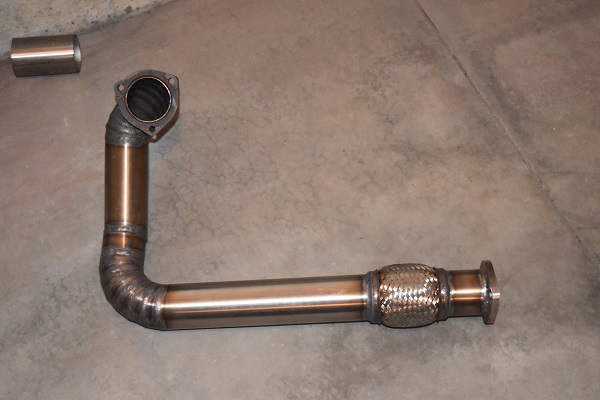
14 November 2018 - I really needed to install an exhaust system that could handle the extra power of the turbo. I upgraded from 2 inch to 2.5 inches which is quite a substantial increase in flow. I tired to mimic the original as much as possible, I chose to go without a resonator since this would up the cost.
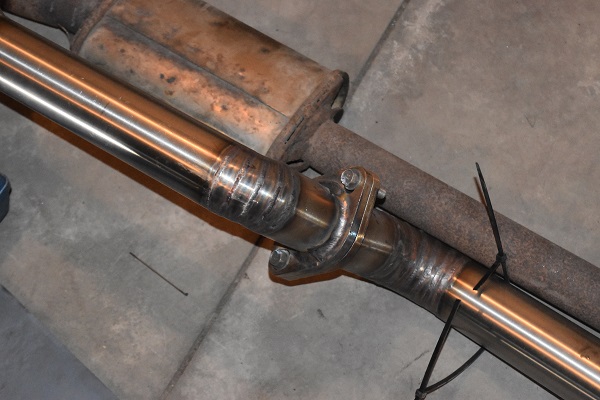
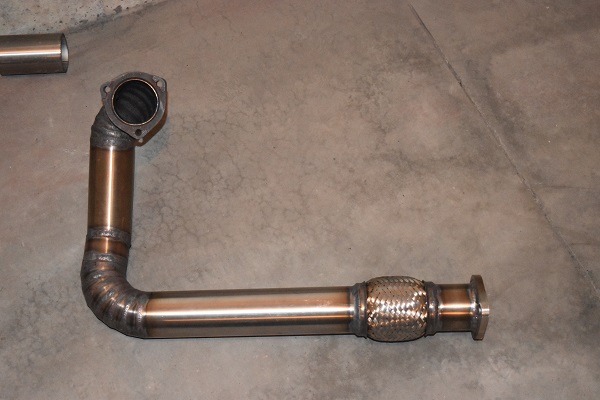
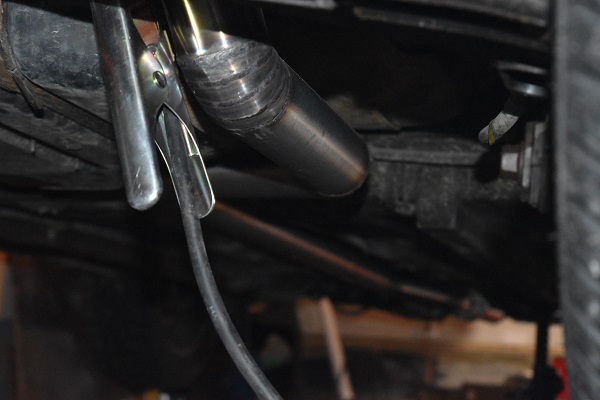
I added a flex coupling to stop the down pipe from cracking when it expands due to the heat.
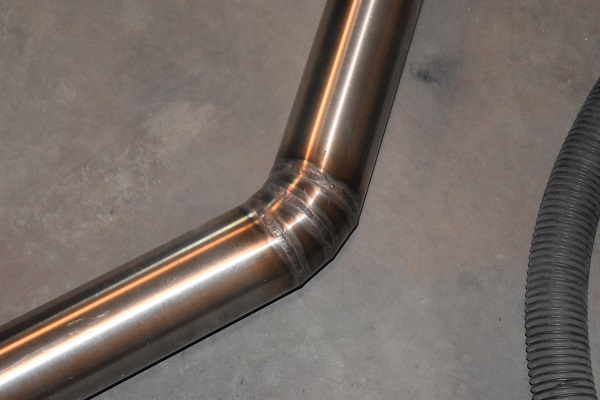
This is the rear section of exhaust, a lot of tight radius pie cuts.
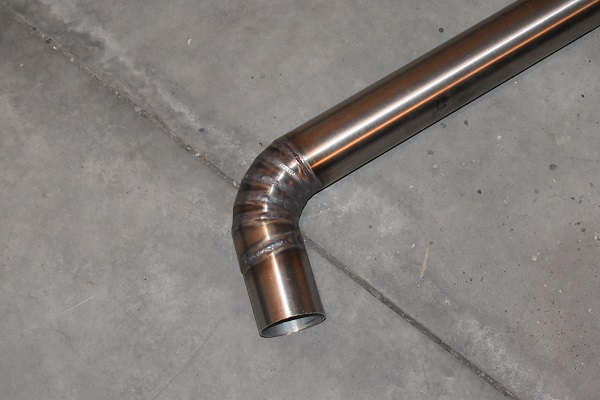
The whole thing assembled really nicely.
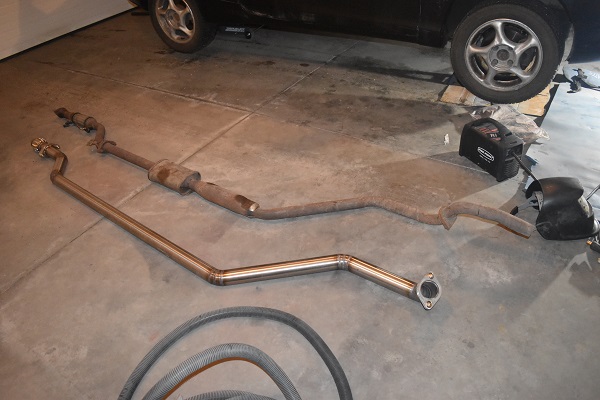
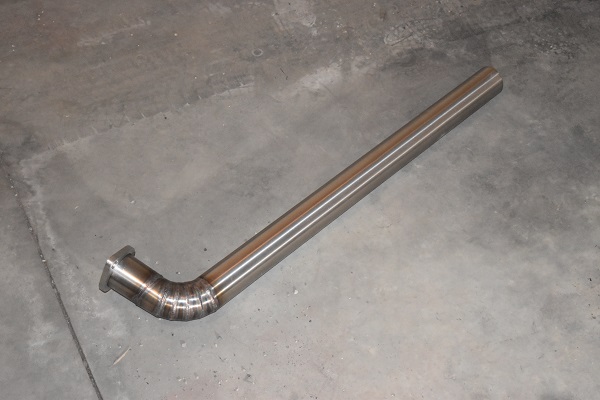
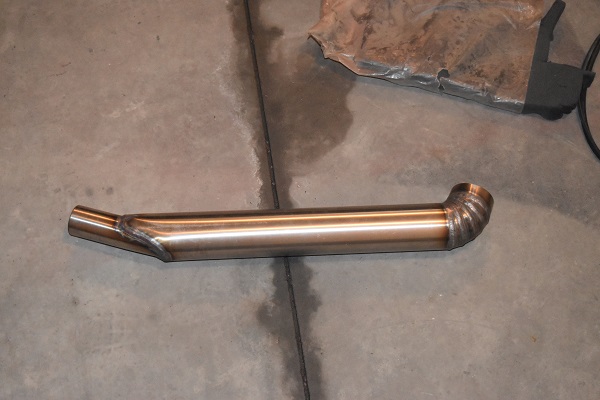
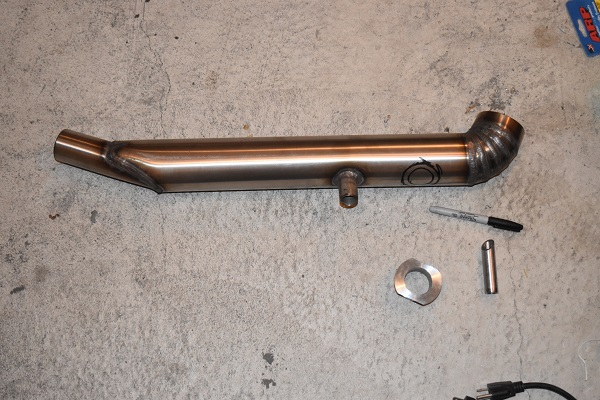
17 November 2018 - Here is the down pipe, it certainly looks a lot better than the original.
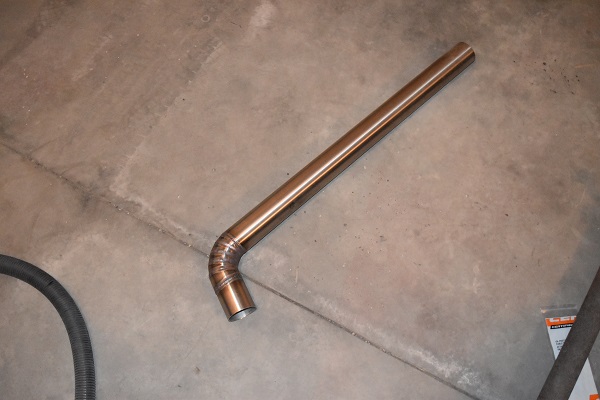
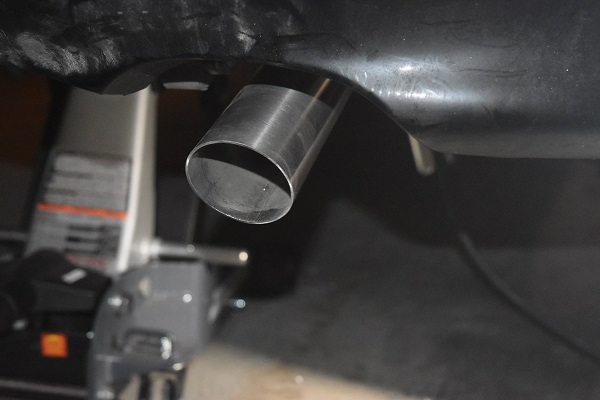
This is the rear of the exhaust, a complete straight through system.
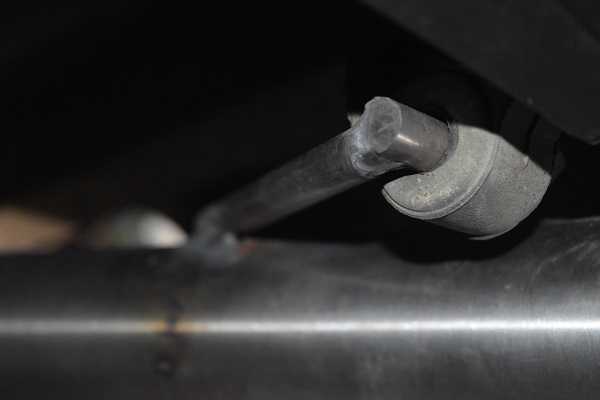
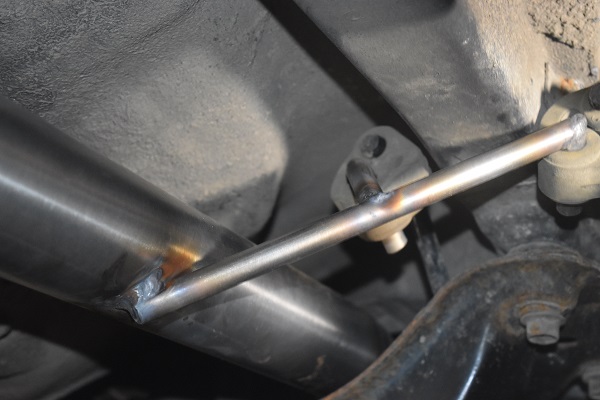
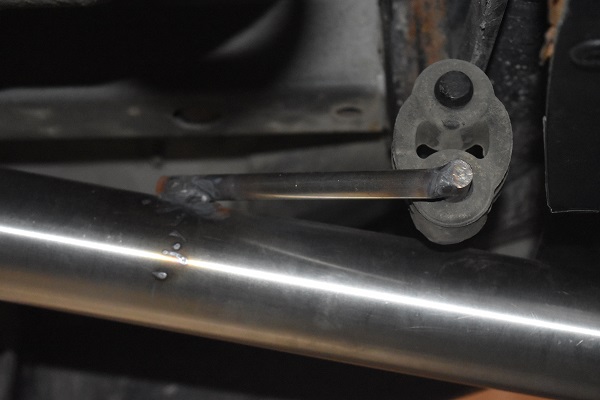
I installed some hangers as to not put strain on the front of the exhaust, it also allows the pipe to move from thermal expansion.
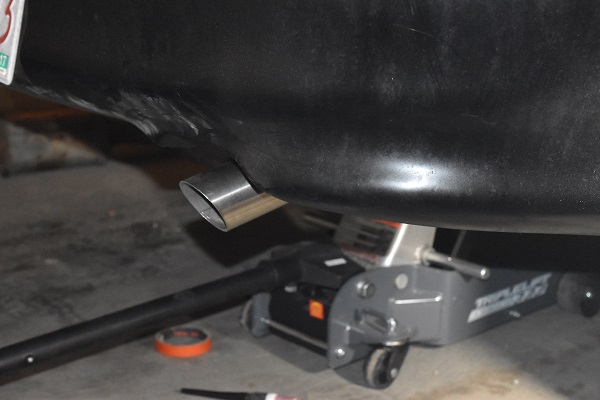
Another shot of the rear exhaust system.
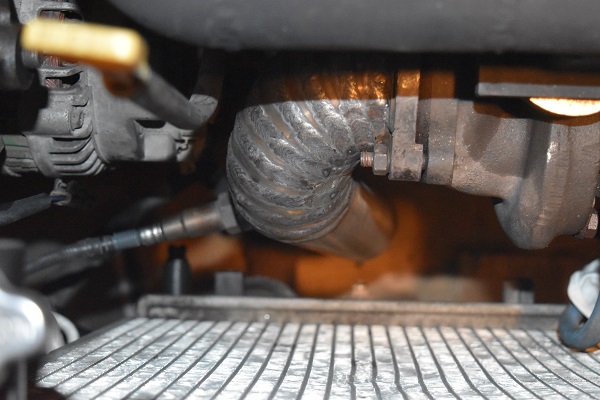
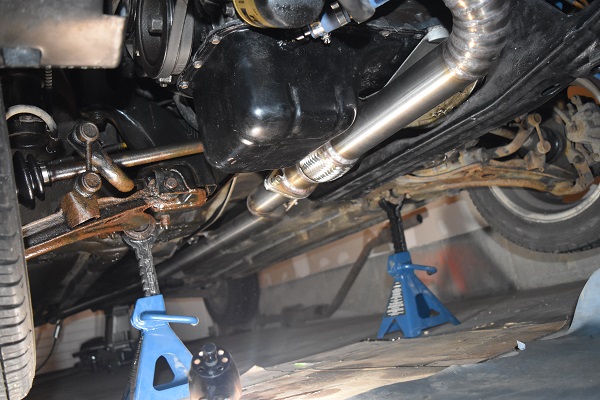
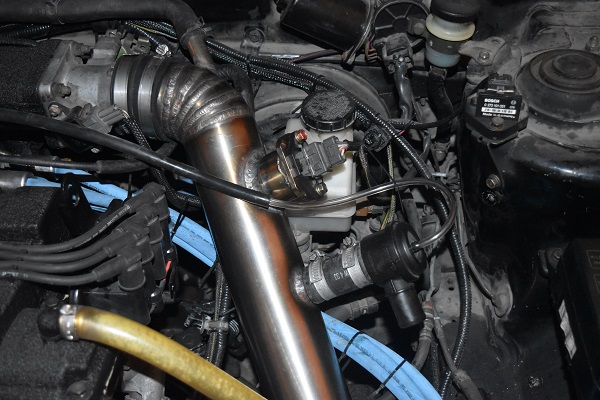
The exhaust system hangs a little lower than it did stock but it certainly should not cause any issues since the suspension is stock. The down pipe clears everything a lot better this time, no melting the alternator wires.
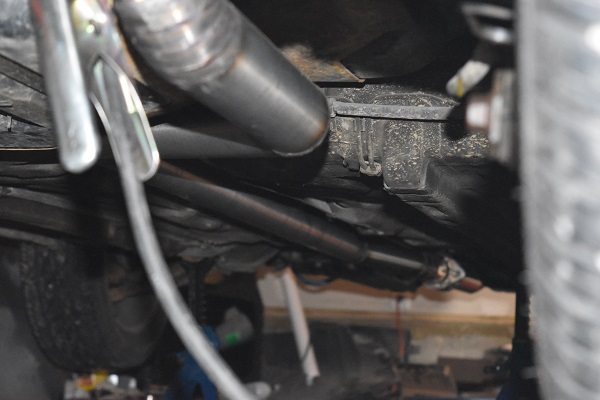
The front section of exhaust is still higher than the sump and the front transmission support. You can see there is a nice coating of engine oil everywhere from the mishap, at least it will prevent some rust.

18 November 2018 - I wrapped the down pipe in some thermal cloth as to reduce some of the heat up front.

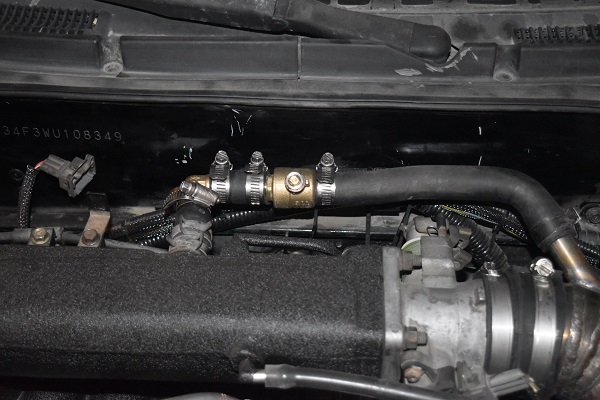
20 November 2018 - A big problem with the car is the fueling system since it relies on a piggyback and a secondary fuel rail. Since injectors have a minimum on time it means that until they reach their maximum capacity the second set of rails cannot kick in otherwise it will result in a rich mixture. It is quite clear when the secondary set kick in, I must kick it in early as to avoid a lean running condition. A solution to this would be to increase the internal diameter of the MAF sensor. If I increase it by 30% then the ECU will see a 30% reduction in flow, I can then make up this 30% with the secondary rail. Overall by keeping both sets of injectors running it will mean a smoother power curve and a much easier fuel control table.
The longer the straight section of pipe from the intercooler, the less turbulent and more accurate reading the MAF sensor will get.

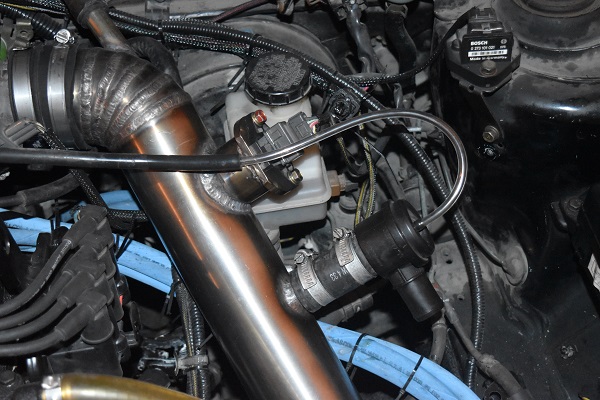
This is the vent for the blow-off, a must to save the life of my turbo and to prevent me blowing the piping apart.
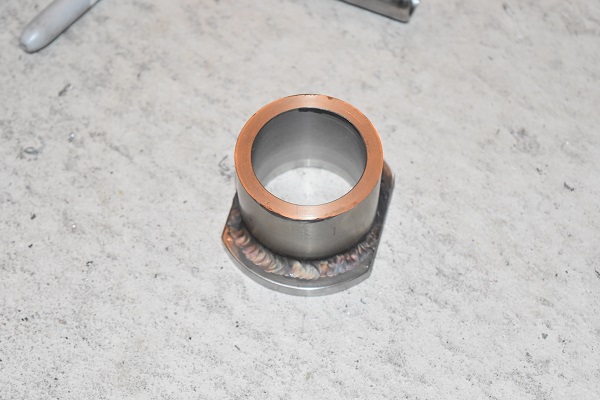
I borrowed a lathe at a local machine shop in order to machine a housing for the MAF sensor.
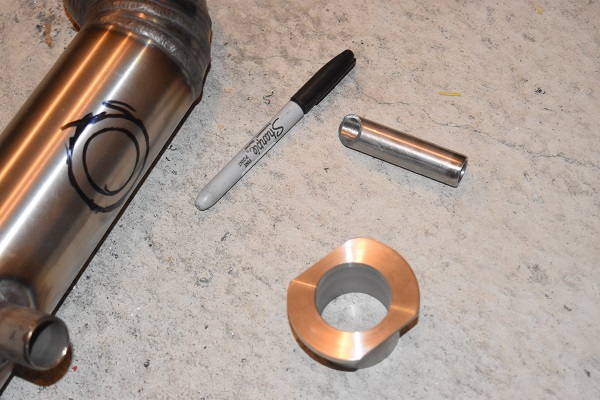

Here is it all welded together.
Installed on the car. I cannot run any boost as I believe the pipe will just blow off, I still need to weld a lip on the tube.
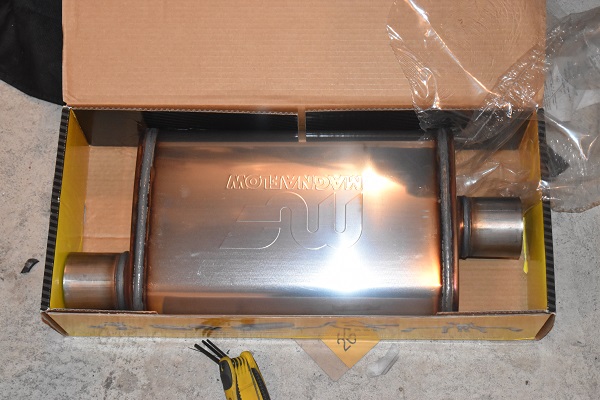
20 November 2018 - I adjusted the program on my fuel turner so it would add 30% extra fuel to what it reads on the stock injectors. It did work however the idle was really rough and would fluctuate a lot. To get around this I would have to get my fuel controller to modify the MAF signal to the ECU, this was something I removed a few months earlier. On a side note the car is stupidly loud, I chose to get a performance muffler. I knew it would still be louder than stock but hopefully not too loud.
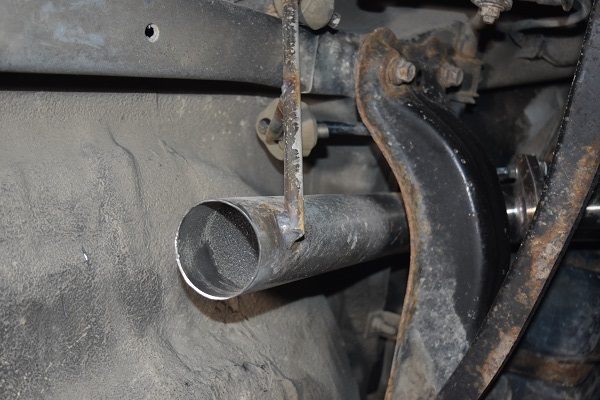
I chopped the rear pipe off to install the new muffler.

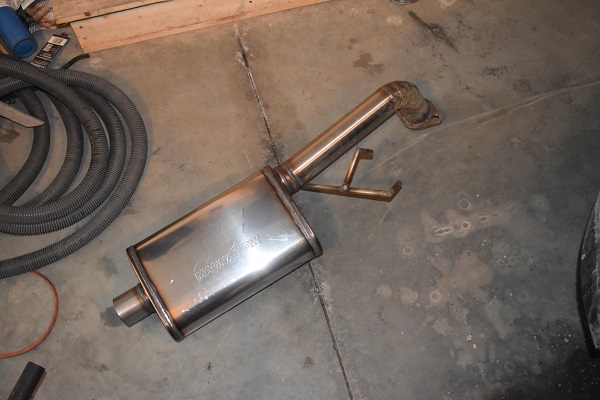
There wasn't quite the room for the last hanger so I left it out, the whole system is still lighter than stock.
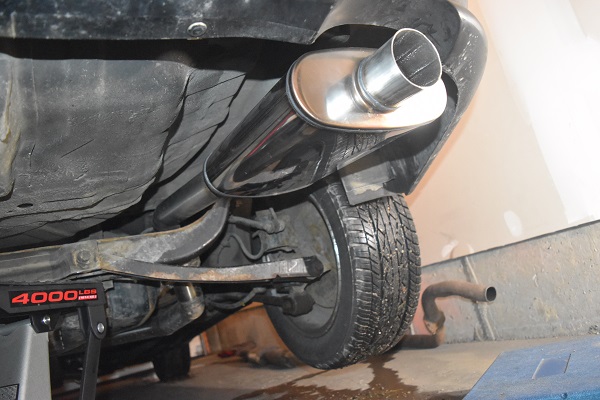
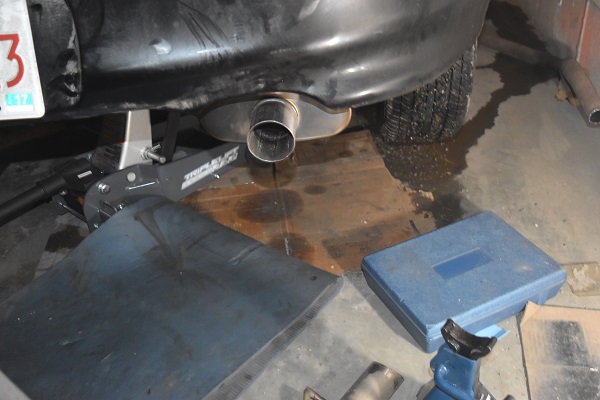
The car was a little quieter after installing the muffler. I still had some huge problems with the car idling so I removed the idle actuator and replaced it with a valve to see if that was the issue. The idling was actually even worse. My theory is that the MAF is barely in the threshold of where it reads a flow and when it does not read. It adds fuel to increase rpm's which then registers a flow, it then drops fuel because it is too high and the idle drops really low, it keeps repeating this cycle.
I have since got a second car as my daily driver so this will now be a complete project. I really do not like the fact that I'm running a piggyback system so a standalone is next on the list. I will be making a test station that replicates the Tiburon's engine, I will be building my own standalone ECU system to test on it before I get the whole thing installed on the car.
Hello, if you have enjoyed reading this project, have taken an interest in another or want me to progress one further then please consider donating or even sponsoring a small amount every month, for more information on why you may like to help me out then follow the sponsor link to the left. Otherwise you can donate any amount with the link below, thank you!