Turbo Tiburon - Standalone ECU
I decided that I needed to get the tiburon turbo running good, I just didn't have the time to finish off my own standalone ECU project. I decided to buy an EMU classic to quickly and cheaply get the car running on a good tune. It is best to check through the past projects of what has been done to the car, but here is a quick summary;
Forged 8.8:1 CP Pistons, Garrett Saab 900 Turbo, 300BHP Clutch, Lightweight Flywheel, Twin fuel Rail, AEM Fuel Pump, 2.5 inch Straight Exhaust, Solid Engine Mounts, Front Intercooler and a few other bits I can't think of. Plus complete engine rebuild.
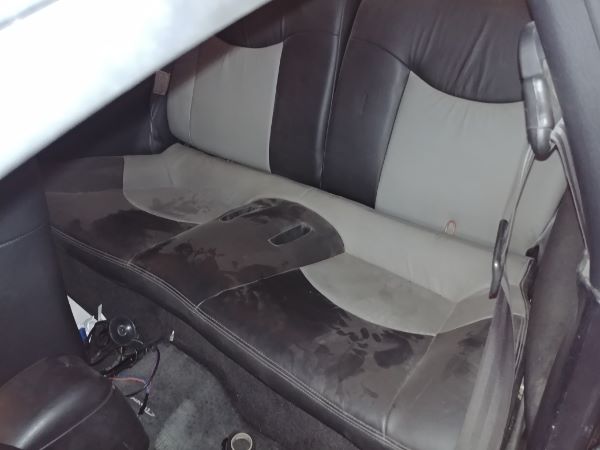
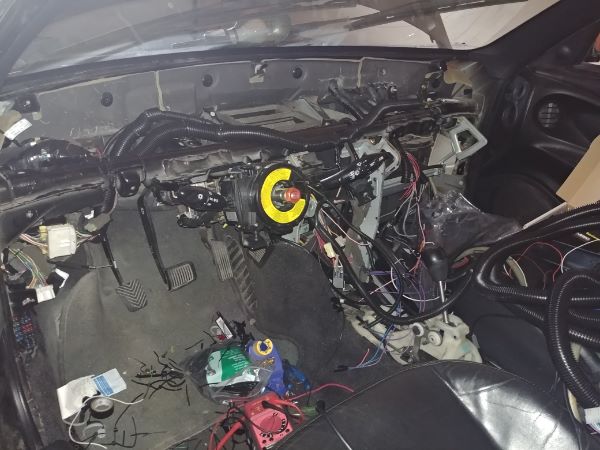
13 October 2019 - I did this conversion many months ago but I have only just got around to typing it up. The first step was to strip out everything I didn't need in the car, this meant all of the rear interior (I have yet to decide whether I put an extra engine in the rear). I imagine a good 150 lbs of weight was removed in the seats, plastic trims and the spare wheel. I then proceeded to remove the front dashboard in order to cut out anything not required.
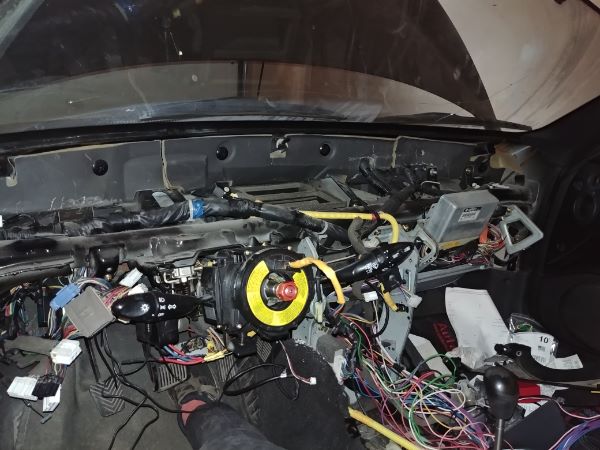
This was quite a big job because the car was originally automatic and there was lots of unnecessary wiring left over from the manual swap. I wanted to keep the car on the road so left all of the body wiring alone.
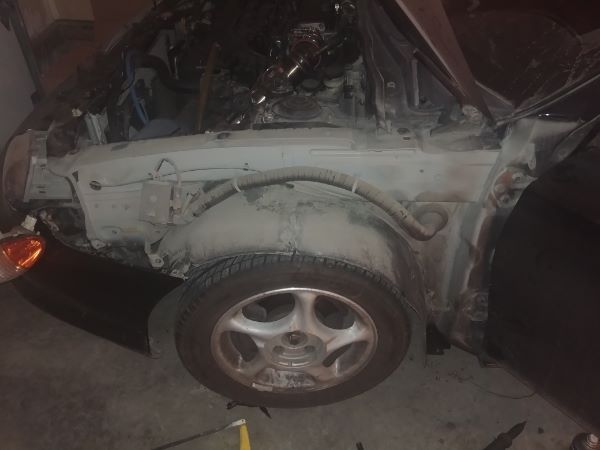
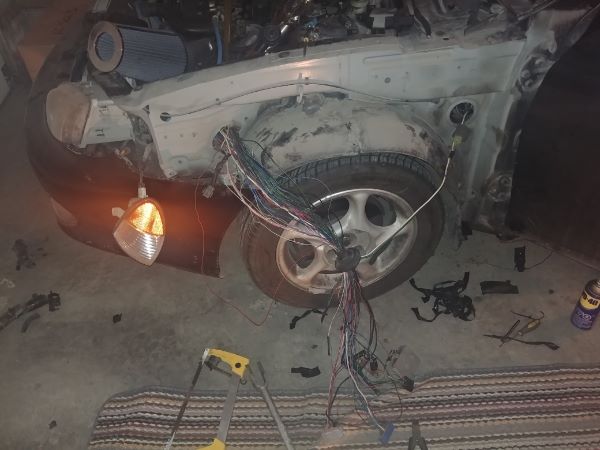
The wing had to be removed to access the full extents of the wiring loom.
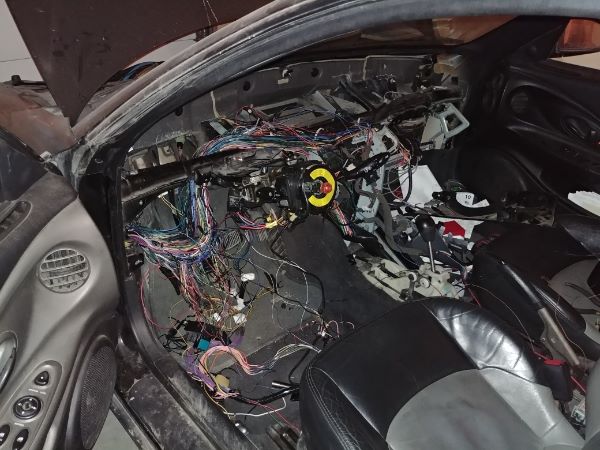
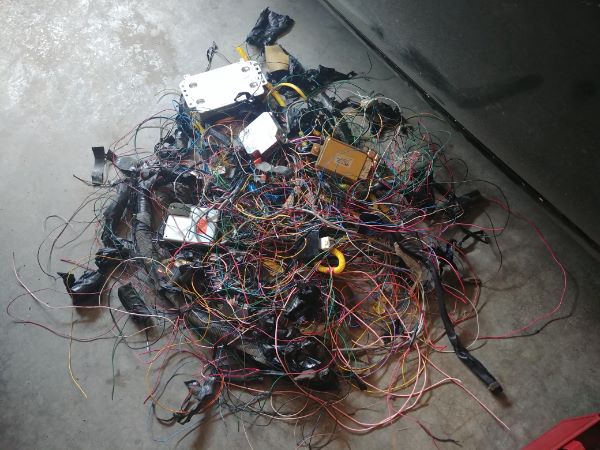
In the end I removed a huge amount of wiring and control modules from the car. With all of this removed all the body lighting, indicators, wind shield wipers, etc.. would all still work.
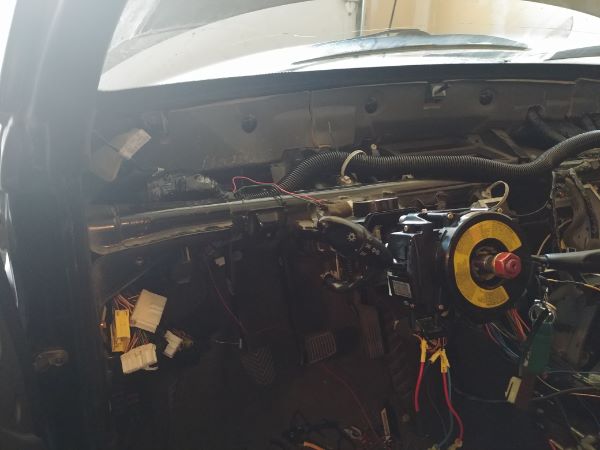
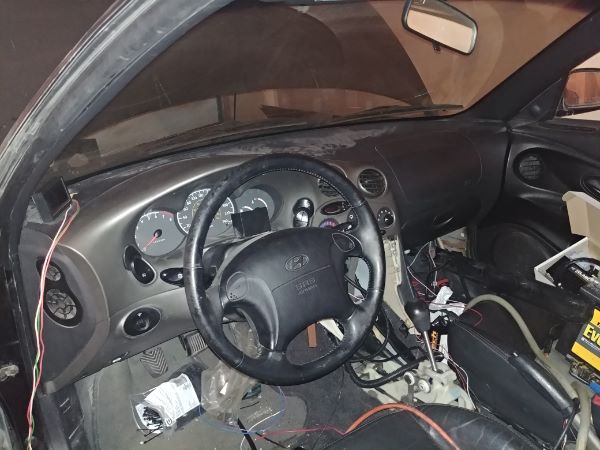
I then proceeded to tidy up all of the wiring and put the dashboard back in place.
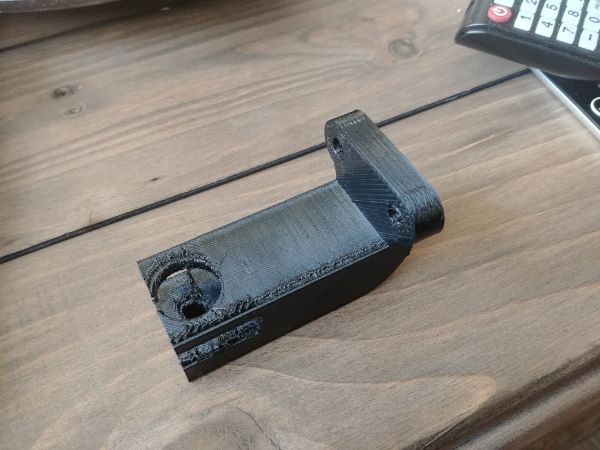
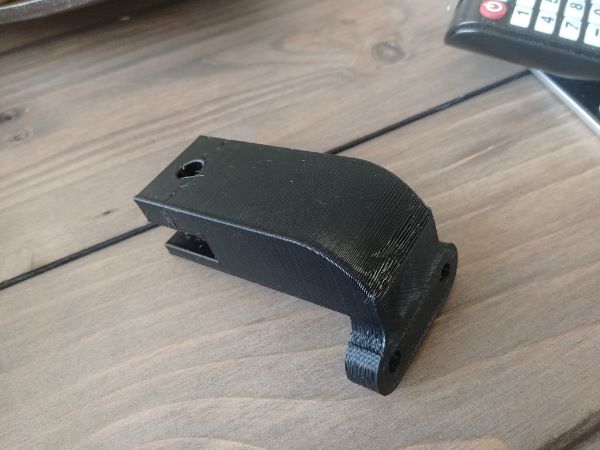
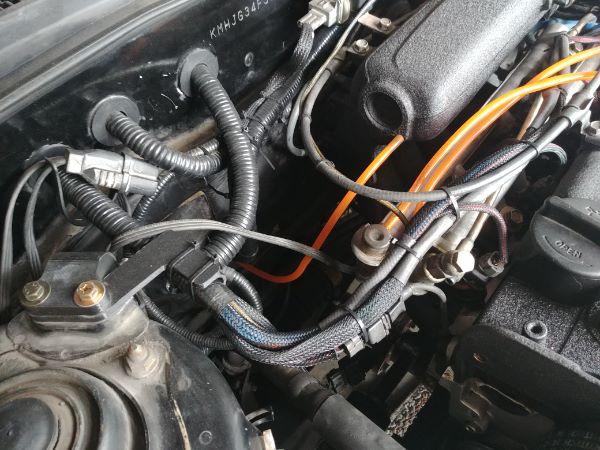
I chose to redo all of the wiring in the engine bay, unfortunately not many pictures were taken. I 3D printed a hanger for the positive battery terminal, this is so I wouldn't need to keep it wrapped in tape.
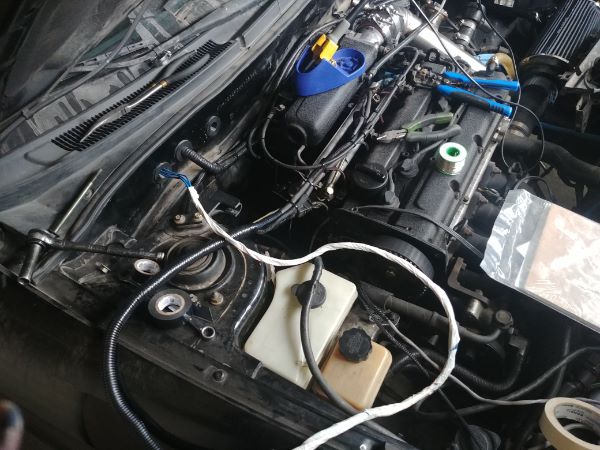
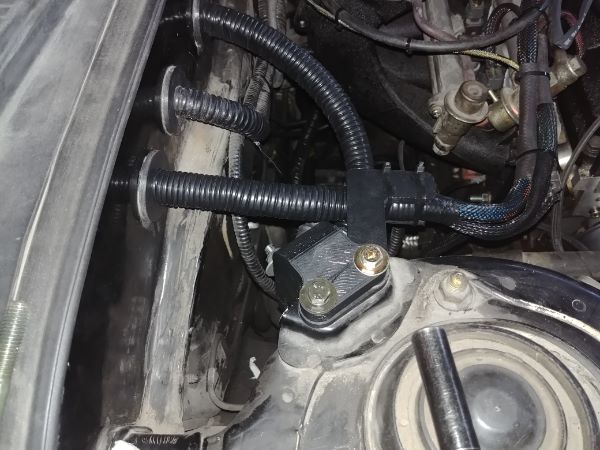
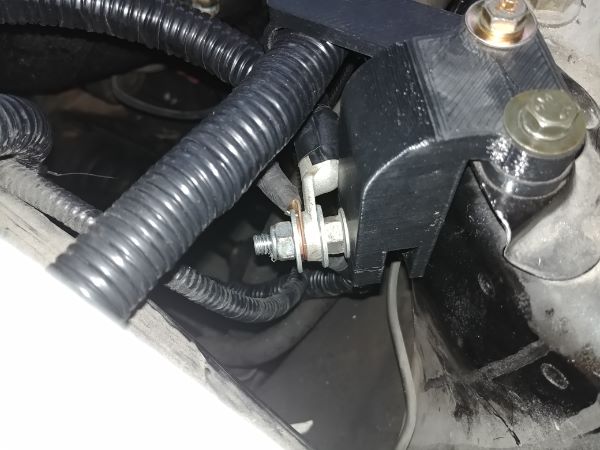
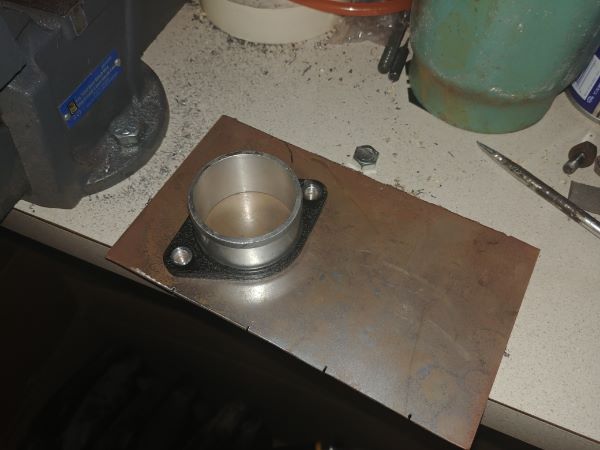
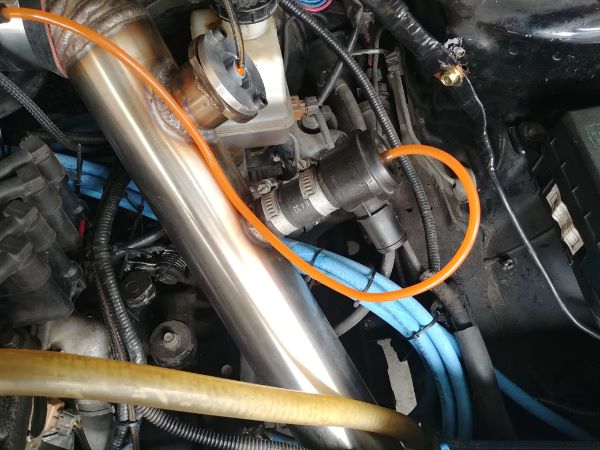
I removed the whole of the air conditioning system to reduce a little weight but mainly to make some room from the engine bay into the dashboard. I 3D printed a bracket to cap off the firewall, it also served a second purpose. This cap had a hole in the middle to allow the grounding cable to pass. Another hole was for the MAP sensor on the ECU to the intake manifold, the shorter the tube, the more accurate and responsive the ECU will be.
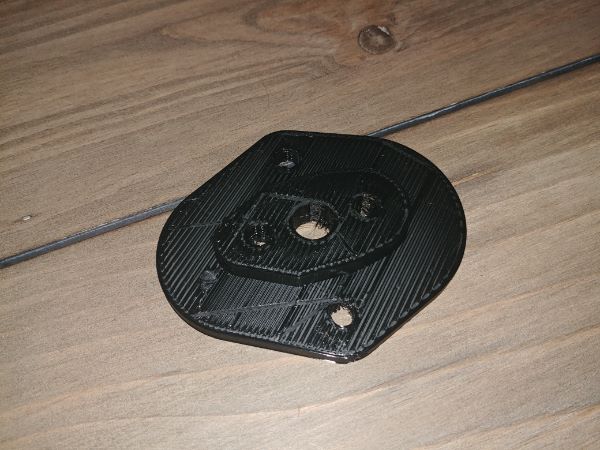
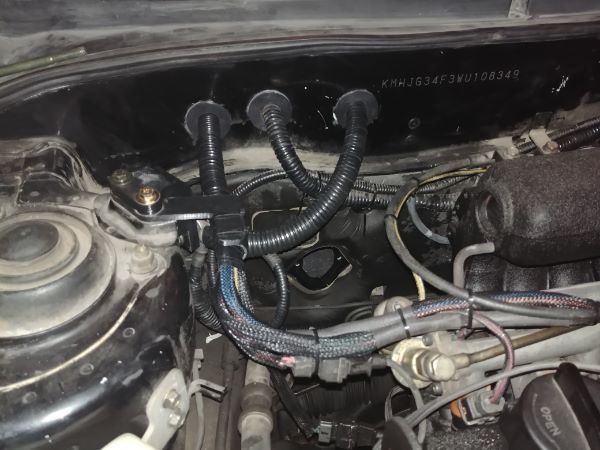
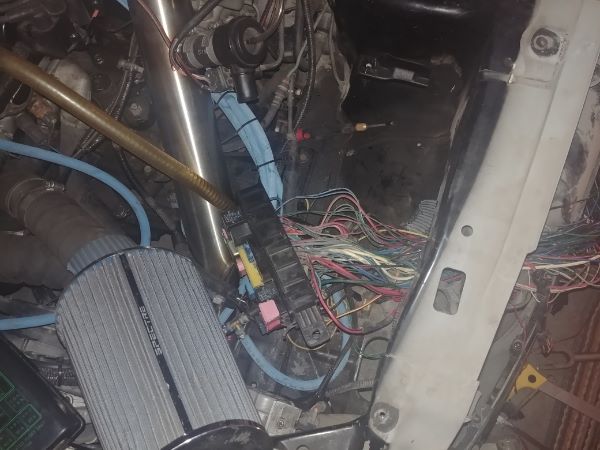
The orange line on the left is that from the intake manifold to the MAP sensor on the ECU. The picture on the right shows the copper grounding bracket that links all of the grounds in the engine bay to that on the battery.

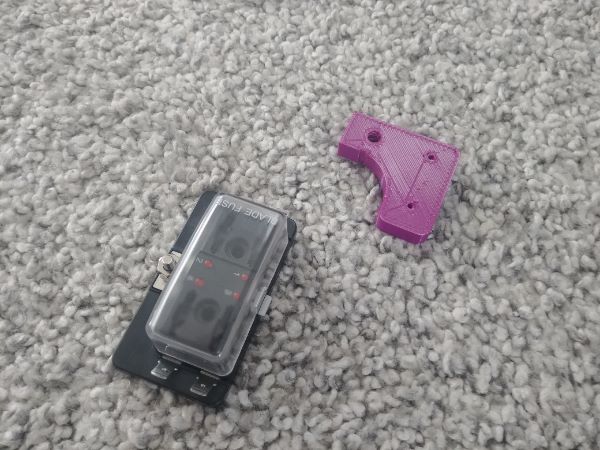
I 3D printed a bracket for a fuse holder on the inside of the glove box, this is to power relays for the fuel pump, fuel system and ignition system.
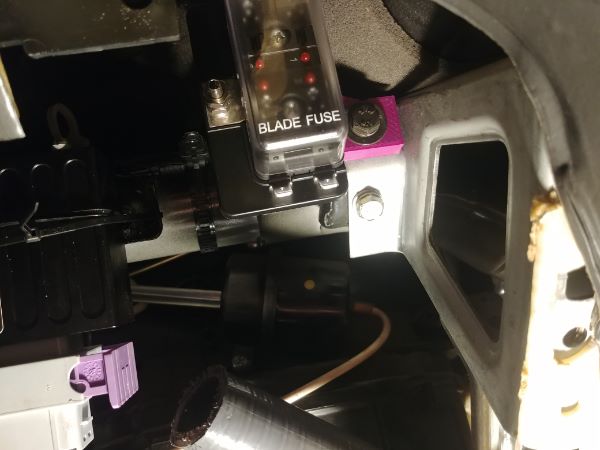
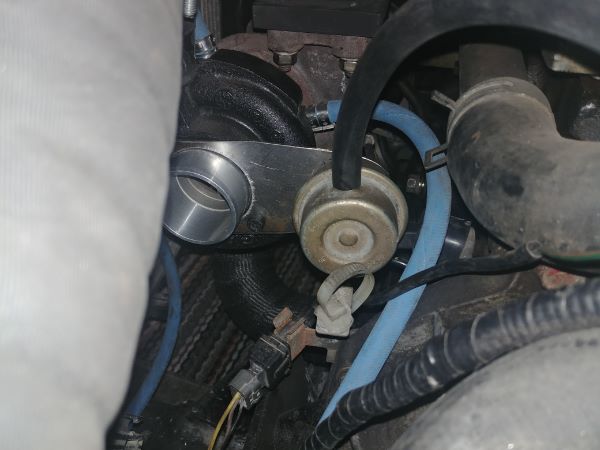
A while back I had removed the waste gate from the turbo, I even cut off the original tab. Since I had recently remade the turbo manifold it meant that the bracket I previously made was no good. I quickly made one up out of sheet steel for testing purposes, I will later make it more permanent.
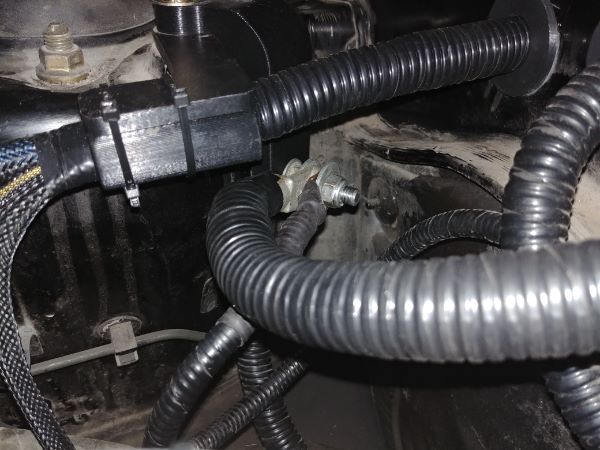
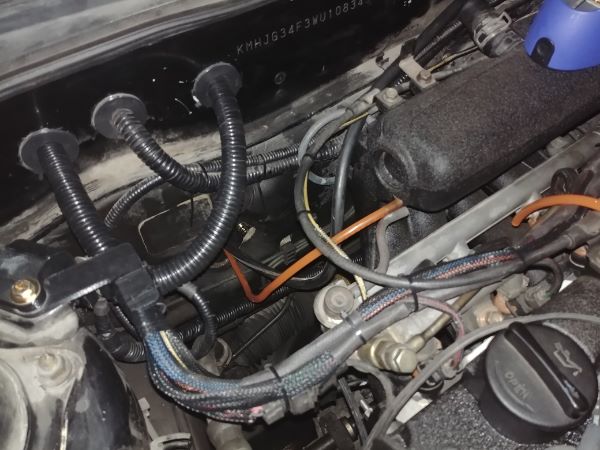
Here shows the engine bay in almost finished condition. The orange tubes are all vacuum lines that connect the intake manifold to the pressure regulators and the blow off valve. The black tubes are soft silicone whereas the orange tubes are hard polyurethane. I used some security wire to secure the tubes together, it also keeps them sealed as the tubes soften due to heat.
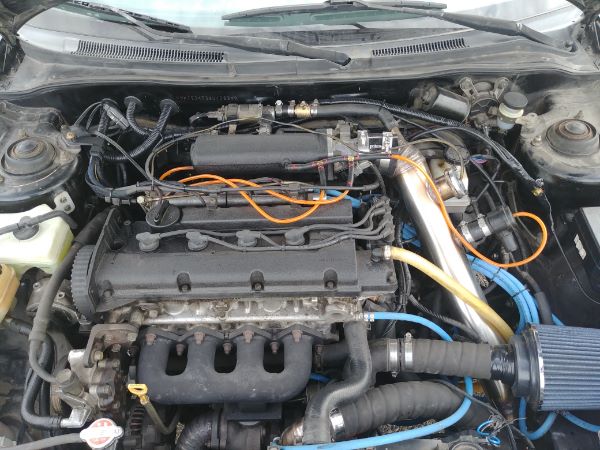
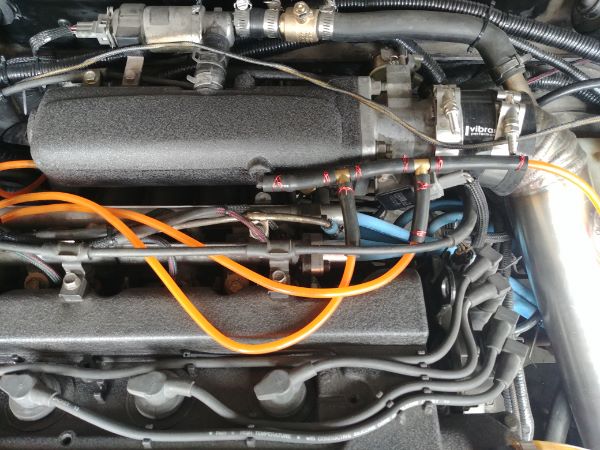
I will add that the engine bay is not quite complete yet but is perfectly functional. I would definitely like to make a fuel manifold for the fuel rails as these are just tied together with hose barbs, it looks a little messy. I would also like to replace the stock regulators with an adjustable one. The vacuum lines need to be cleaned up somehow, again it looks a little messy. I got the welds a little too hot when TIG welding them so I would like to blast them down to raw stainless, again this will look better. There are many many more things to do but that will be saved for a later project.
Standalone ECU
A standalone ECU is an aftermarket term for an ECU other than stock that can be programmed. The reason for going standalone is because the stock ECU may not be programmable and is only capable of controlling the stock auxillaries of the car. The standalone ECU also has many more extra's that a stock ECU can not support such as boost control, extra injectors, tune switches, etc.. The particular ECU on this model of car cannot be programmed without deconstruction, the standalone can be tuned in real time which certainly makes things a lot easier.
I will follow up in a totally different project of how a stock ECU is to be programmed. It all depends on the construction of an ECU too as they are all built differently. For the most they used to have the engine tune programmed to a small EEPROM / FLASH chip which is then inserted in the assembly line. There are of course many ECU's that can be programmed directly but this does not apply. The chip can be desoldered and then analysed to see how the tuning tables are constructed. Once it is clear how the tune is laid out either a new tune can be applied to the chip and soldered in or a computer can replicate the chip and provide real time tuning.
The ECU I have chosen for my application is the ECU Master Classic because it was cheap but very capable. I will also add that while I know the theory of how an engine works and how an ECU works, this is the first time I have ever tuned a car. So all I will say is that this may not be the perfect tune for this car or engine, I will leave the files at the end of this page.
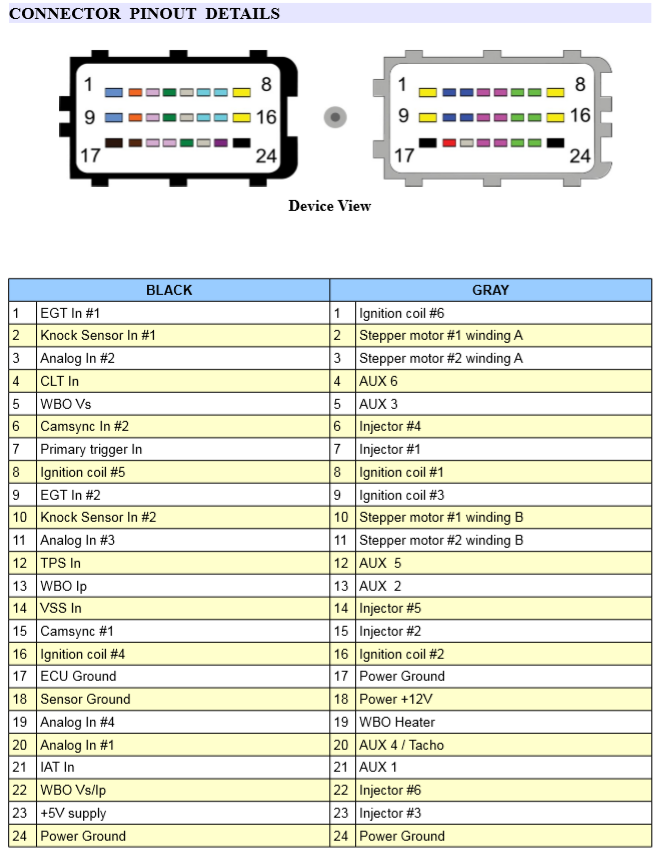
Here to the left is the pinout diagram for the ECU, this was taken from the official manual which goes over setting up all aspects of the ECU.
There is a little printout card that comes with the ECU, it is colour coded to each of the pins and makes wiring very easy.
The majority of the pins have a single purpose and cannot be used as anything else. However many of the pins can be used for anything, such as the injectors can be used to control relays.
It is also pretty amazing that the ECU comes with a built in wide band oxygen sensor controller. For my application I already had one so I did not need to use it.
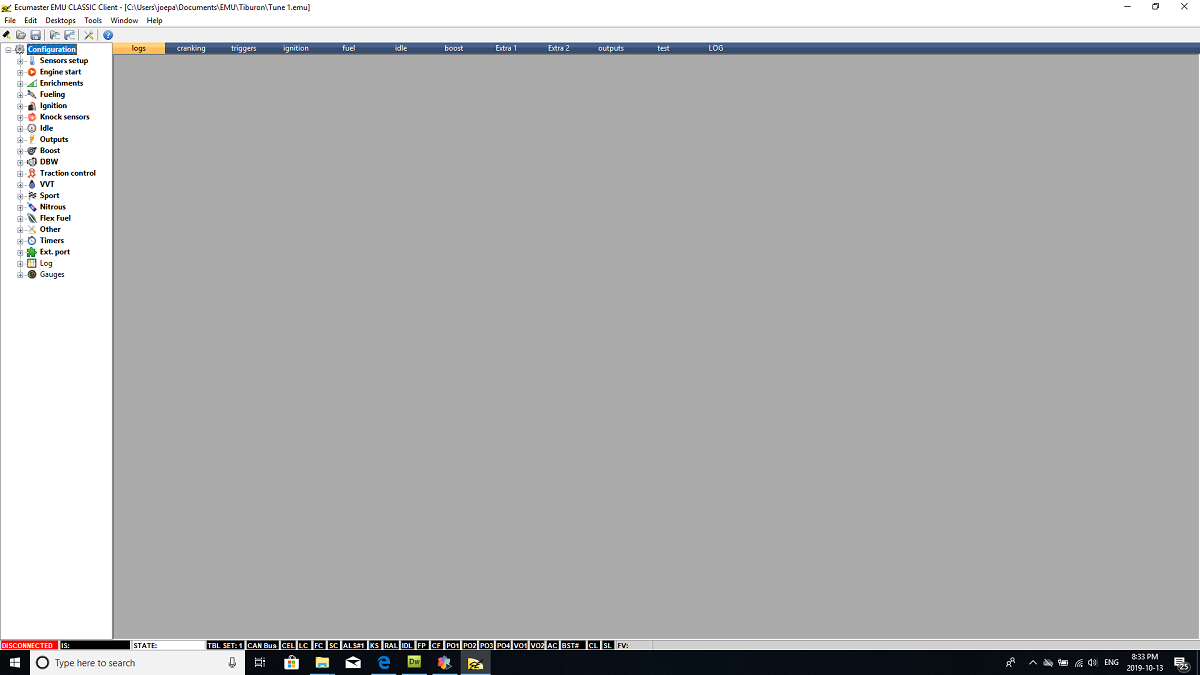
I have already connected all of the correct pins to my application, this page is mainly to show how I configured my setup.
Here shows the software when opened for the first time. Down the left is a column with all of the engine parameters. I will show all of those related to my build, it can change between applications. I will work down them in order of how they are displayed.
Sensor Setup
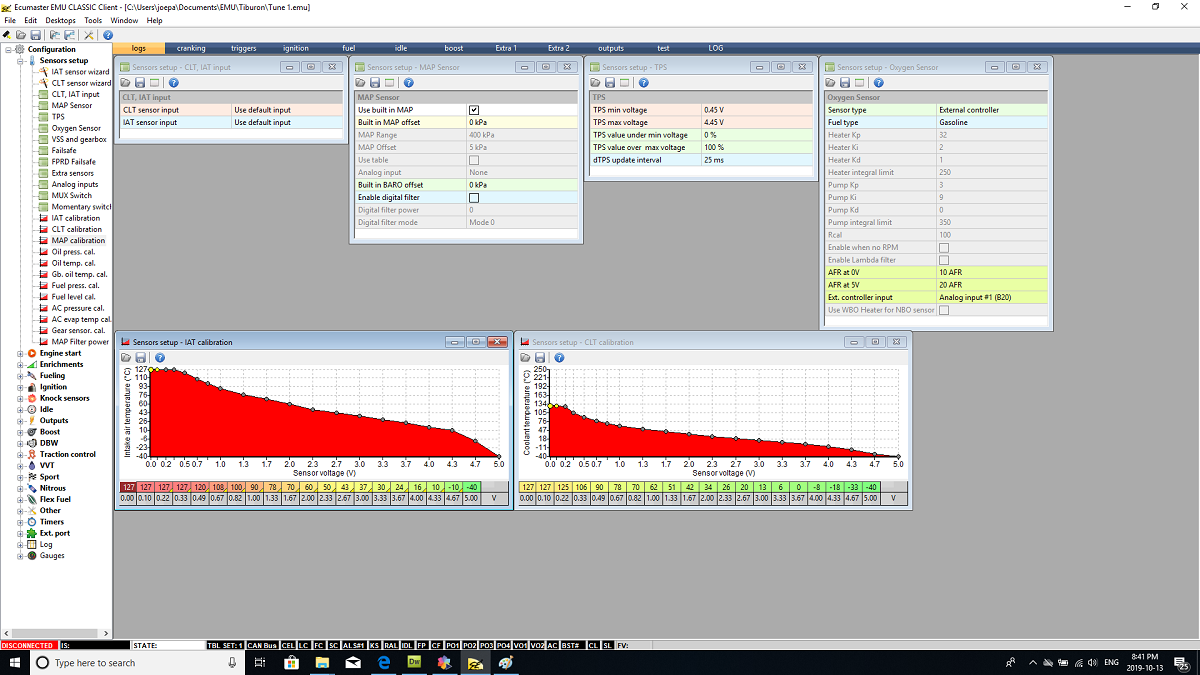
The most basic sensors are what I chose to go for. The only sensor that might not be needed is that of the coolant temperature however this determines what speed the engine idles at, what fuel enrichments it may need for starting and a few other parameters. I enabled this sensor and took the information from my cars workshop manual. If the information is not available then the sensor needs to be removed and measurements taken in water of varying temperatures to log a graph. The voltage of this sensor is dependant on resistance, it is connected to a potential voltage divider. One end of the sensor connected to sensor ground, the other end the ECU input, and then internally from this input to a 5V rail is a 2.2k ohm resistor. When the resistance of both match, the voltage will be half the supply rail, so at 2.2k ohm it will read 2.5V, coincidentally this is room temperature, 25 deg C.
The intake air temperature sensor is very important as when heat increases it greatens the risk of knock. The ECU needs to know the temperature so it can retard timing or increase fuel if the air gets too hot. Like wise it can advance the timing to get more power from the tune if the air temperature is cold. For a turbo application this sensor is critical as compressing air will greatly increase temperatures, the reason an intercooler is used. I got a GM style sensor with a voltage table based on a 2.2k ohm resistor, this made setup a lot easier.
This ECU comes with a built in MAP sensor, this measures manifold pressure and should be located as close to the intake as possible, the reason I threaded the orange hose through the firewall. Depending on engine RPM, temperature, volumetric efficiency and manifold pressure the ECU can calculate how much air is being compressed inside the engine cylinders. Sensors are more prone to failing when mounted to an engine due to vibration, an external sensor on the ECU will be more reliable, however a hose needs to connect this which is also a possibility for failure.
The throttle position sensor is used for many parts of the tune but is not strictly necessary. This sensor is often used for engine enrichments or boost control as it acts like a "heads up" for the ECU. If I plant my foot on the accelerator it will read this way before changes start to happen elsewhere in the engine. It is commonly used to enrich fuel to prevent a lean fuel spike if the throttle is applied quickly. The voltages are based on the "Log" folder towards the bottom of the menu, as the throttle pedal is pressed it will give a live readout, I then set the parameters based on these values.
Lastly the ECU can be used to control a wideband oxygen sensor or it can accept an external sensor. I had bought an external sensor a long time ago so I chose to stay with that. To setup this sensor there is plenty of information in the manual.
Engine Start
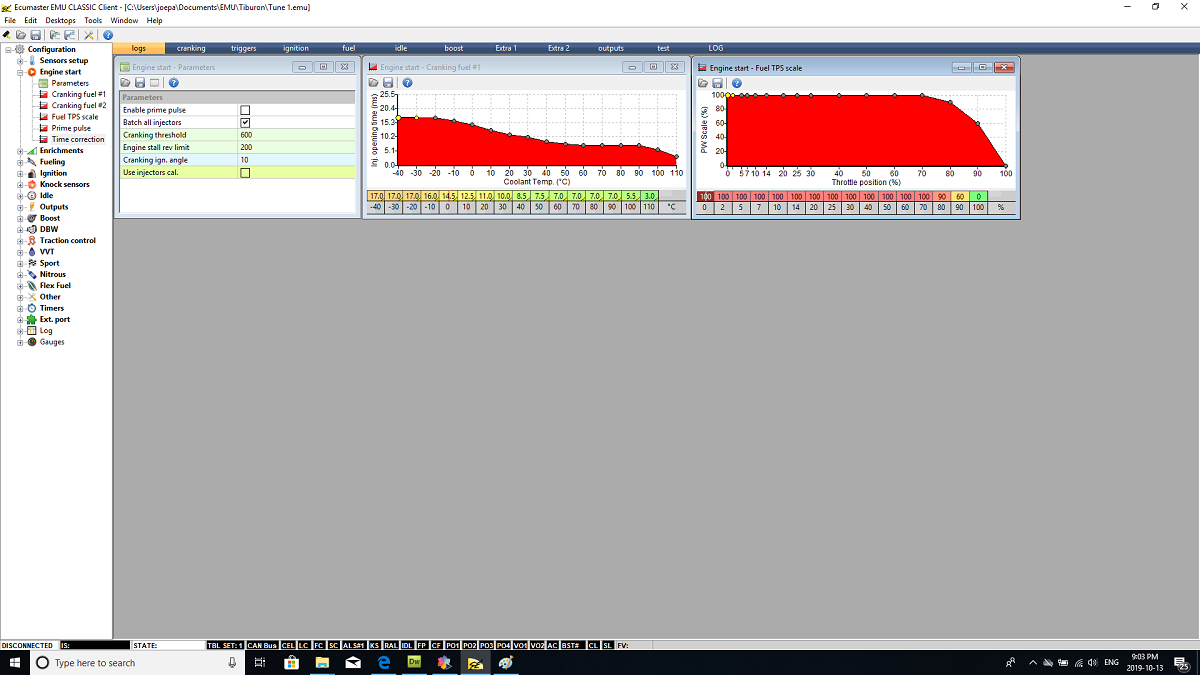
Starting the engine requires a lot more fuel than you could imagine, this can often be based on experience. When engines used to use a carburetor to mix the fuel is was common practise to apply the choke when starting. The choke would restrict the flow of air into the carburetor and therefore increase the vacuum inside to the engine. This greater increase in vacuum would pull more fuel into the engine to help it to start.
These injector opening times all depend on the size of the injector, for my car they are only 190cc. At room temperature my engine needs them to batch fire at over 10ms in order to start the engine. As the engine warms up it requires less fuel to get it started, this is the reason for the coolant temperature sensor.
The last thing to comment on is that the cranking threshold is where the engine switches over from this starting map to the actual tuning map. The engine stall limit is where the ECU shuts down ignition and fueling. The cranking ignition angle is the firing advance when starting, this is often anywhere from 8 to 12 degrees. Any less and the burn will be wasteful, any more and it can stall the engine.
Enrichments
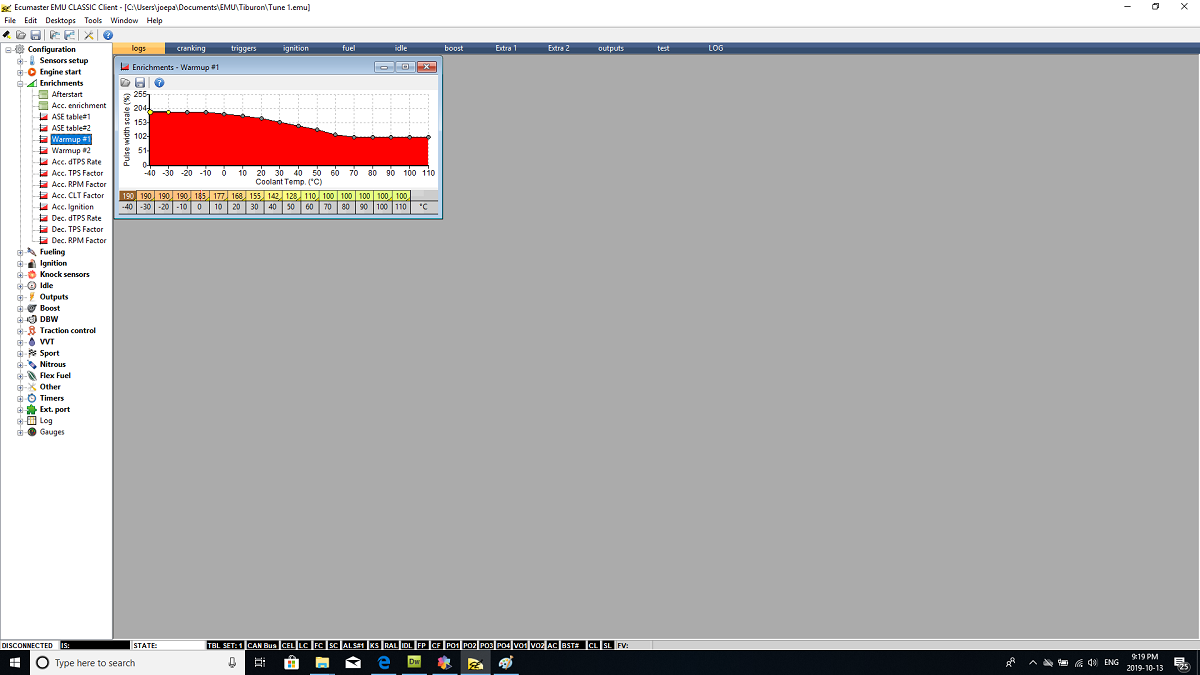
These are enrichments added to the fueling and are usually only used dependant on engine temperature. So in my case the injector pulse width is increased until it reaches operating temperature. Other enrichments can be based on throttle position and even ignition angle. A good example on the ignition timing is that knock is more damaging at higher rpms where the advance is very high. A way to reduce knock is by increasing the ratio of fuel to air.
Fueling
The fueling is one of the biggest parts when tuning a car, there is a lot to go over here.
The first are some general parameters of how we want the ECU to work dependant on engine displacement and injector size. For my engine the displacement is 2000cc and I want to base it off speed density, this requires an IAT sensor and MAP sensor. I want to base the fueling strategy to an AFR table, this will mean the ECU will make micro adjustments to aim for this. Baro correction adjusts the tune dependant on altitude, there really is no reason not to tick this. Finally the ECU must know what size injectors it is dealing with in order to provide the correct amount of fuel.
Staged injection is for additional fuel rails, only an extra one for this ECU. I have two fuel rails on my engine due to the fact that I can upgrade one set for more fuel but I can also keep the stock set so the car idles and runs properly on low power. The staged injection is an extra injector to provide additional fuel, this can be just one or several together as they all batch fire. This engine will run fully sequential while the secondary fuel rail will run in batch configuration when extra fuel is required.
Injector phase is dependant on the engine configuration, my engine is an inline 4 cylinder. The injector phase is dependant on the ignition event which is 1 - 3 - 4 - 2, basically what is shown here is correct. I will also add that if staged injection is chosen then nothing else needs to be changed in this box, the ECU will know what to do.
Fueling cut is the final method for limiting RPM, personally I do not like this method as cutting fuel at high RPM is a recipe for knock. I set this limit about 1000 rpm higher than the soft cut, as I'll explain later.
Injector calibration is the opening time reference to the battery voltage. In basics the injector has to open for a much longer time to deliver the same amount of fuel if the battery voltage is low. When the car engine is running at operating speed the voltage should remain pretty constant. This calibration is very evident when it comes to starting the engine, it all depends if this box is checked.
The AFR target table is where the ECU is aiming for, the table provided is pretty generic.
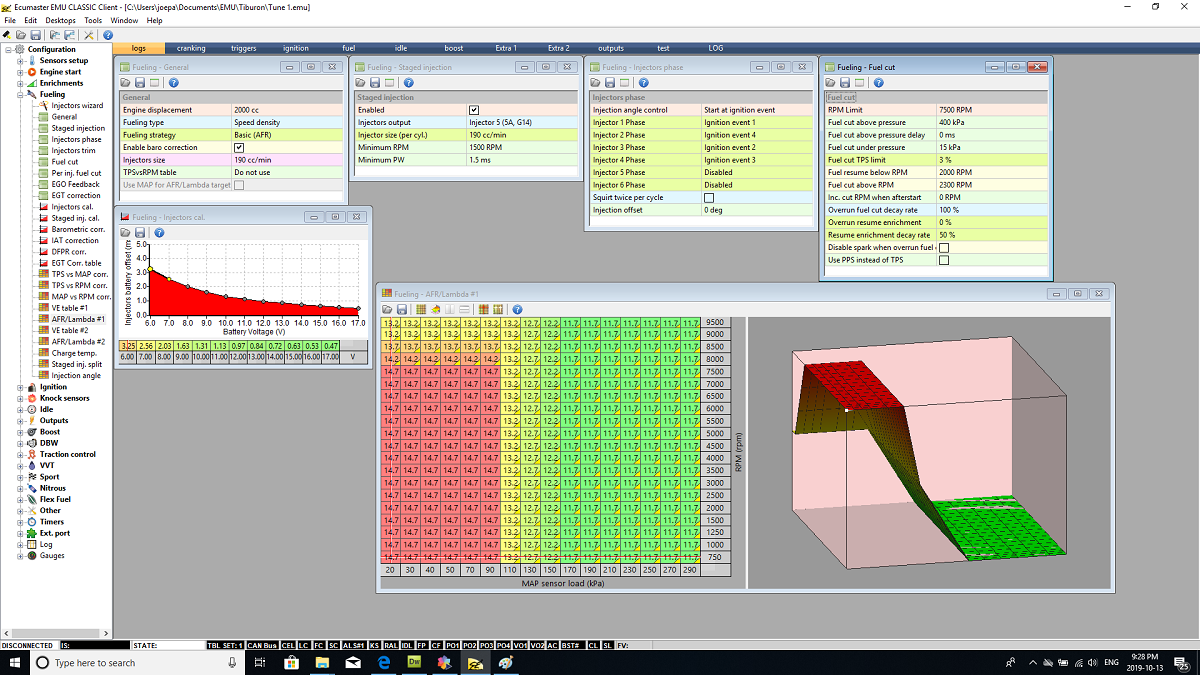
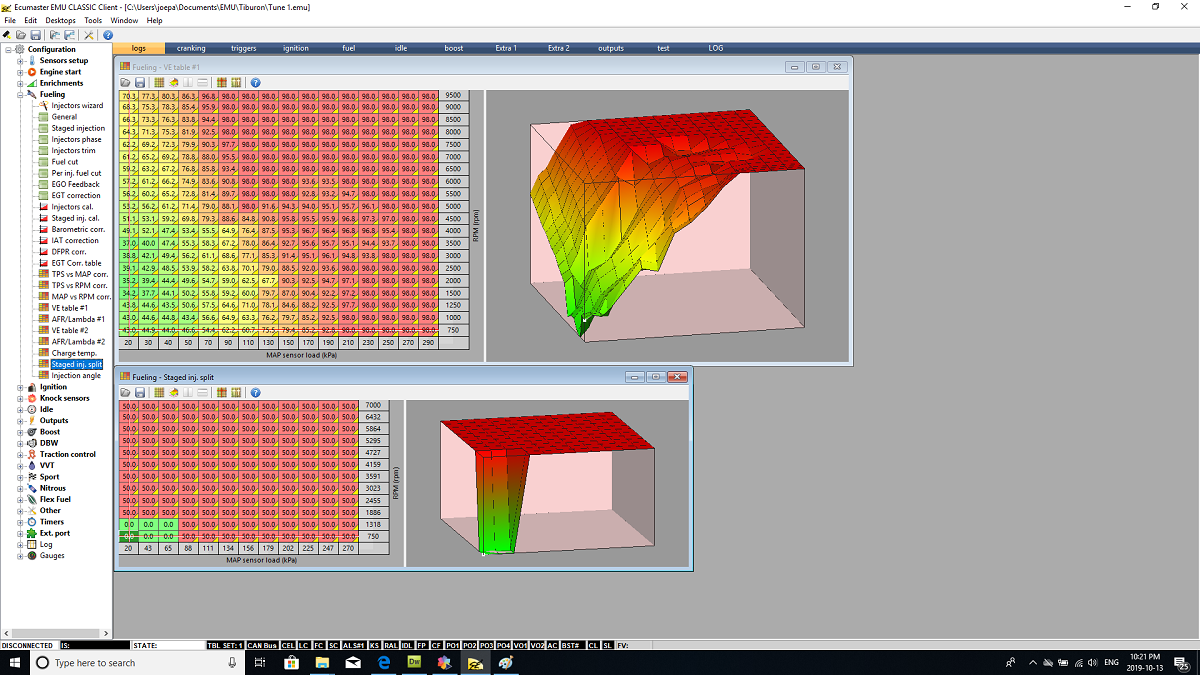
The most important table in the whole of tuning is the VE table, that is if speed density is chosen. The ECU reads engine speed, the MAP sensor, IAT, fuel target and then the volumetric efficiency in order to calculate injector opening time. The VE table is how efficiently the engine is working at transferring air from the intake into the cylinders. This table can be very similar between engines and it is the part tuners spend much time perfecting. This ECU has a self tuning feature that adjusts the VE table taken from data obtained while driving, this is how I obtained this table.
The last table is how much work the primary injectors do compared to the staged secondary injectors. I placed them at a 50% split apart from idle as the duty cycles become way too low. This is a table that I need to update as the secondary injectors shouldn't be required until much higher engine loads.
Ignition
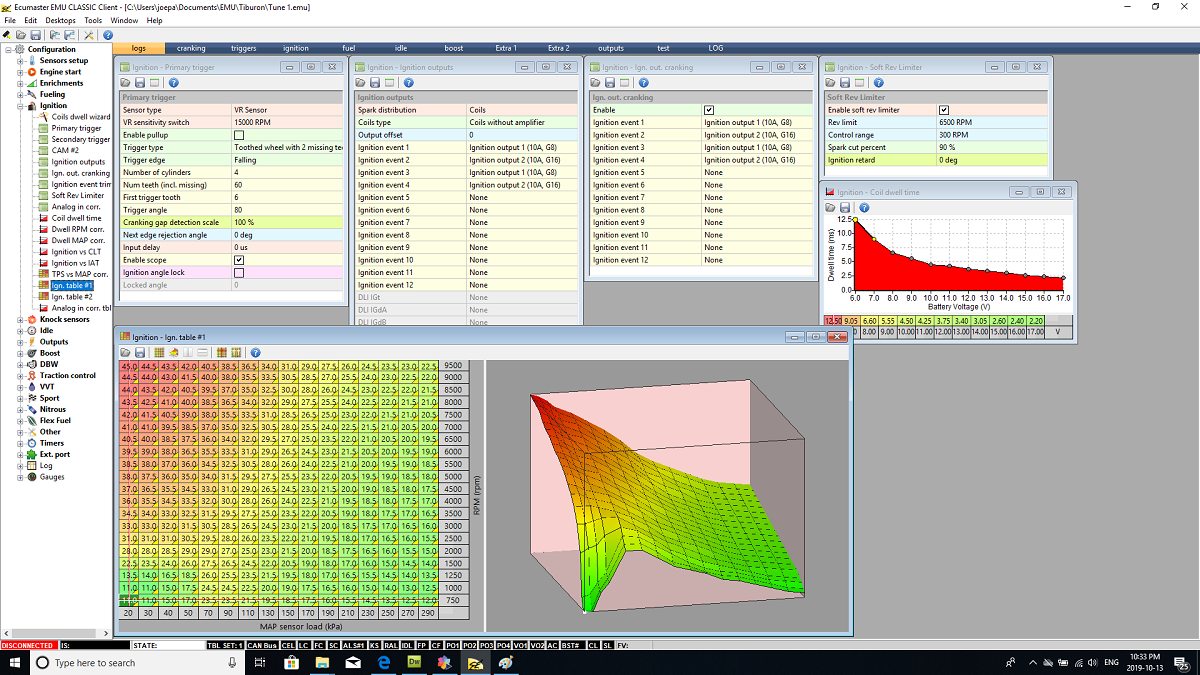
The ignition is the easiest way to destroy and engine and great care must be taken. The first step is to setup the crank position sensor, for this engine it is a VR sensor. The trigger edge is extremely important and can be confirmed using the on board scope. The number of teeth is 60 with 2 missing and the first trigger tooth is 6. The trigger angle can vary slightly between engines and has to be dialed in with a strobe light. I was advised this value was to be 76 but after using a timing light I found it to be 80.
This engines firing order is 1 - 3 - 4 - 2 and uses wasted spark ignition. The ignition event is Coil 1, 2, 1 and 2. The injector phasing is dependant on these ignition events.
The soft Rev limiter is the safest way of limiting engine RPM. This engines stock limit was 6500 and that is what I will keep it as, speed is often the failure of connecting rods and I have not upgraded the cap bolts. There are two different methods to cutting rpm with ignition, one is to cut the spark and the other to retard it. Retarding ignition makes combustion less powerful and most of this is lost as heat down the exhaust, it's an amazing way to over spool a turbo and melt valves. The other is to cut the spark which leads to plug fouling and back fires. Either method works perfectly fine as long as the rev limit isn't bounced off continuously. For racing applications it is best to retard timing as this keeps the turbo spooling and turbo lag to a minimum.
Ignition coil dwell time is how long the ignition coil has to charge to provide the best spark. The higher the battery voltage the faster the coil will charge. If the coil does not charge fully then the spark will be weak. Once the coil is fully charged any more will result in heating and deteriorate coil life. Many aftermarket coils will come with a table, the one provided is generic for most cars.
Lastly is the ignition table. The faster an engine turns the more advance it will require. Often the more advance, the more power you get per combustion cycle. The downside is that adding more advance brings the engine closer to knock which is the most destructive event an engine can encounter. Knock is when the fuel detonates before top dead centre and causes a massive spike in pressure, it breaks pistons and bends rods. Anything that increases temperature or pressure will greaten the risk of knock as fuel burns much faster. When boost increases it is best to decrease advance, typically around 1.5 degrees per psi. The ignition table used in my car is quite aggressive and top octane fuel has to be used. I would say that any parameter can be tuned without a dyno, the one thing that cannot be is ignition advance.
Knock Sensors
The knock sensor is to detect if a possibly destructive event is starting to occur. Knocking is when the fuel detonates before reaching top dead centre and creates a huge spike in pressure, this spike causes resonance in the combustion chamber. The function of a knock sensor is to measure this amount of resonance, like a microphone. The ECU reads the duration of this resonance, the longer it is the worse the knock. The ECU will retard timing and even add fuel to counter a worse knock event.
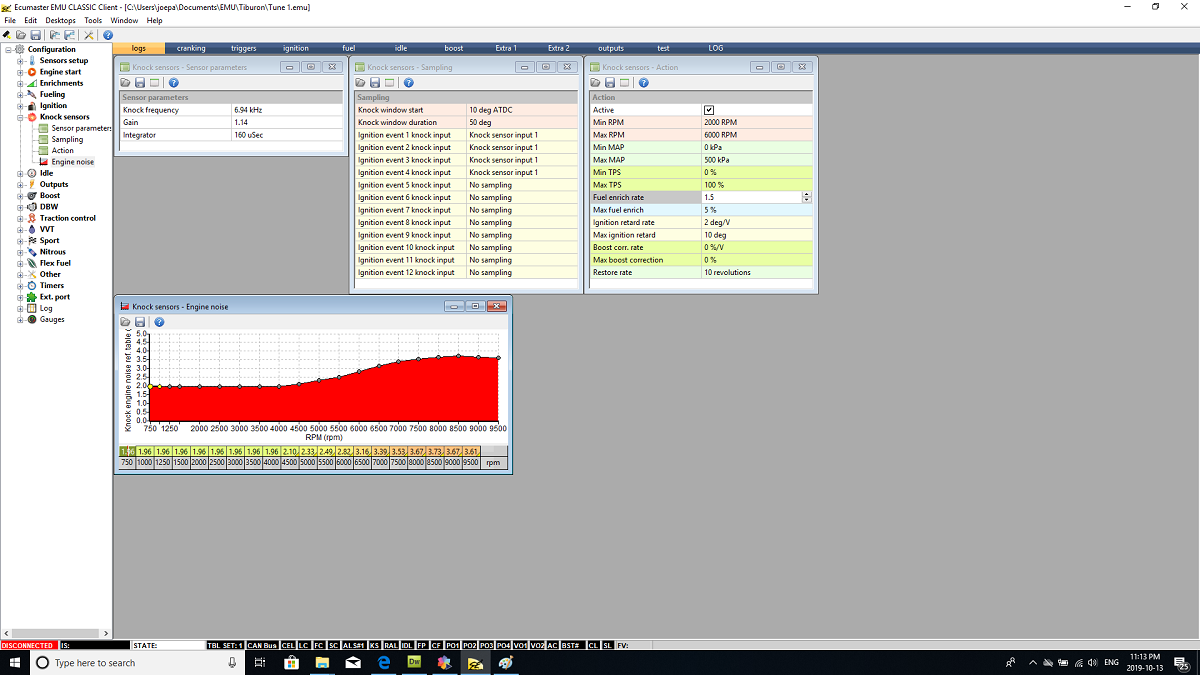
Setting up a knock sensor is very dependant on the engine and sensor itself. Without the correct data it is often hard to set this accurately but some precautions can be taken. Firstly the knock frequency can be calculated as 1800 / (pi x D). The diameter of the bore being 82mm, therefore a frequency of 6.99kHz, 6.94kHz being the closest in the menu. The gain and integrator are dependant on the application, I found some stats for a similar engine and went with these.
Knock sampling is done for every cylinder and the start window and duration are just default values.
The action the ECU takes against knock are very important. It is common practise to retard the timing and also enrich the fuel as shown in the example below. The higher the retardation the lower the amount of power produced but the least risk of engine damage. The engine will cycle "X" amount of times before restoring advance, known as the "Restore Rate".
The knock sensor acts like a microphone and will pick up any noise. The ECU acts like a bucket of water, when the bucket is full it will take action. When any noise occurs it will start to fill the bucket, a knock event resonates with the sensor and fills the bucket quickly. Also when the engine begins to rev higher the noise will increase further filling the bucket. The last noise table is how much of this bucket the ECU ignores with regards to noise. It is quite common to disable the sensor above certain RPM's as engine noise can become too much.
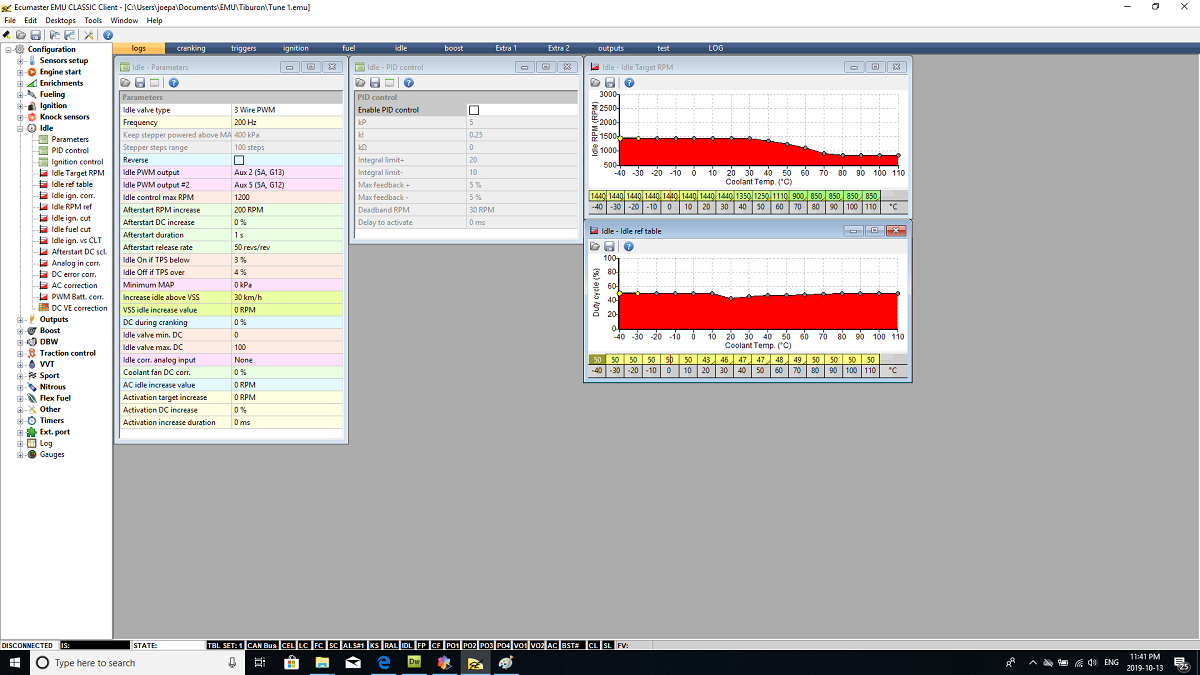
Idle
I did struggle a little with getting the car to idle properly, I had to resort to open-loop control. The idle is dependant on the engine temperature, the colder it is the higher the idle. The reason to keep the idle higher at lower temperatures is to get the engine up to operating temperature faster. Another reason is that the oil will not circulate the engine very well at low temperatures, the higher revs boosts the oil pressure getting it around the engine.
The duty cycle is for the idle control valve, I unfortunately have not had the opportunity to start the car below room temperature.
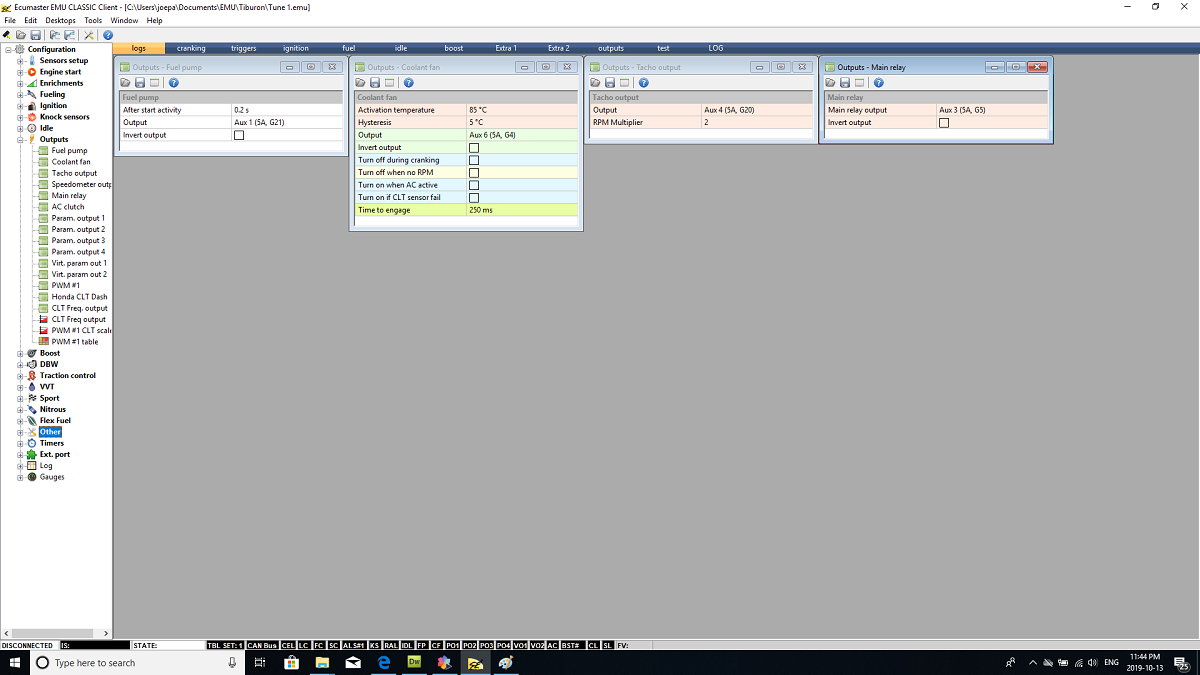
Outputs
There is a multitude of possible outputs for this ECU that can be positioned on many of the pins, such as those for the injectors. All of the relays powered from this ECU come from the fuse box I added earlier. I will also add that all the grounds in this car are like a tree, there are no loops and no grounds connected twice. Having multiple grounding points can treat the car like a resonant circuit creating noise that may otherwise affect the ECU's operation.
Boost
This is where I have been a little naughty with my setup. I have boost control setup with a control valve. The problem is that I have set my boost target table much higher than what the turbo is capable of, so I'm not going to show it. The current turbo on this car came from an old Saab 900 which is a pretty small one, there is a higher output turbo for the same car that I need to source. Once I get this larger turbo I will set some boost control as sometimes a too high boost can be counter productive for the setup. As boost pressures increase so does the temperature, if these temperatures are not dropped then the ECU pulls timing. So whereas my current setup peaks at 1.5 bar of boost, it may actually be faster on 1.0 bar of boost because of the lower intake temperatures.
Here is a video of the car doing a rolling pull, I don't like launching the car because it's a new clutch. Also since I have never launched the car I can see if the clutch has been slipping when I pull it. You'll notice in the video that power drops at around 5500 rpm. It feels like the timing is pulled since the boost pressure does not drop, I imagine the intake temperatures get too high. There feels to be a lot more torque between 4 to 5000 rpm.
Future
I'm really undecided what to do with this car simply because front wheel drive is no fun, but it's a lot harder to crash if I lose grip. I think finding the larger turbo will definitely make it a lot more fun to drive. I have decided to take the car off the road over the winter so I can completely restore all the suspension system, basically paint and bushes. I did have plans to put a second engine in the back or even electric motors in the back, the reason I pulled out the interior.
I have also considered selling the car but I imagine it's not worth a great deal. If I was to get the money back for the pistons, ECU and clutch then I would be happy to lose what I paid for the car. I would probably build a turbo V8 if I get the chance, drop it into something like an RX8, it would be quite a cheap build. Keep an eye out for further progression on the project, but for now I'd say it was a success.
Hello, if you have enjoyed reading this project, have taken an interest in another or want me to progress one further then please consider donating or even sponsoring a small amount every month, for more information on why you may like to help me out then follow the sponsor link to the left. Otherwise you can donate any amount with the link below, thank you!