Electric Supercharger Version 3
This is the third attempt at making an electric supercharger. Originally I saw a tuning product, basically a small 15W fan that was boasted to dramatically improve engine performance. After doing some quick calculations I realised that to boost my 140bhp car up to 200bhp would require around 10kW of power. I intend to make this project to augment my car, I don't expect massive increases in performance but this combined with a turbo will result in no turbo lag.
The very first project I opted to go for an axial fan design, due to limited motor speeds and the fact that an axial compressor is very inefficient at producing pressure led me to drop that design. The second attempt was to use the conventional turbo impeller design, again with the limited speed of my motor I only just managed to produce 3 psi. Now there are two options, since the motors speed is limited to 50,000rpm I could go with a gearbox, it would be loud, inefficient and produce heat. The second option and possibly my last is to greatly increase my impeller diameters, altering the design to favour more pressure and finally using two stages.
13 August 2017 - I chose to go with the twin impeller design as I figured a gearbox would require too much machining, it probably wouldn't last that long either since I would aim for an output speed of 150,000rpm. I thought I would use the previous motor and housing that I used in the last project. The diameter of the impellers are now 23% larger which results in double the air flow, the planes on the impellers are also longer which should help to boost pressure. It is likely that I would have to make the housing in sections since there would be no way of installing the impellers otherwise.

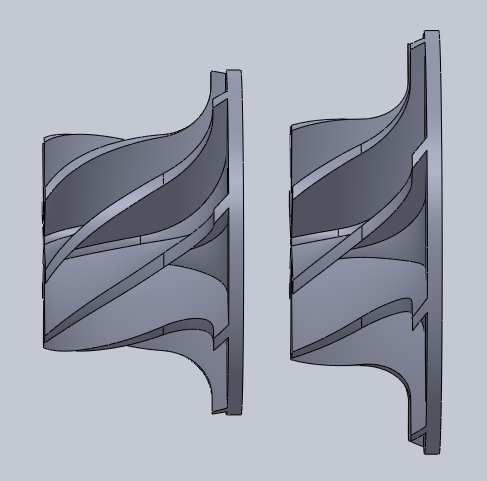
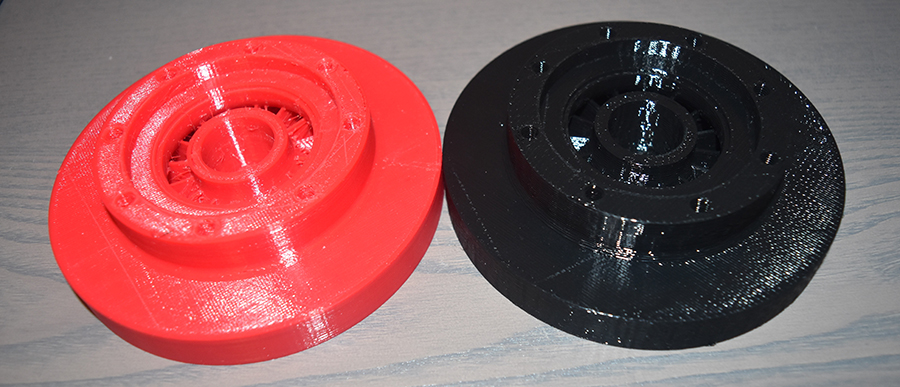
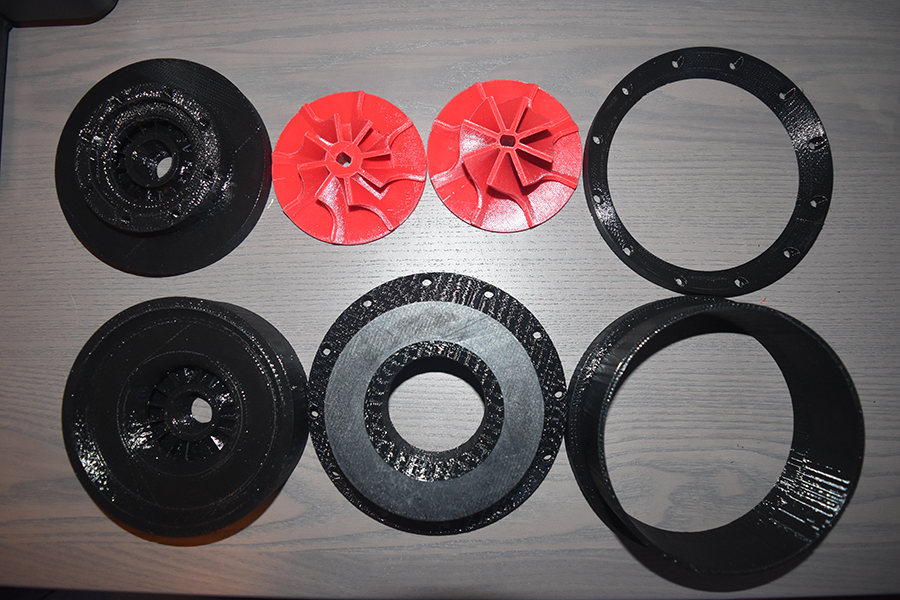
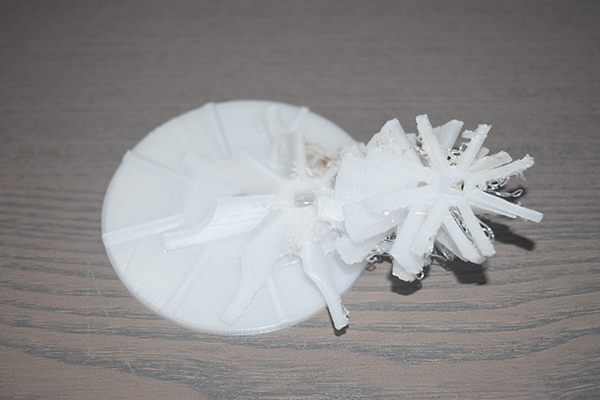
Here is a comparison of the previous impeller (on left) with the new impeller (on right). The fan blades were shortened as this length really doesn't make a huge amount of difference, the planes have been lengthened which will make a huge difference on the velocity of the air and the pressure.
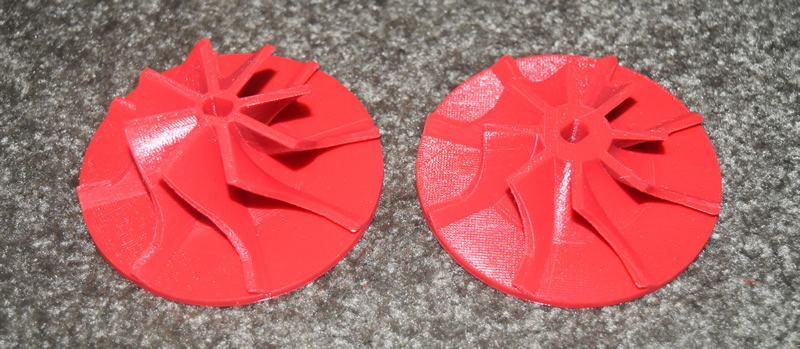
I chose to print the impellers out of PETG, they came out pretty much perfect, I am a little nervous that they may flex at the high rpm's.
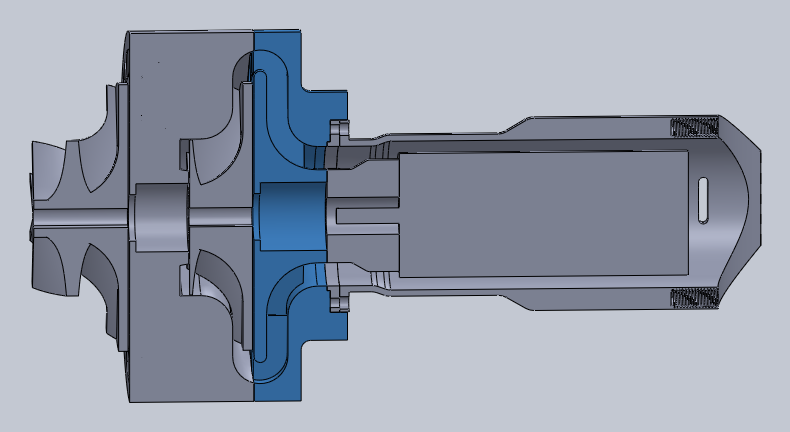
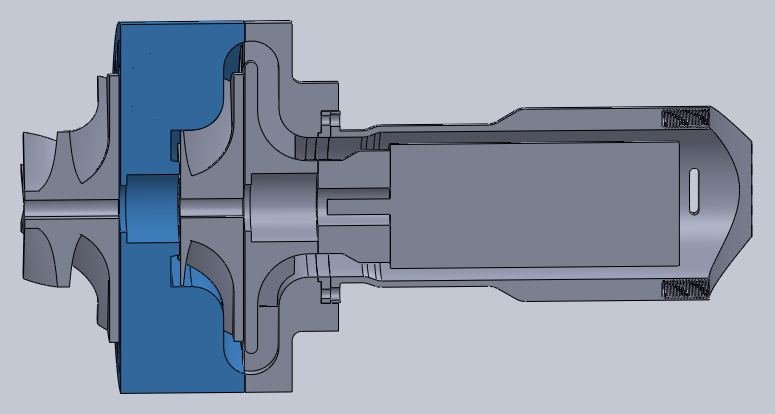
15 August 2017 - The next part to make is some of the housing, this will have to be made in 3 or 4 parts simply because there would be no other way to assemble the impellers. The part highlighted in blue is what I shall make.
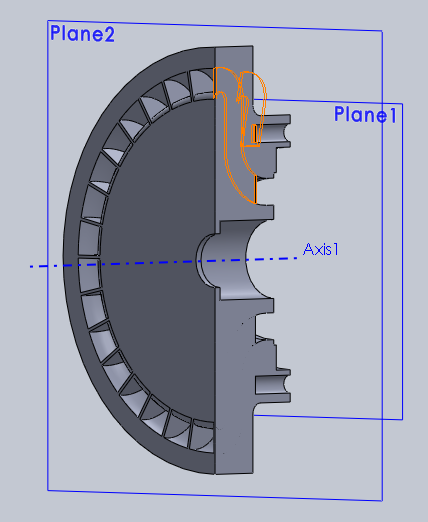
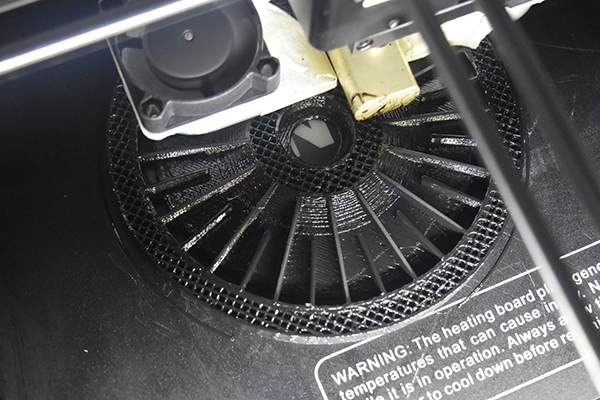
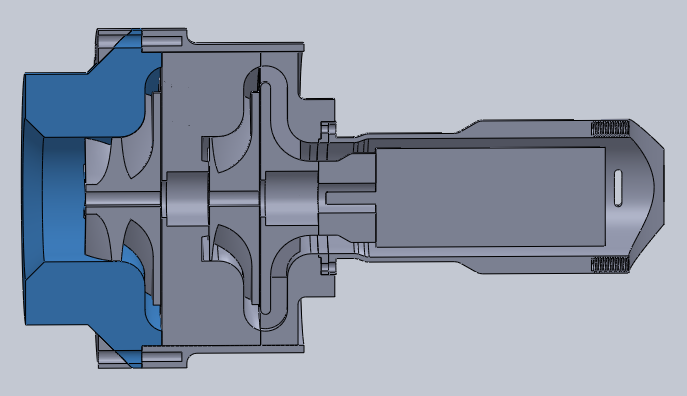
Here is a cross-section cut, note the addition of the vanes, these are to connect the outer body to the inner, the reason there are so many is because they act like support material for the printing process.
I again chose to go for PETG due to it's ease of printing. I was really worried about the overhang part way through printing, the reason I added the vanes. It did turn out to be an issue but after several layers it was ok, I really need to upgrade my printer and add extra cooling fans.
19 August 2017 - Upgrades! Today I thought it was about time I sorted out some issues with my printer, the cooling, the nozzle sticking, warping and long print times. The first upgrade was to add an extra cooling fan, so I printed a mount out of polycarbonate to house the additional fan. The second upgrade was an all metal nozzle, basically higher temperatures and no sticking at the nozzle like that with a brass one. The final upgrade was a larger nozzle, from 0.4mm to 0.8mm which will drastically decrease print times.
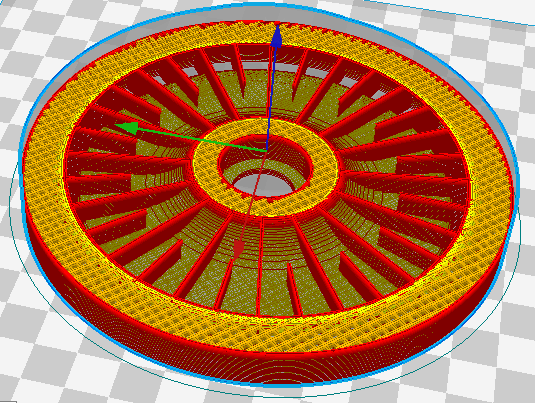
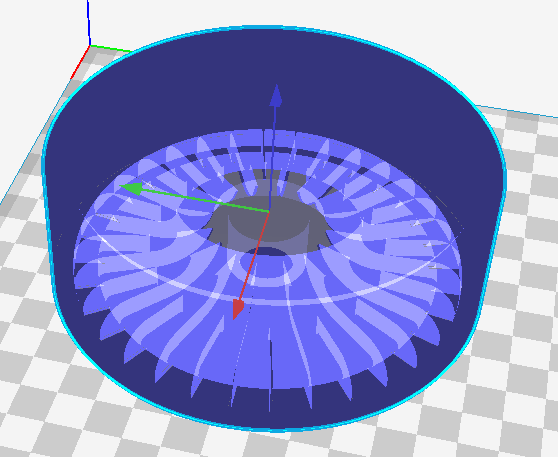
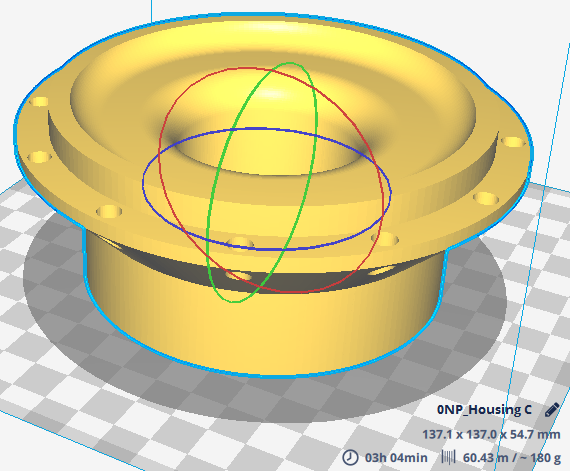
I chose to print the part again from a few days ago, here is a screen shot of the vanes in the Cura software.
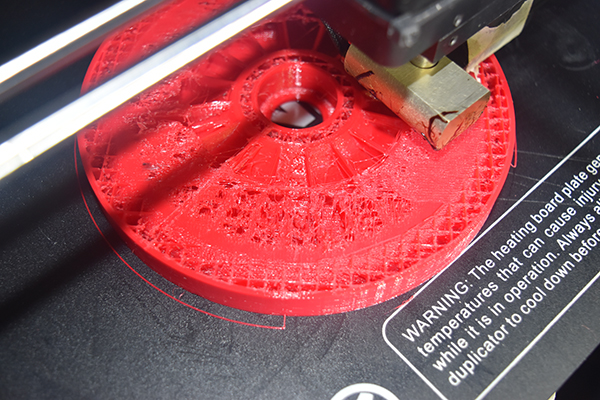
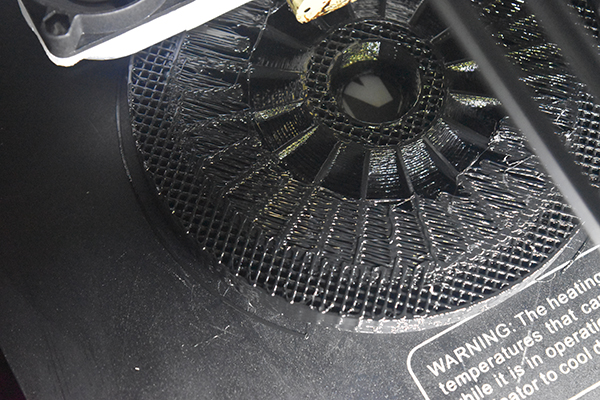
The previous print time took around 15 hours to complete whereas this part took just under 3 hours, the finish is actually better and dimensionally it's pretty good. The image below on the left shows the vanes being printed, with this nozzle I can print 0.4mm per layer while maintaining excellent adhesion and finish. The right picture shows the first layer of the overhang, it did the majority of it perfect by the first layer and completely covered by the second. With the 0.4mm nozzle and the insufficient cooling made a real mess of this part.
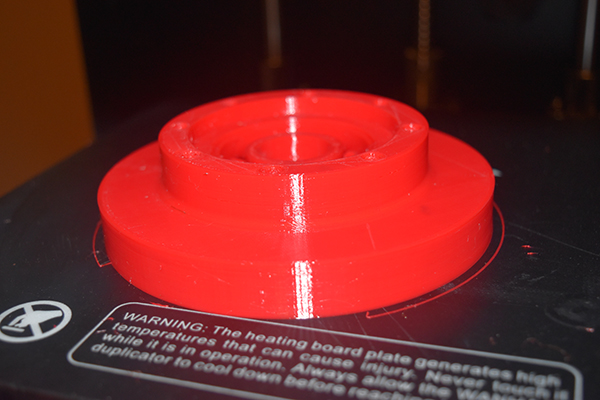
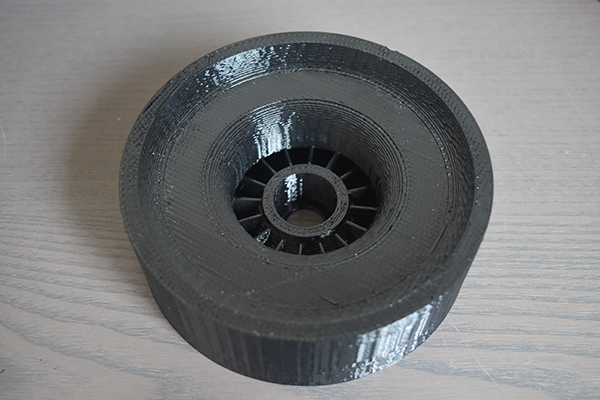
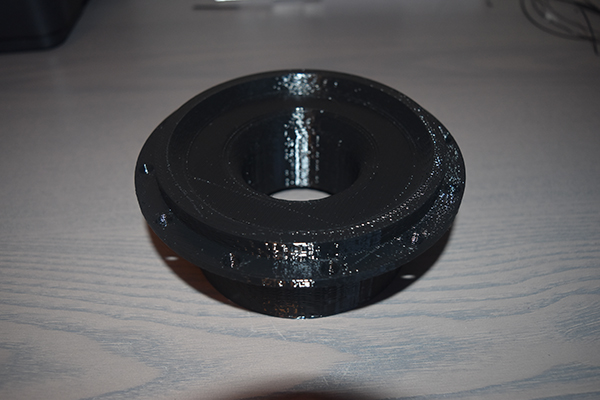
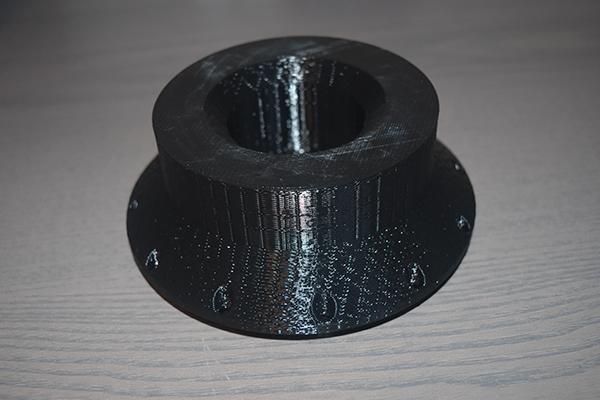
The part complete in under 3 hours with no stringy parts to deburr.
The parts compared, you can probably see that the finish is a lot coarser on the newer part, there is however no stringing unlike the first part which can be seen in it's centre. It is pretty clear that the 0.8mm nozzle is the way to go for such parts as these.
20 August 2017 - Time to print another part of the housing. I also had a think and I decided I will try and print the impellers out of polycarbonate, they will be extremely strong in comparison, the only issue may be warping.
The housing cross-section cut showing again all of the vanes to keep it to one part. I have a piece of plastic tubing in which I will place all of the housing components inside, they will all be glued together. I think that if this design works then I will attempt to make it all from ABS or polycarbonate and bolt it all together instead of using glue, I can then replace parts if need be and it can survive engine bay temperatures. Ultimately if it can be made from metal then I will but if plastic is easier and works just as good then I will keep with it.
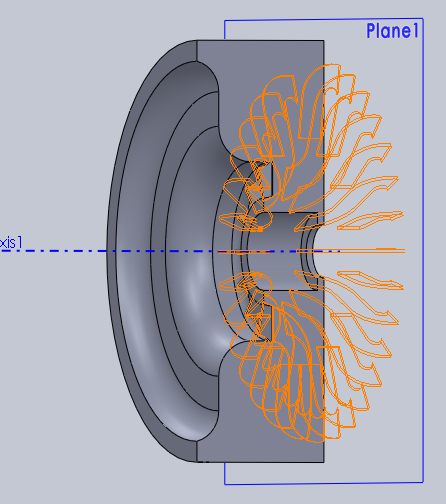
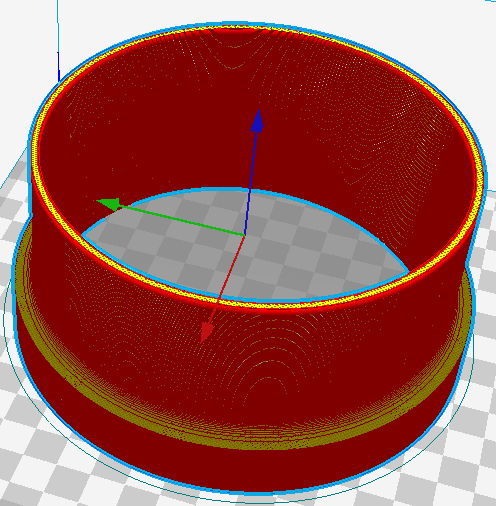
An X-ray view just before I 3D print it.
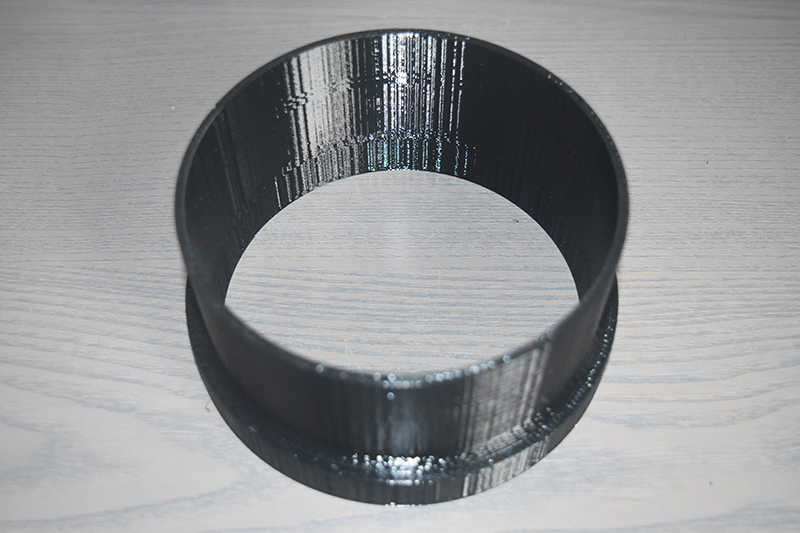
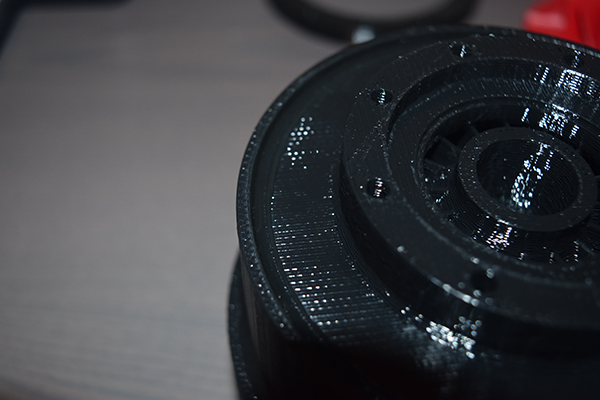
The part complete, due to the step layers the impeller is a very tight fit, I will either just go and let it bed itself in or machine the contour at work.
I did some more design work this morning, I really wasn't happy with the idea of gluing it all together especially if something didn't fit right or failed. The first part I made will be glued to an outer shell, the second and third housing pieces will slide inside of it. The third housing contains some bolt holes that screws into the outer shell. The only part I have missed is a retaining ring for the third housing piece, printing flat would have been difficult without support so I printed at and angle and then will print a retaining ring to mate.

The shell was the next on the list simply because I had little filament left on my spool, just enough.
The shell done, or was it, well I made a mistake in the drawing, the dimension looked like it had snapped in place but turned out to be floating. So while the part below looks right, it's not. I printed another one thereafter.
The retaining ring was to be printed next, printing the third housing in two parts reduces errors as if I did not there would be a large overhang, things would get messy.

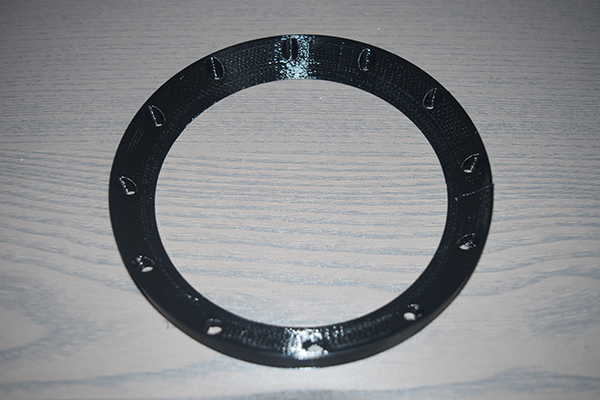
The completed retaining ring.
The last part to print was the third housing.
The Cura software projected it would take around 3 hours to complete, with my previous nozzle this could have easily taken 24 hours. I would imagine it would actually take around three and a half hours but that's still pretty fast.
The final part printed.
All of the parts are now ready for assembly.
The outer housing (sleeve) had the motor end housing pushed inside and then glued in place.
All of the 3D printed parts are now complete, I might take the pieces into work to machine out the contours to make them a little more accurate. I think I will also reprint the impellers out of polycarbonate just simply because they will be a lot more rigid and stronger.
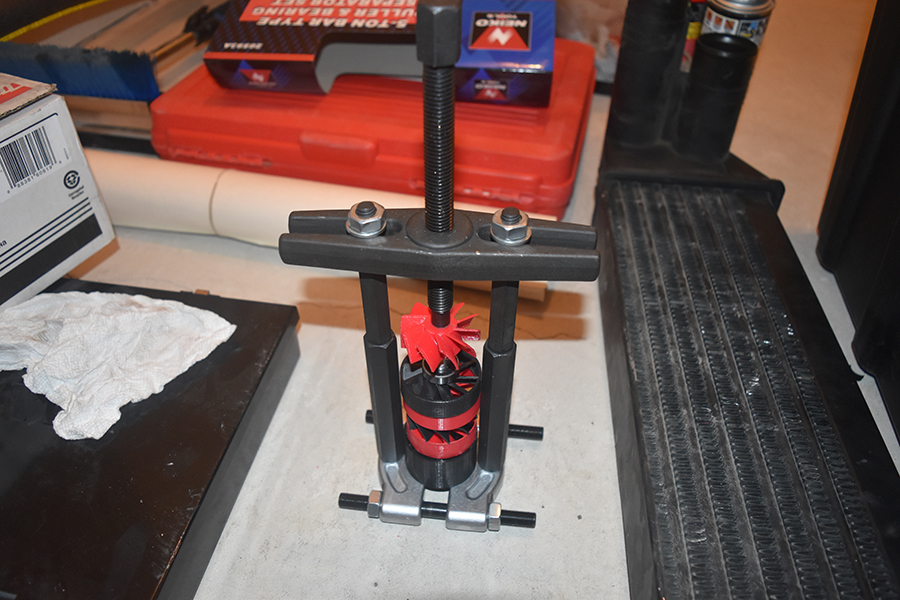
27 August 2017 - I used a drive shaft that I used in a previous project, in the picture below I am using old impellers and a bearing press to install the bearings on the shaft.
I had a major mess up with the housing so instead used some parts I made previous, one of those being the section of housing that the motor bolts to. I also printed the smaller impeller out of polycarbonate due to it's better temperature stability and greater strength.
The larger impeller was the next on the list, my cooling fan decided to sag which resulted in it catching and the printer loosing it's place. Another seven hours later the impeller was printed again, perfect this time.
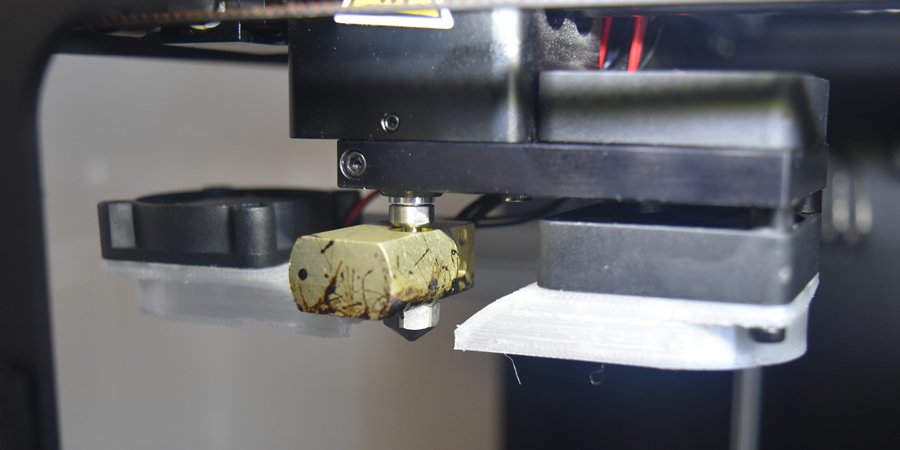
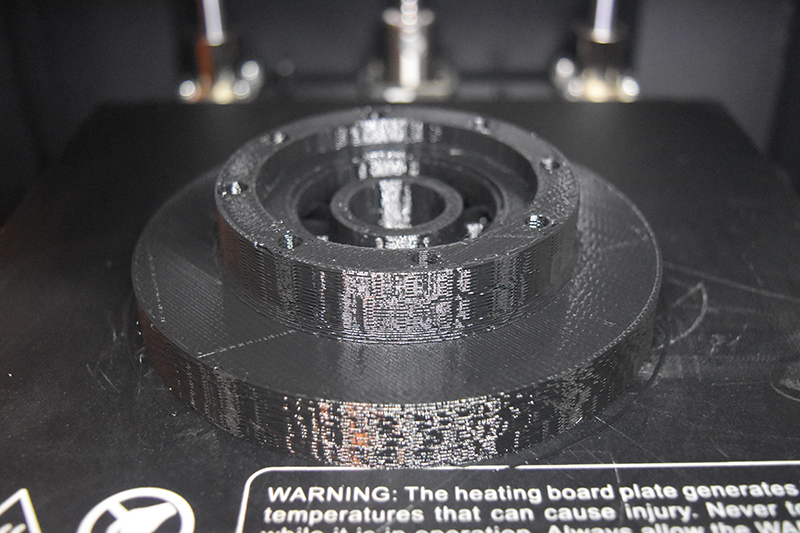
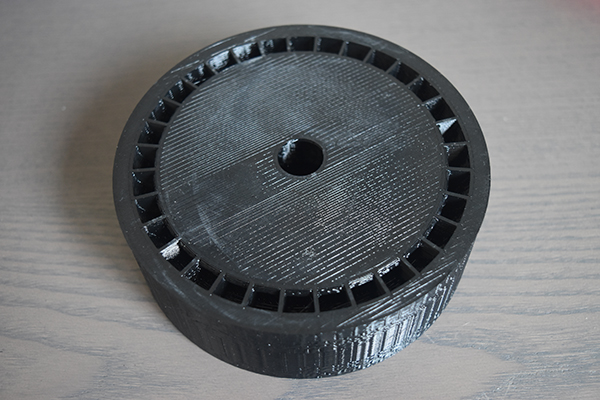
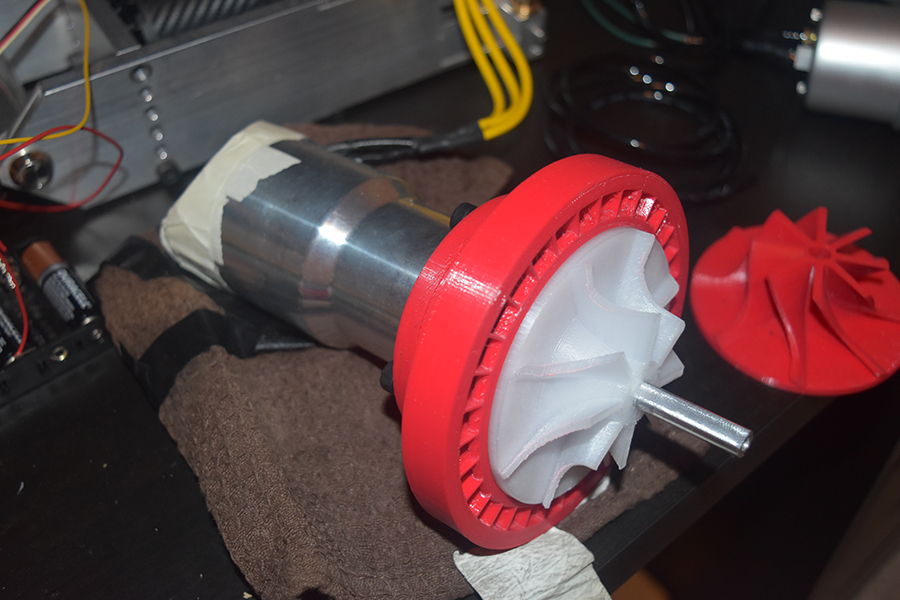
The majority was assembled and I gave it a run to bed in the impellers, hence the white dust.
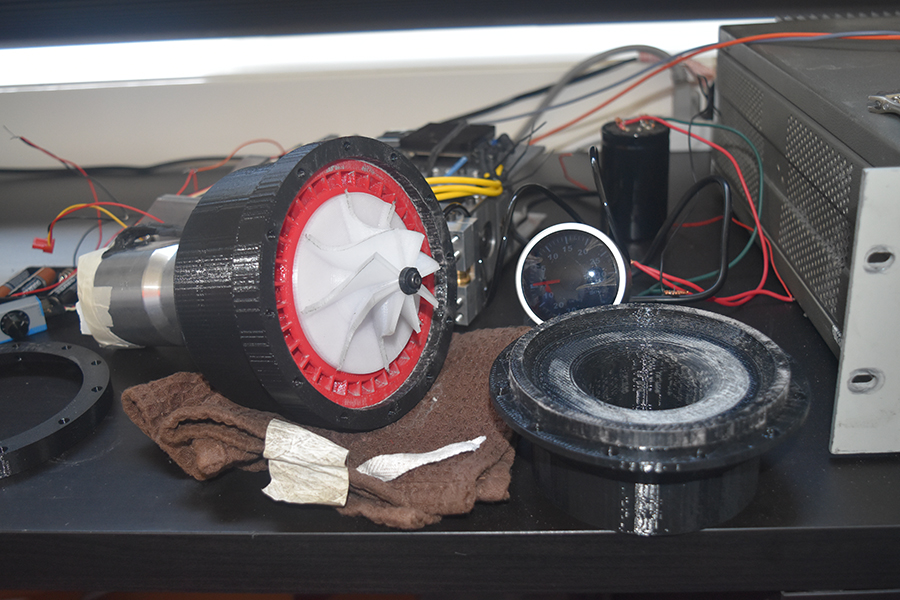
The whole setup, I just need some longer bolts so I can bolt the retaining ring in place. I may need to buy a mushroom filter to bolt to the end of the supercharger, I think my existing cone filter may be too long. I gave the setup a quick run, I managed to reach 15A at 45V before I exceeded my supply current, a total of 675W achieving a pressure of 2psi. This may sound worse but in fact I could only manage about a third of the motor speed which means that at full speed I should be around 8psi of pressure, maybe more.
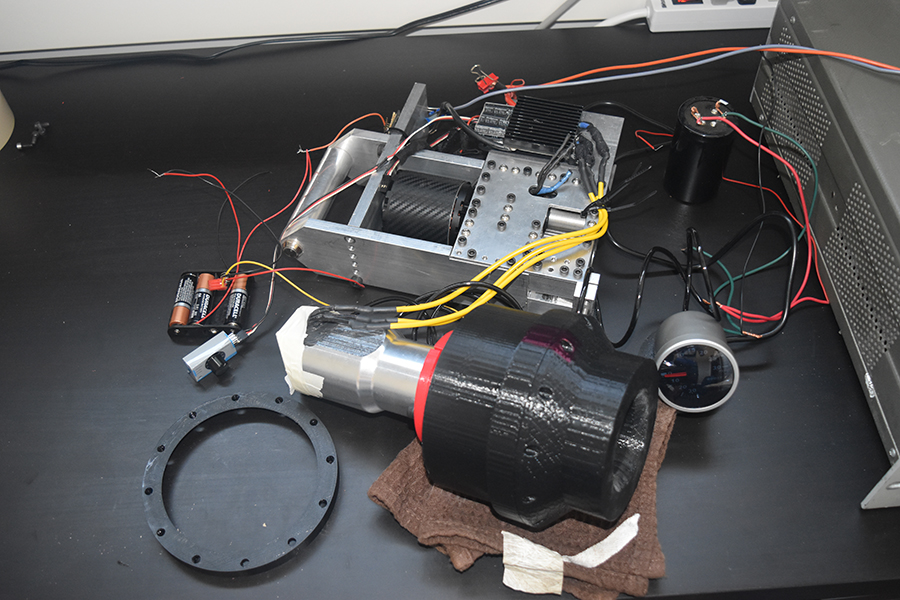
So now the limiting factor in the project is my supply. Car batteries are far too bulky and expensive to buy, they can't handle the currents very well either. I did find some LiPo batteries online and for a total of 45V at 5Ah, capable of a constant 150A discharge. I would be able to attain full power for around three and a half minutes, these are 200CAD total. I can't really spend this money at this time especially when I don't know if the project will work, I will need them however later on to finish my grappling gun project.
What bothers me is that if this project does work and I decide to try to sell the units the problem is the supply. Using battery packs will require a special type of charging system, LiPo's don't have a great life when they are put under these kinds of stress cycles. I want to be able to power the project via a large 12V leisure/commercial battery, this means a boost converter. So in the mean time I will try to find some free car batteries (which seems to be impossible in Canada with the core charges), I will also be starting a few boost converter projects, when I get them working I will scale them up to about 12V at 400A.
So, the project will likely be on hold for a while, hopefully not too long.
Hello, if you have enjoyed reading this project, have taken an interest in another or want me to progress one further then please consider donating or even sponsoring a small amount every month, for more information on why you may like to help me out then follow the sponsor link to the left. Otherwise you can donate any amount with the link below, thank you!