Ed's Projects

Home

About

Skills

Calc's

Projects

Workshop

Contact

Legal

Bikes

Timeline

PDF's

Sponsor

Youtube

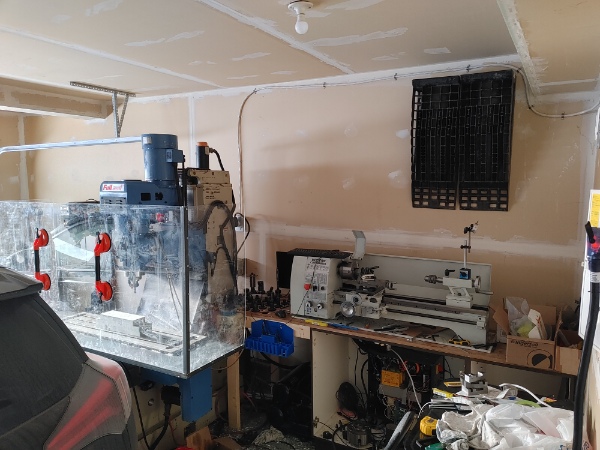
Hobby Lathe CNC Convserion - Page 1 - May 2021

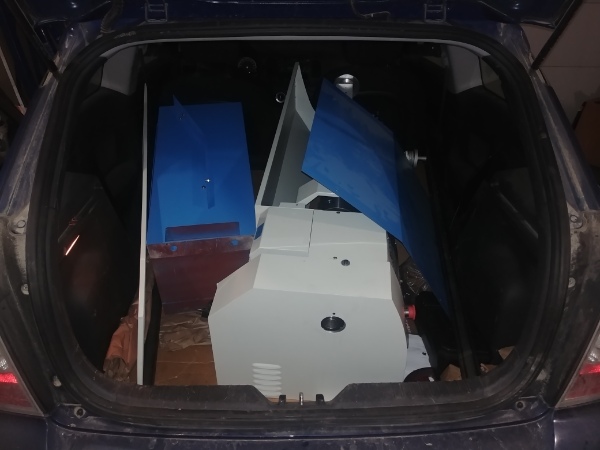
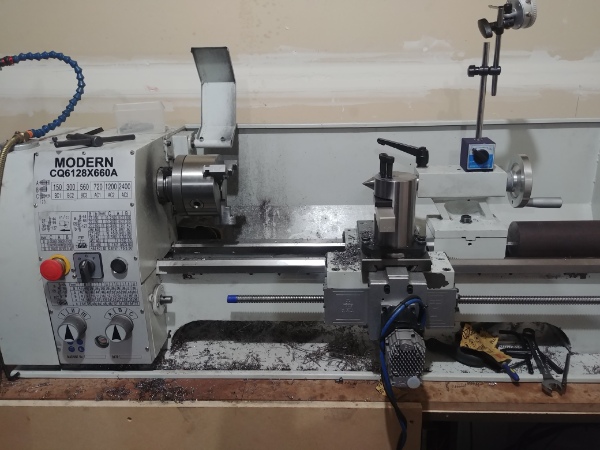
It's pretty difficult not having a lathe in the workshop, so I chose to purchase one. I wanted an older lathe but could not get one at a reasonable size, so I had to settle on a smaller, new lathe. I knew I would have some issues in terms of power, rigidity and accuracy. I made the decision to convert it to CNC. It turned into much more of a project than that, but I needed something accurate and usable.


The lathe is an 11 x 26 inches.


CNC Hobby Lathe Conversion and ModificationCNC Hobby Lathe Conversion and Modification


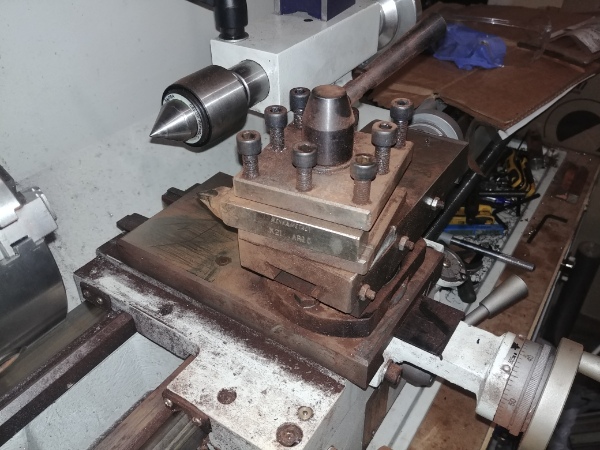
Since I will be using CNC there is no need for the compound, it is also one more thing to reduce rigidity.


CNC Hobby Lathe Conversion and ModificationCNC Hobby Lathe Conversion and Modification


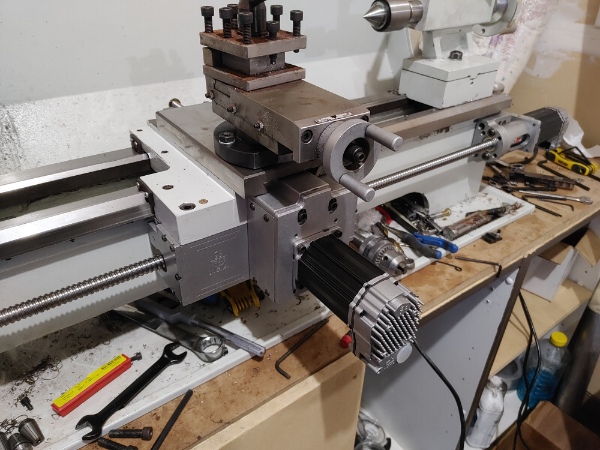
I bought a CNC conversion kit for a similar lathe make, assuming they all come from the same Chinese manufacturer.


CNC Hobby Lathe Conversion and ModificationCNC Hobby Lathe Conversion and Modification


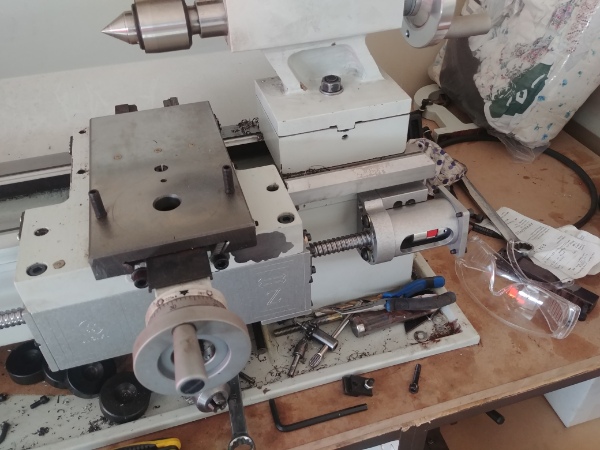
The only modifications I had to make to the kit was including a spacer on the Z-axis motor mount and grinding some of the X-axis ballscrew nut in order to fit properly.


CNC Hobby Lathe Conversion and ModificationCNC Hobby Lathe Conversion and Modification


CNC Hobby Lathe Conversion and ModificationCNC Hobby Lathe Conversion and Modification


The kit didn't take long to install and I was happy with the quality of it. I bought some servo motors with integrated controllers, these are so fast that I could run the lathe at 10m/s on the Z and 16m/s on the X. They also accelerate and decelerate so fast that it sounds like I'm hitting the machine with a hammer.


CNC Hobby Lathe Conversion and ModificationCNC Hobby Lathe Conversion and Modification


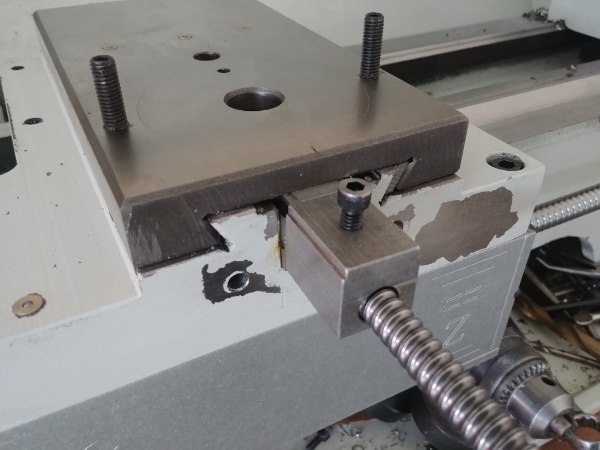
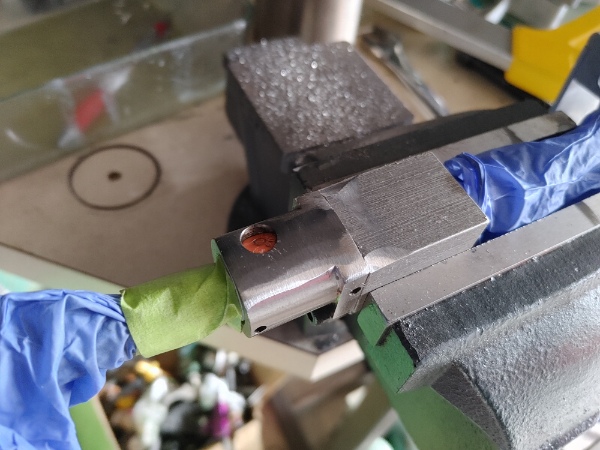
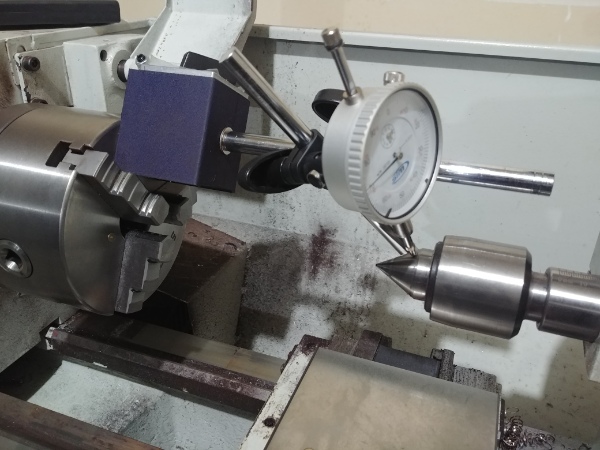
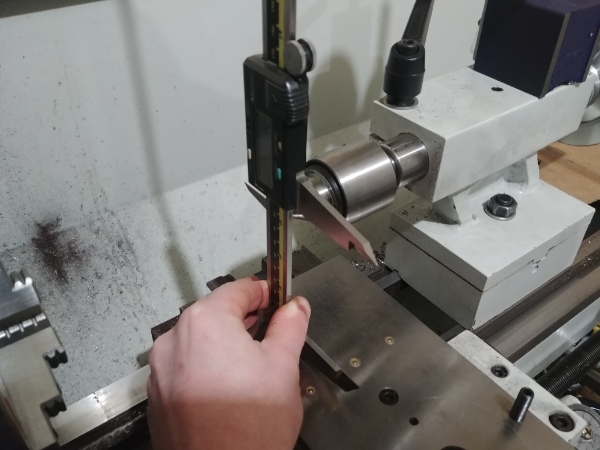
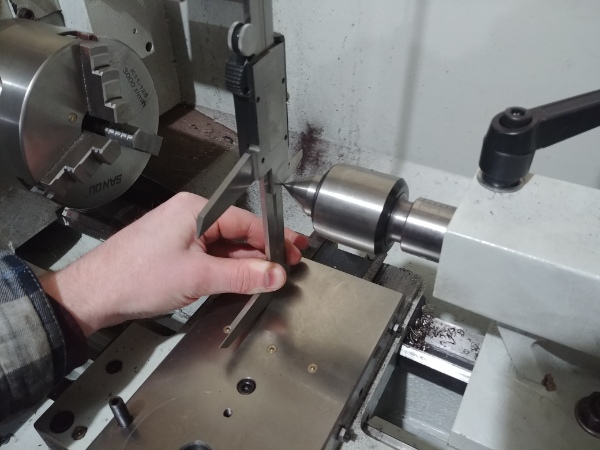
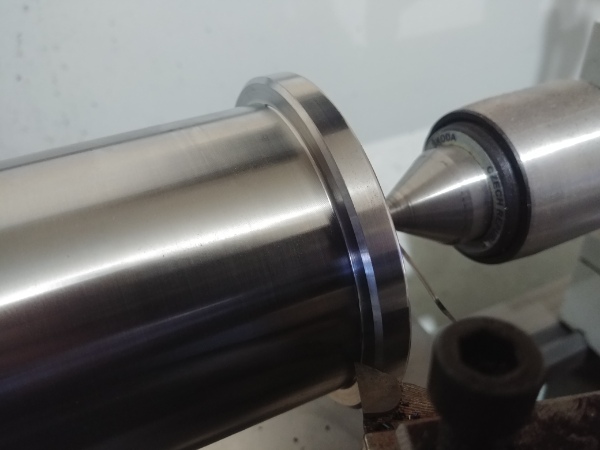
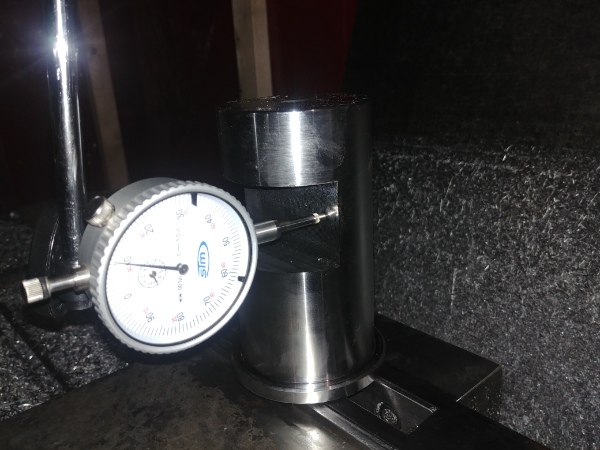
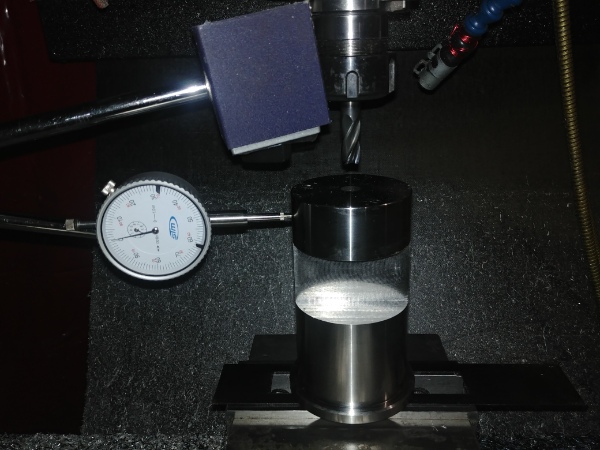
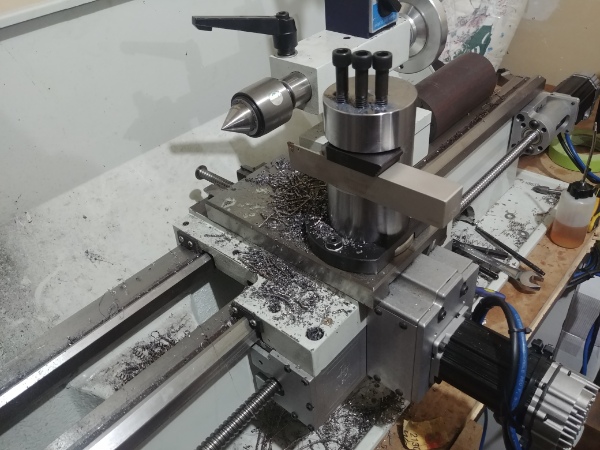
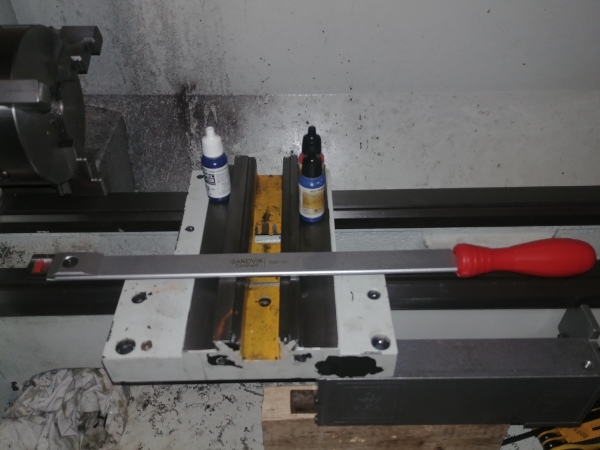
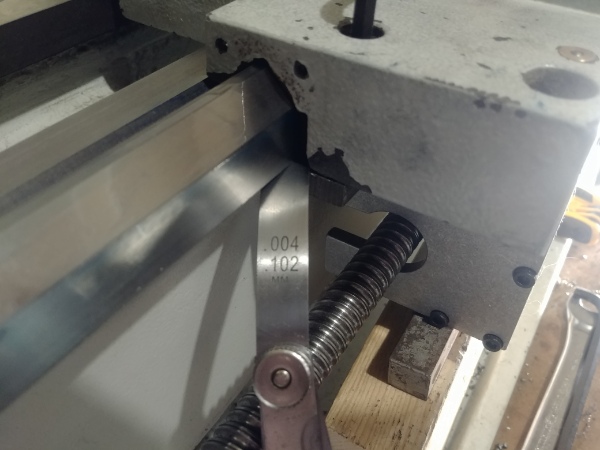
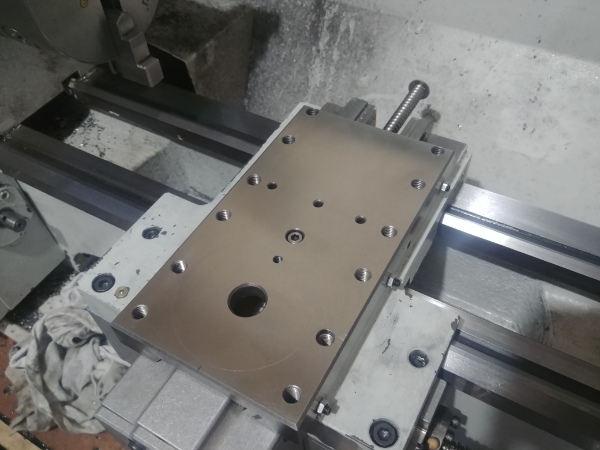
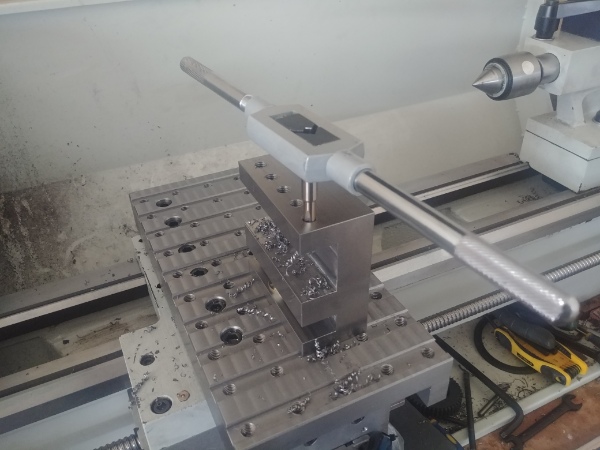
I checked that my tail stock was centered the same as the spindle, it was. I then determined that from the cross slide to the centre was 91mm, I could design my tool holder around this.


CNC Hobby Lathe Conversion and ModificationCNC Hobby Lathe Conversion and Modification


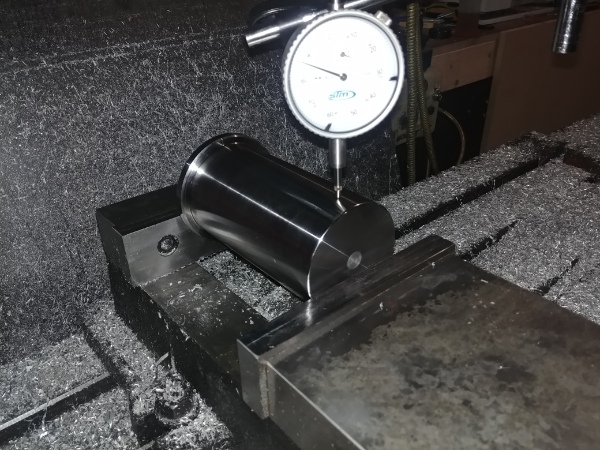
I made the holder from a left over chunk of 4140HT, I assumed this would be substantial enough.


CNC Hobby Lathe Conversion and ModificationCNC Hobby Lathe Conversion and Modification


CNC Hobby Lathe Conversion and ModificationCNC Hobby Lathe Conversion and Modification


CNC Hobby Lathe Conversion and ModificationCNC Hobby Lathe Conversion and Modification


CNC Hobby Lathe Conversion and ModificationCNC Hobby Lathe Conversion and Modification


CNC Hobby Lathe Conversion and ModificationCNC Hobby Lathe Conversion and Modification


CNC Hobby Lathe Conversion and ModificationCNC Hobby Lathe Conversion and Modification


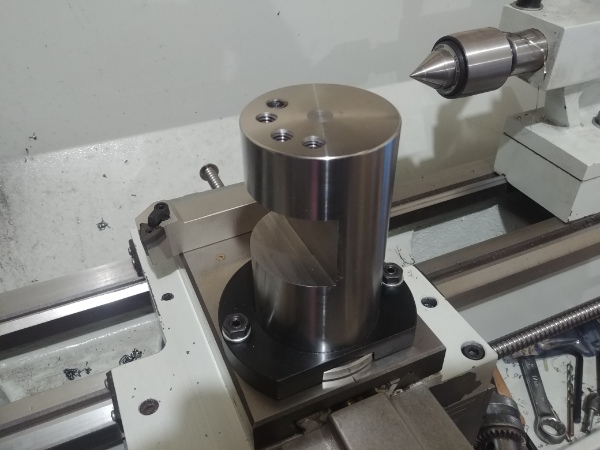
The holder worked but I had a lot of issues with chatter on harder materials. I started to pull the machine apart to see if there was anything that I could improve. I first investigated the headstock to see if the castings were substantial enough, they were reasonable. I do think I will make a completely new headstock at some point with a larger spindle, but not now.


CNC Hobby Lathe Conversion and ModificationCNC Hobby Lathe Conversion and Modification


CNC Hobby Lathe Conversion and ModificationCNC Hobby Lathe Conversion and Modification


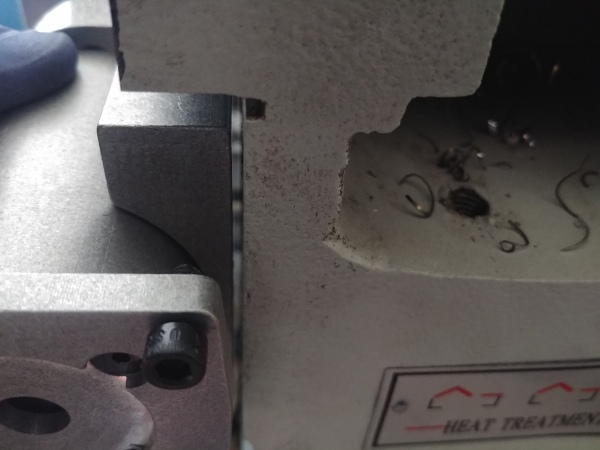
I removed the saddle and found the machining to be quite poor on the surface that mates with the bed. This is quite a contrast to the bed itself which is pretty much perfect. Even though the machining is rough that does not matter since this iron is a lot softer than the bed, it will also help retain oil. The main thing is that they are dimensionally good.


CNC Hobby Lathe Conversion and ModificationCNC Hobby Lathe Conversion and Modification


CNC Hobby Lathe Conversion and ModificationCNC Hobby Lathe Conversion and Modification


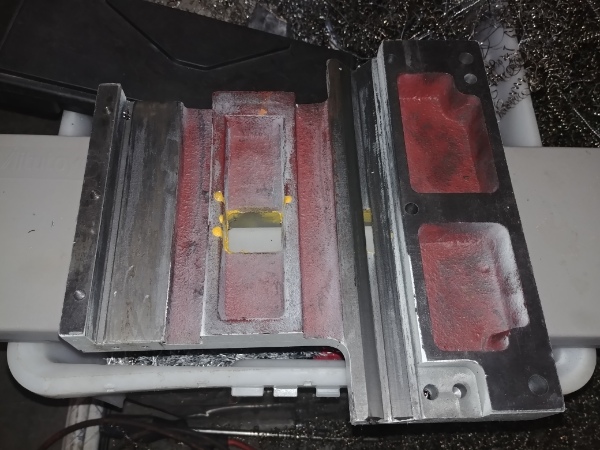
I got some modeling paint to use for bluing and got my scraper ready.


CNC Hobby Lathe Conversion and ModificationCNC Hobby Lathe Conversion and Modification


I was quite shocked to see very little contact area. The flat section had a very small area at one end and the vee had spots all the way down.


CNC Hobby Lathe Conversion and ModificationCNC Hobby Lathe Conversion and Modification


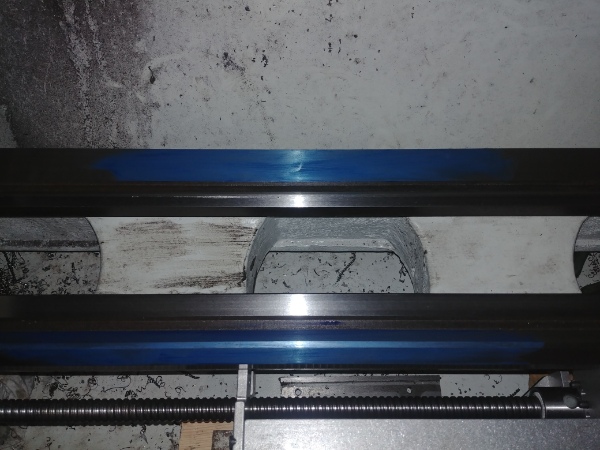
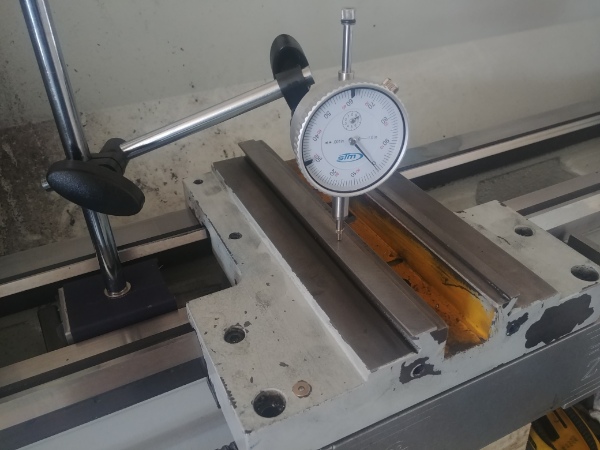
I spent a number of hours bluing the bed, checking the high spots and scraping them down. I eventually got it to where the contact was the full length and the majority of the area. I placed a few deeper scratches to help retain some oil. I got so caught up in it that I missed taking some pictures. I did a real good job of the scraping, but not the prettiest on the cross-hatching. I assembled the saddle to the bed and checked the gaps of the gibs, they both worked out to be between 4 and 5 thou.


CNC Hobby Lathe Conversion and ModificationCNC Hobby Lathe Conversion and Modification


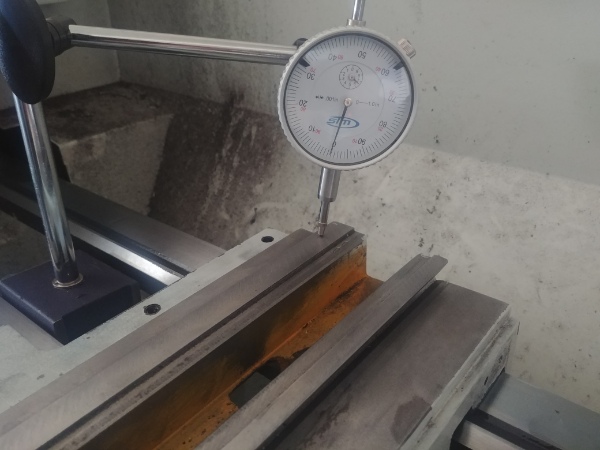
Since the gibs are not adjustable it meant removing some material to get to gap down. I want to get it to zero, but anymore and the saddle would not move. There is an old machinist trick of placing a dial indicator against the piece you are machining and leaving it there. If you take the right amount off you will see it on the indicator, this is particularly useful when your machine is not very accurate or has a lot of wear.


CNC Hobby Lathe Conversion and ModificationCNC Hobby Lathe Conversion and Modification


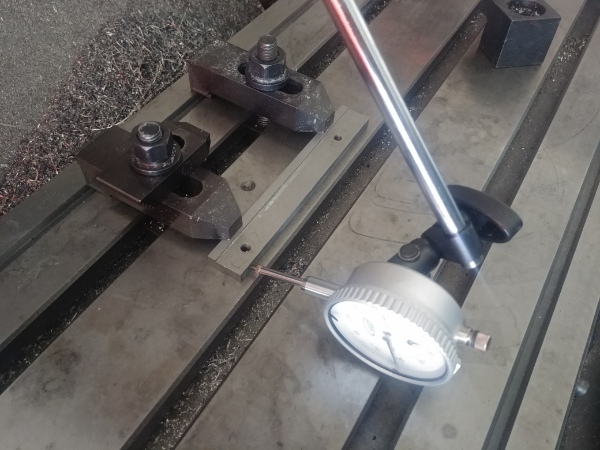
The saddle would stick under the tension of the oil but would freely move thereafter. I placed a dial indicator on both the back and front of the saddle to see if it would move when lifting the saddle. Any movement would indicate a gap, no movement would be the best. At the front I got no movement and a quarter thou at the back. This was all fairly simple to do but disappointing to see a new machine this bad.


CNC Hobby Lathe Conversion and ModificationCNC Hobby Lathe Conversion and Modification


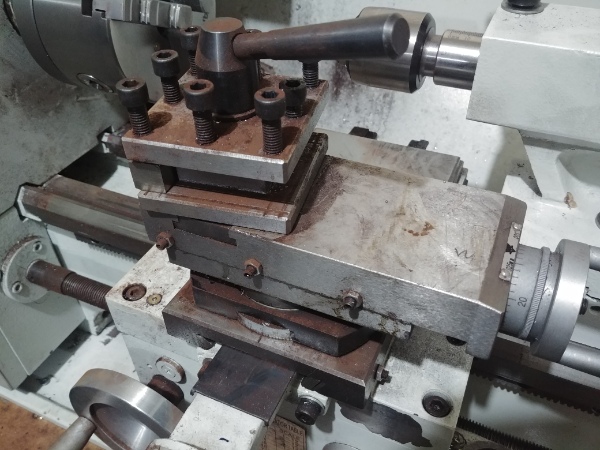
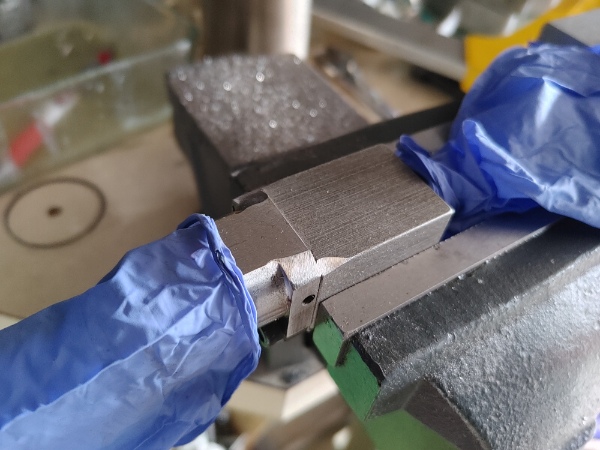
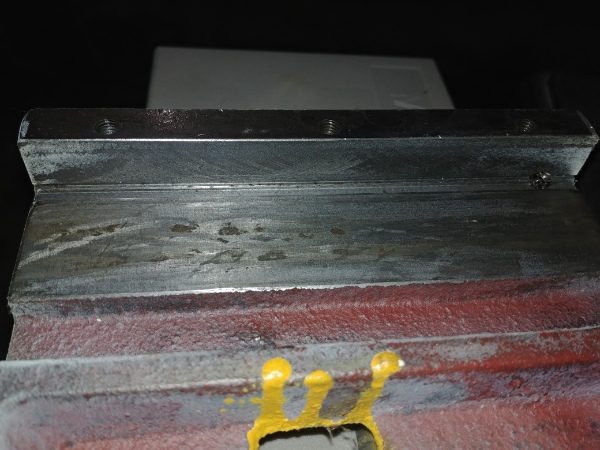
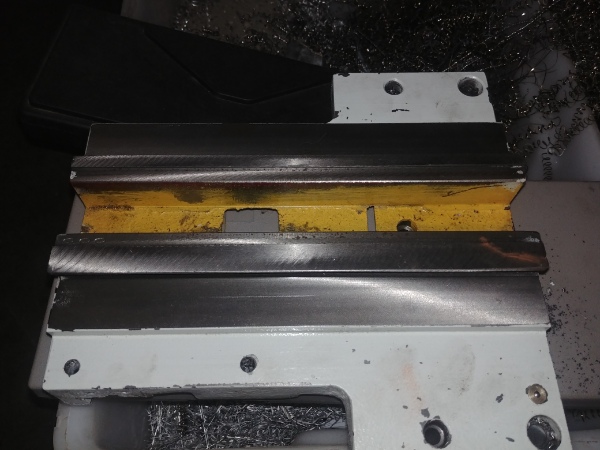
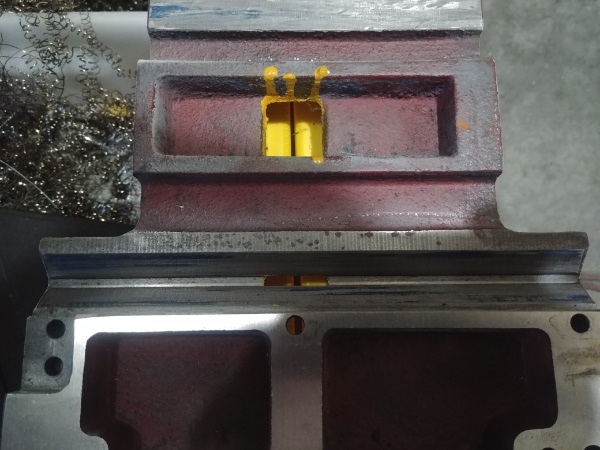
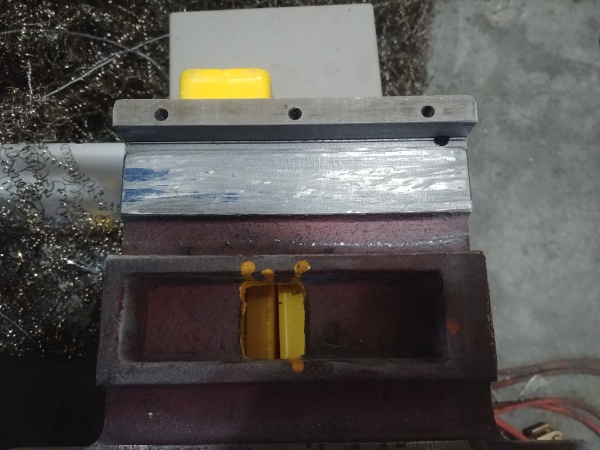
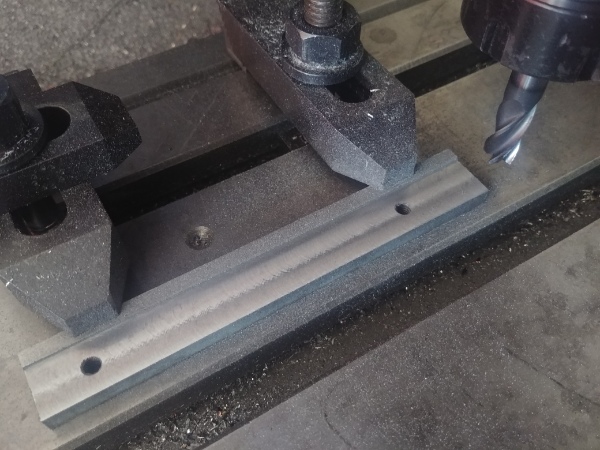
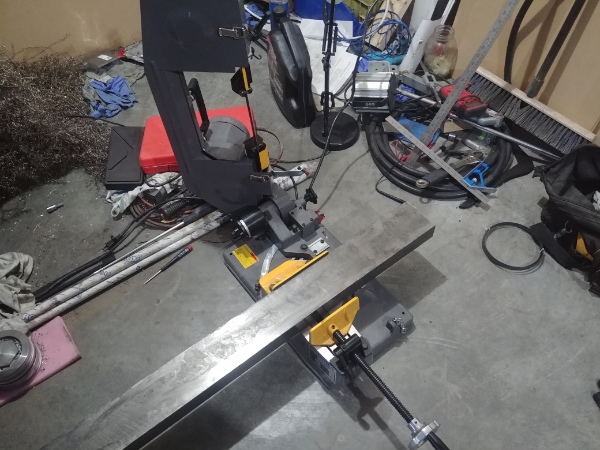
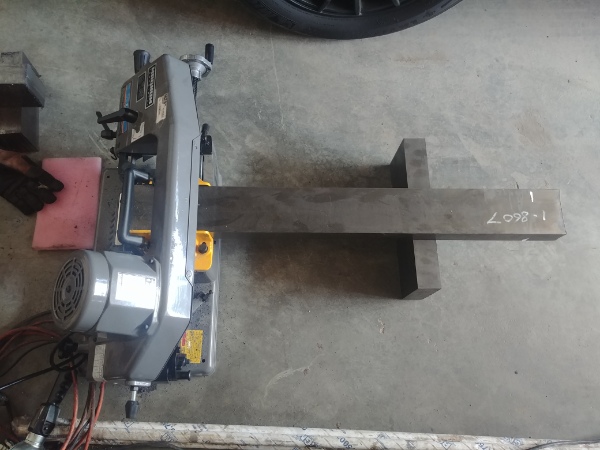
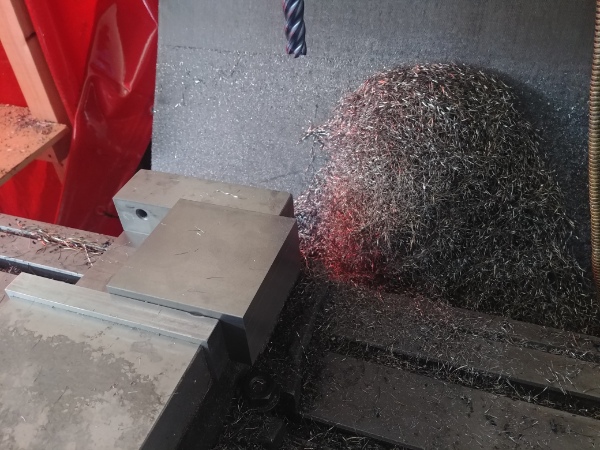
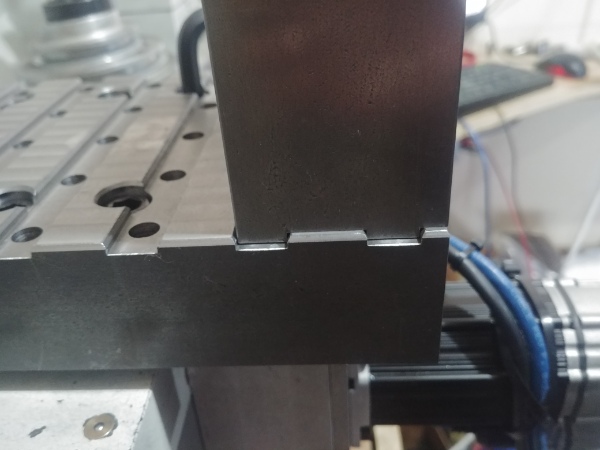
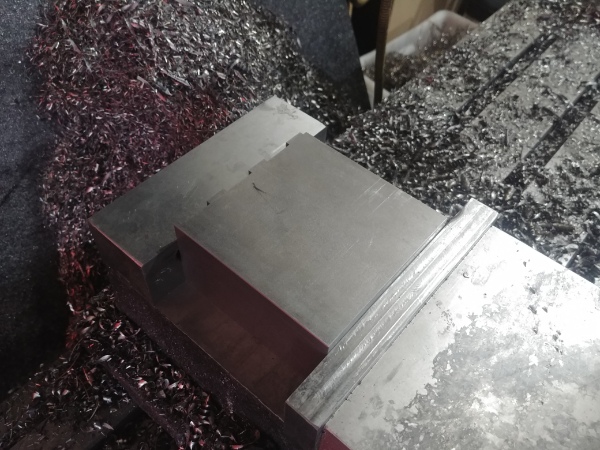
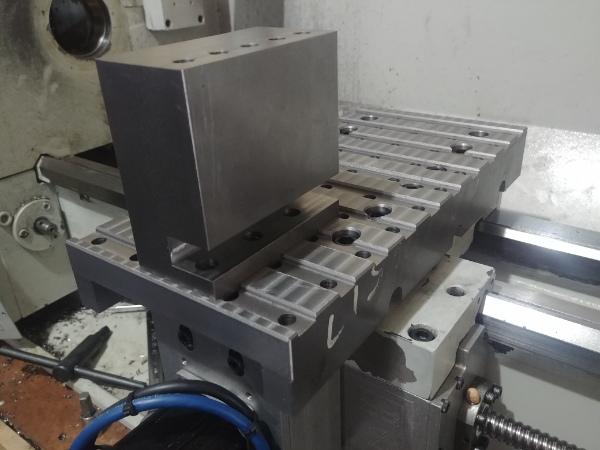
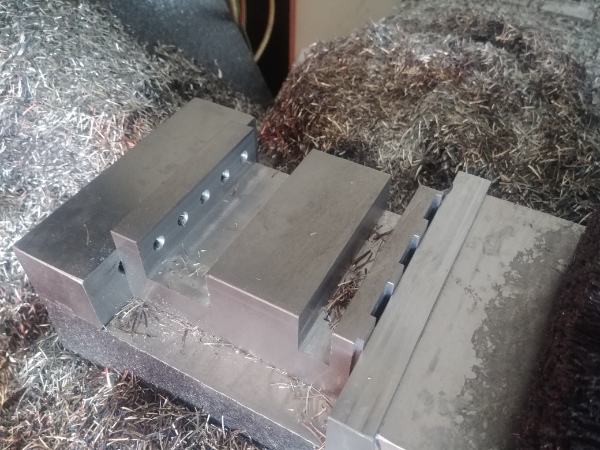
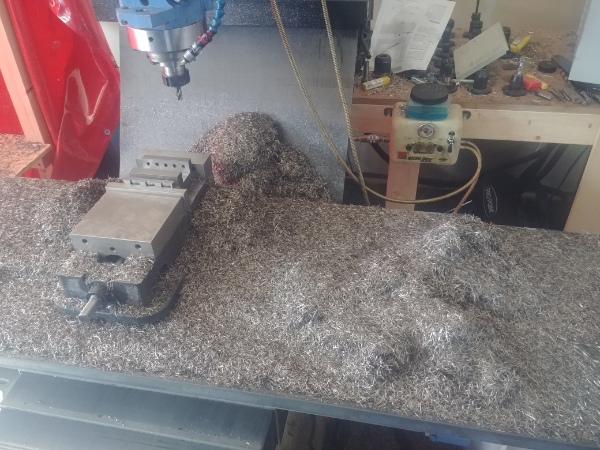
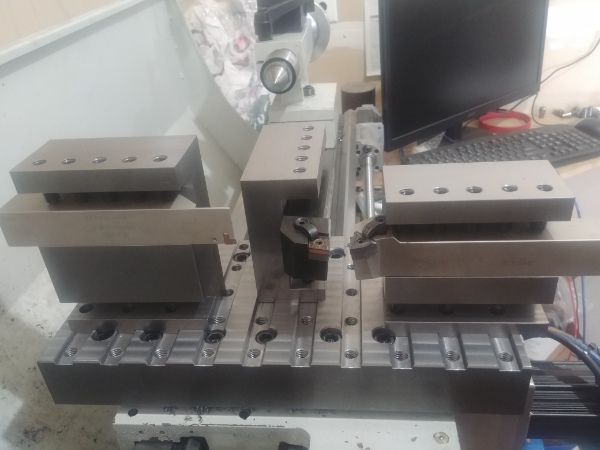
I did some thinking about how thin the cross-slide was and what kind of tooling I would be using. I made the decision to make modular tooling for the top slide, that would also allow me to use gang tooling. I also took into account the maximum diameter I would be cutting. I first started out with a piece of 13 x 2 x 6 1018 steel.


CNC Hobby Lathe Conversion and ModificationCNC Hobby Lathe Conversion and Modification


CNC Hobby Lathe Conversion and ModificationCNC Hobby Lathe Conversion and Modification


CNC Hobby Lathe Conversion and ModificationCNC Hobby Lathe Conversion and Modification


CNC Hobby Lathe Conversion and ModificationCNC Hobby Lathe Conversion and Modification


CNC Hobby Lathe Conversion and ModificationCNC Hobby Lathe Conversion and Modification


CNC Hobby Lathe Conversion and ModificationCNC Hobby Lathe Conversion and Modification


CNC Hobby Lathe Conversion and ModificationCNC Hobby Lathe Conversion and Modification


CNC Hobby Lathe Conversion and ModificationCNC Hobby Lathe Conversion and Modification


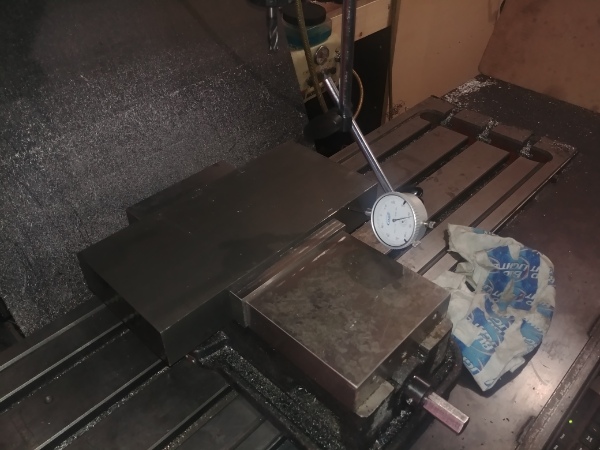
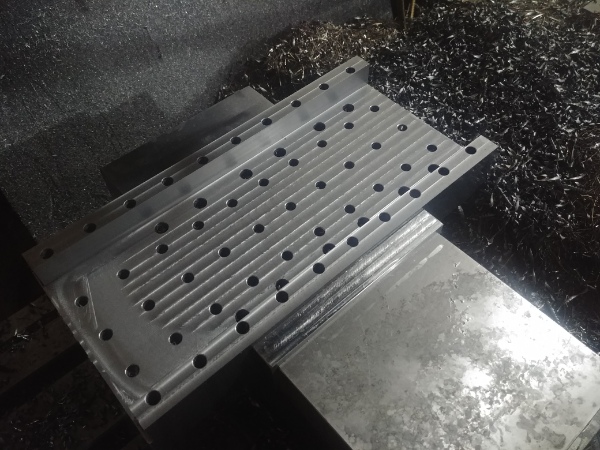
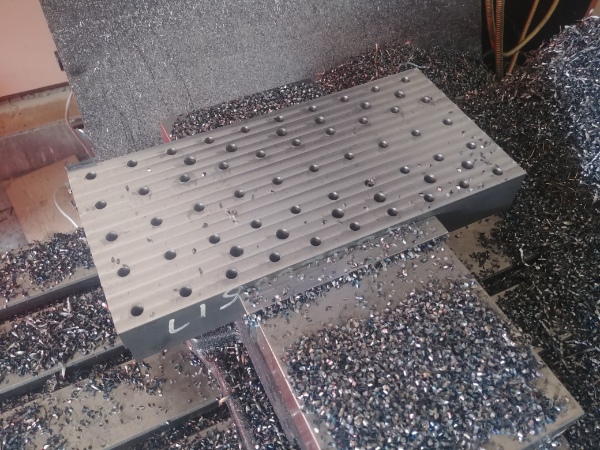
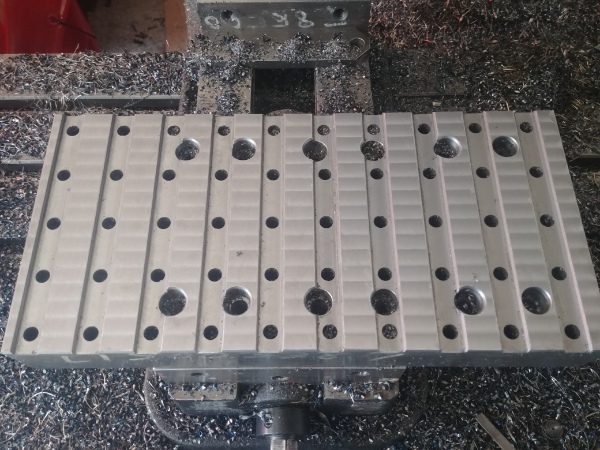
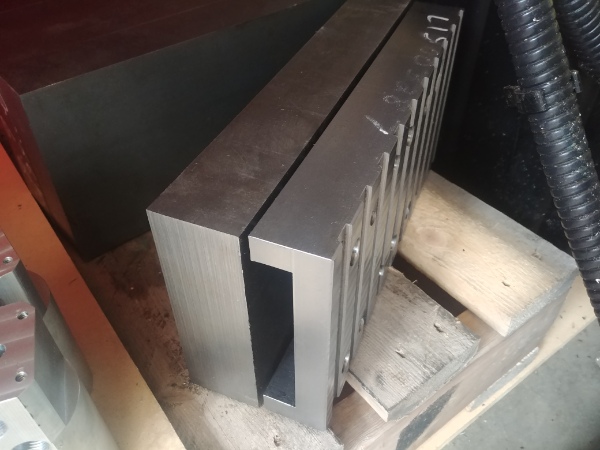
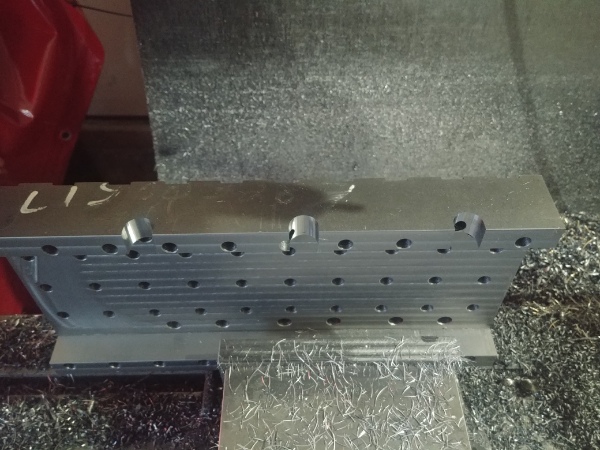
The top slide came out really good, this would also add some weight and further reduce the chances of chatter. I could also bolt holders to the slide to act as weight.


CNC Hobby Lathe Conversion and ModificationCNC Hobby Lathe Conversion and Modification


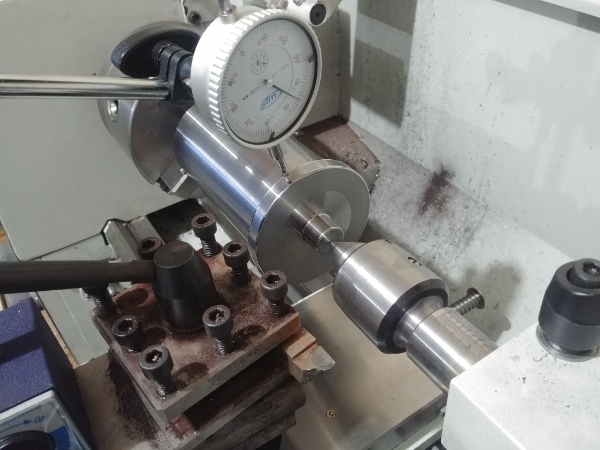
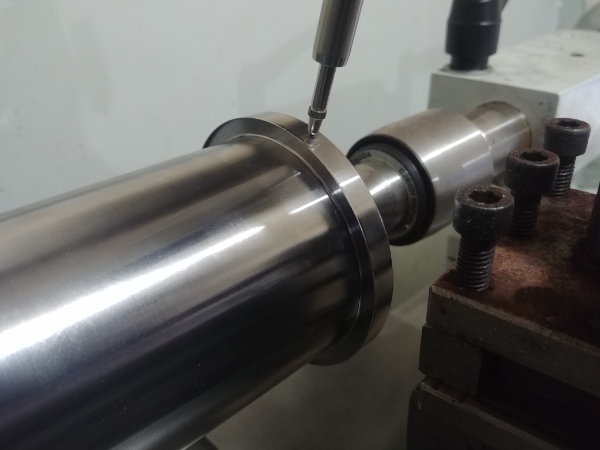
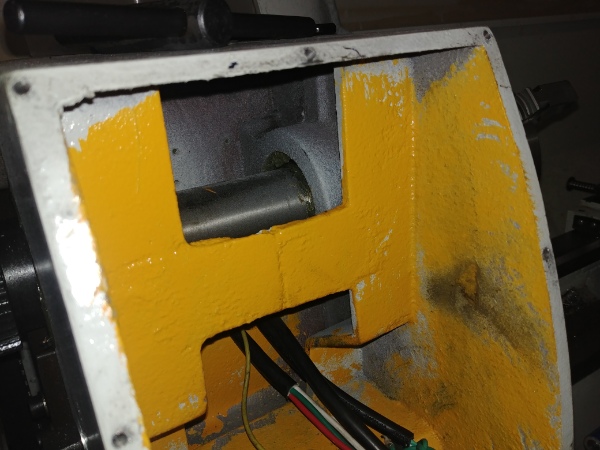
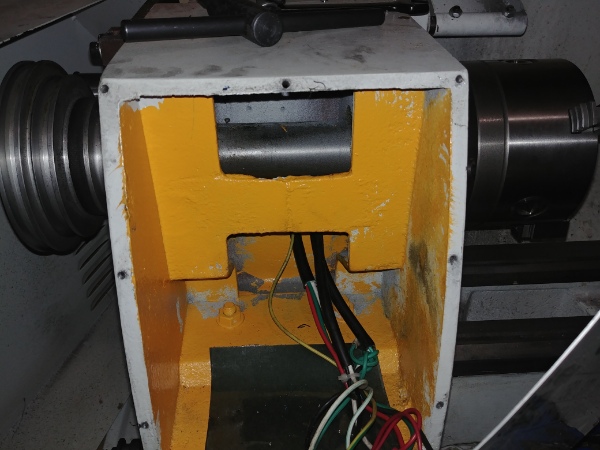
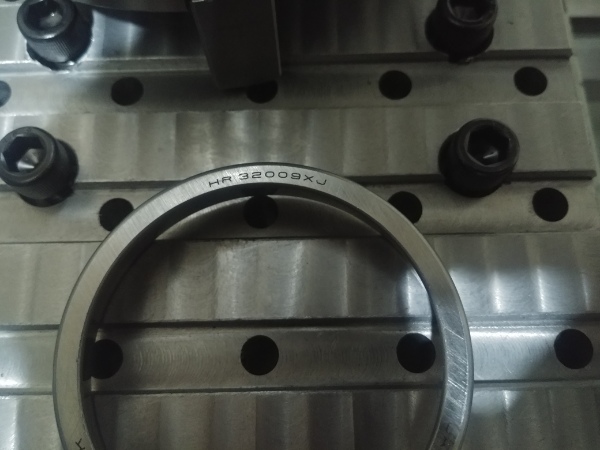
The next thing to check was the spindle bearings. I removed them to find they were SKF, a quality make. I did however find they painted the machine after the spindle had been installed, so there was paint inside of the bearings themselves. I made the decision to order some new ones.


CNC Hobby Lathe Conversion and ModificationCNC Hobby Lathe Conversion and Modification


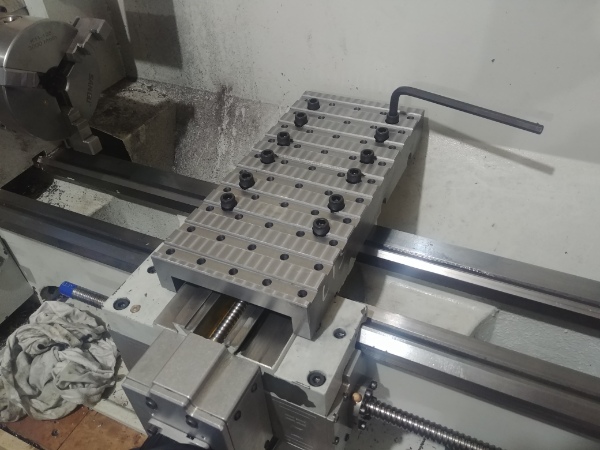
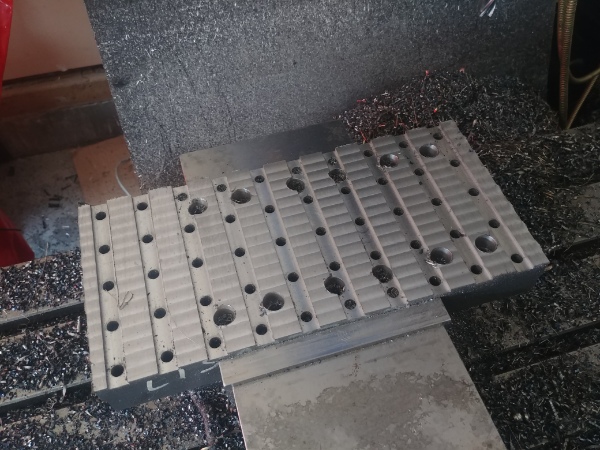
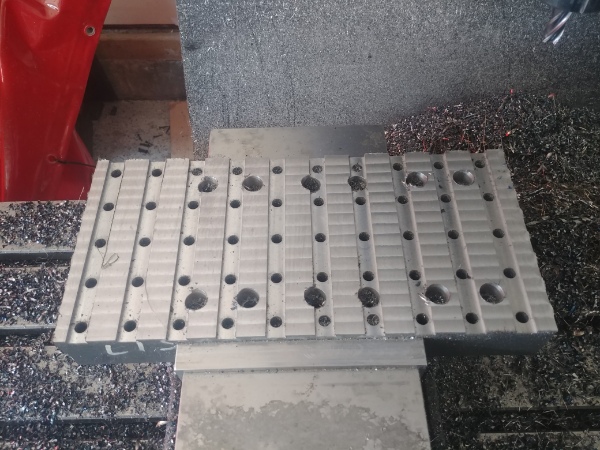
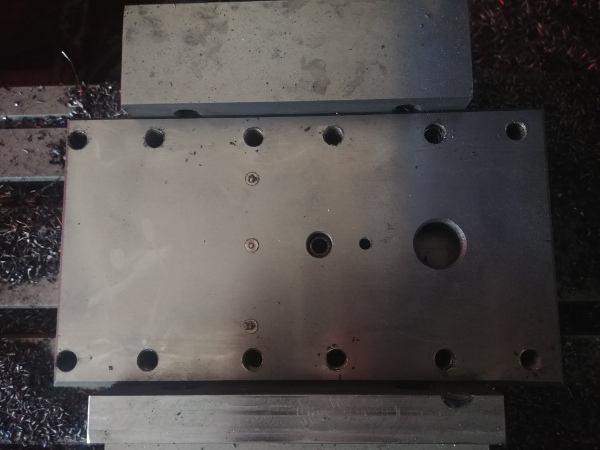
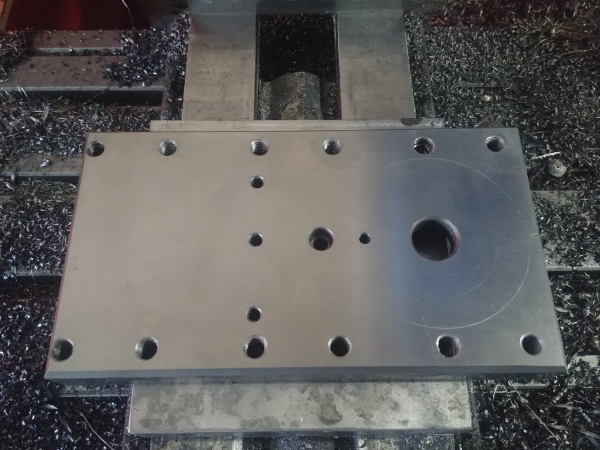
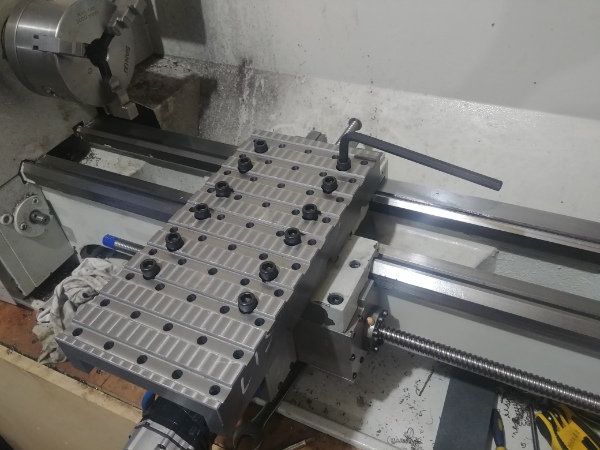
While waiting for my bearings I set to making some tool holders. I designed them so I could use standardised 1 inch tooling in either up or down positions. I also designed them to be used from either the front, back or side directions.


CNC Hobby Lathe Conversion and ModificationCNC Hobby Lathe Conversion and Modification


CNC Hobby Lathe Conversion and ModificationCNC Hobby Lathe Conversion and Modification


CNC Hobby Lathe Conversion and ModificationCNC Hobby Lathe Conversion and Modification


CNC Hobby Lathe Conversion and ModificationCNC Hobby Lathe Conversion and Modification


CNC Hobby Lathe Conversion and ModificationCNC Hobby Lathe Conversion and Modification


CNC Hobby Lathe Conversion and ModificationCNC Hobby Lathe Conversion and Modification


CNC Hobby Lathe Conversion and ModificationCNC Hobby Lathe Conversion and Modification


CNC Hobby Lathe Conversion and ModificationCNC Hobby Lathe Conversion and Modification


CNC Hobby Lathe Conversion and ModificationCNC Hobby Lathe Conversion and Modification


CNC Hobby Lathe Conversion and ModificationCNC Hobby Lathe Conversion and Modification


CNC Hobby Lathe Conversion and ModificationCNC Hobby Lathe Conversion and Modification


CNC Hobby Lathe Conversion and ModificationCNC Hobby Lathe Conversion and Modification


CNC Hobby Lathe Conversion and ModificationCNC Hobby Lathe Conversion and Modification


CNC Hobby Lathe Conversion and ModificationCNC Hobby Lathe Conversion and Modification


CNC Hobby Lathe Conversion and ModificationCNC Hobby Lathe Conversion and Modification


CNC Hobby Lathe Conversion and ModificationCNC Hobby Lathe Conversion and Modification


CNC Hobby Lathe Conversion and ModificationCNC Hobby Lathe Conversion and Modification


CNC Hobby Lathe Conversion and ModificationCNC Hobby Lathe Conversion and Modification


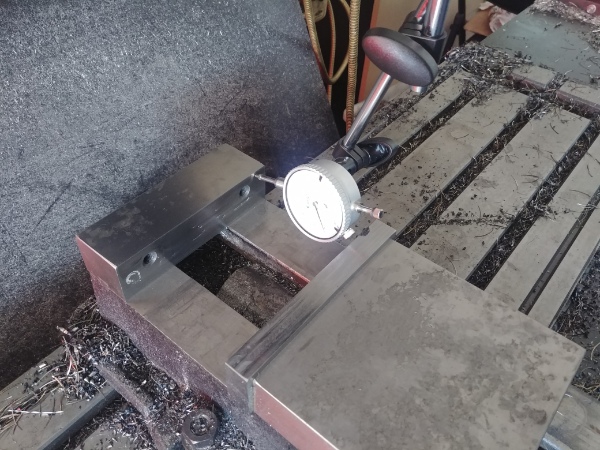
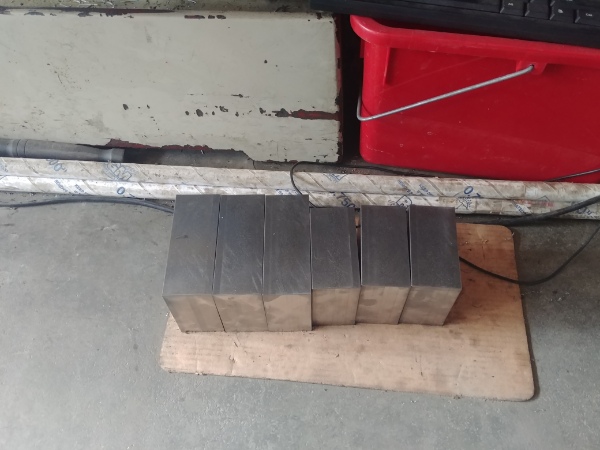
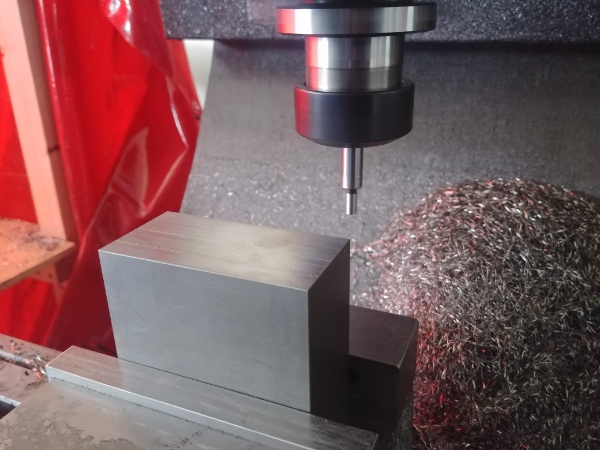
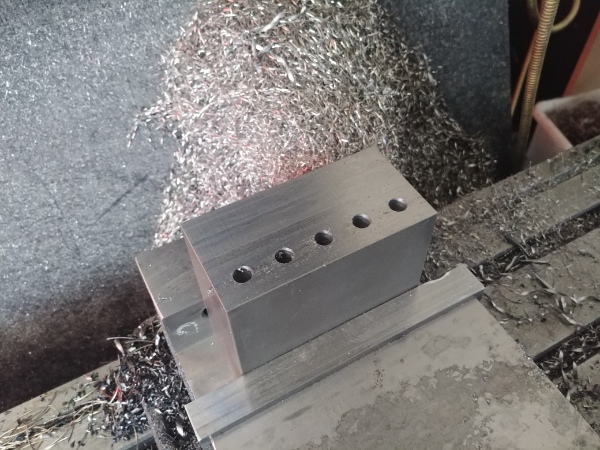
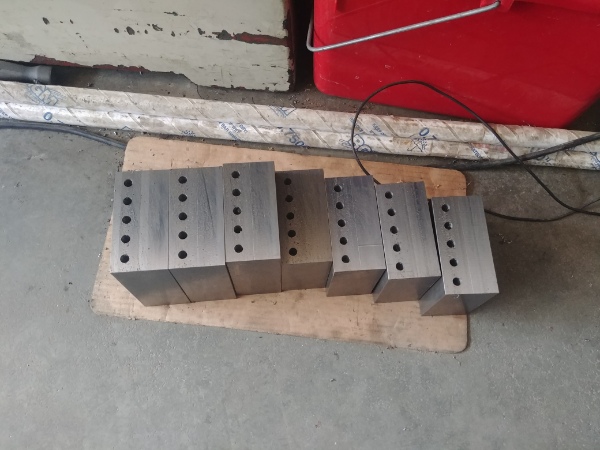
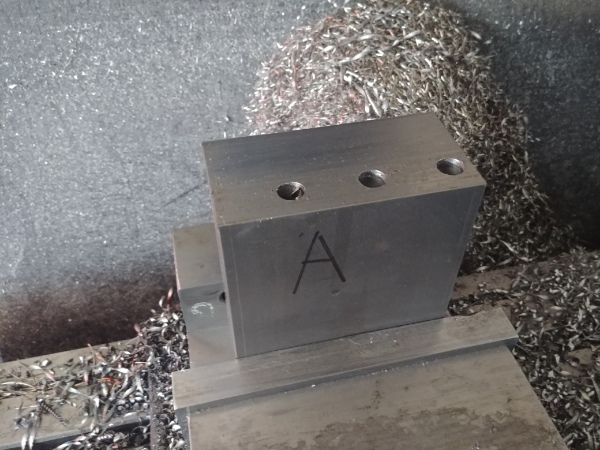
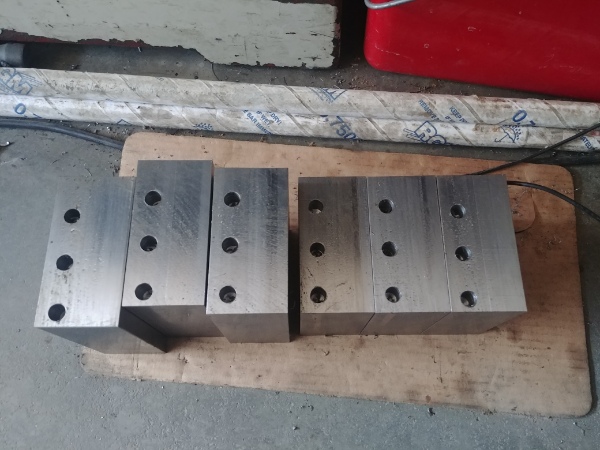
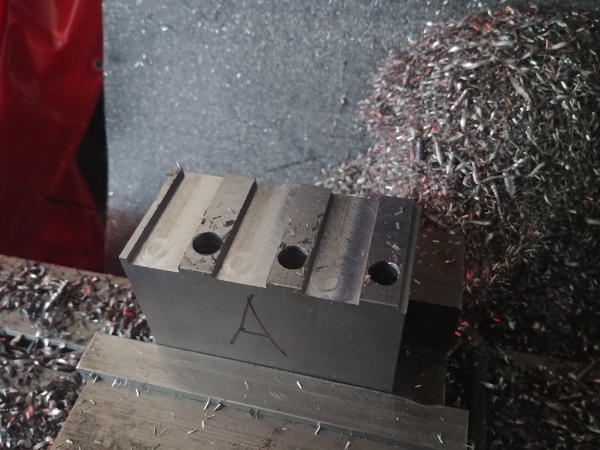
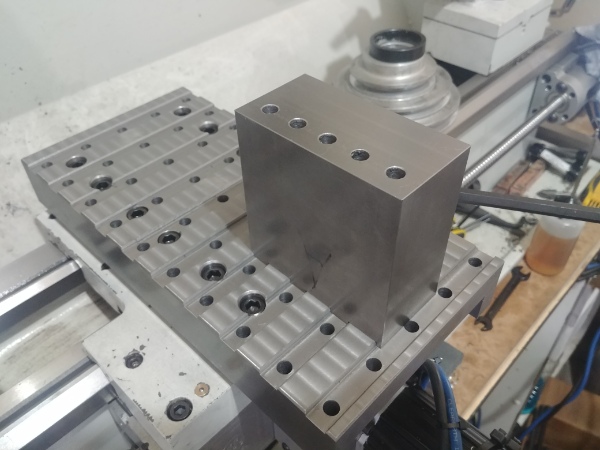
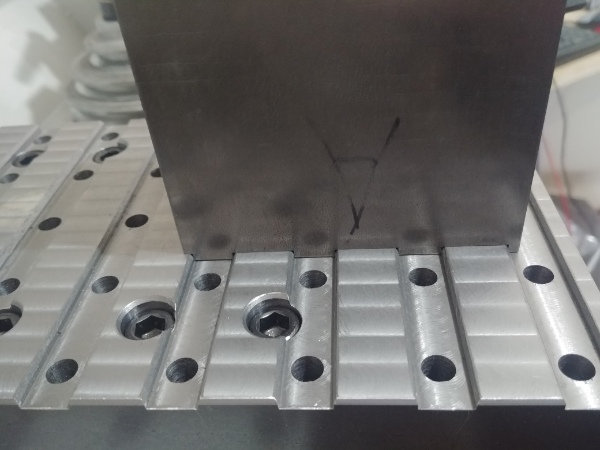
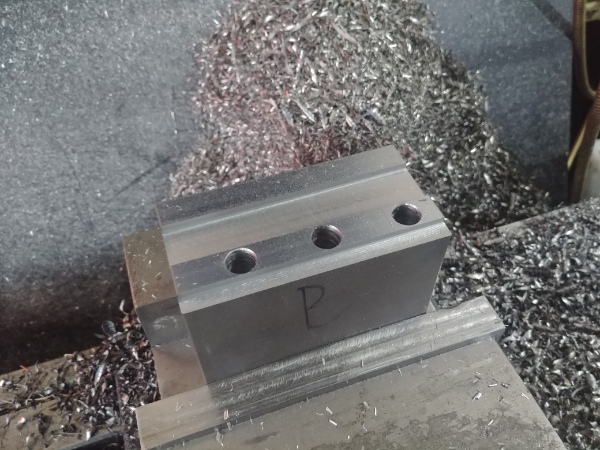
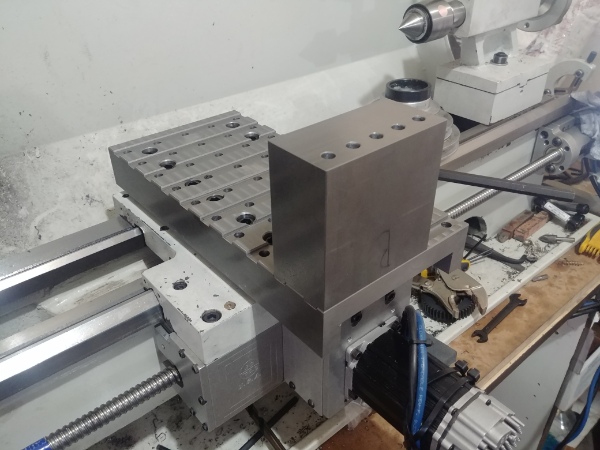
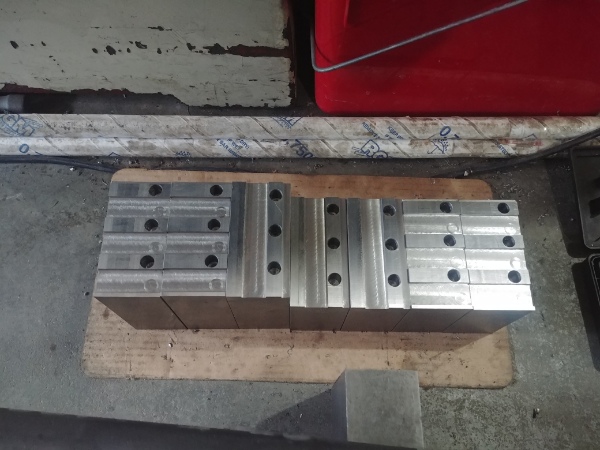
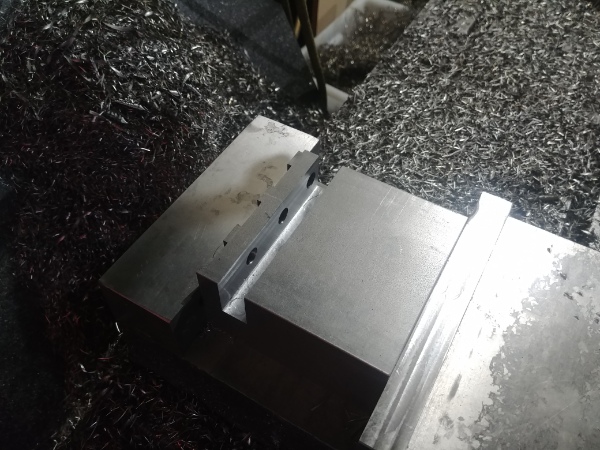
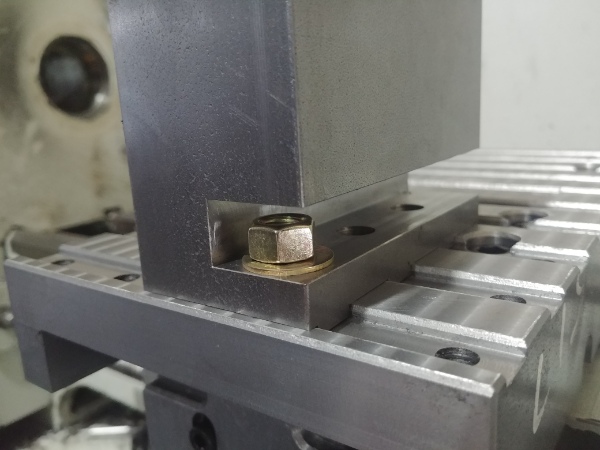
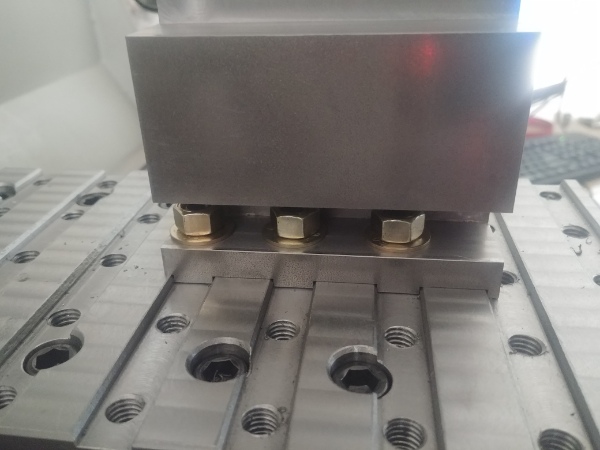
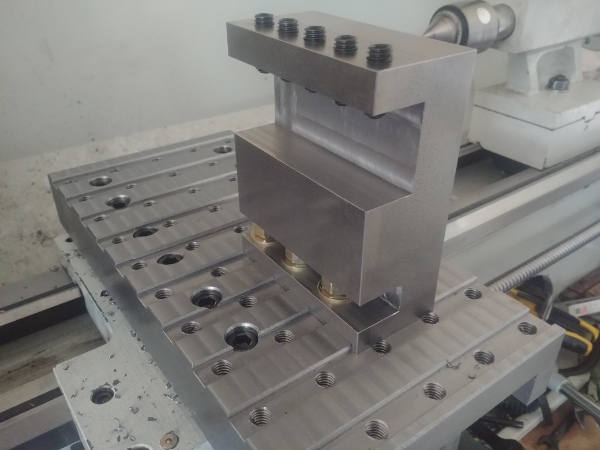
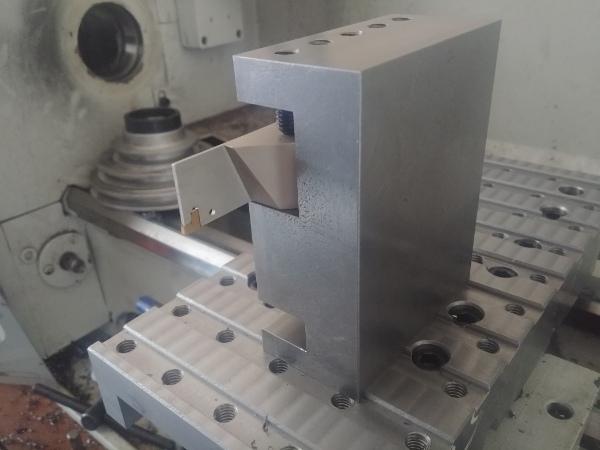
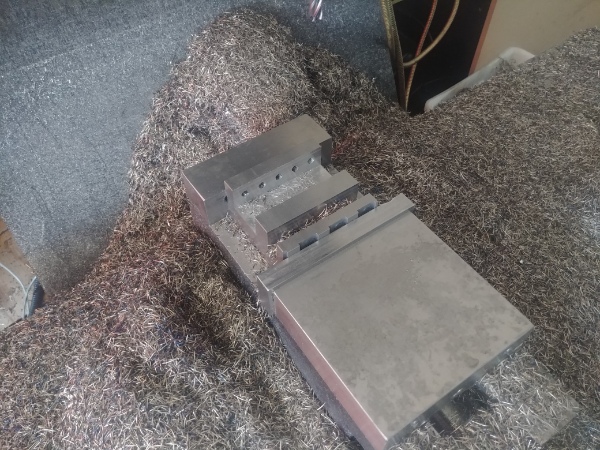
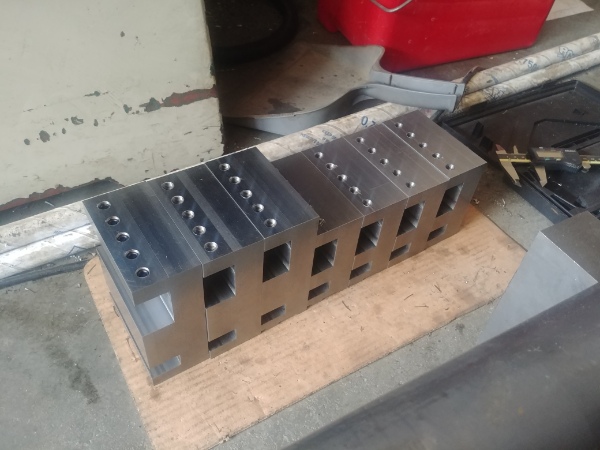
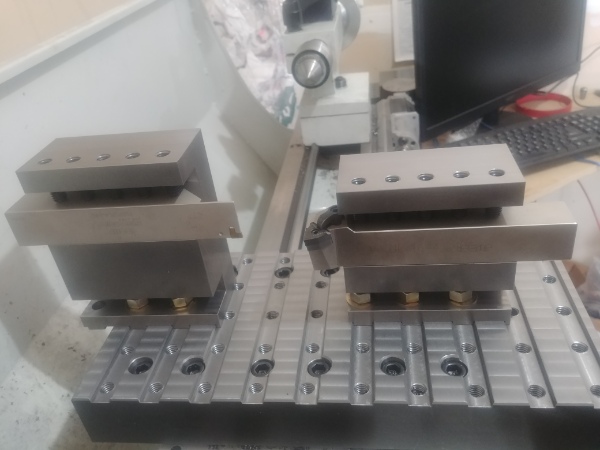
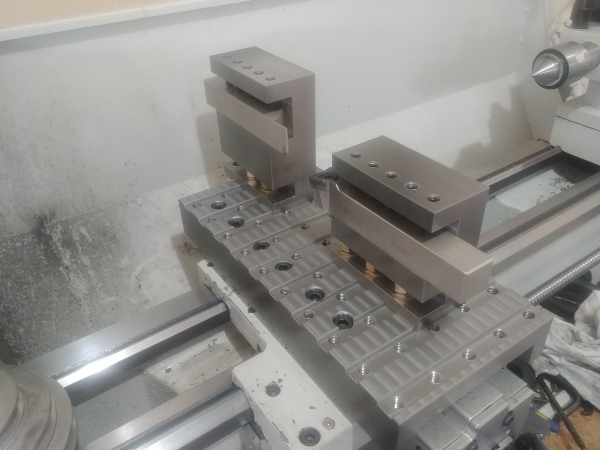
The tool holders came out really good, the tool heights are also perfect. Some could argue that the holders could have been designed better for better strength, however considering they are 2 x 4 inch thick they are very strong. The main reason for making them so beefy is to put lots of weight on the carriage.


Go to Page 2


Hello, if you have enjoyed reading this project, have taken an interest in another or want me to progress one further then please consider donating or even sponsoring a small amount every month, for more information on why you may like to help me out then follow the sponsor link to the left. Otherwise you can donate any amount with the link below, thank you!