Turbo Tiburon - Manifold, Mounts, Pistons, Clutch
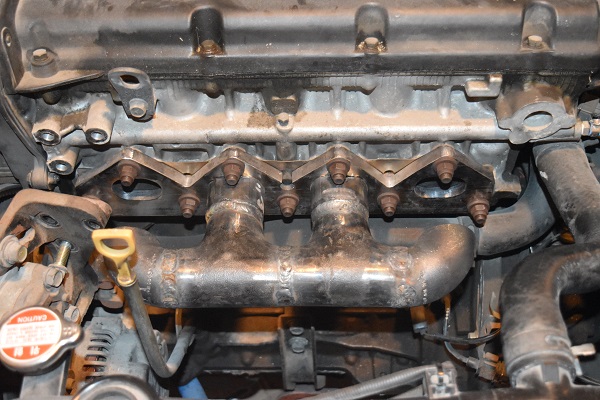
I did just about everything on my turbo tiburon build on the cheap, well I now want it faster and more reliable. The biggest factor at the moment is that my exhaust is too restrictive for the turbo, after that I will need a stronger clutch. I will also be close to the limit of my stock pistons. The down pipe for my turbo is already touching the alternator so I will need to make a new turbo manifold. The engine also rocks quite a bit so I need to sort out the engine mounts, to make them solid.
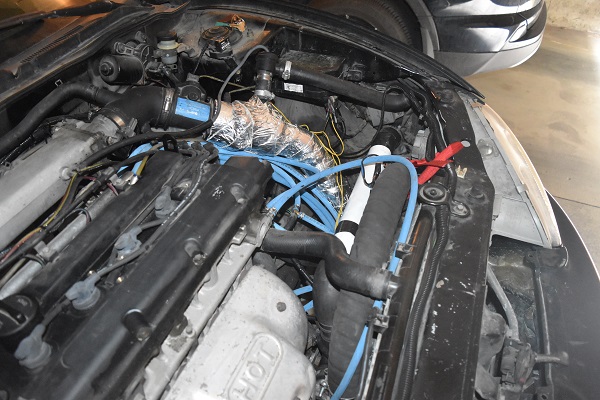
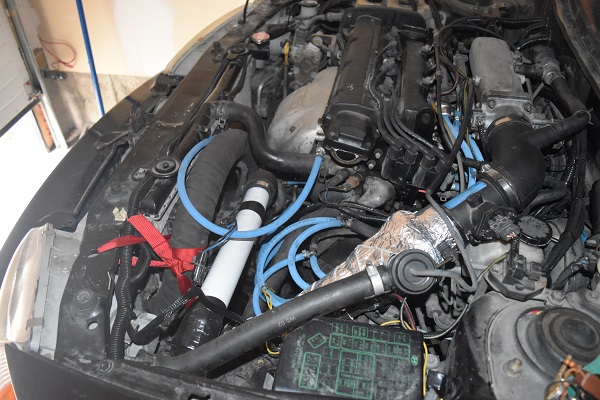
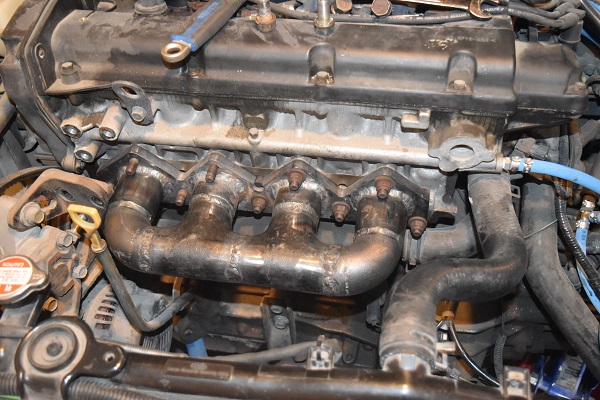
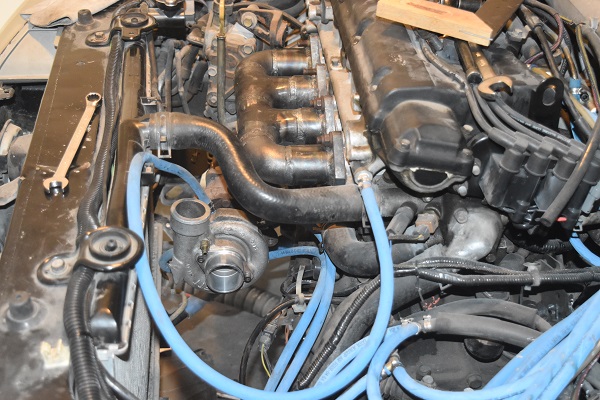
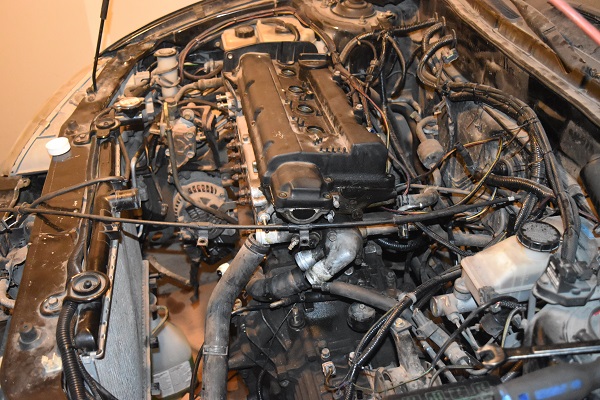
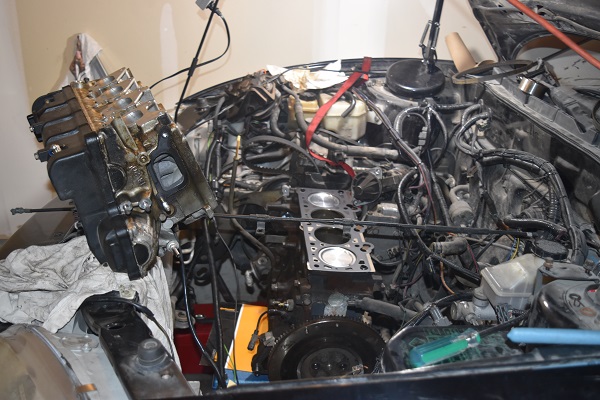
Quite clearly there is a huge amount of work that I need to do to this car. Here you can see below that the engine bay is a complete mess.
05 September 2018 - I ordered a load of parts for my car, most importantly some low compression forged pistons.
I picked up some metal to begin work on the exhaust system. The original plan was to keep with the stock exhaust system and then make a valve that would release the gases through a straight pipe, the issue is that it would have to be close to the turbo and be able to handle the heat. After quite a bit of thinking I chose to abandon the idea and will be upgrading to a 2.5 inch exhaust system, that is an additional 60% flow and plus the exhaust will be less restrictive, probably around 70% more flow over stock.
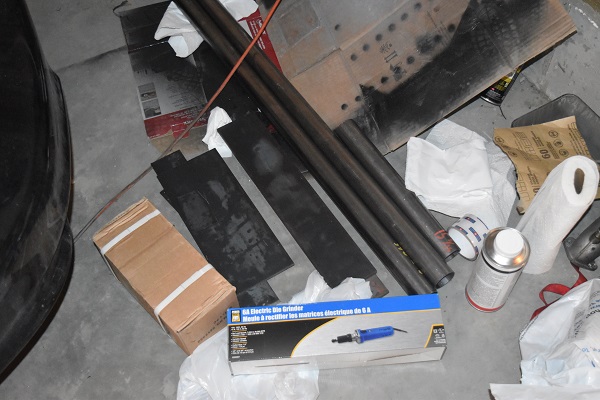
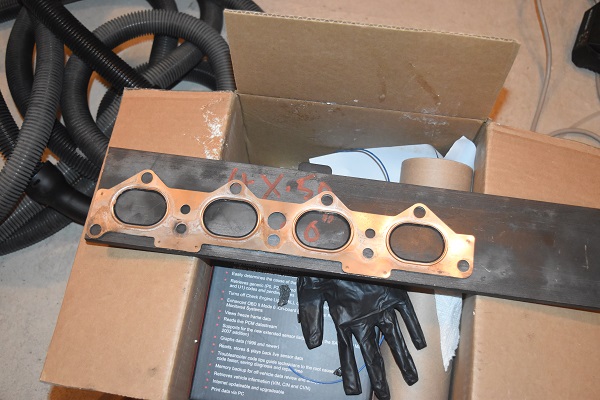
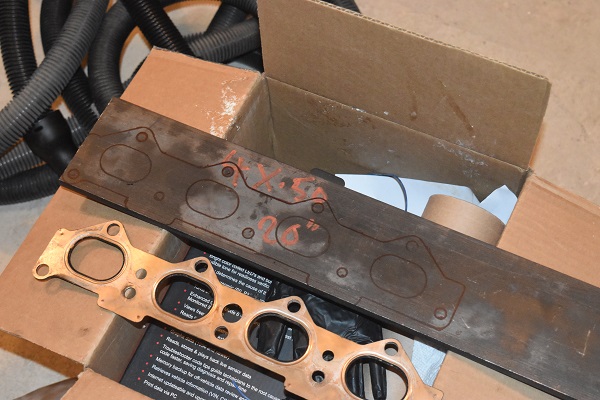
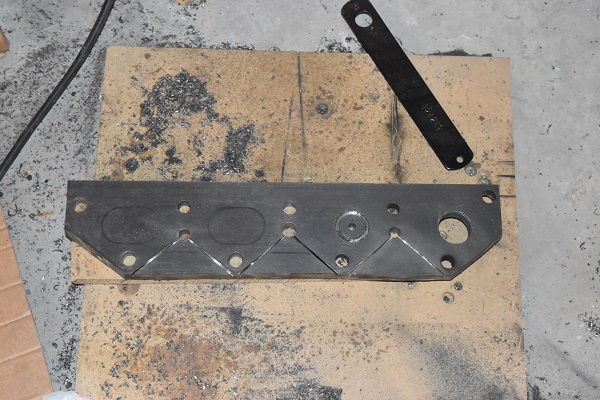
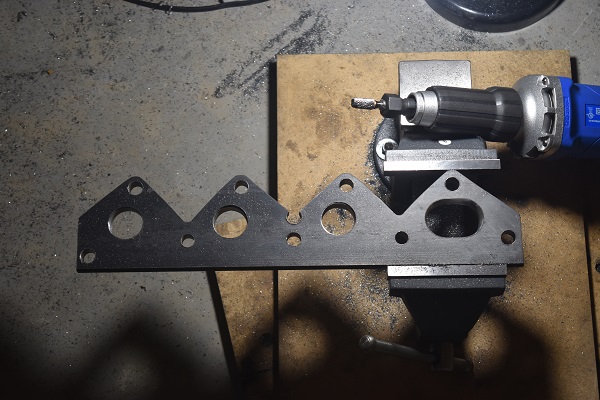
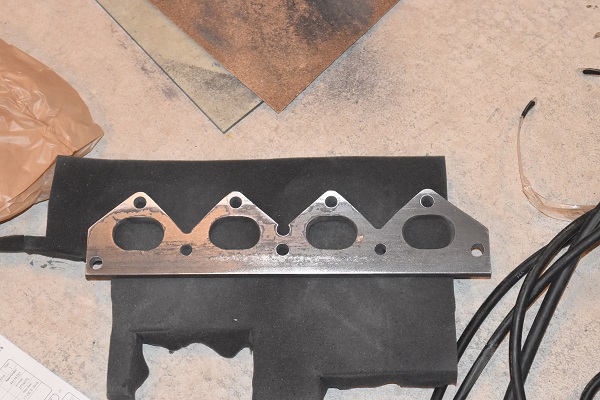
I got some 1/2 inch steel plate to make the turbo manifold, eventually I will make a new one in stainless and get it all waterjet cut. I used the exhaust gasket to mark out the areas I needed to cut, I first started out with drilling the mounting holes.
The plate fit, that's a pretty good start considering I'm using a hand drill. The next step was to cut the plate out, I knew this would be a time consuming task.
The only problem with using a cordless hand drill to make the holes is that it kept running out of power.

I got there in the end, well actually that was the easy part done.

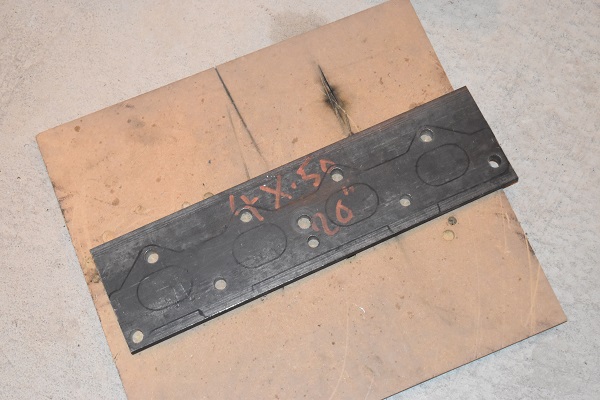
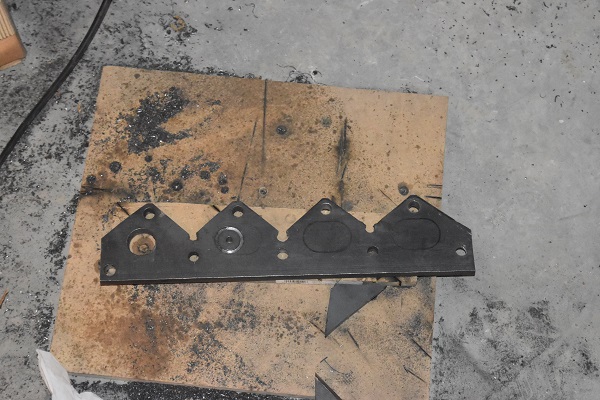
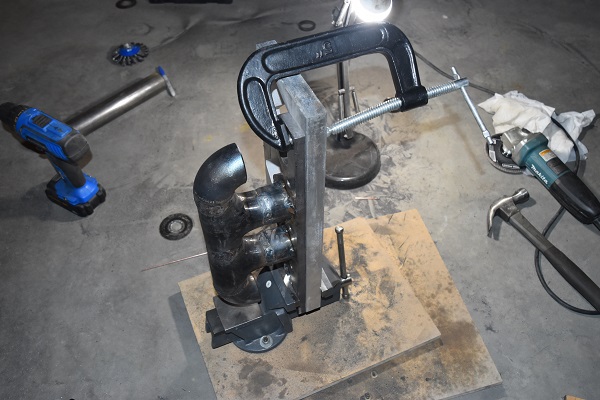
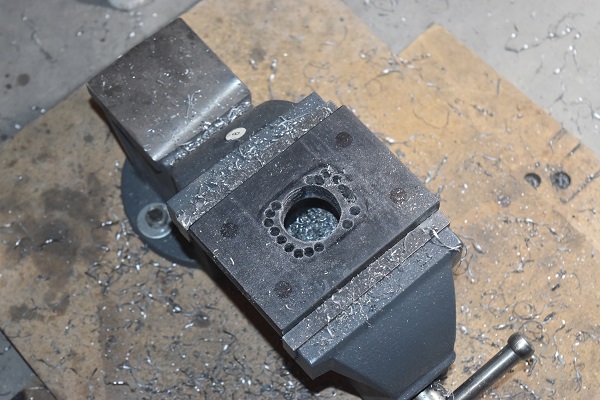
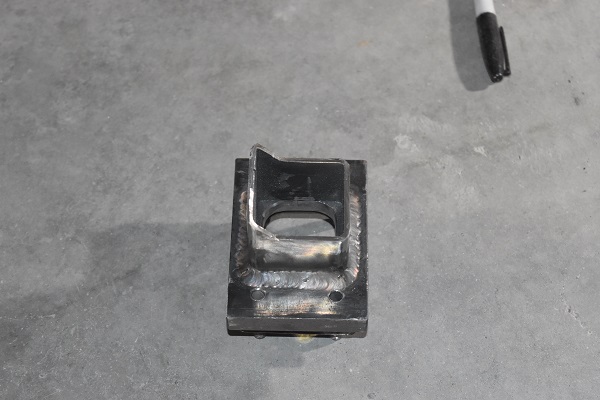
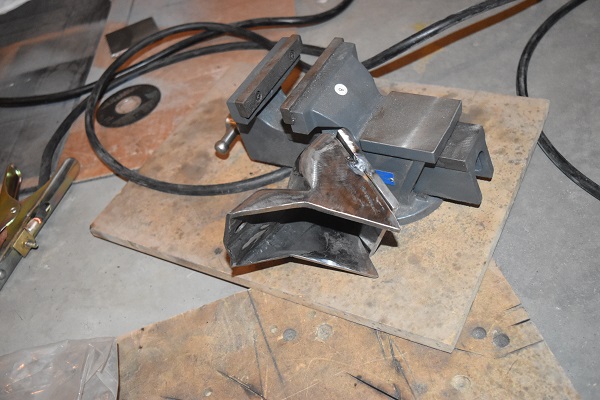
I picked up a die grinder to cut the ports to the correct size, I eventually got a 1/2 inch bit in order to speed things up. I spent quite a lot of time cutting these ports. Random picture on the right, this is a plate to make my engine mounts solid, I managed to forget to take pictures of this part of the build.

The manifold complete, well no, still a long way to go. I picked up some cast steel pipes in order to make fabrication of the manifold easier. I originally was going to hire a MIG welder but instead chose to buy a cheap TIG welder, I really wish that I had gone stainless instead.
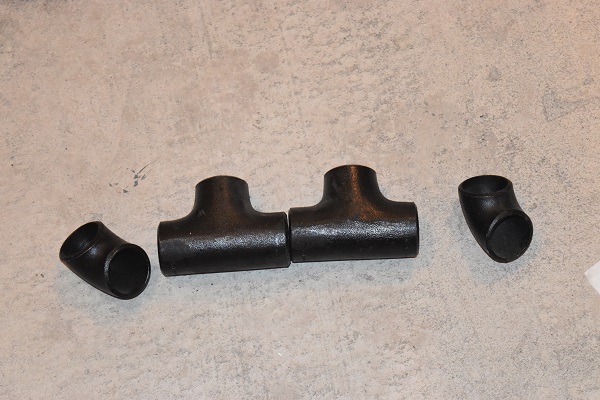
These pieces of tube are designed for welding yet they are covered in paint. I also quickly found out that they were full of impurities which made TIG welding them a massive task, or maybe I just couldn't get all the paint off. I think one of the biggest issues was that the paint was impossible to remove on the inside, the paint proved to be very gassy when it got hot. There is one major benefit to using this tube, it is extremely thick which should result in a long lasting manifold.
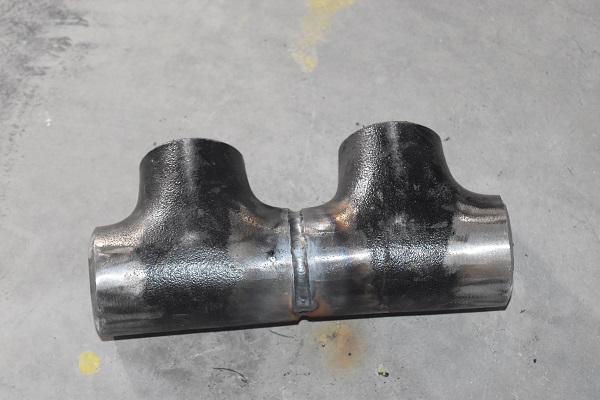
It's getting there, welding this thing was infuriating to say the least.
The welds came out pretty good, not my best work but it was the best I could do with this steel. I also tried my best to weld as much as possible on the engine but that proved difficult, ultimately I knew I would get some warping.
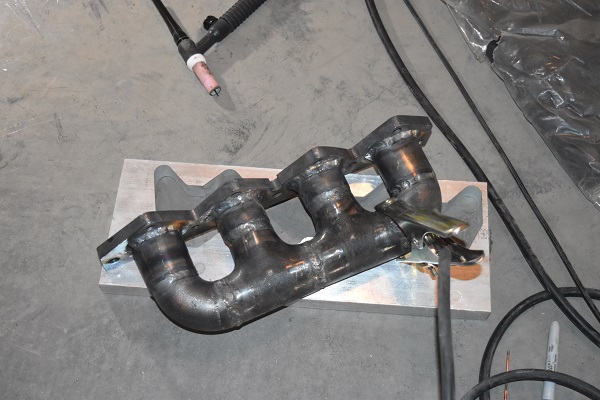
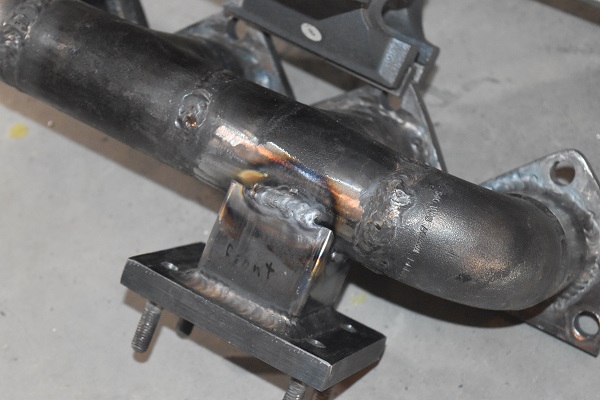
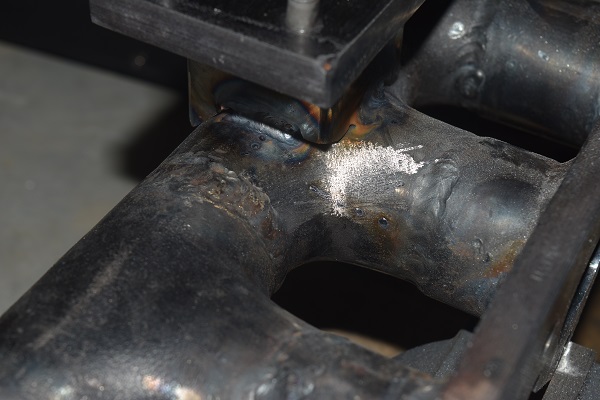
Here is the part of the manifold that will bolt onto the turbo, it is a T25 flange. I did the weld in two passes, it came out very nice. The one thing I'm not quite used to with this welder is that it is a scratch start and not a hot start like I'm used to, hence why it was cheaper. The scratch start can introduce some impurities from the tungsten but that is minimal risk if striking is done correctly. The biggest issue is that when you have finished a weld you have to flick the torch away to stop the arc, this introduces problems. The argon gas stops flowing on a hot weld leading to oxidising, not always a big issue. The thing I do miss is that I cannot ramp down the current before removing the torch, this can lead to spots, again not a major issue but it can be unsightly. I think in the future I will modify the welder so I can incorporate a foot pedal to drop the current, it shouldn't be all that difficult.
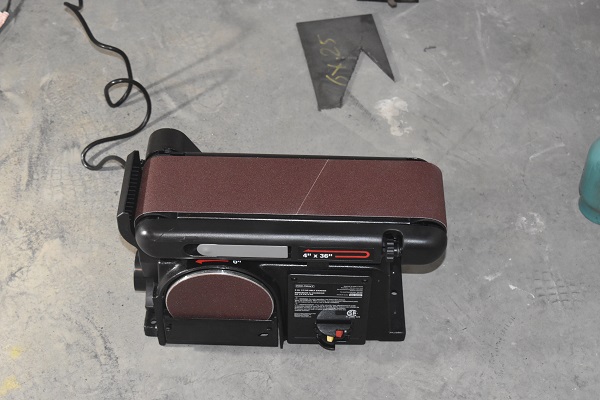
The manifold had warped around 0.5mm, not a huge amount but not acceptable. I had to pick up a belt sander in order to flatten it down, this took a long time.
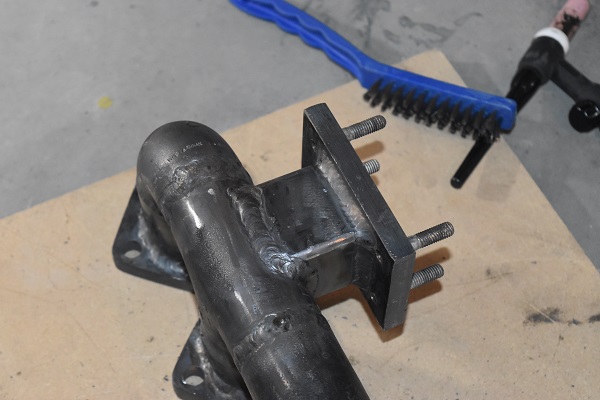
17 September 2018 - I chose to work on the turbo flange next, first the hole saw and then a series of holes. This again took quite a bit of time as my drill kept running out of power.
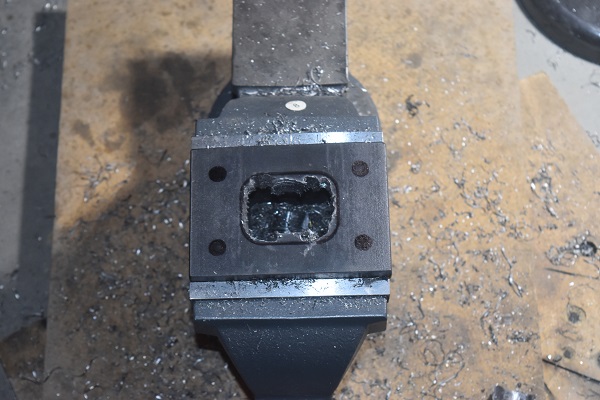
This is the die grinders nightmare, a recipe for an accident. This didn't take all that long to machine out this time and thankfully no mishaps.
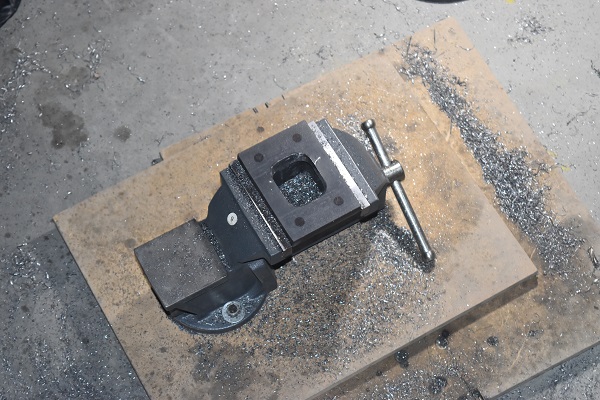
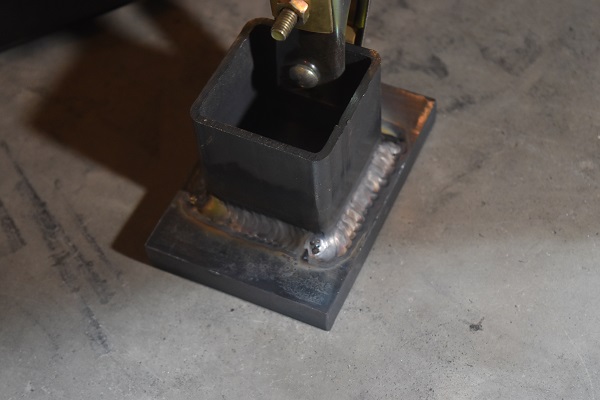
I drilled, tapped and then inserted some studs. I also had to sand this flat before fixing the studs, surprising how such a thick piece of plate can warp so much.

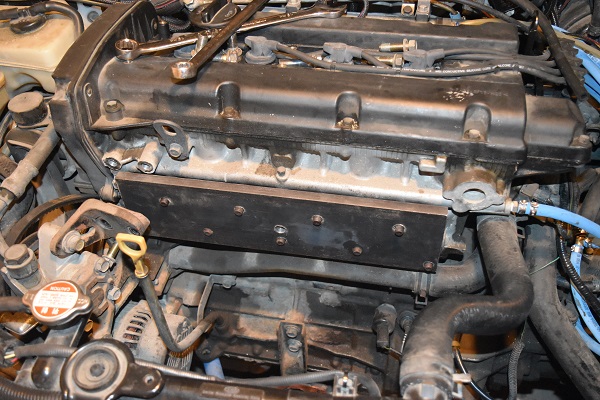
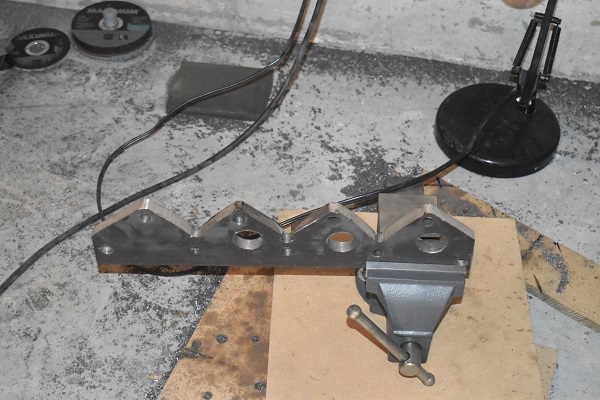
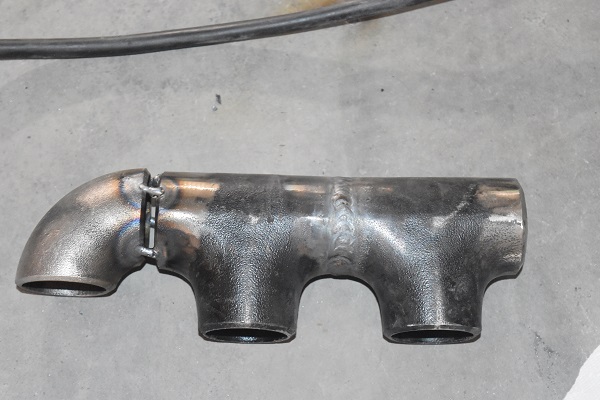
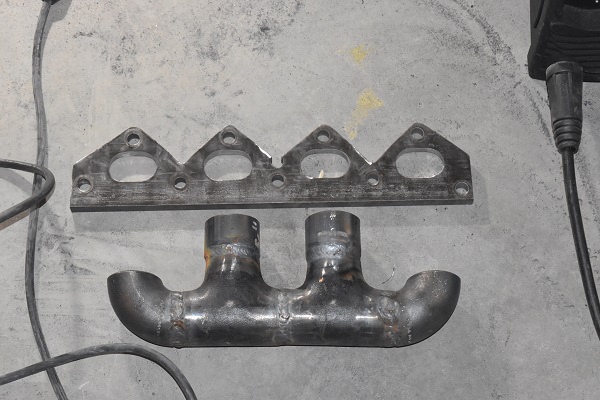
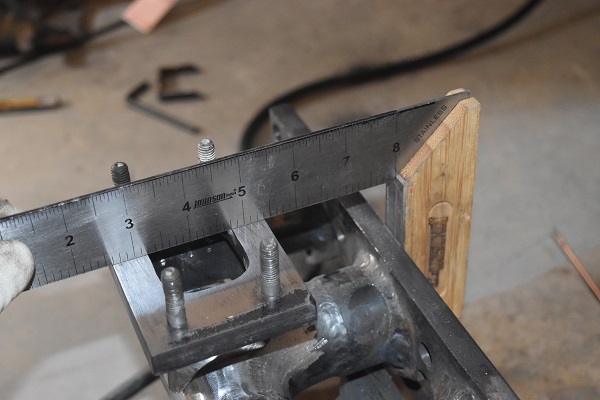
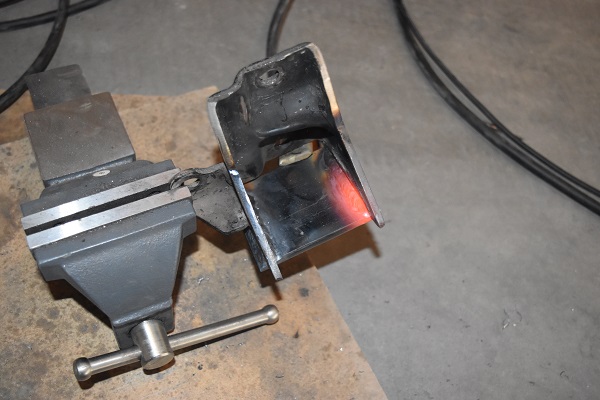
I installed the manifold on the engine in order to get an idea of where the turbo should sit. It is very common on log style manifolds for the turbo to sit at the third cylinder, exactly where this one would.

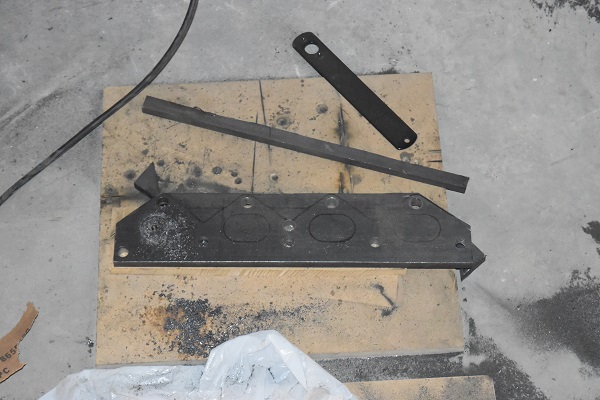
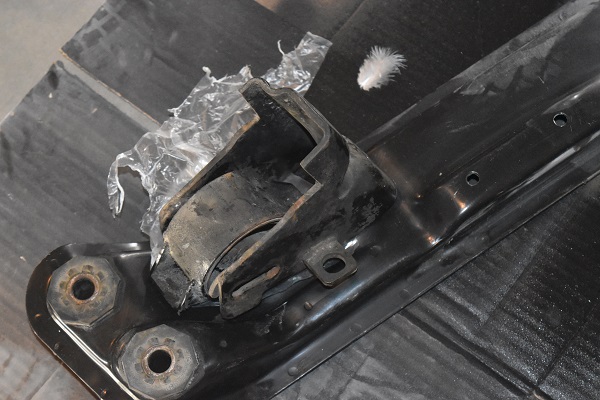
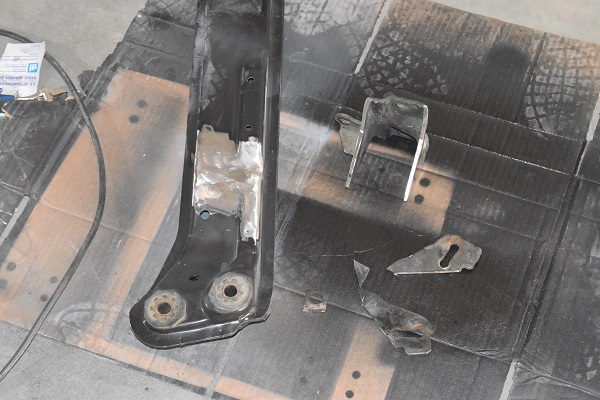
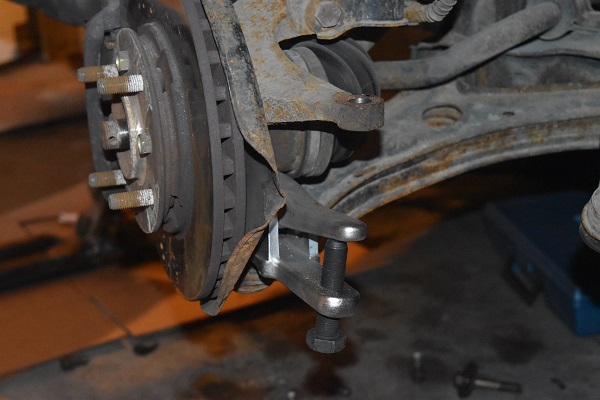
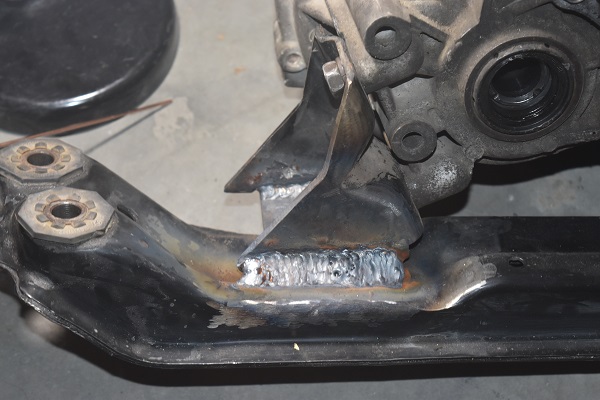
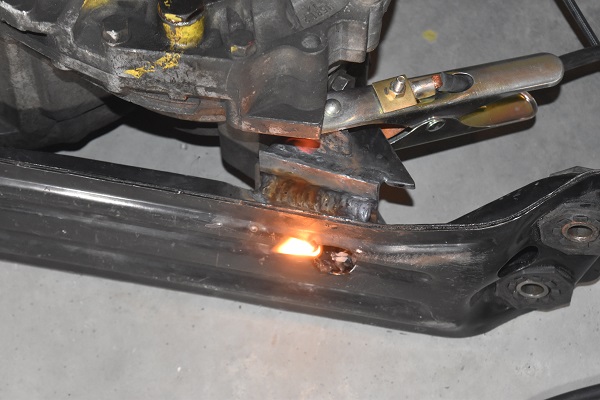
I cut down the flange slightly so that it would contour better to the manifold. Another random picture to the right of the front transmission mount, again I am making it solid.
I drilled lots of holes in the manifold in order to punch a larger hole in it. To the right is again the front mount, I reused the old one but had to modify it slightly. The transmission mounts would have to be welded on while installed on the car in order to ensure that they would not shift.
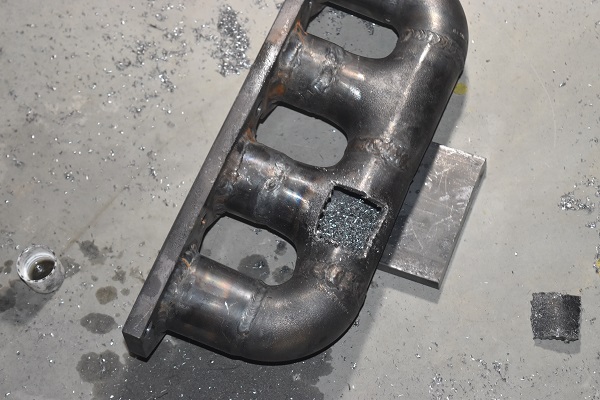
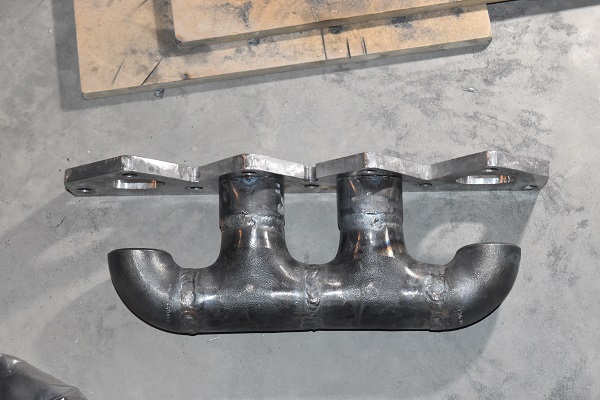
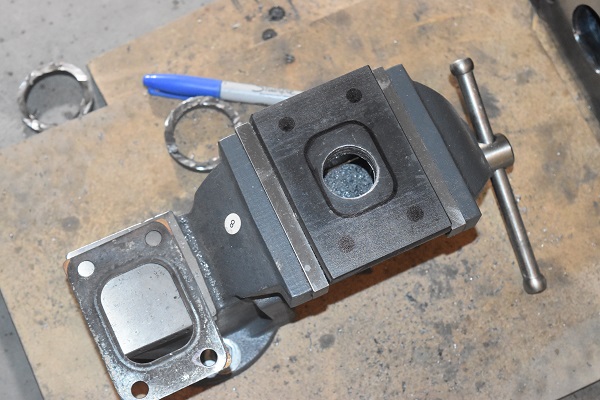
The hole in the manifold was ground out with the die grinder to the correct size. I then used a flap wheel to remove surrounding paint, again I could not get to the paint on the inside. I used a square to get both of the flanges perpendicular to each other.
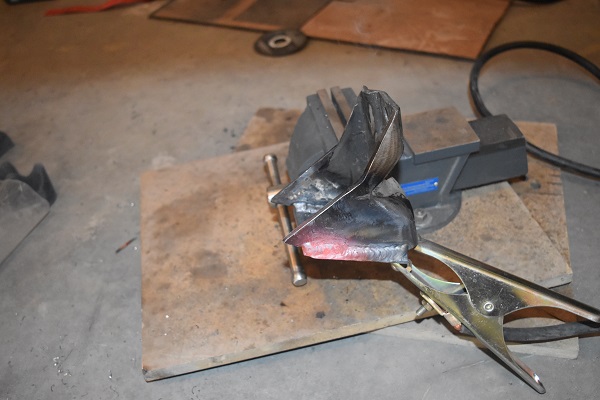
The flange was tack welded in place, well a little more than a tack weld.
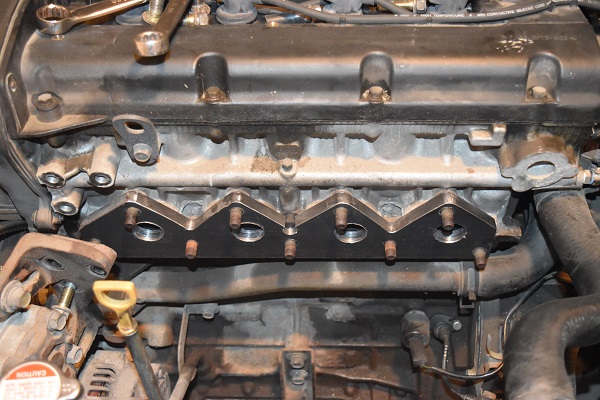
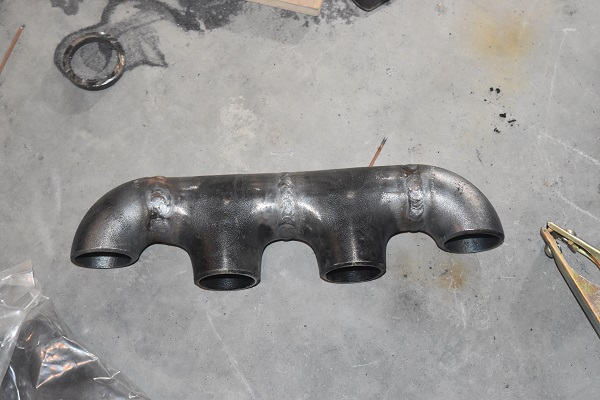
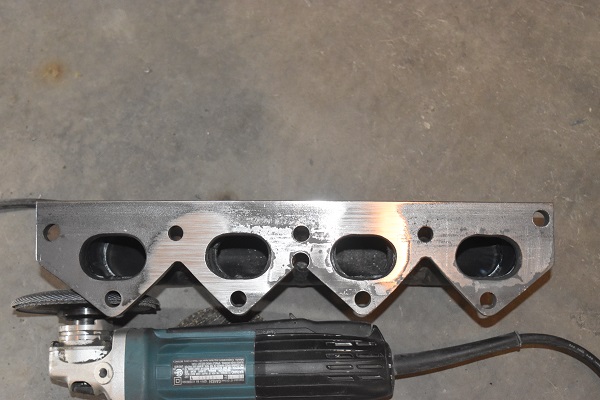
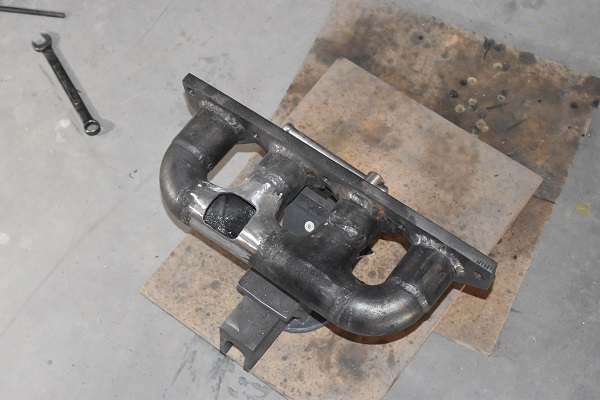
The manifold was complete with nice hefty welds, I will however be choosing to place a brace from the turbo to the engine to avoid cracking. The only issue which is hard to see in this picture is that the turbo looks off kilter. The original owner crashed the car, the front radiator is still the original along with the front brace, I will eventually replace these.
Here is that front transmission mount. I had to weld in some packing beneath it, again really chunky welds.

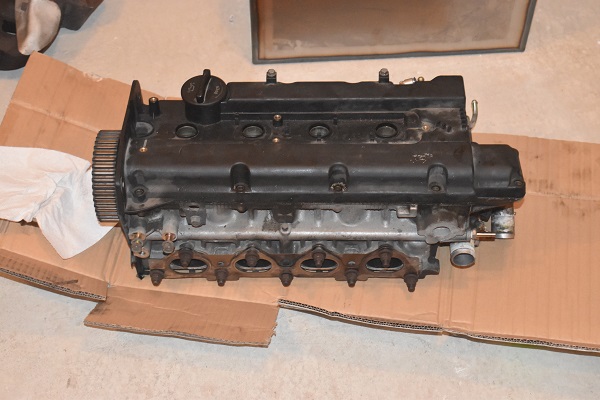
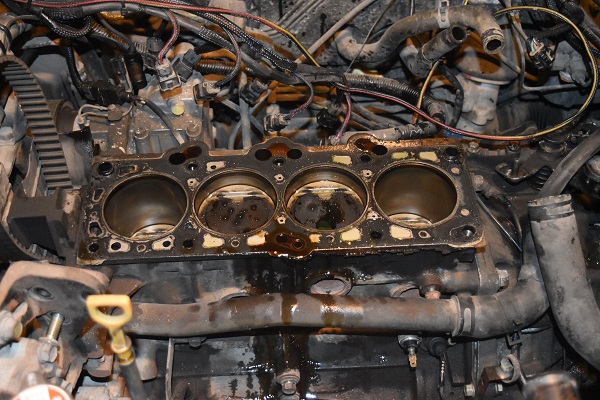
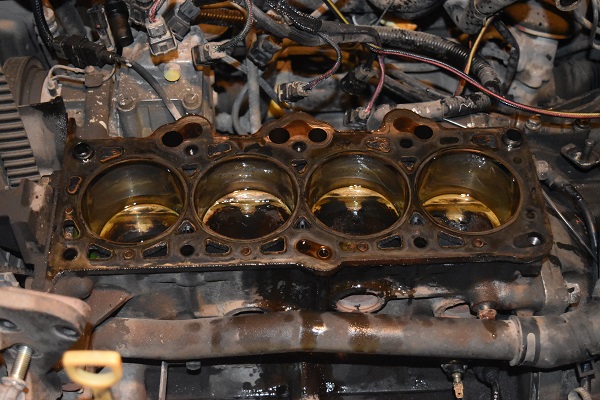
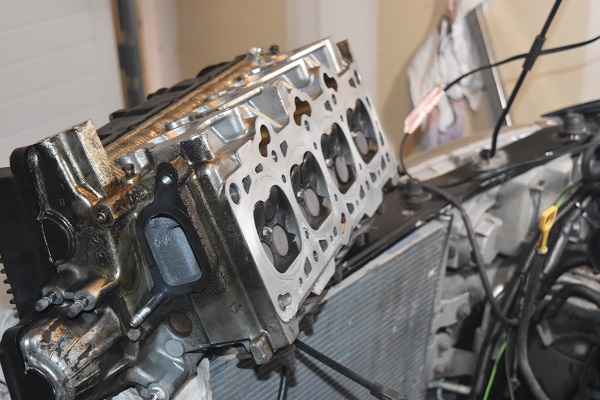
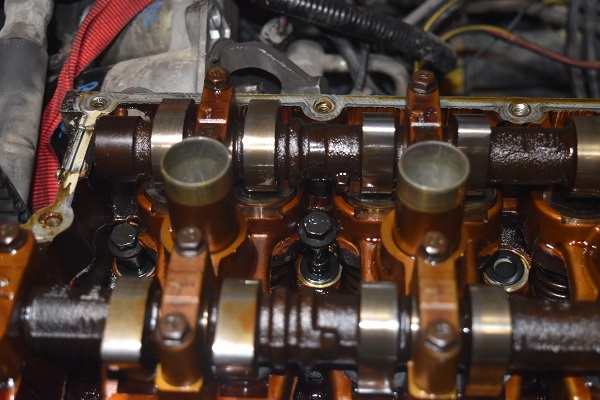
22 September 2018 - It was time to start stripping the engine. I drained and removed almost everything from the engine, including the head. I have not shown in the pictures but the cams have not a single bit of wear, nor do the valves, that makes me happy.
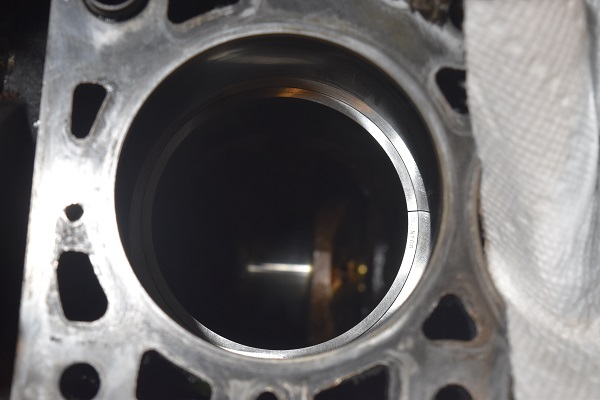
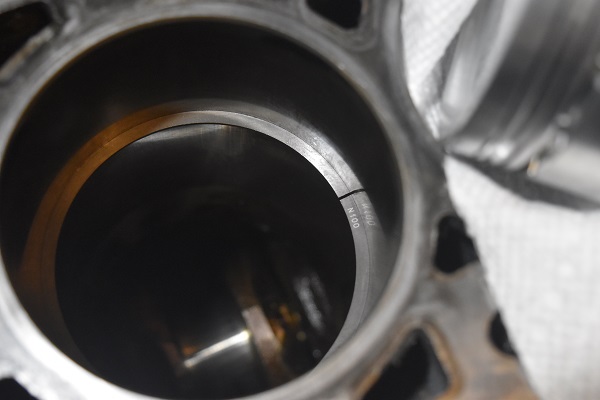
The bores and pistons are also in amazing condition, I smothered the exposed metal in engine oil to avoid rusting.
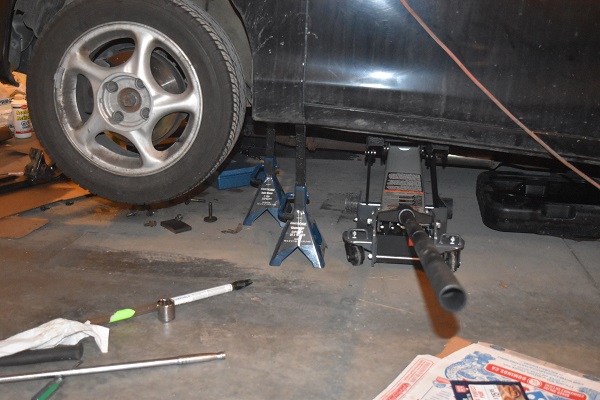
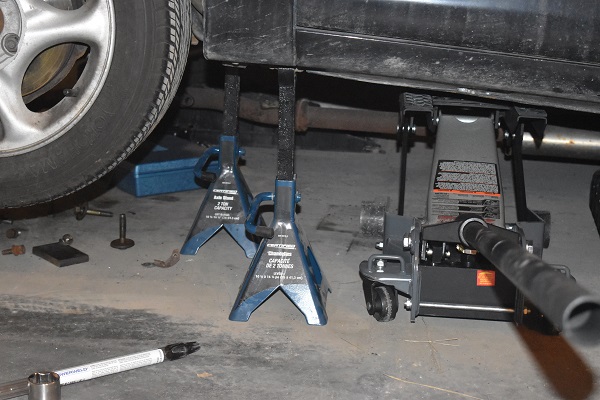
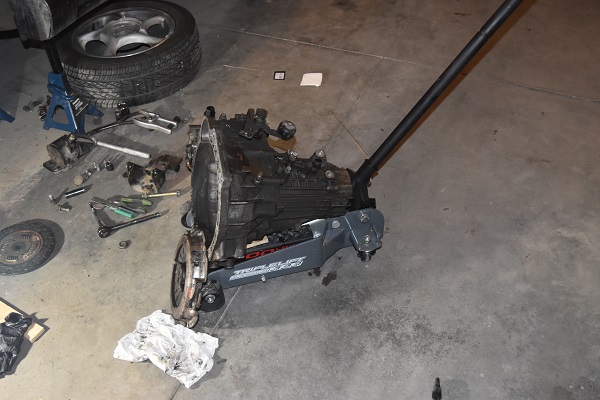
I jacked the car up since the transmission was next on the list. I placed two axle stands underneath the car along with the wheel, hopefully the car will stay still.
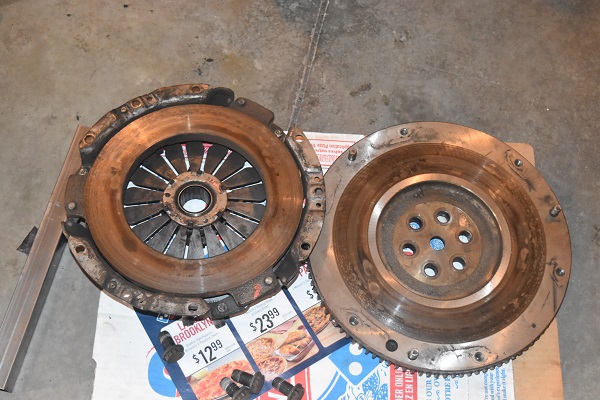
The transmission was removed, this was a relatively straight forward process. What I did not expect to see was damage inside of my gearbox, the pressure plate had been catching the housing.
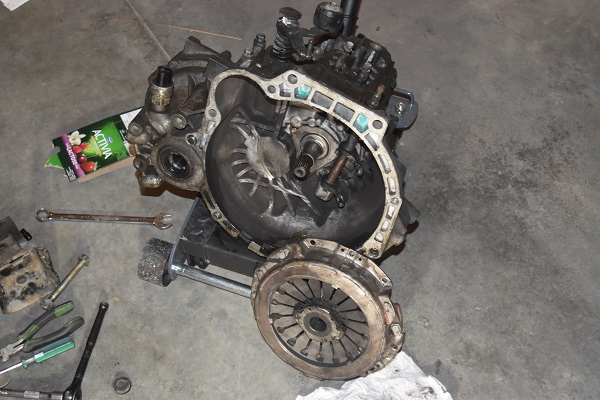
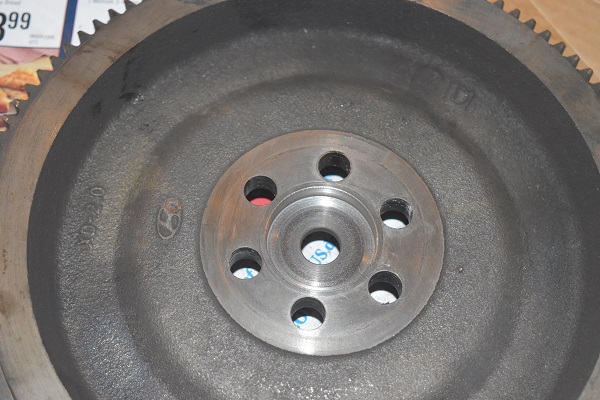
The damage was pretty serious looking but was at most maybe 0.5mm deep, I'm not too concerned about it failing. If you have read the previous projects you will know that I had to machine a flywheel to fit my crankshaft. Something I did not expect was the flywheel to be longer than it should have been, turns out it was 2.5mm longer.

The flywheel was pretty easy to remove, I was happy to find no bolts were loose since I hand torqued them.
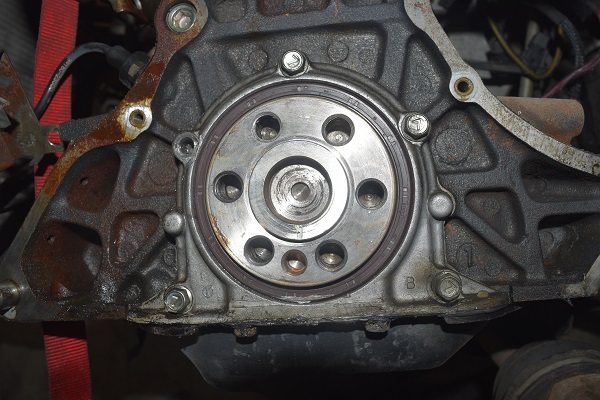
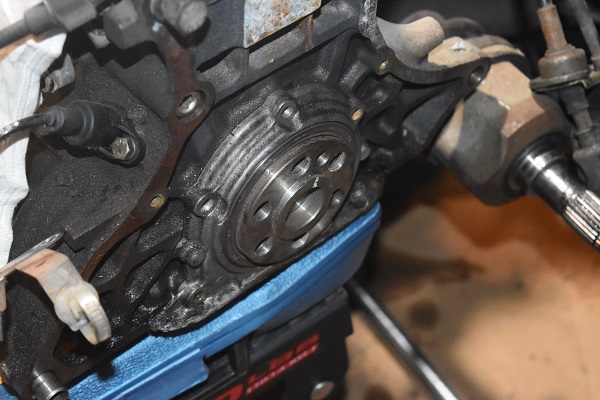
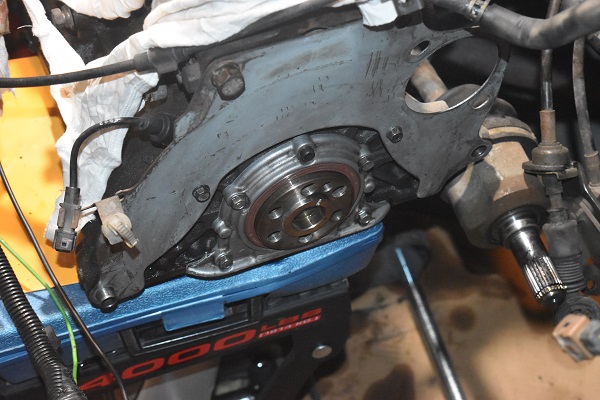
The last thing I expected was to find that a bolt had come loose. A bracket that retained the crank seal is surrounded by several bolts, one of these was missing. It seems the bolt got chewed up a little, it was no where to be found so hopefully it didn't spend long there. What really worries me is that I did not touch this bolt, none of them were particularly tight.
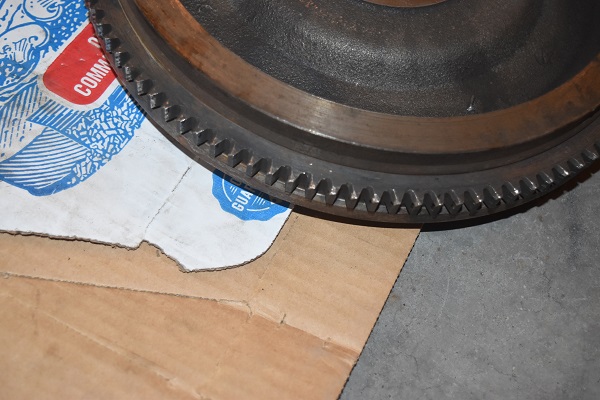
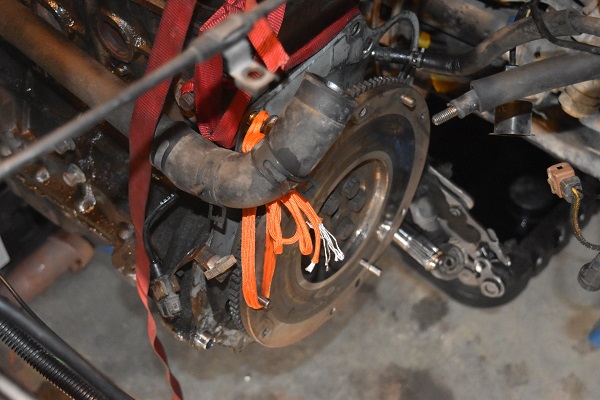
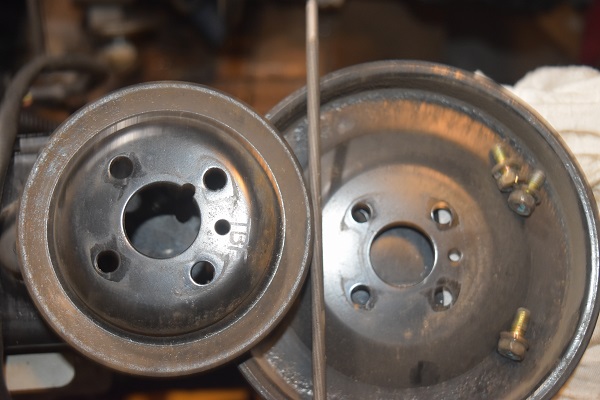
One thing that is certain is that my stock clutch and flywheel were never meant for a turbo, these are pretty glazed. I was originally going to leave the clutch in to see how it would go, I did not realise it was slipping this bad.
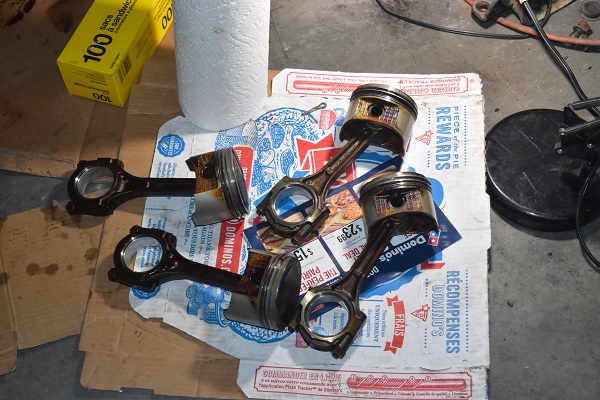
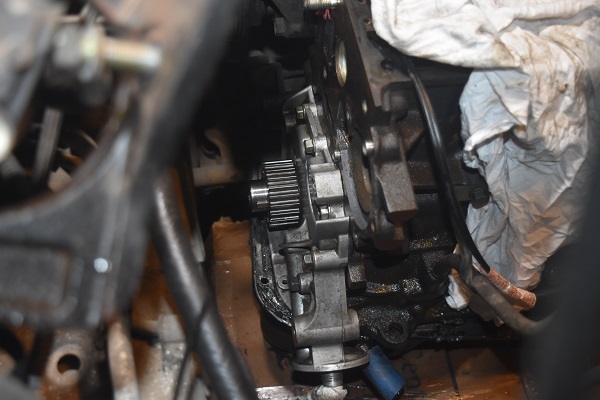
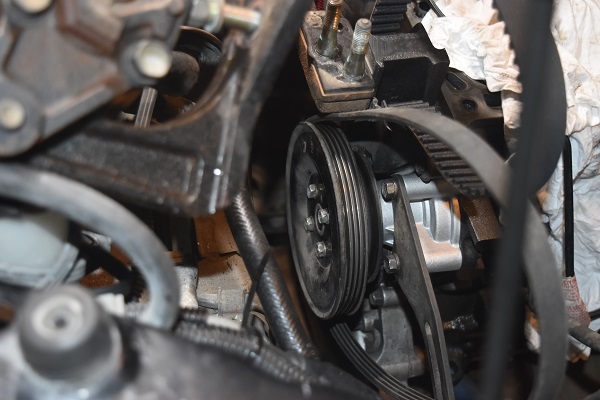
24 September 2018 - I removed the pistons in order for the pins to be pressed out and the new pistons installed, that was something I chose not to do myself as I did not have a press. While the pistons were being taken care of I decided to work on the rest of the block. I started out by removing the engine mounts, pulleys and then the water pump. Here you can see the timing sprocket, thankfully it was not rusted on.
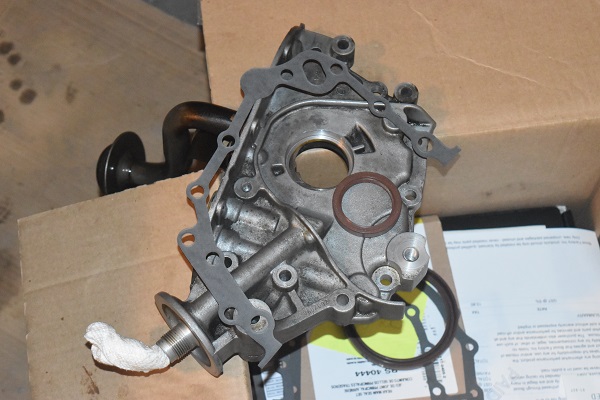
The oil pump was removed next.

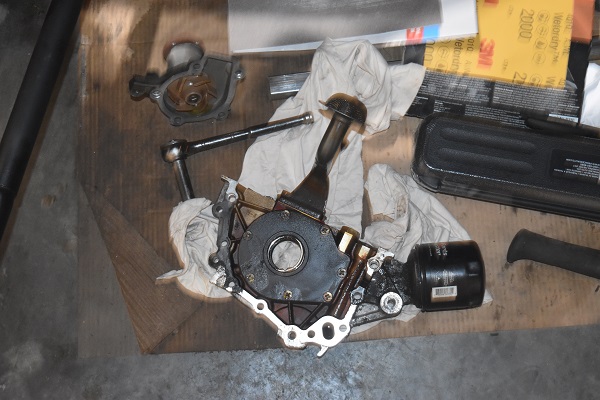
The case was cleaned down with acetone to remove all of the grease. I removed the oil seal and installed a new one since the car was 20 years old, however the old was in excellent condition.
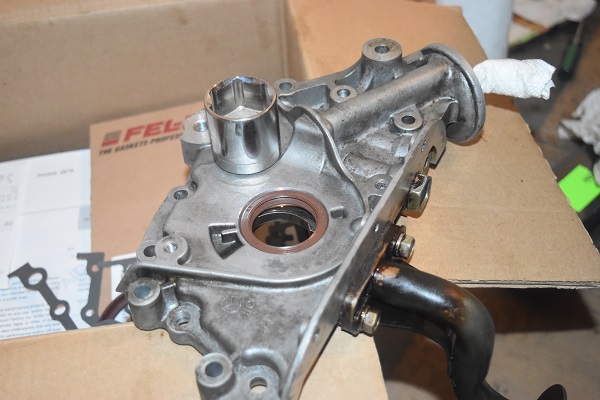
The oil pump assembly was installed with a new gasket and the timing pulley was slipped on with fresh oil. I installed the new water pump, timing belt and cover.
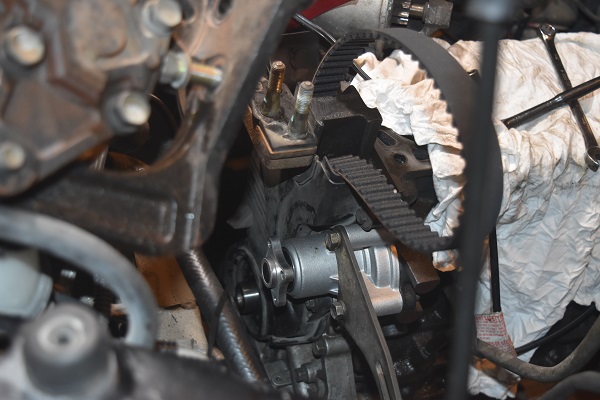
The original water pump used a pin whereas the newer had a key on the shaft. I could not quite understand why the pulleys would require a key since it was fixed via four bolts. I used a file to the modify the pulleys and used a thread lock as well.
24 September 2018 - I got my pistons, the first step was to gap the rings. A piston will compromise of three different sets, each having a specific purpose. The first ring is a chrome coated high strength ring, this is what takes the majority of the heat and makes the most of the sealing. The second ring also acts to seal but it's main purpose is to work as a scraper. The third is a set of oil retaining rings that are made up of three parts, a corrugated ring holds oil and two backing rings hold the oil ring in place. All of the rings must have a gap so when they heat up and expand do not collide. It all depends on the application as to what the gap should be. A gap too large will result in blow-by, oil consumption and harder starting but a gap too small can result in an engine seizing. All the manufacturers of pistons have a guide as to what the gap should be, for turbo it's 0.055 x bore (inches) for the first ring and an extra 0.004 to 0.008" for the second ring.
The first ring had to be filed down with a diamond file since the ring material was harder than a regular steel file. Here you can see the ring set for a stock application on the left and turbo on the right. The first ring worked out to be 0.018" (0.46mm) and the second ring 0.024" (0.61mm). The second ring was made from cast iron so it was really easy to file down and gap.
The pistons were really easy to install, I chose to re-use the bearing shells since they were in excellent condition.
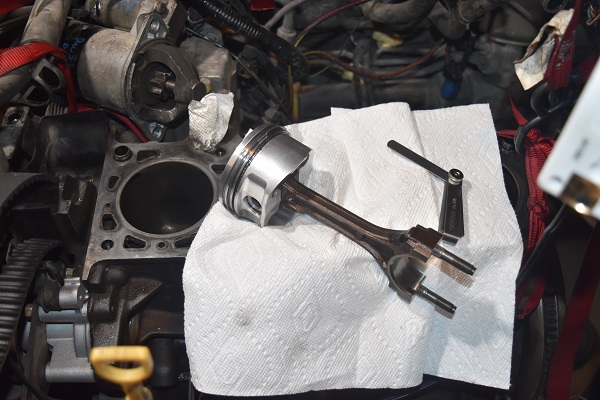
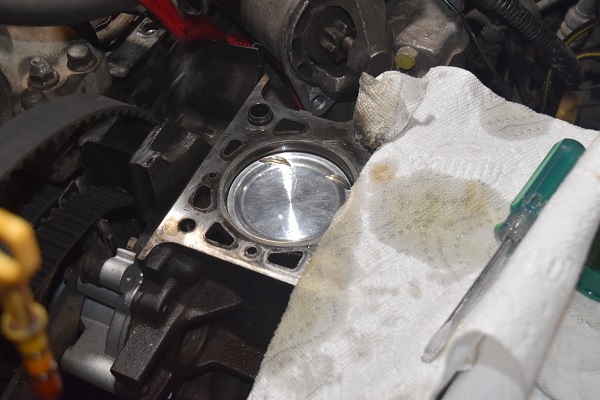
The pistons were installed and turned over freely. I scraped the block and head and cleaned them both down with acetone.
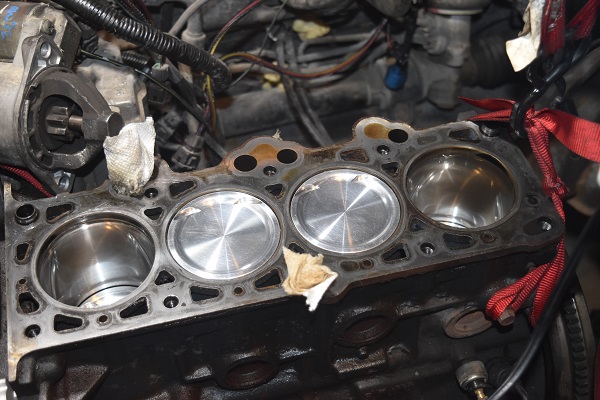
The head was dropped on and ready for the bolts. The factory bolts are known as "torque to yield". The bolts are torqued down to a fairly low level, they are then turned by a set rotation which then over tightens the bolts causing them to stretch and yield. The factory bolts are not supposed to be used again as they have yield, in theory they could be torqued but it's certainly not wise. I chose to go with after-market bolts as these do not yield, they are intended for race engines. I quickly found that the heads on three of the bolts would not clear the bodies of the lifters, I am hoping to replace them with studs. I have seen some people use these bolts by grinding away at the cylinder head, I certainly do not intend on rebuilding the head.
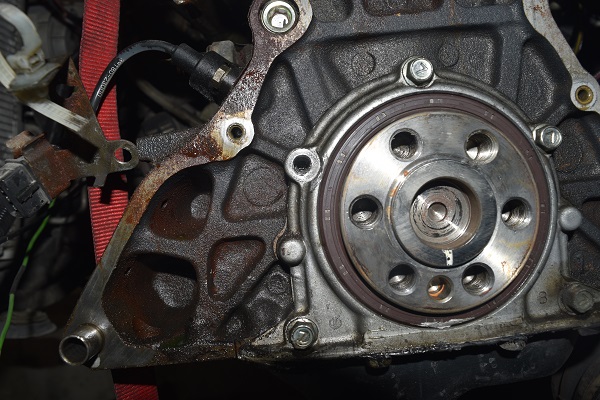
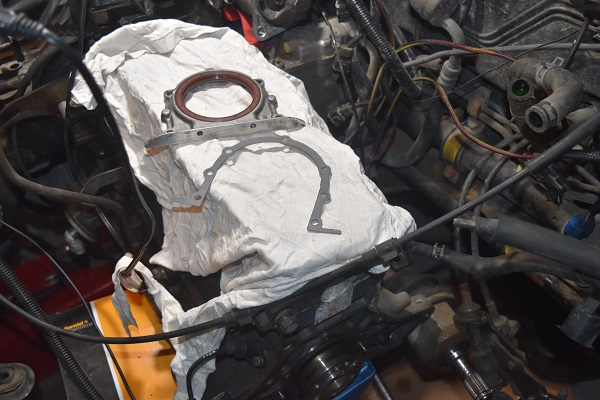
Even though the front crank seal was in excellent condition it was old, I removed the old seal.
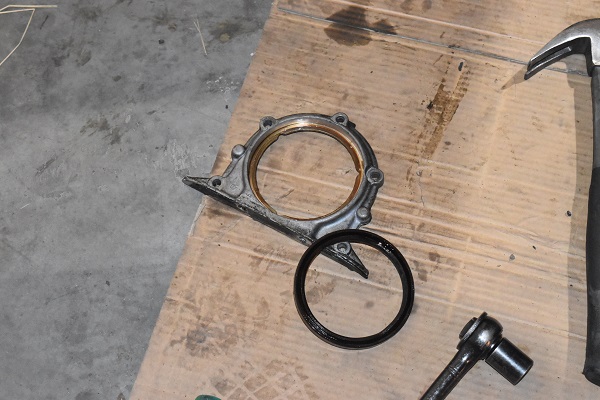
I cleaned it all up, installed a new seal and gasket and installed it on the engine. I had found that one of these bolts had worked it's way loose previously, I had never even touched them before. I thought as an extra precaution that I should use a thread locker.
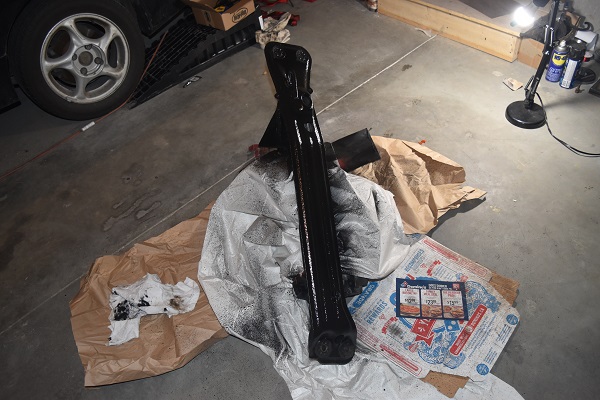
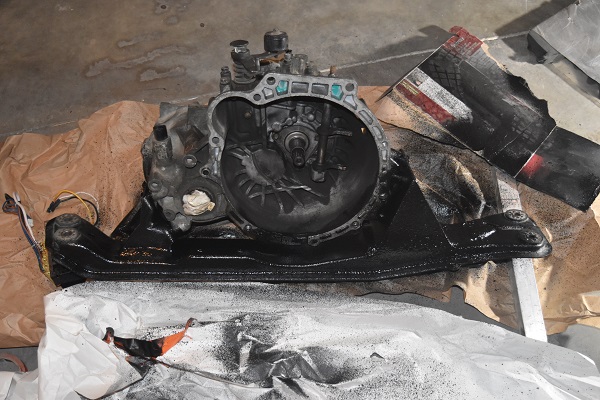
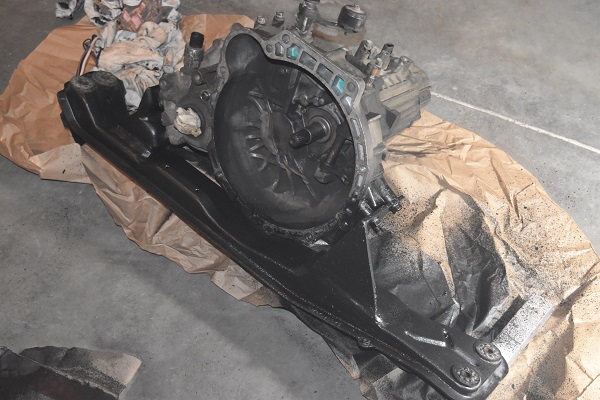
04 October 2018 - I got the clutch and flywheel a couple of days ago, unfortunately it came with no pressure plate bolts. Since I was upgrading the car I did not want to go with the original factory bolts so I decided to order some aftermarket ones. There is a lot of speculation as to what the factory flywheel bolts are supposed to be torqued at, some say 55 ft/lbs and some 95 ft/lbs. The fact that the aftermarket ones are torqued to 110ft/lbs makes me think 55 ft/lbs for stock is more likely. Anyway, nothing to do with that, I fixed the transmission to the bottom support in order to finish welding. I got a little porosity on a small section of the weld, nothing to worry about in a whole.
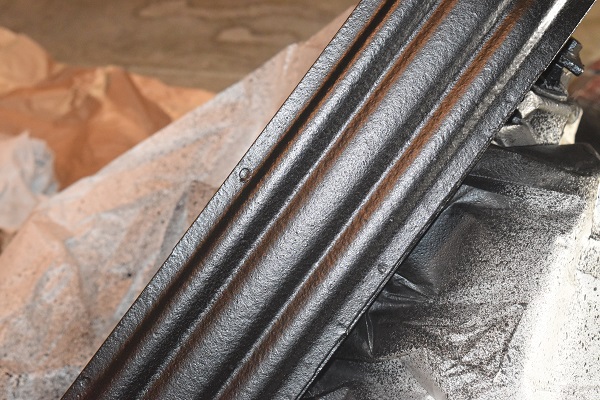
I found a hard rubberised paint so I would not have to worry about stone chips.
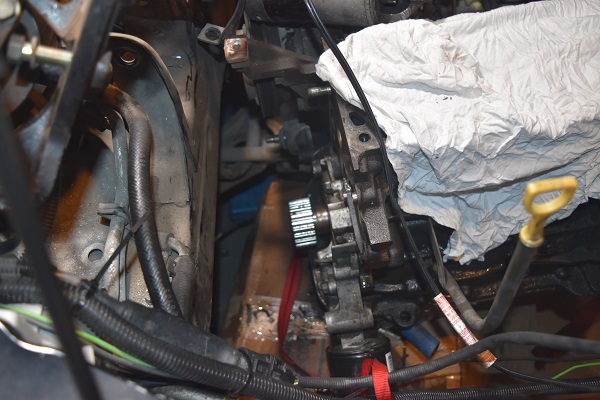
I really hope that having a solid transmission mount will not be an issue. I also think that it would be wise to make the top engine mounts solid too, will also make the chassis a little stiffer.
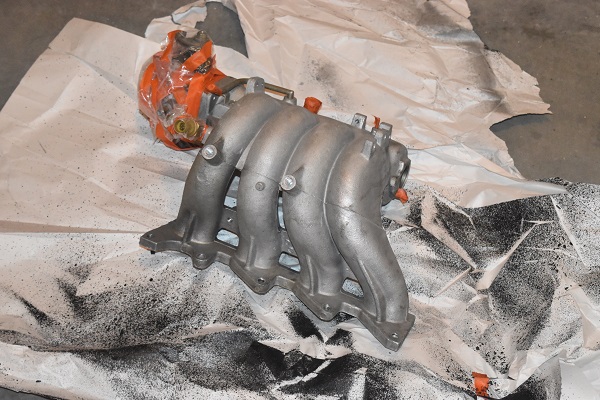
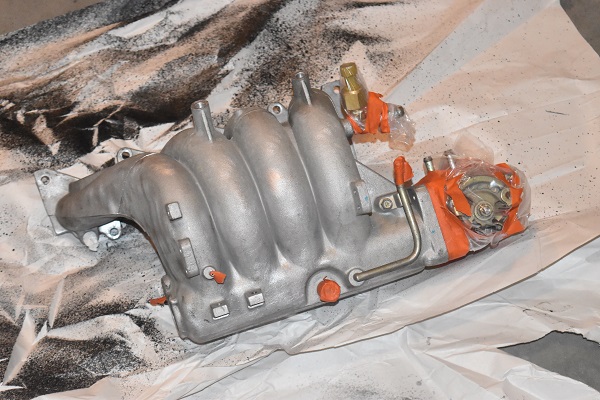
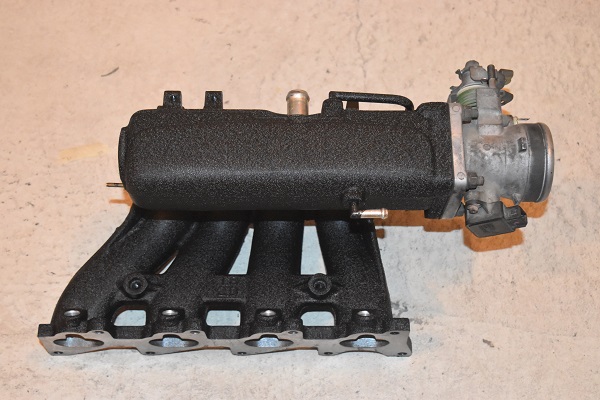
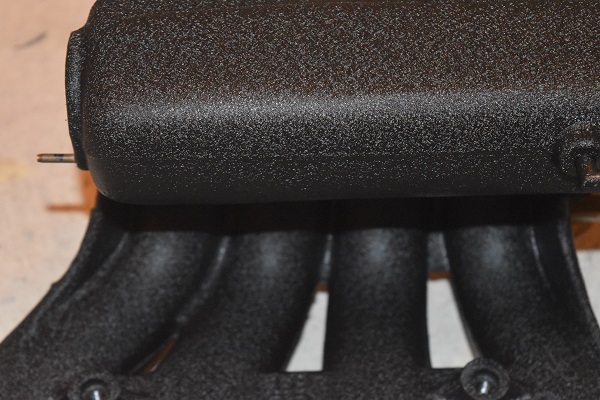
06 October 2018 - Not a great deal I can do at the minute, plus I'm a little busy with the electronics side of things. I thought I should brighten up some parts inside of the engine bay, one of those being the intake. I first gave it a good clean down with a wire brush, cleaned off with acetone and then taped off parts.
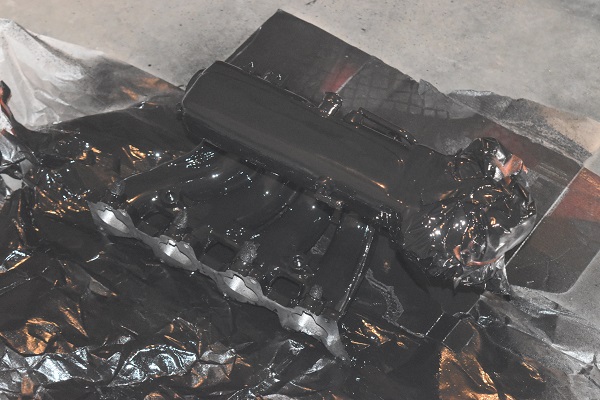
The paint I chose is a wrinkle finish, it goes on just like normal paint at first. The directions say to use very thick layers and to just wait. Surely after around four hours the paint began to wrinkle.
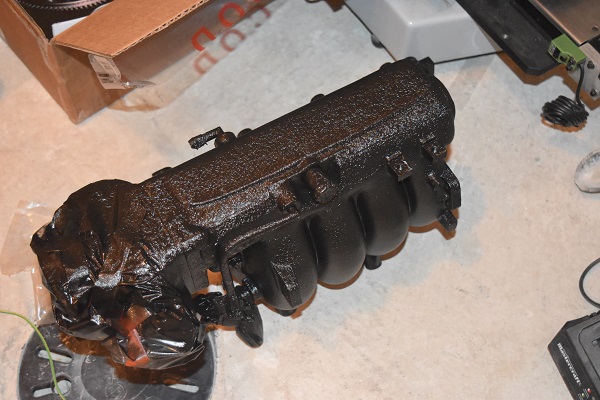
After two days the paint looks amazing, it's also supposed to be extremely durable.
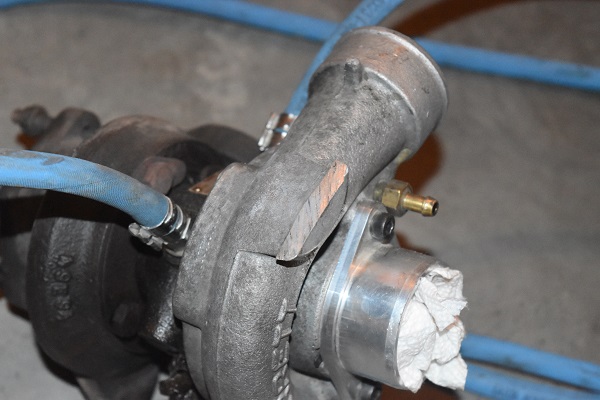
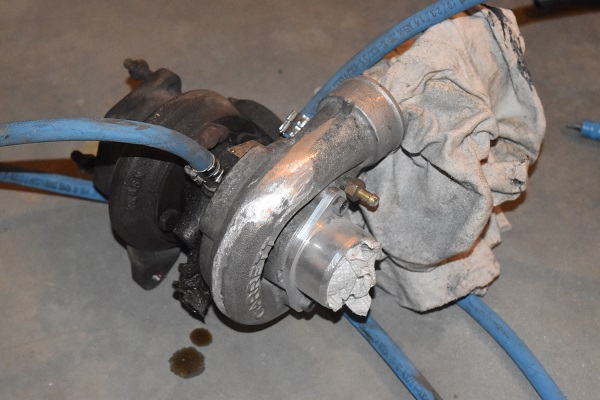
I was so impressed with the paint that I thought the turbo should be next. A while back I had to cut off the waste gate tab in order for it to clear the radiator. Since the tab was no good I thought I would just grind the whole thing off. I ran out of acetone so will have to paint it later.
It seems this is quite a large project, so much so that I need another page. As of what is left, I need to fit the clutch but I'm waiting for the pressure plate bolts. Once I get the bolts I can get the transmission put back in. Once I get the head studs it can all go back together. The only things left are the solid engine mounts, exhaust system and some intercooler piping.
Hello, if you have enjoyed reading this project, have taken an interest in another or want me to progress one further then please consider donating or even sponsoring a small amount every month, for more information on why you may like to help me out then follow the sponsor link to the left. Otherwise you can donate any amount with the link below, thank you!