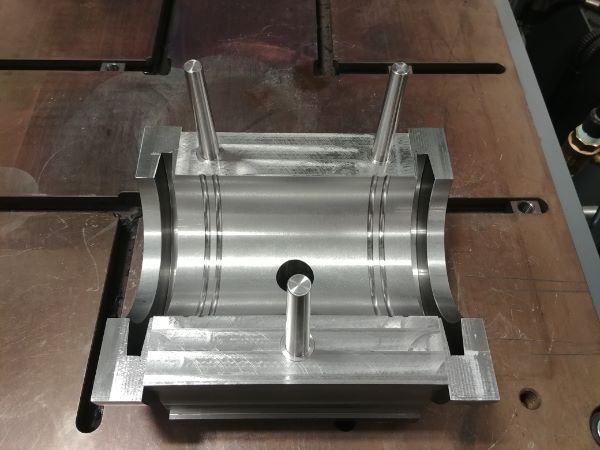
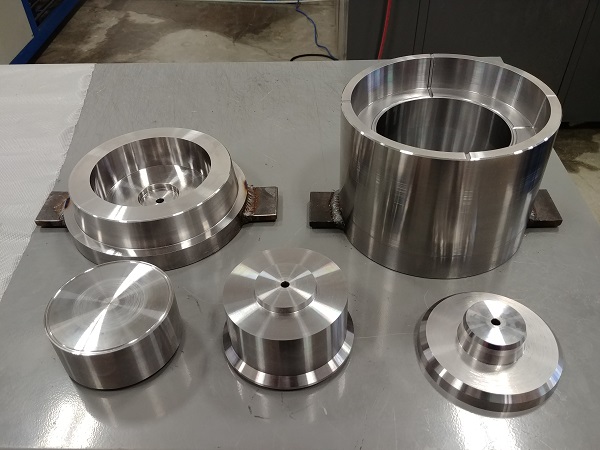
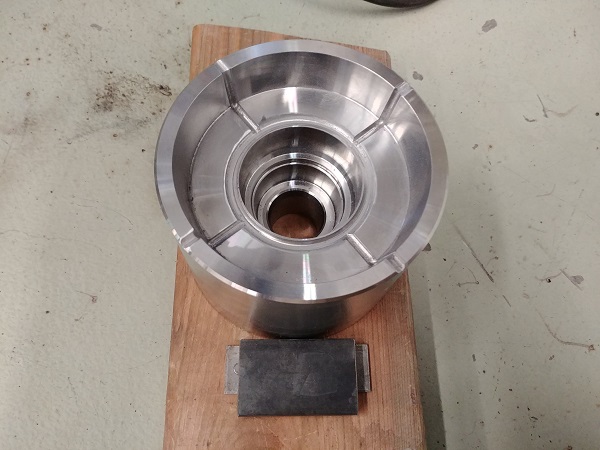
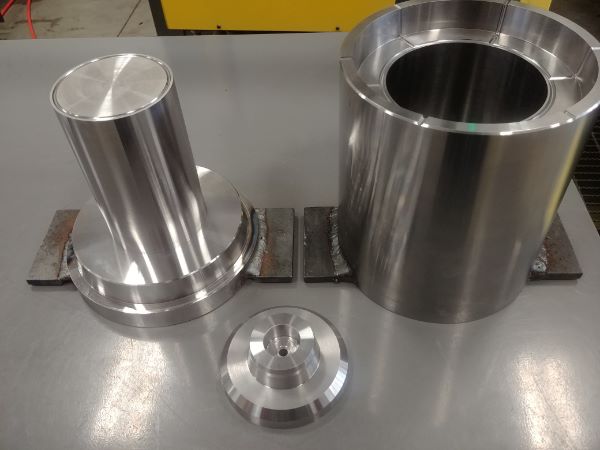
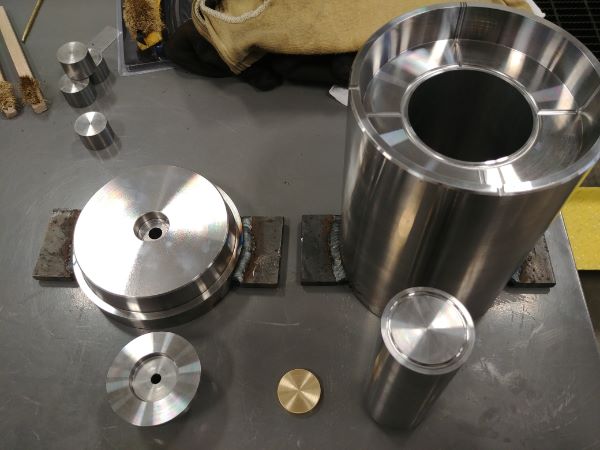
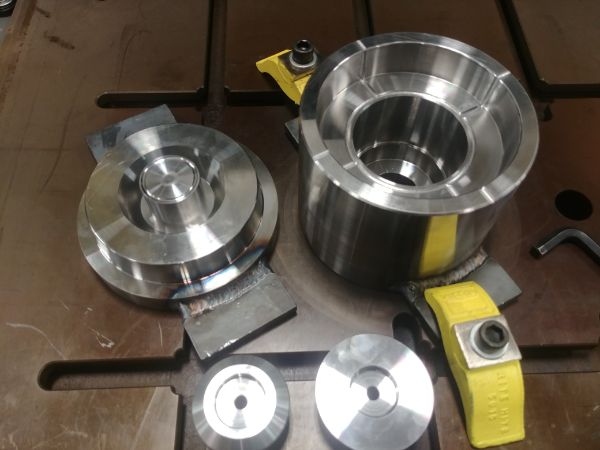
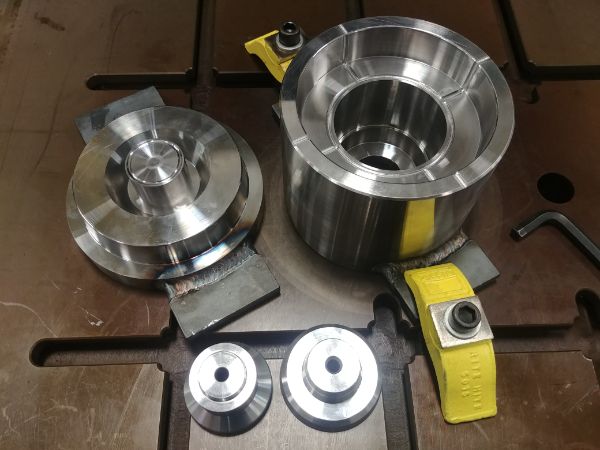
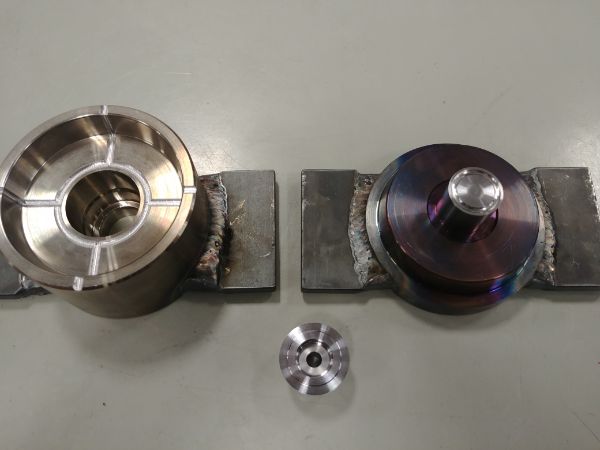
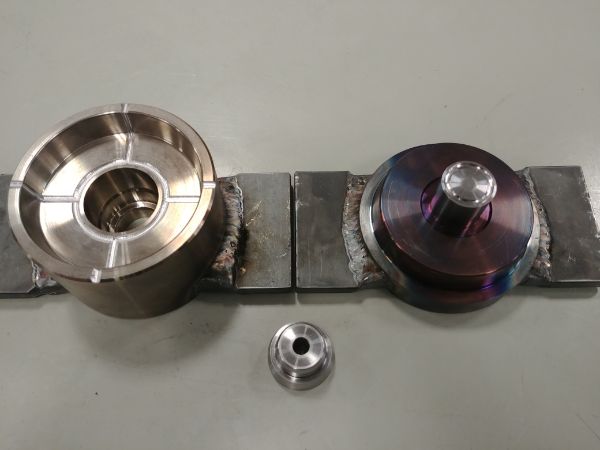
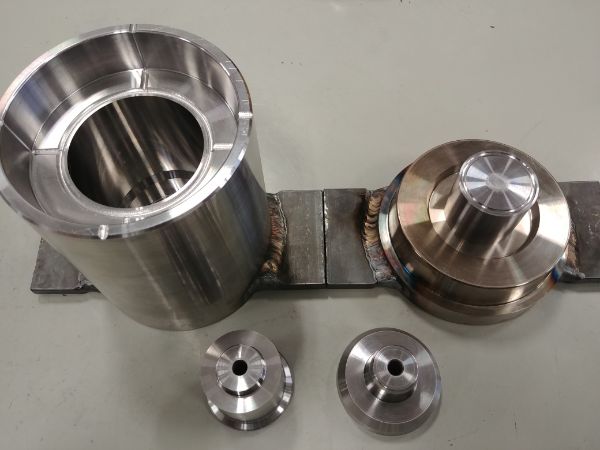
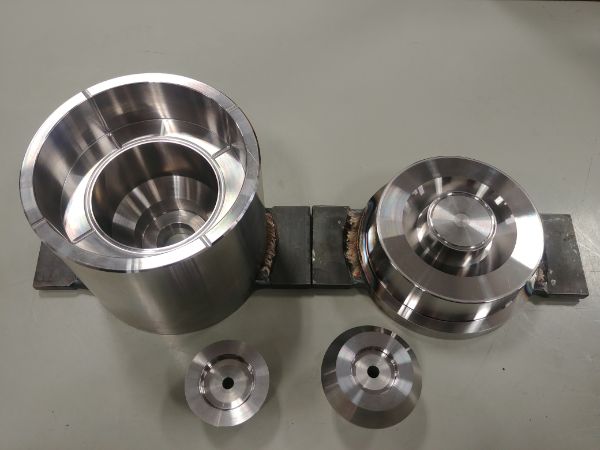
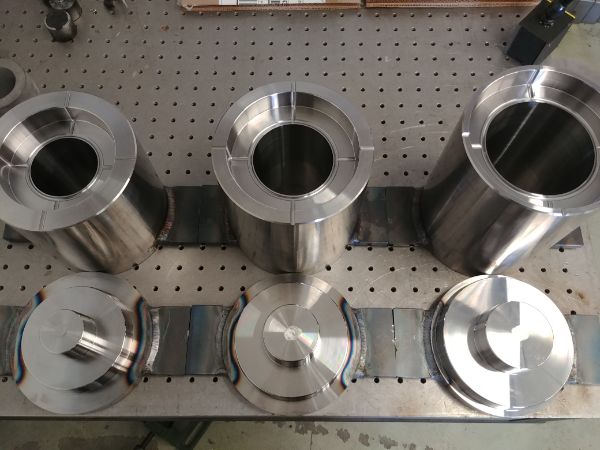
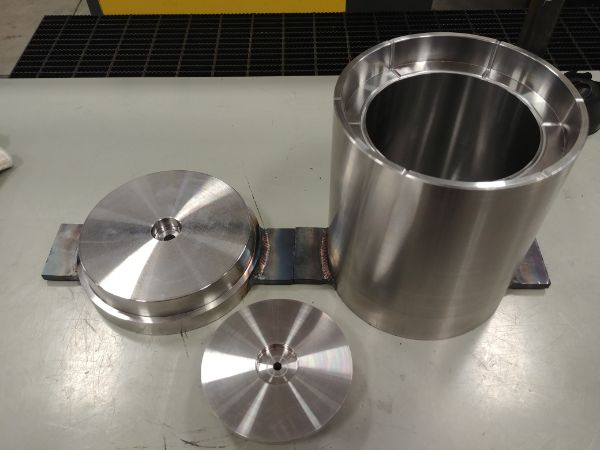
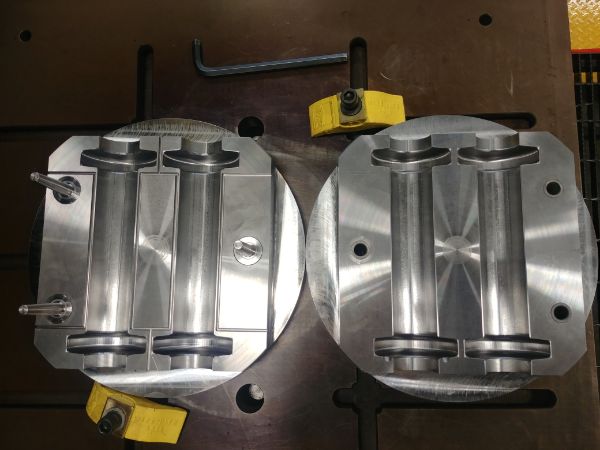
Mould Making
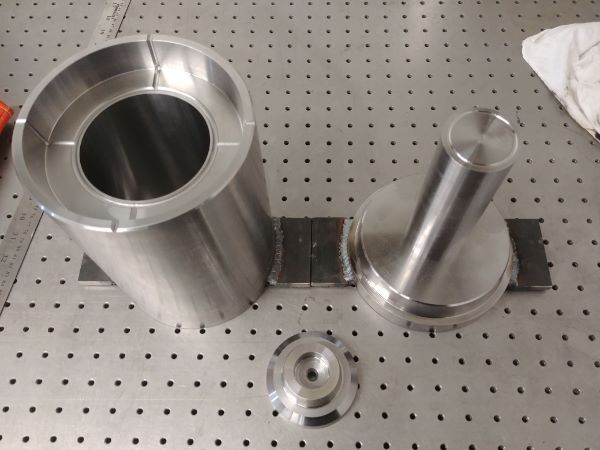
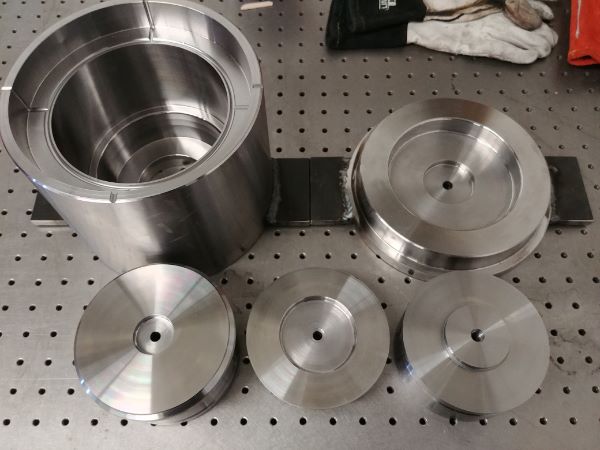
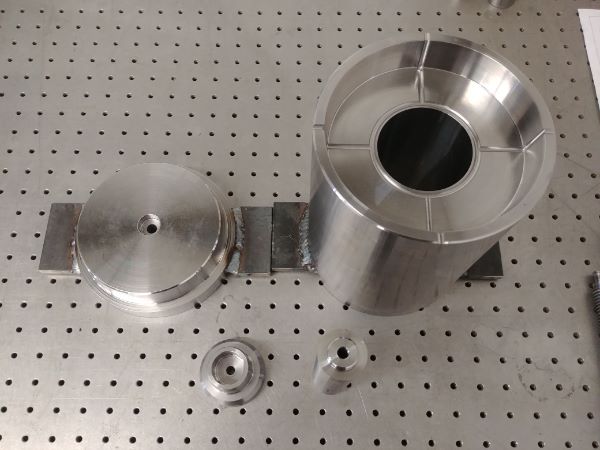
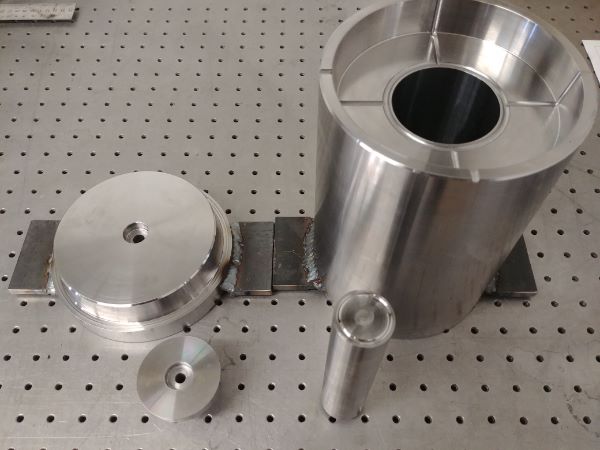
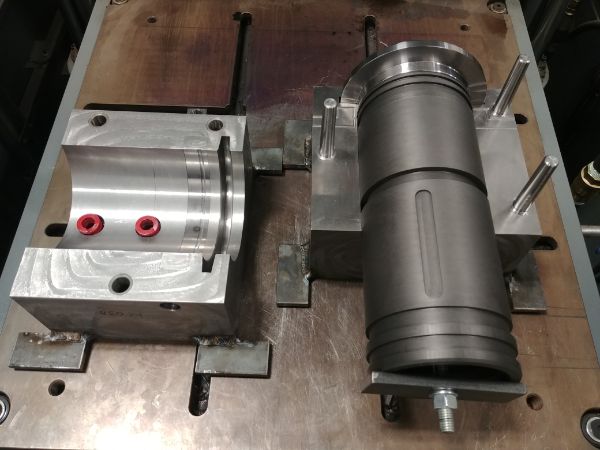
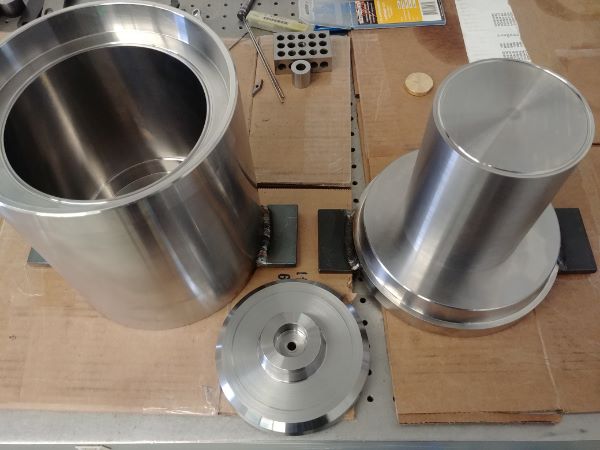
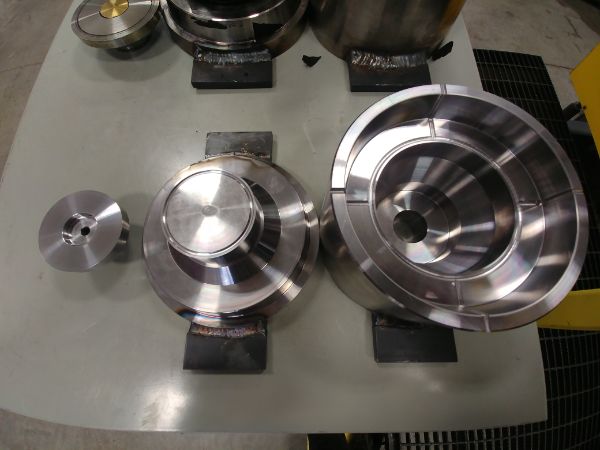
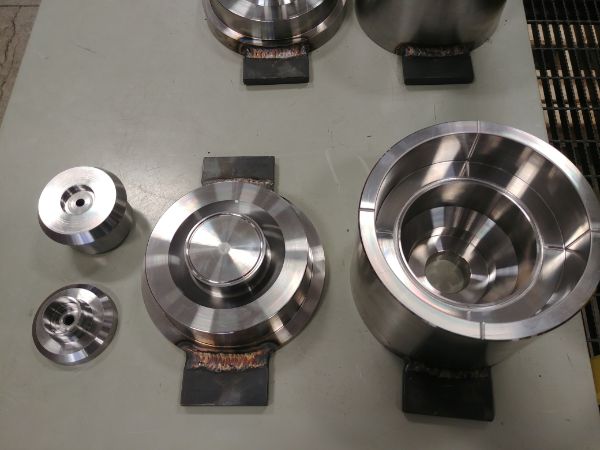
At the current time of writing this page (2019) I work as a mould maker. I often don't record anything work related for various reasons, mainly because I cannot show any dimensional drawings of the mould or the finished part. I am able to show some pictures of the manufacturing process and how I personally work on these parts. I generally use this website as a portfolio to my resume / CV, it shows what I can do.
There are many other moulds that I had machined previously, approximately eight, I had not started recording the machining process for these. I will add there are many more other items I machine such as jigs, fixtures and specialised tooling not shown on this site.
Note: I stopped logging moulds after I hit 32 since they're mostly the same, the only exception is anything of interest.
I chose to leave my place of work and in that time I made over 60 moulds, February 2021. At the end of this page I will explain a little more about the equipment I used and why I machined things in a certain way. I learnt a lot over this time and greatly improved tolerances, machining times and surface finishes. I should also add that I did not design any of these moulds, but do understand the concepts of design. In reality the design of these molds has barely changed in the past 100 years, the ones shown on this page. I do however know of much faster methods that yield less non conformancies, that is unrelated to this page.
All Moulds I Have Machined
Mould 1
Mould 2

Mould 3
Mould 4

Mould 5
Mould 6
Mould 7
Mould 8
Mould 9
Mould 10
Mould 11

Mould 12
Mould 13

Mould 14
Mould 15

Mould 16

Mould 17 & 18
Mould 19
Mould 20
Mould 21

Mould 22
Mould 23 & 24
Mould 25
Mould 26, 27 & 28
Mould 29 & 30
Mould 31
Mould 32
Mould 33
Mould 34
Mould 35
Some Machining Info
I thought I should add some more data to this page of the equipment I used and just some more of the theory and thinking involved. I will add that all of these were made on a very tight budget using cheap machines, inserts, tooling and work holding. Just about everything originated from Asia, to the cheap end of the scale. The only thing not originated from Asia were the inserts, milling cutters and anti-vibration bars. It was not my choice of the equipment purchased, only the tools themselves did I get an input.
Lathe - The lathe I used was a generic no-name from Taiwan with a Fanuc control, basic two axis with no spindle orientation or live tooling, the most basic of the basic. It used a metric 12-station tool holder which seemed to be impossible to source tool holder blocks, yet all tooling and the machine itself were imperial. The lathe was built to a reasonable quality however there were some major issues. Within the first two weeks there were some electrical issues, but the biggest issue was that everything was loose. I pulled down the tool probe to visually see it move, some of the limit switches had moved which caused an emergency stop. The hydraulic chuck had way more movement than the sensors, I had to adjust it daily. All of the tool holders had a very basic coolant jet, nothing enabling connection to a U-drill or boring bar. I had to epoxy a hose barb to one of the holders to use coolant effectively. The biggest issue by far was how the turret was mounted to the axis.
I had to use a jacobs chuck to hold a drill, not a collet which would have been my first choice. Since the coolant nozzle was behind the chuck I could not cool the drill at all. All of this lead to the drill breaking in which I physically saw the turret twist, that was a 0.25" cobalt at that. The turret was aligned to find that all the bolts were loose, literally finger tight. In the future I had to manually apply oil for every drilling operation since I was not given the time to make a better holder. A few weeks later the turret twisted again when using a U-drill, the insert broke which shattered the glass. The turret was again aligned and tightened to an extreme, on the odd occasion it would still twist but was less likely. At this point all I could do was realign the turret myself because it was a fairly easy job, but it was a must due to using long drills and boring bars.
After the first couple of months the centre height was completely wrong, by about 0.05", the tail stock was about 0.15" out. I figured that the spindle itself may also be loose, the bolts were. I made several suggestions to having the machine re-aligned and for me to make a plate to stop the turret moving. I also made suggestions of making some split holders for the anti-vibrations bars as I was using the set screws, not recommended at all. I never got to make any of these improvements to the day I left, it really could have saved a lot of time.
Since the tool height was wrong it meant inserts would break easily on U-drills, the drill itself would rub against the inside of the hole. Since I could not set the height on some of the boring bars it also meant that tolerances were difficult to hit. Since everything had to be a 1 thou tolerance it meant I had to make a lot of check passes depending on the diameter, I had to cheat the program to be consistent. I found it frustrating at times because I was damaging tooling and inserts unnecessarily, but it was not my decision. Any kind of maintenance was avoided because it did not earn money, a rather disappointing attitude. Since all of the anti-vibration bars were round it meant the centre height had to be set against a probe or a solid centre. I had to remove the bars for different operations due to the over-hang behind the turret. So to use a boring bar I had to set the tool height every time. I had made lots of attempts to be given the time to make an appropriate holder that I could remove, but it was always considered a waste of time. The time I wasted in removing the work piece to setup the bar surely was false economy. The jaws in the chuck were not very accurate either, so it meant placing the work piece in the exact same position or machining out some soft jaws.
I also had to take quite gentle cuts due to the turret instability which added to the time of every part. I used a 2 inch U-drill that had to be run at 150SFM at a 0.002", that is about 0.3 inch a minute, otherwise the turret would move, or the drill vibrate and an insert break. So drilling anything used to take a while and the drill would scream because of the low feed. The lathe is the one instance where I ran coolant on everything because I had to take lots of shallow cuts. I still managed to make every mold in tolerance and only ever scrapped one cavity, that was an insert chipping on the final pass, you need a minimal depth of cut to achieve a good finish.
Overall I found the lathe to be useable but somewhat limited in terms of performance. It had a powerful motor and a very sturdy frame, it could consistently achieve close tolerances but ultimately the turret mounting let it down. I think my work came out exceptional considering the circumstances. I did manage to take some heavy cuts on 1018, the largest being 0.25" DOC (0.5" dia) at 0.020" F, that was the absolute limit.
Milling Machine 1 - The first milling machine I used was an old retrofit originally used for research purposes in a hospital. It had never run coolant and by the look of it never cleaned. It had a single tool spindle which meant making anything other than basic was very time consuming. The tool setting and alignment was a little strange, albeit unreliable at times. I did manage to make some very good work on the machine but the accuracy was definitely an issue. I could often achieve 1 thou on the height and around 5 thou on X and Y. The spindle motor was 5HP and limited to 3500rpm. Anything under 1000rpm had very little torque, this became a massive issue when drilling, reaming, shell facing or slitting.
I believed that everything required coolant at the time, which made a colossal mess because it was open frame. I even proposed the idea of building a simple enclosure, that was again deemed a waste of time. Although when there was a six foot radius of coolant radiating around the bottom it did get questioned a lot. Instead of spending money on an enclosure some anti-slip mats where bought instead. The room became a bit of a slipping hazard since the mats would float on the coolant. When manually jogging the machine it would sometimes move in the wrong direction, often breaking the cutter or damaging the work piece. One day the control failed to boot and could not be fixed cheap enough with a service engineer. The machine sat there untouched for a year until I decided to buy it, long story, it was originally free, until I took it, then I had to pay for it.
I rebuilt every component of the machine and built a completely new control system. It was amazing to see all that was wrong and how it had been maintained incorrectly. All of the bearings were filled with copper grease, some were burnt and some just full of debris. I managed to get the machine to a reasonable accuracy at home and learnt that coolant is bad for tool life. The only coolant required would be that for machining aluminium, which I use a micro drop system. I also found the head of the mill was so packed with grease that it covered up all the original manual operation components. Since the low speed gears were still there once serviced it allowed me to drop it to the low gear. The low torque of the spindle motor was now not an issue.
Milling Machine 2 - The second machine enabled me to start milling out mould cavities due to its much better accuracy and higher spindle speed. The machine had a 12 station automatic tool changer with an 8000 rpm spindle speed. I found that it would consistently hit the sub 1 thou tolerances with ease. I could now make parts with multiple tools without having to set them every time. In truth I could find no issue with the machine, even though it was used and originated from China.
I honestly don't think I can say a bad word about the machine, take a look through some of the last moulds I made, it did an amazing job. I guess the only criticism would be the coolant system as it was not powerful enough. I did however learn that I could substantially increase tool life without the use of coolant. The only time I would use it was for the evacuation of aluminum chips.
Machining in General - I learnt a lot from my experience with making moulds, and I really did enjoy it, however I left due to moral reasons. I believe that tooling is a lot more important than the machine itself, but you still need a good machine to achieve finishes and tolerances. Overall being cheap will lead to higher expenses later on. Cheap inserts will chip easier, often unexpected, which if not caught could lead to some tool friction welding or a crash. A cheap boring bar will flex like crazy, get a terrible finish and probably destroy the insert pretty fast. Moving fast and taking little away will stop work hardening due to heating but will also improve tool life, that is if you don't use coolant. In all, cutting corners will cost more time in the long run.
I mostly milled 4140HT and some 1018 steel. I found that these parameters worked really well in both tool life, finish and tolerance.
Lathe - 4140HT - 35HRC - minimum 0.006 Feed and 0.010" DOC for finishing up to 0.008 Feed. A lower feed will lead a poor finish and poor tool life, as with a lower depth of cut. The finish depth can be anything that the machine is capable of or how rigid the setup is. A DOC of 0.1" (per side) or more will better help break the chip, anything lower will be one continuous razor coil. Inserts are capable of the full length, so 0.4" DOC on a 432 CNMG is fine if the machine has the power, it is also excellent for tool life.
Roughing is whatever the machine is capable of. For a 432 CNMG anything below 0.012" feed is unlikely to chip break, I would recommend 0.015" deep with a minimum of 0.05" DOC, all the way up to the full insert, then start increasing feeds. Using the whole insert will give it more life, the feed determines the machines power. A higher feed will help break chips more than a larger depth of cut.
I found the surface speed to be optimal at 400 SFM, any more and the insert edges dull fast.
The only difference with softer materials such as 1018 is that they have to be run faster to get a good finish. 600 SFM is a good starting point with a minimum finishing feed of 0.008" F and a roughing of no less that 0.015" F. Soft steel can be chewed through really fast, it is the work holding and rigidity that becomes an issue.
Most of the mould making was using less than ideal circumstances. Like for example holding onto an 8 inch round 4140HT at a length of 9 inch while only holding onto 0.5 inch would be quite common, that is with no support. With something like this I would play it very safe, so roughing 0.012" F, 0.05" DOC and 0.006" F, 0.01" DOC for finishing. If there was a live centre holding the other end then there would be no issue running the full power. These numbers I kept pretty consistent for all operations, tolerance and finish were more important than time. With taking these small cuts it would put some heat into the work piece itself, this is why I would always run coolant on turning.
Milling is definitely a lot more involved than turning, so I will quickly skim over. Personally I would lean more towards solid carbide mills rather than indexable stuff, unless face milling with a shell. When indexable inserts break during milling it often destroys the tool faster than you can react, you also tend to use bigger cuts which requires a sturdy and torquey machine. The solid carbide mills with long flutes can cut at very long depths, the key is to skim thin and fast. A deep cut will generate heat and a slow feed will localise heat, increase depth or feed in this case will lead to a broken cutter. Keeping the cut shallow puts little heat into the work piece while feeding it fast doesn't allow the heat to even build up, the heat is actually thrown out with the chips.
For 4140 I would use 3 x D for depth, that is usually the full flute length. I would keep to around a step-over of 8% and just keep ramping up the feed. 400 to 500 SFM for 4140 and 600 upwards for 1018. I keep to 0.004 IPT on my machine at home but would maybe go to 0.008 IPT or more on a more industrial machine, that is IPM / RPM / Number of flutes. So my machine often runs at 3500rpm, 70IPM. An industrial machine will start at 150 IPM or more.
If the milling cutter has to cut at full diameter then I would keep the same SFM and IPT, instead the depth would be 8% of the diameter. So a 0.5" cutter would be a depth of 0.04".
Hello, if you have enjoyed reading this project, have taken an interest in another or want me to progress one further then please consider donating or even sponsoring a small amount every month, for more information on why you may like to help me out then follow the sponsor link to the left. Otherwise you can donate any amount with the link below, thank you!